Xephyroth's stats
- Review count104
- Helpfulness votes1,392
- First reviewMay 11, 2016
- Last reviewApril 16, 2024
- Featured reviews0
- Average rating4
Reviews comments
- Review comment count0
- Helpfulness votes0
- First review commentNone
- Last review commentNone
- Featured review comments0
Questions
- Question count0
- Helpfulness votes0
- First questionNone
- Last questionNone
- Featured questions0
- Answer count5
- Helpfulness votes8
- First answerOctober 23, 2016
- Last answerNovember 28, 2020
- Featured answers0
- Best answers1
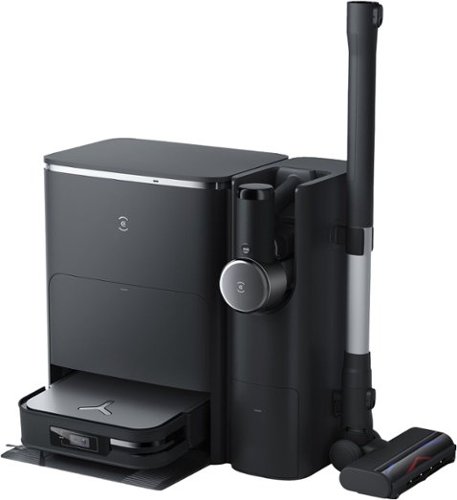
ECOVACS DEEBOT X2 COMBO COMPLETE is the total package for whole home cleaning. This exclusive set combines the convenience of our cutting edge robot vacuum and mop with the go-everywhere capabilities of our cordless, hand-held stick vacuum. Both state-of-the-art cleaning tools are charged up and automatically emptied by the industry-first OMNI Docking Station so they stay ready to clean every inch of your home. For the most advanced clean, it doesn’t get better than DEEBOT X2 COMBO COMPLETE.
Customer Rating

4
A Premium All-In-One Home Cleaning Package
on April 16, 2024
Posted by: Xephyroth
📦 UNBOXING:
The box is quite large and reasonably heavy, so some folks may need help getting it moved into their home, but I was able to move it on my own. The entire package includes the OMNI Station, the X2 Omni robot vacuum with mopping pads, a single side brush, the handheld vacuum and all its attachments. You’ll also receive extra dust bags, but unlike the original X1 Omni, you won’t receive additional mop pads or a cleaning brush for the sink.
💪 BUILD:
Like the original X1 Omni, the X2 Omni appears well-built. The main brush, side brush and mops are accessible for easy replacement by flipping the robot on its back. The dust filter is accessible from under the magnetic top lid of the robot should you need to replace or clean it.
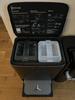
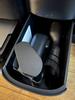
The X2 OMNI station houses your clean water reservoir, dirty water reservoir, a dust collection cabin, a cleaning sink for the robot to clean its mops with hot water, a heated air dryer, a charging station for both the robot vacuum and handheld vacuum. Additionally, it has a compartment for stowing away a few of the smaller handheld vacuum attachments.
The handheld vacuum feels solid, has a 3-bar battery indicator on it, and uses a simple quick-release button to attach and detach the various vacuum heads..
🛠️ SETUP:
I highly recommend going through the manual to set up your X2 Omni. It has plenty of diagrams and explanations and will ensure you understand the basics and more advanced features of your X2 Omni.
Place the base station against a wall with clearance on all 3 sides, then plug in the power cable. Attach the side brush. Remove the clean water reservoir from the OMNI station and fill it up to the labeled MAX line. Then using the QR code under the magnetic lid of the robot, you can perform the pairing process to your WiFi Network. The robot can only function over a 2.4GHz wifi network, so be sure that whatever network you select has a 2.4GHz channel option.
Once I got it setup, It performed a mapping of my main floor which took under 10 minutes.
✅ CLEANING FEATURES:
Like the original X1, the X2 Omni shares many of the same features and expands upon them. Once your floor plan has been mapped, you can see them in 2D or 3D and configure your room layout so that you can create schedules and different cleaning scenarios. So if you need to clean only certain rooms on certain days, the X2 Omni will give you that ability. Like all Ecovacs I’ve used, you’ll be able to view the cleaning progress in the app, as it shows where it has mopped/vacuumed during each run in both 2D and 3D modes.
The cleaning session can be configured with varying levels of vacuuming power or water flow, and you can change them on-demand while it’s cleaning. It can also wash the mopping pads with hot water—a feature that wasn’t present on the original X1 Omni. I also like that with the X2, it can lift the mop pads to vacuum over short rugs without getting them wet. This wasn’t something available on the X1 Omni, so I’m quite happy to see this upgrade.
However, there were a few regressions. While trying to divide my map into rooms, I encountered errors that prevented me from splitting my dining room from my kitchen. And there doesn’t appear to be a way to specify a sequential order for the rooms I want to clean—a feature that was and still is available on the X1 Omni.
However, there were a few regressions. While trying to divide my map into rooms, I encountered errors that prevented me from splitting my dining room from my kitchen. And there doesn’t appear to be a way to specify a sequential order for the rooms I want to clean—a feature that was and still is available on the X1 Omni.
In 3D, you can map out specific furniture so that you can use voice commands or select furniture in the map to have the X2 Omni clean under/around specific furniture in specific rooms. Personally, this isn’t a feature that I use, but I can see how useful that might be if you have a wet spill in a certain area and need a quick mop. But I think for dry spills, that’s where the handheld vacuum comes in handy.
The handheld vacuum is a really nice integration into the X2 Omni ecosystem. The fact that I can dock the vacuum to charge instead of plugging in a cable or needing to drill a mounting bracket into my wall makes it a very easy integration. I just grab whatever attachment I need, and I’m off to cleaning. Then when I’m done, I stow away the attachments, then dock the handheld vacuum and it auto-empties its contents into the dust bin. I’ll admit, I can be pretty lazy when it comes to cleaning, but features like this make sure that I can be effective when I do need to clean.
One thing I appreciate about the handheld vacuum is that you don’t have to hold the trigger to engage power. Rather, you can simply click the trigger once, and it’ll automatically start suction until you pull the trigger again. This will take some pressure off those who have carpal tunnel, but will probably use a bit more battery than alternative handheld vacuums on the market. You can also switch between two suction modes—silent (60 minute runtime) and MAX (15 minute runtime).
📹 VIDEO FEATURES:
Like the X1 Omni, the X2 Omni has a video manager which allows you to receive a remote video feed from the camera on the robot vacuum. You can use this feature to remotely control the vacuum for cleaning or even just patrolling your home.
The Home Patrol feature will patrol your home, but won’t send you notifications if it notices anything out of the ordinary. However, it will take pictures that you can look at later. It only stores 50 MB worth of pictures, and they are pretty low quality, but if you just need to ensure that nothing is out of place while you’re abroad or away from home, then it’s still a good peace of mind, and you can schedule them to occur regularly, albeit the utility of that is probably pretty niche.
🧹 CLEANING PERFORMANCE:
Like the X1, the X2 does a great job for both mopping and vacuuming. This robot is focused on its mopping capabilities, so that’s where it really shines. Like any robot vacuum, it’s recommended to keep loose cables organized so the X2 doesn’t inadvertently get snagged on them, but it’s otherwise good at avoiding obstacles.
The X2 has kept my floors very clean, and it is especially evident whenever I empty the dirty water reservoir. The main brush does a good job picking up loose debris like crumbs, and the side brush is effective in moving debris away from walls.
The mopping pads do a solid job at cleaning up dust and liquids, but probably won’t be sufficient for more egregious sticky situations. So as long as you don’t let any serious sticky messes develop, the X2 will keep your floors clean on a regular basis.
Thankfully, I haven’t run into any situations yet where the X2 has gotten stuck. The cliff detection has prevented it from falling down my stairs, and it’s done a decent job at navigating under ottomans and chair legs. Of course, your mileage may vary. For 527 sq ft, my X2 Omni took 63 minutes and still had plenty of battery left—well over 50%.
As for the handheld vacuum performance, I find that the silent mode does a good job for most scenarios, and the MAX mode is a deeper clean for situations like car rugs. The various attachments give versatility to different cleaning scenarios, and I also like that there is a light on the floor brush attachment so you can see dust and dirt in darker scenarios. Unfortunately, this capability isn’t available for the other attachments. It might not be quite as good as some of the competing options, but it’s certainly no slouch.
🧐 CONCLUSION:
Overall, the Ecovacs Deebot X2 Complete is an impressively complete system for many of your home cleaning needs. If your focus is mopping, the X2 robot vacuum does a fantastic job, and if you still have short rugs or carpet in your home, the X2 can lift its mopping pads to vacuum them without getting them wet. And if you’re in the need for a decent handheld vacuum, the X2 Complete gives you one that is seamlessly integrated.
I would recommend this to a friend!


Share this review:
0points
0of 0voted this as helpful.

Customer Rating
4
Premium Features at a Mid-Range Price
on April 16, 2024
Posted by: Xephyroth
📦 UNBOXING:
The unboxing experience for the Sony ULT Wear is straightforward. Inside the box is a nice rigid protective zip case. Inside the case, you’ll find the ULT Wear headphone, a 3.5mm cable for analog listening, and a USB-A to USB-C charging cable.
💪 BUILD:
The build of the ULT Wear is a lightweight plastic and weighs in at 255g. There are lighter headphones out there, but the ULT Wear is certainly light while also being well-made.
The material feels confident overall, and will hold up to day-to-day treatment. The design looks good without being gaudy or attention-grabbing. I like its understated look, but it may not be as aesthetically pleasing as some other headphones on the market.
The headband can be adjusted with a tactile click to accommodate a wide range of head sizes, and the ear cups also rotate in either direction, but if you wear them around your neck, they can’t face fully outward.
The case itself is also very good and the rigidity will ensure that the headphone won’t get crushed in a bag. Some folks might prefer a bit more flex since it means it will take up more bag space, but it’s a tradeoff I’m personally willing to take. Whether or not you decide to use a case is up to you, as you can also just fold them up and put them in your bag.
🎧 COMFORT:
The comfort of the ULT Wear is excellent. I’ve seen a lot of headphones these days take the route of making thinner and thinner headbands for better aesthetics, but Sony has opted to keep things very comfortable with the ULT Wear. The headband padding is plentiful and soft without any rigid pressure points, so the apex of my scalp is free from any discomfort.
The ear pads are also very comfortable, with a nice plush foam material that avoids wrinkles and creates a nice seal for your ears.
This is a headphone I could wear for many hours at a time—especially for work in a noisy office, or on an international flight. I’ve tried other Sony consumer headphones, and I’ve really liked these recent designs for comfort, even compared to something like the XM5.
🎛️ CONTROLS:
The control scheme is very familiar like the more premium Sony consumer headphones. On the left earcup, you have your power button which can also function as your pairing button and battery status, the noise cancellation/ambient sound toggle, and the new ULT button which adds a bass shelf for thick bass.
On the right earcup, you can use swipe gestures for volume controls, playback/pause, and skipping tracks. And it also has a built-in sensor that detects when you’ve removed the headphones so it can instantly pause when you need to address a disruption. Then putting the headphones back on will resume playback.
📱 APP:
The Sony Headphones Connect app has largely remained the same for a number of years now, and while nothing is inherently broken, it’s also not the most “delightful” app I’ve used. Thankfully, you won’t need to use it much after you’ve configured it the way you want. But I would recommend checking back every now and again to see if any firmware updates have been released that improve the performance of the ULT Wear.
In the app, you’ll be able to set up a basic 5-band EQ and go through a personalization test which will prompt you with a few EQ adjustments to preview as you listen to your own music. And after a few prompts, you’ll have a custom EQ to work with. For me, I received a mild increase in treble energy.
Additionally, the app allows you to toggle multipoint connections should you want to simultaneously connect 2 devices to the ULT Wear.
🎵 SOUND:
The out of the box sound profile of the ULT Wear is very inoffensive to my ears. In large part, it gets most things right for a consumer-oriented sound experience. It’s not too bright, and it’s not too bassy, but it still has room to deviate for individual preferences. But if I didn’t have an option to EQ, I’d frankly be pretty happy with the stock sound. As an avid listener of Pop R&B, Metal and instrumental music, I felt the ULT Wear out of the box was good at representing the characteristics of these genres I’ve come to expect without breaking my immersion.
In the case of more bass-emphatic music, the ULT button can be pressed to enable ULT1 or ULT2 which creates a much thicker bass shelf. Personally, I did not like ULT2 at all, as it degraded the overall clarity to deliver an overwhelming quantity of bass. However, ULT1 I did feel could be tasteful for bass heads, assuming you have the right library of music that is well-mixed for this bass shelf.
Frankly, for the price, the out-of-box sound is better than quite a number of more expensive headphones I’ve heard. I wouldn’t call it audiophile level, as I don’t think it quite reaches that level of immersion for me, but it exceeded my expectations, as I was also not a fan of the XM5, but I quite enjoy the ULT Wear.
🔊 ANC / AMBIENT SOUND:
The ANC is no slouch, despite this being a more mid-range headphone for Sony. The ULT Wear sports the same Sony V1 processor as the XM5 for ANC, and it does a great job at keeping a low noise floor and canceling out background noise. It also has an anti-wind sensor for blocking sounds from wind while wearing the ULT Wear. The ANC trades blows with the XM5, and when compared to other options in its own price bracket, it’s among the best.
As for the Ambient mode—it’s easily one of the more impressive implementations I’ve heard recently. Without any audio playing, you can clearly hear the environment and speech without it sounding unnatural. Personally, I was very impressed—even compared to more expensive headphones with ambient sound modes. Sony really landed with a solid implementation on the ULT Wear.
🎙️ MICROPHONE:
The microphone on the ULT Wear does a great job in less-noisy environments. It can isolate your voice clearly without making you sound muffled or distant. But in louder environments like city streets, the microphone noise cancellation might struggle a bit and cause your voice to break up a bit, but it still holds up better than quite a few other microphones I’ve tested.
🔋 BATTERY:
Sony claims the ULT Wear can reach 50 hours of battery on a full charge with ANC disabled. With ANC engaged, it can achieve up to 30 hours on battery. This is competitive with most other options on the market, and even outperforming some premium options on the market. Sony also says that a quick 3 minute charge can yield 1.5 hours of non-ANC playback and a 10-minute charge can yield 5 hours of non-ANC playback. But for a full charge from dead, Sony says 3.5 hours will bring it to a full charge.
🧐 CONCLUSION:
The Sony ULT Wear is a win for consumers, in my opinion. It delivers a good consumer-friendly sound out of the box without being offensive. But I do wish Sony would give consumers more choice when it comes to their EQ, since more advanced users are still hindered by a basic 5-band EQ. Even so, I liked the out of box sound, but felt the ULT modes were hit or miss, and you’ll probably find yourself toggling it if you have a library of mixed genres. But there’s no denying the ULT Wear can be a fantastic commuter headphone thanks to its ANC and excellent comfort.
I would recommend this to a friend!


Share this review:
0points
0of 0voted this as helpful.

Experience the height of gaming innovation with the ROG Zephyrus G16. Featuring an all-new premium aluminum chassis with customizable lighting, this laptop merges style and durability. Its ultra-slim 0.59” profile and lightweight 4.30lbs 16” chassis redefines portability without compromising performance. Powered by Windows 11, an Intel Core Ultra 9 185H processor, and an NVIDIA GeForce RTX 4080 laptop GPU, the Zephyrus G16 seamlessly aligns with your lifestyle, meeting all your gaming and creative demands. ROG Intelligent Cooling features liquid metal for reduced CPU temperatures and upgraded Arc Flow Fans for improved airflow to sustain peak performance on the Zephyrus G16 no matter the task. Immerse yourself in the OLED ROG Nebula Display and enjoy rapid 0.2ms response times, vivid 2.5K resolution, and a smooth 240Hz refresh rate.
Customer Rating
4
A Lightweight Premium Build w/ Gaming at Its Core
on March 10, 2024
Posted by: Xephyroth
💪 BUILD:
First impression of the G16 is that ASUS really stepped up their build materials compared to previous years. It’s an all-aluminum design from the base to the keyboard deck to the lid. It’s an overall thin profile that feels more durable and confidence-inspiring, and just feels more portable at 4.3lbs—which is great for a gaming laptop of this caliber.
On the top lid you have the new Slash Lighting array which you can configure in Armoury Crate, and on the bottom you have 11 T6 Torx screws to gain access to the internals. Other than the rubber feet spanning across the bottom, the Zephyrus G16 is thinner than the MacBook Pro 16, but when placed side by side on a flat surface, the G16 stands thinner at the front and becomes taller at the rear due to the protruding rubber feet.
🔌PORTS:
For the I/O, the G16 sports a proprietary 240W power input. Personally, I really wish ASUS would support 240W over an additional USB-C port, but I’m sure that’s additional cost and engineering time. Even so, it does support 1x Thunderbolt 4 USB-C port as well as a USB 3.2 gen 2 USB-C port—each of which supports 100W USB-C Power Delivery. I do wish ASUS would make both of these Thunderbolt 4 compliant since it would give additional flexibility when using thunderbolt docking stations, external thunderbolt storage, and potentially eGPUs.
Additionally, gamers will appreciate the 2x USB 3.2 gen 2 Type-A ports—especially for peripherals like mice, keyboards and USB headsets. And if you have a modern TV that supports HDMI 2.1, you’ll be able to achieve full bandwidth for a native 4k120Hz connection as long as you have a proper HDMI cable.
Lastly, I appreciate having the option for a 3.5mm analog headphone/microphone combo jack for music, gaming or meetings, and a UHS-II SD card slot for creators.
🔧 EXPANSION & UPGRADES:
Expandability on the G16 is one of its weaker points. On the bottom of the laptop are 11 T6 Torx screws. While 9 of the screws are exposed, you’ll need to remove two smaller rubber stoppers at the rear of the laptop to expose the 2 additional screws to gain access to the bottom of the chassis. And unfortunately, the screws are of different lengths, so you may want to keep track of the locations for each screw, or consult the service repair manual from their support website if you accidentally forget.
Once the rear cover is removed, you’ll really only have access to 2x PCIe 4.0 NVMe SSD slots—one of which is unoccupied, and another slot for your WiFi module. It would have been nice to see a WiFi 7 module included instead of a WiFi 6E. But more importantly, you won’t be able to upgrade RAM, so you’ll need to buy the model that fits your needs.
⌨️ KEYBOARD & TOUCHPAD:
The keyboard has good tactile feedback and travel, and the deck is rigid without flex. I’m able to type at my normal speed ~112 wpm without constantly fumbling. For work, I use a MacBook Pro 16, but I found that the transition to the G16’s keyboard was fairly natural for me. The RGB backlit keys are also appreciated for darker environments, but admittedly, is something I don’t care much about and don’t find myself often needing.
After changing some preferences, I feel that the touchpad is very good. But I think the palm rejection could be improved because I did find myself accidentally changing the cursor position while typing. The physical clicks on the G16 touchpad do feel a bit stiff, but it’s still one of the better touchpads I’ve experienced on a Windows laptop.
💻 DISPLAY:
The G16 sports a 2560x1600p@240Hz OLED display. ASUS says it supports 100% of the DCI-P3 color space, and is Pantone Validated for color accuracy.
While I don’t have the tools to objectively measure the display, my personal opinion is that it looks fantastic, gets very bright (especially for my use-cases), and HDR content looks fantastic on the OLED display.
As a content-creator who focuses more on creating rather than editing and color-grading, it’s still good to know that I’m at least working with a display that should represent colors accurately, but for gaming purposes, I am subjectively impressed with the experience, as colors pop off the screen with excellent contrast in games. And with HDR enabled, you’ll be sure to enjoy an even richer visual experience.
240Hz will be more practical for eSports and games that are just generally less-demanding, but maxing out the most graphically intense modern games will not yield this kind of framerate. However, because the display does support Adaptive Sync, you should experience much less screen-tearing while gaming.
📹 WEBCAM & MICROPHONE:
At 1080p, the webcam does perform better than many others, but it’s also not going to replace a dedicated camera if you’re the type of person to stream on Twitch, Discord or YouTube. But for taking a video call, it should be sufficient with not too much noise unless you’re in low-light conditions. Additionally, you can use Windows Studio Effects to leverage the Intel NPU to apply a background blur. And of course, the Windows Hello facial recognition has been more reliable than ASUS’ fingerprint sensors.
The microphone also sounds quite good when you configure it correctly. Windows claims that the G16 has a 4-channel microphone, and this checks out. Flanking the webcam on both sides, you have 2 microphone channels, and inside of the left speaker of the G16 are the other 2 channels. In my experience, I got the best quality audio by opening the Realtek Audio Console and setting the microphone to Stereo-Enhanced Mode. And if background noise is a concern, I prefer to use NVIDIA Broadcast to apply AI noise reduction.
🔊 SPEAKERS & HEADPHONE:
The built-in speakers on the G16 are a pretty significant improvement over most ASUS laptops I’ve tried in the past. While perhaps not quite at the level of the MacBook Pro, it’s still very good and makes all content sound fantastic. If you want to adjust the sound profile of the speakers (and I think you should), you can open the Dolby Access app and select different presets or set your own EQ. Personally, I created a custom flat EQ without any additional surround virtualizers or volume levelers.
As for the headphone experience, this is an area where I prefer to disable Dolby Atmos entirely, since I want a flat EQ so that I can listen to my music through the sound profile of my different headphones. Overall, I found this also to be a pleasant experience and it seemed to deliver decent loudness without distortion on sensitive both in-ear monitors and power-hungry planar magnetic headphones. It certainly won’t be replacing my dedicated DAC and amp, but in a pinch, it’s great to know I don’t have to compromise a ton.
⚡ PERFORMANCE:
For these benchmarks, I opened Armoury Crate and set the laptop’s power profile to Turbo Mode and the GPU Mode set to Optimized. I also used a laptop stand for better cooling access. Sometimes I’d run Cinebench Multi Core on the same power profile and yield 14%-16% lower results than what I’ve documented here. So take these with a grain of salt.
◾ Unigine Superposition 1080p Extreme DirectX benchmark: 9588
◾ 3DMark Time Spy: 14681 https://www.3dmark.com/spy/46231593
◾ 3DMark CPU Profile: 8866 https://www.3dmark.com/cpu/1789367
◾ Cinebench R23 Multi Core (10 minutes): 18649
◾ Cinebench 2024 Multi Core (10 minutes): 1011
◾ 3DMark Time Spy: 14681 https://www.3dmark.com/spy/46231593
◾ 3DMark CPU Profile: 8866 https://www.3dmark.com/cpu/1789367
◾ Cinebench R23 Multi Core (10 minutes): 18649
◾ Cinebench 2024 Multi Core (10 minutes): 1011
Under a full sustained CPU load, the Intel Core Ultra 9 185H can yield very respectable results. During the PL2 load (2min sustained), the CPU would eventually sustain around 4.3GHz @ 96C, then dial back to a PL1 around 3.9GHz @ 83C.
During this time, both fans do get loud (~47dB average / ~50dB max), reaching a peak around 5700 RPM, but thankfully without any high-pitched whining. Putting some closed-back headphones (Audeze Maxwell) on, I don’t really notice the fan noise. But there’s no doubt that others in my environment would certainly hear it.
It’s also worth mentioning that while plugged in and using the Silent power profile, I could not get less than ~1700 RPM on the fans, but it can reach 0 RPM on battery mode for a truly silent experience.
The most graphically demanding games like Cyberpunk 2077, Control, and A Plague Tale: Requiem will play well over 60fps on average while on very high settings with RT and DLSS enabled. But to engage a high frame-rate experience > 120fps, it may be better to dial back some settings, and you’ll still achieve a very crisp visual experience on the native 16” display.
But if you’re comparing to other “thin” gaming laptops, the G16 may not have the best performance since the graphics only delivers 95W base + 20W dynamic boost, while others might deliver up to 175W, but those laptops will be much heavier despite having a thin profile. This puts the G16 in very limited competition for all that it offers.
🔋 BATTERY:
Battery life continues to be a struggling point for Intel-based laptops, but it’s undoubtedly improving. If you have higher-performance needs for software development purposes, you may only get a few hours of battery life. But if your battery needs are geared towards documents, basic web browsing and video streaming, then I think it’s much more likely that you can get a 6hr to 7hr day while on lower display brightness, RGB effects disabled, and the silent power profile.
🧐 CONCLUSION:
The 2024 Zephyrus G16 delivers a lot of improvements compared to last year’s G16 and 2022’s equivalent M16. While you will pay a premium, ASUS delivered much more value this year with a very premium experience for every aspect of the build. If performance is what you’re really after, then there are certainly better options on the market to deliver performance per dollar. But if you want something that is not only slim but lightweight and delivers a premium experience with very solid gaming performance, then the G16 may very well be what you’re looking for.
I would recommend this to a friend!


Share this review:
+6points
6of 6voted this as helpful.
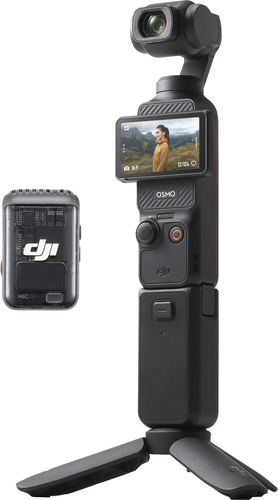
Osmo Pocket 3 features a powerful 1-inch CMOS sensor that puts detail-rich imaging right in the palm of your hand. With a 2-inch rotatable touchscreen and full-pixel fast focusing, go horizontal or vertical for more precise awareness and control. 4K/120fps, three-axis mechanical stabilization, and a host of intelligent features make Pocket 3 ready for any moving moment.
Customer Rating

5
Superb Image + Audio Quality & Innovative Build
on November 29, 2023
Posted by: Xephyroth
Firmware at time of review: V01.02.0604
UNBOXING:
The box of the DJI Osmo Pocket 3 Creator Combo is surprisingly very small for everything that you get. It’s only once you unpack it that you realize how much you’re actually getting in the box.
Inside you’ll find the Osmo Pocket 3 camera, a USB Type C to C cable, a Protective Cover for on-the-go use, a Wrist Strap, a short Handle with ¼” Thread, a Wide Angle Lens, a DJI Mic 2 Transmitter, a DJI Mic 2 Windscreen, a DJI Mic 2 Clip Magnet, a Battery Handle with ¼” thread, a Mini Tripod, and a Carrying Bag.
This sounds like a lot, and it is, but everything is incredibly compact and can fit inside the included carrying bag. Fully packed, my carrying bag measures in at about 6.5in x 4in x 3in, making the entire combo very portable. But if you don’t need the full kit, you can use the protective cover to carry the Pocket 3, Wide Angle Lens and Mic 2 Transmitter at a rectangular volume of 6.75in x 2in x 2in, but it’s actually even slimmer than that.
CAMERA BUILD:
The Osmo Pocket 3 has a matte plastic build that feels premium and rugged. The camera is mounted on a gimbal which allows it to capture a very stable image. When you power it on, the gimbal rotates into place, and when you power it off, it rotates back into its locked resting position so you can stow it away.
It also uses a 556x314 resolution 2” OLED touchscreen display that can physically rotate to landscape or portrait mode so you can monitor and playback in full screen no matter what aspect ratio you record at.
Below the display is a speaker, and the audio quality and loudness for something this size is actually pretty decent.I found that it helped ensure that my microphone levels were sufficiently configured and review the content of the video. On the left, right and rear side of the Pocket 3 you’ll find microphones for recording audio from the Pocket 3, itself.
Below that, you also have a low-profile joystick for operating the gimbal, and it can also be pressed in for additional actions. Above the Joystick is an LED status indicator, and to the right of the joystick is the record/power button.
On the left side is the exposed microSD card slot, and on the bottom is the USB-C input which can be used for charging, data transfers, and a webcam mode for your computer.
The Osmo Pocket 3 is NOT rated for any water resistance, so I would be cautious taking the Pocket 3 into environments where it could accidentally make contact with water, dust and debris.
MIC BUILD:
The DJI Mic 2 Transmitter is built with a similar kind of plastic as the Osmo Pocket 3, but has a transparent plastic front which is probably to ensure best signal strength.
On the right side of the Mic 2 is the power button which when powered on, a single tap will also toggle noise reduction. Above the power button is the link button which also functions as a remote recording button when you’re paired to the Osmo Pocket 3.
The left side houses the USB-C port for charging and for accessing the ~7.8GB of available onboard storage for audio. Below that port is a button to initiate recording onto the internal Mic 2 storage, which is fantastic since this means you can use the Mic 2 as a standalone field microphone without needing the Pocket 3.
On the bottom you’ll find the pins that I can only assume will connect to an upcoming DJI Mic 2 Charging Case. And on the back, you’ll find the magnetic clip which you can either clip to your lapel without a magnet, or you can use the included Clip Magnet to attach the Mic 2 to magnetic surfaces or even to fabrics by putting the fabric between the Mic 2 and the Clip Magnet. I used this magnetic feature to place the Mic 2 in a better position on my shirt, rather than having to clip it to my lapel.
SOFTWARE:
When you first get your Pocket 3, you’ll want to check for firmware updates which can be done through the smartphone app. But you don’t need to use the smartphone app much outside of that. With that said, it can certainly be helpful for monitoring your footage on a larger display or operating the Pocket 3 remotely with access to all the settings and some additional options for streaming.
The software onboard the Pocket 3 is pretty easy to use, but because it’s such a small display, it has to rely on a lot of iconography for some menus, and I might argue that some of them aren’t the most intuitive at first. But with a bit of time, you’ll find yourself navigating menus with ease.
You’ll have quite a good number of options for your recording preferences such as resolution and framerate, and then you can dial in your image preferences with things like white balance, exposure, sharpness, noise reduction, focus mode, and 10-bit color.
And you can also adjust your audio preferences for either the built-in microphones or for the Mic 2. You’ll have options like Mono or Stereo audio, Noise Reduction, and if you’re using the built-in microphones, Directionality so you can record audio front/rear or both.
Once you’ve connected the Mic 2 Transmitter, you’ll have additional options like using 2x Transmitters simultaneously, gain adjustment, and mute. Under the system settings menu you can also find some additional configuration for the Mic 2 Transmitter like 32-bit float recording, the “Audio-Video-Sync” feature which will record the Mic 2 audio to its internal storage in addition to using the Mic 2 audio for the encoded MP4 video. And recently added in a firmware update was the ability to record the onboard mic as a separate .wav file even when you’re using the Mic 2 Transmitter or other external mic. For me, these are no-brainer features since it means you’ll have redundant copies of the microphone audio should you need the flexibility in a post production workflow. And lastly, you do have a low-cut filter option on the Mic 2 should you need it.
Some other great features include their ActiveTrack 6.0 to track a subject, Face Auto-Detect, Dynamic Framing to switch between focus points in the frame using the joystick, and the SpinShot which can rotate the camera 90 or 180 degrees for you to capture an interesting artistic shot.
Of these modes, I did find that the SpinShot was not as perfect as I wanted it to be because the camera sensor is effectively orbiting around the axis of the handle. So any shots where you want to zoom in perfectly onto a subject will still have its challenges. However, it’s still amazing that you can do this at all and still achieve a very smooth capture.
And for capture modes, you can select from Video, Low-Light, Slow-Motion, Timelapse, Photo, and Panorama. Although not all of them will work in portrait/selfie mode, each mode will still have configurations such as aspect ratio, resolution, and framerate.
If you’re experienced, you can enable the pro mode which will give you better control over shutter speed, ISO, sharpness and noise reduction for you to dial in an image with superb dynamic range and low noise.
And for the photo modes, you will be able to capture JPEG and RAW either independently or simultaneously, and you’ll still have control over the white balance, exposure and focus.
However, because it’s such a small screen, it’s really hard to have more advanced controls at your immediate disposal, so dialing in shutter speed and
IMAGE QUALITY:
In higher brightness conditions, the DJI Pocket 3 really has excellent image quality out of its 1” CMOS sensor. With the D-Log M or HLG 10-bit color profiles you’ll be able to capture a neutral flat profile and grade your footage in post, or you can opt for the default color profile. One thing to note is that 10-bit color profiles are only available in the standard Video capture mode, and now for Slow Motion after the latest firmware update.
In lower light environments, the Low-Light mode can help expose darker areas, but may sacrifice some sharpness and may also introduce additional noise. If you’re in a nightlife environment that still has plenty of lights, then this mode can be great for that. But in sparsely lit environments, it may struggle more in auto mode.
AUDIO QUALITY:
The onboard audio of the Pocket 3 is actually quite good and very usable. You should be able to capture a good amount of dynamic range, so quieter noises and loud noises should not be an issue for capture. And with the recently added ability to simultaneously record both onboard mics and the Mic 2 Transmitter to their own respective .wav files, this will give you even more flexibility should you want to mix levels between the Pocket 3 audio and the Mic 2 audio.
I do find that the Mic 2 sounds most clear when you’re speaking directly into it as opposed to on your lapel or shirt, but it still sounds fantastic for how small it is and is versatile for different recording circumstances. I magnetically clipped it to a PA speaker and recorded some electric guitar out of that. It sounded very clear and thanks to 32-bit float recording, it didn’t have any clipping despite how close the microphone was to the driver and how loudly I was playing.
BATTERY LIFE:
DJI claims the Pocket 3 should yield 166 minutes of recording at 1080p/24, and additional 103 minutes with the battery handle. At 4k resolution, you can expect minor a drop in battery life, but given that you can charge the Pocket 3 to 80% in just 16 minutes, I don’t have any serious battery anxiety. But YMMV if you decide to record at high frame rates like 60 or slow-motion at 120fps.
CONCLUSION:
The Pocket 3 is such an impressive little camera, and I do think the creator combo is worth the upgrade over the base package. If you’re looking for a super portable (pocketable) camera focused on video, the Pocket 3 should certainly be on your radar. The image quality is very good, especially given the size, and all the capabilities it has for beginners and professionals alike make it a really good pickup for creators of all experiences.
I would recommend this to a friend!


Share this review:
0points
0of 0voted this as helpful.

No matter how fast life moves, you can take it all with ACCENTUM Wireless - the perfect, on-the-go headphone for every journey. Experience high-quality, take-anywhere wireless audio with an unrivaled 50-hour battery playtime and hybrid ANC for distraction-free enjoyment throughout your day. ACCENTUM's listening experience is elevated by the captivating, high-quality sound delivered by Sennheiser's meticulously engineered transducer system. This fantastic audio can be personalized with sound modes, including Bass Boost or Podcast mode, or precisely tailored via the built-in 5 Band equalizer. Take on any environment without distraction with the hybrid ANC, which lets you listen on your terms, even in busy outdoor environments or crowded places. Need to hear your surroundings without removing your headphones? Transparency mode lets in external sounds at a touch. ACCENTUM gives you fuss-free, everyday simplicity and effortless ease of use. Control is direct and intuitive, with dedicated buttons and one-touch voice assistant access. From your morning commute to your late-night chillout, ACCENTUM keeps you incredibly comfortable thanks to its lightweight, ergonomic design and soft-touch headband. Thanks to robust Sennheiser build quality, fold-flat design for easy portability and fast USB-C charging, it's ready for every day's adventures.
Customer Rating
4
Good Audio Performance for Smaller Heads & Ears
on November 9, 2023
Posted by: Xephyroth
UNBOXING:
The unboxing experience for the Sennheiser Accentum is pretty barebones. Inside the box, you’ll be greeted with the headphone, a USB-C to USB-A charging cable, and the manual. There is no case or bag included with the Accentum, so you will need to purchase one separately if that’s a concern.
BUILD:
The Accentum is quite lightweight at only 221g. It’s a plastic build, but it manages to look sleek. With that said, you should not expect the kind of build quality found in more expensive ANC headphones, as the feeling in hand is not premium, but also not bad.
The headband can be adjusted a reasonable amount, and the ear cups themselves have 180 degrees of rotation so you can rest them around your neck or on a flat surface with the ear cups facing either up or down. It’s a small thing, but you don’t see many headphones supporting both directions these days.
COMFORT:
Out of the box, the comfort of the Accentum is ever-so-slightly above average. Personally, I think the clamping pressure is too much, so I’d stretch these out over a box before trying to wear them for many hours at a time. I was able to wear them on and off throughout the day, but I’d usually experience some level of discomfort from the clamping pressure.
That being said, the ear pads themselves are quite soft, but the headband padding is thin and rather firm for my head. If you are the kind of person who frequently experiences discomfort from cheaper headphones, then I don’t think this headphone is going to solve that problem. I think Sennheiser/Sonova put more emphasis in making comfortable ear pads and decided to cut back on the budget for headband padding and simply increased clamping force to prevent discomfort from the headband, but it distributes discomfort in multiple places.
Don’t get me wrong, this is not a horribly uncomfortable headphone, but it’s definitely not geared towards long-term comfort in my experience.
CONTROLS:
On the right ear cup, you’ll find all the controls and the USB-C input for charging. You have the multifunction button, as well as volume buttons and a playback/pause button.
You can pair by holding the multifunction button until you hear an audible noise and voice, and you can switch between the ANC and transparency mode by double pressing the multifunction button. To my surprise, you can spawn your device’s voice assistant by a single tap of the multifunction button. Most devices I’ve used would let that be a secondary action instead of primary action, so I found that strange.
And if you want to hear the battery status, you can hold the playback button. I think some of these are less intuitive, and I’d like to see some ability to re-configure these controls, but since this is a mid-budget ANC headphone, I doubt we’ll ever see that kind of improvement to the user experience.
APP:
The Sennheiser Smart Control app has some potential, but needs a bit of refinement as well. The Accentum supports 2 devices connected simultaneously, but it can pair to more devices. The app itself lets you switch between your paired devices, switch between ANC and Transparency mode, adjust sidetone for phone calls, and adjust the 5-band EQ.
Additionally, if you want to register with a Sennheiser account, you can create special customized EQ presets for different genres and styles through the Sound Check feature, and you can also use the Sound Zone feature to automate your settings based on your geo location. I tried the Sound Check feature which gave me options to pick from while listening to my music, and I ended up with a completely flat EQ—so no EQ at all.
This is a pretty decent way of determining your listening preference for different styles of music, but given that it can only adjust across 5 bands, it’s also fairly limited in how well it can tune to your preferences.
SOUND:
The sound profile of the Accentum leans toward the typical consumer-grade V-shape with accentuated bass and elevated treble. While I tend to prefer a treble forward sound signature, I actually found that setting a -1.6dB drop at the 8kHz shelf in the EQ was a bit more preferable for me. Not a significant change, but it helped make my music sound a little bit more balanced.
Other than that, it’s really hard to fault the Accentum for its tuning. The bass shelf is tasteful for most music without becoming overwhelming. I listen to mostly a mixture of Pop, R&B, Metal & Instrumental music. And while the Accentum didn’t “wow” me with its sound, it also didn’t do anything to disappoint me. I think the only disappointing aspect was the fact that I couldn’t wear it for longer due to physical discomfort.
The soundstage is average, vocals present themselves as well-balanced in the mix, and more mid-range focused elements like guitars can push forward without drowning out other elements in the mix. Your mileage may vary if you apply EQ in the app, but at least with a flat curve it’s a tasteful tuning.
With that said, it’s not going to deliver a ton of detail and resolution, so audiophiles will want to temper expectations here.
ANC / AMBIENT SOUND:
The ANC is one of the weaker elements of the Accentum. At its price point, the Accentum has middle-of-the-road active noise cancellation, and unfortunately that also comes with an elevated noise floor. While higher-end ANC headphones will be very quiet when you engage the ANC, the Accentum exhibits some noise when ANC is engaged. When music is playing it’s not really noticeable, but if you are the kind of person who likes to put ANC headphones on just for silence, the Accentum ruins that with a bit of noise.
So you can expect it’ll be effective at canceling some degree of background noise, but it won’t compare with more sophisticated methodologies of higher-end ANC headphones.
The Transparency mode also exhibits a higher noise floor compared to the ANC mode—which isn’t surprising. However, speaking out loud with this mode engaged does sound pretty clear with just a bit of muffling. But I could certainly engage this mode and clearly hear what’s going on in my surroundings without issue.
MICROPHONE:
The microphone on the Accentum is serviceable for quieter environments, but will perform pretty poorly in environments where there is a lot of background noise. In my testing, clapping or background noises like music or speech is picked up by the Accentum, and there’s no setting in the app for any sort of AI microphone noise rejection.
The audio that does get picked up by the Accentum also sounds a touch distant, so speech will sound like it’s coming from a few feet away. This didn’t really impact clarity too much since it picks up midrange and treble frequencies pretty consistently, but the microphone does have some potential to clip if you tend to project your voice. It’s probably fine for most people, but it definitely has a run-of-the-mill phone call quality sound to it.
BATTERY:
Sennheiser boasts that the Accentum can reach up to 50 hours of battery on a single charge, and thus far, they are living up to that claim. Bluetooth 5.2 introduces new advancements for lower power consumption, and the Accentum is taking advantage of that.
CONCLUSION:
The Sennheiser Accentum is a headphone that could be better, but perhaps not without some additional cost. Cutbacks were made in order to target the asking price, and those concessions may well be worth the savings to some people. If you have smaller ears or are not sensitive to clamping pressure or thin headband padding, the Accentum is honestly a decent sounding headphone with mid-range ANC performance.
But if you have a larger head, larger ears or are more susceptible to discomfort with headphones, then I do think you should skip the Accentum because comfort should never be sacrificed for a headphone—especially one that you plan to wear for extended periods of time.
No, I would not recommend this to a friend.


Share this review:
+1point
1of 1voted this as helpful.

Prepare to be captivated. Whether you prefer dramatic thrillers or fantasy football, lose yourself in the viewing adventure with a contrast rich picture. Let your picture do the talking with the sleek and thin Laser Slim design. You’ll see pure blacks, bright whites and dramatic color, while the audio pulls you into the action thanks to Dolby Atmos built in and Object Tracking Sound Lite. The Samsung OLED experience doesn’t stop there shifting adventures is a breeze with access to the latest Smart TV apps and Samsung Gaming Hub.
Customer Rating
4
Great Picture, Meh OS, Minor Display Bend
on November 6, 2023
Posted by: Xephyroth
UNBOXING:
This is a 2-person job and I really wouldn’t recommend attempting to set up the S89C alone. To unbox, you’ll lift the cardboard up which will reveal the TV sitting in a protective foam enclosure. Overall, it was packaged decently well, but for such a thin panel, it does feel like perhaps there would be better packaging. But if it’s delivered without issue, then it shouldn’t be a serious concern.
Inside of the box, you’ll have the TV, power cable, detachable stand, solar remote control, documentation, cable cover, and a 3.5mm male to RCA female adapter.
SETUP:
If you decide to use the stand, one of the really nice aspects of setting up the S89C is that you can install the stand before you fully remove it from the box. The stand on the S89C is mounted at the center of the TV as opposed to the edges of the frame. So Samsung opted to make it easy to remove the middle of the packaging so that the stand can be mouned before removing the TV from the box. No tools are needed to install the stand, either.
Once you’ve installed the stand using the included instructions, it requires two people on each side to lift the TV onto your desired surface. After which, you can install all the necessary cables and attach the cable cover.
Alternatively, you can also VESA mount the TV to a wall, and the screws are installed in a 400mm x 300mm configuration, so you’ll need to use a mount that can be adjusted to meet this specification.
Then the software setup can be performed either by smartphone through the Samsung SmartThings app with a QR code, or with the physical remote. With that said, I recommend using the app, and if possible, using the Smart Calibration which leverages your smartphone’s camera to calibrate the S89C’s display. I’ll touch on that later.
BUILD:
The Samsung S89C weighs in at 79.4lbs with the stand, and the vast majority of the build is going to be slightly more than ¼” inches—which is less than many smartphones, while the thicker portion at the bottom of the TV is a mere 1.8”. Excluding the stand, the TV yields a cubic volume of 67.7in x 38.9in x 1.8in.
I did notice some small gaps in the build where the mainboard enclosure meets the display, but this isn’t something to be particularly concerned about. That being said, I think for the price being paid, many folks would expect a more consistent build.
More importantly, I did notice that because the bottom half of the TV has the electronics whereas the top half only has the display, there really isn’t a ton of structural support for the top half. As a result, when I looked at the side of the TV, I noticed that the display exhibited a very subtle backwards bend. And if I’m being honest, this isn’t the first time this in a large-format Samsung OLED TV. Because Samsung keeps making these TVs so incredibly thin, it is much more likely that they may develop a subtle bend during packaging, transportation, and delivery. I experienced this on the smaller Samsung 65” S95B, and it continues its legacy here on the larger 77” S89C.
That being said, it is not noticeable unless you are paying very close attention, and it’s certainly not noticeable at all when you are looking straight at the display. Even so, I have owned or inspected other OLED TVs at this size and they do not design them this thin without structural support for reasons like this. So your mileage may vary, but it’s also not an infrequent occurrence—the question is how much bend you will have as opposed to if there is one at all.
Other than that, you have 4x HDMI 2.1 ports which is refreshing to see considering how many TVs may only have 1 or 2 that may have full support, and the remote control charges via USB-C and by a solar cell on the back of the remote.
DISPLAY:
With display bends aside, how does it perform in terms of color, fluidity, and HDR?
Out of the box, before running the Smart Calibration through the SmartThings app, I noticed that the HDR performance leaned towards making content overly bright and blown out, and there was more frequent color-banding in gradients. But after Smart Calibration, this was significantly improved with better dynamic range and less color banding between gradients. So I highly recommend using the Smart Calibration if possible.
With that done, the performance of the S89C is fantastic to my eyes. This is using a WOLED panel from LG Display, not to be confused with the higher-end QD-OLED displays that Samsung is manufacturing. If you’re looking for QD-OLED, you’ll need to look at the S90C model.
With that done, the performance of the S89C is fantastic to my eyes. This is using a WOLED panel from LG Display, not to be confused with the higher-end QD-OLED displays that Samsung is manufacturing. If you’re looking for QD-OLED, you’ll need to look at the S90C model.
The S89C has very rich contrast, and colors appear vivid and punchy with more of a life-like appearance as opposed to artificial. Things like color banding may be more prevalent depending on your source device, the quality of the content,how you’ve configured the settings of that device, as well as the S89C, itself. In my testing, using an Apple TV yielded the best overall color performance with streaming services compared to the same services on the native Tizen OS of the S89C.
HDR content also looks fantastic on the S89C thanks to the OLED panel. When presented with scenes where there is incredibly bright content juxtaposed with darker content, the S89C is able to represent both on the display without causing blooming. Moreover, I never experienced any screen flickering in my tests. I used the full gamut of features with 4K HDR with Variable Refresh Rate and at 120Hz. When all these features were in effect simultaneously, the S89C did quite well. Games were responsive with low input latency, high refresh rate, and with incredible contrast and dynamic range thanks to OLED’s incredible HDR performance.
Another feature I’d like to mention is that with a compatible PC connected, the S89C can yield a 144Hz refresh rate which may be desirable for PC gamers, and it’s possible across all 4 HDMI ports.
AUDIO:
The S89C is equipped with 40W of audio output via 2.1 channels. In my testing, the audio was actually reasonably good. For those who do not yet own a dedicated sound system and aren’t interested in purchasing one, I think that they will be pleased with the clarity of the audio from the S89C. While you won’t have amazing directionality or deep bass, audio was clear without sounding tinny, dialog was easily understood without muffling, and cinematic audio effects were able to preserve their overall intent.
SOFTWARE:
The Tizen OS software is reasonably responsive on the S89C, but it can also be a bit cumbersome to use in certain circumstances. Navigating between your HDMI inputs requires more button presses because there aren’t any dedicated shortcuts on the remote for your HDMI inputs. If you’re the kind of person who normally avoids using the integrated smart TV OS, you won’t be able to completely avoid it on this TV.
The remote itself is incredibly minimalist with no numeric buttons for channels, so it’s fine for directional controls in onboard apps, but not for navigating to a specific channel on your cable box. You’ll of course have all the mainstays like Netflix, Prime Video, Disney Plus, YouTube, and Hulu, as well as an app store for others. A few of which have shortcuts on the remote control in addition to the Samsung TV Plus service.
You can use a voice assistant either through Alexa or through Bixby, but these were often hit or miss. Sometimes I could ask for a specific thing and it would find it, and other times it would struggle to understand what I was asking for.
I think that the user experience could use some improvement across Tizen OS, but with such a simplified physical remote control, it will always be limited in how quickly you can navigate. I understand there are people who may be happy using the onboard smart TV software for all their streaming needs, but I just continue to find that most smart TV operating systems can be sluggish or provide non-intuitive user experiences. While Tizen OS is pretty responsive overall, it really seems like the onboard processing of video streams is not as good as dedicated Apple TV hardware.
But I am at least happy that it doesn’t freeze up and lag every time I try to navigate through the OS.
CONCLUSION:
Overall, I think the S89C is a solid 77” OLED TV. It has solid performance for cinematics and games, and its native Tizen OS is responsive albeit perhaps more cumbersome to navigate for certain circumstances. When compared to its competitors, it has more build quality issues due to the incredibly thin design, but its visual performance is solid after calibration, and the audio performance is also quite good for onboard audio. If you’re evaluating this TV against the competitors, I’d say its biggest shortcoming is that its OS is less mature, and its display is more susceptible to bends due to its very thin design.
I would recommend this to a friend!


Share this review:
+1point
11of 21voted this as helpful.
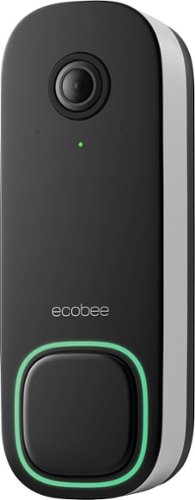
The ecobee Smart Doorbell Camera (wired) sees what others can’t by letting you see more of what’s really happening at your door, day or night. Get real-time notifications for people and packages whether you’re home or away, and get the full picture with our industry-leading field of view. Automatically track, pan, and zoom-in on important activity at your front door in full 1080p HD quality with built-in radar and Smart Focus. That’s something to get excited about.
Customer Rating

3
Decent Hardware Held Back by Software
on October 29, 2023
Posted by: Xephyroth
UNBOXING:
The Ecobee Smart Doorbell comes with very small packaging and includes everything you should need to get started other than a phillips head screwdriver and perhaps a drill for creating screw holes for mounting the doorbell to your wall.
Inside the box, you’ll find the doorbell and backplate, an optional wedge, screws for mounting, extension wires, and a chime adapter.
BUILD:
In short, the build quality is good. It’s a glossy finish which I’m not a fan of since this will yield more scratches over a matte finish, but I also don’t think it’s particularly important because it’s going to remain stationary.
It connects through your existing doorbell wires and connects to your network via 2.4GHz and 5GHz W-iFi network with support for up to 802.11ac.
It has a 5MP camera that delivers footage at 1080p with 30fps with a 4:3 aspect ratio and 175 degrees vertical and 115 degrees horizontal field of view. And in very low light, it can enable its night vision mode. As for the audio, it has an onboard microphone and speaker so that you can remotely communicate with your guests.
And for the weather-conscious, it can operate at -13F to 113F.
SETUP:
The setup process for the Ecobee Smart Doorbell is pretty standard among the video doorbells that I’ve tested over the years. You’ll need a phillips head screwdriver and likely a drill, but it's otherwise a pretty straightforward experience, especially because the Ecobee smartphone app will guide you through the process.
I do want to mention that you’ll need to install the included chime adapter onto your existing doorbell chime, and you’ll want to make sure that the operating voltage is 16V to 24 VAC. Ecobee’s support website has many resources on helping you find out whether or not your existing doorbell system is capable. Most homes these days should not have this issue, but if your home is quite old, then it’s strongly advised that you verify. Following the guided instructions, the doorbell chime was quite easy to install.
My installation location was at the adjacent wall of the door as opposed to the same wall as the door. While at first I would have liked to have the doorbell facing towards the street, I did find that having the camera capture footage of the door was also valuable. I chose not to use the wedge in this case, but I certainly could have used it to capture more of the street and less of the door. And it was nice to know that if I had short cables at my doorbell, the included wire extenders would have ensured a smooth installation.
VIDEO QUALITY:
Ecobee has a lot of established competition, and video quality is really one of the most important parts about a video doorbell. Unfortunately in my testing, the video quality is below my expectations based on the quality demonstrated by competitors.
Firstly, sometimes it can take 5-10 seconds to load the actual video stream through the Ecobee app. It is possible that this may be more prevalent if it chooses to use a 2.4GHz network. So if you have a single WiFi network name for your home that hosts both 2.4GHz and 5GHz, the Ecobee might prioritize 2.4GHz over 5GHz, and you don’t have any ability to configure which WiFi band the Ecobee should prefer. I ended up testing the Ecobee Smart Doorbell Camera on a dedicated 5GHz WiFi network, and this typically yielded a video stream in about 5 seconds. Coming from other doorbell systems, this still just feels like a long time. Most other systems I’ve used will respond in 2-3 seconds. This probably isn’t a big deal unless you watch your doorbell footage a lot for some reason, but for someone like myself who has experienced a number of doorbells, it’s something I certainly noticed.
Oftentimes, the video bitrate starts off quite low and so I notice more visual artifacts, but eventually the bitrate appears to improve and the footage is reasonably sharp. However, it tends to struggle to stabilize the image for anything in motion, while things that remain static will yield a more stable, detailed image. Given that it’s connected to a dedicated 5GHz WiFi band, this doesn’t seem to be an issue with my network, but rather an issue with some aspect of Ecobee’s compression.
In broad daylight, stable/static footage is generally decent, but not particularly “sharp” since it’s only 1080p. So zooming in on the footage will yield a much softer overall presentation. But if someone is walking up to your doorbell, you should be able to identify people you know. Whereas for those you don’t know—the footage might not give a clear enough image unless their face is clearly exposed in the camera’s field of view. Since my doorbell was not mounted facing the street, it does mean that the doorbell will capture footage mostly on the side of people’s faces, so the quality of the footage will matter a lot more to identify a stranger. If I was able to mount the doorbell facing out towards the street, I think that I would be able to get better footage of faces, which would yield more detail.
In lower light conditions, the night vision will really only activate if it’s quite dark. If you have a porch light on, it’s much less likely to activate. But when it does activate, it will certainly help to ensure that the footage is more usable. If you decide to leave your porch light on, the footage will generally be more detailed and reliable over night vision footage, but it’s good to know that you’ll have visibility even in very dark scenarios.
One strange thing I also witnessed was that zooming and panning in on the live feed will actually retain that location until you zoom back out. Maybe some folks have circumstances where they would want to digitally zoom in and keep their live camera feed and recorded footage zoomed in, but I certainly did not. Because zooming on the live feed is performed on the Doorbell hardware, you will be subjected to network latency, so it was overall pretty slow to zoom or pan.
AUDIO QUALITY:
In my testing, the audio was actually pretty good, and this is an area that should not be ignored. Sometimes you might have an unexpected package or visitor, and you need to be able to communicate effectively. From the app, I was able to communicate through my smartphone’s microphone to the guest at the doorbell, and the audio quality sent from my smartphone to the doorbell was coherent and clear. Likewise, the audio recorded from the doorbell’s onboard microphone was clear so that I was able to hear guests without issue.
APP:
In terms of features, the Ecobee Smart Doorbell Camera has many offerings to match its competition, but many of its features are only available behind the Ecobee Smart Security Subscription. Ecobee does provide a 60 day trial out of the box, but once that trial has lapsed, some notable features are unavailable.
Some notable features include Rich Push Notifications, Motion Detection, Activity Zones + Detection Range to prevent unwanted alerts, Package Detection and Person Detection, Apple HomeKit integration, and Smart Focus which will auto-pan and zoom to keep people and packages in view. Additionally, you can use other Ecobee devices like your Ecobee thermostat to function as your doorbell chime.
Once that subscription trial lapses, the 30 day video history is downgraded to only image snapshots of events, the package detection will be completely unavailable, and the Rich Push Notifications will be simplified to text notifications. Given that there’s no video history without a subscription, this could be a serious deal breaker for a lot of folks, including myself. But if you’re already deep into the Ecobee system, this might not phase you.
While most of these features actually work quite well, the Smart Focus feature (which is currently in beta) is the one feature I do not recommend at all. In my findings, it would often zoom to people’s lower body (like their legs). If you simply record the full field of view, you can always just zoom and pan while reviewing the footage anyway. It makes much more sense to capture the full field of view so that you don’t risk losing any important footage.
It should also be mentioned that the Apple HomeKit integration lacks HomeKit Secure Video. So while you’ll be able to view the live camera from the Home app and initiate communication over the microphone, you won’t be able to get notifications or perform recordings through HomeKit. Rather, you’ll be relying on Ecobee’s app for notifications and recordings.
Lastly, figuring out how to change the WiFi network was not trivial. Whereas most apps would have a “WiFi Configuration” or something similar under the Settings for the Doorbell, Ecobee opted to put this under the “Support” section of their app which I have never seen done before. Not a big deal once you’ve found it, but little things like this certainly make me question their thought-process behind the user experience.
CONCLUSION:
To be honest, I had higher hopes for the Ecobee Smart Doorbell Camera. There is still potential that Ecobee may perform updates to their app and firmware that will make this doorbell a more compelling option, but if you’re not already in the Ecobee system with an Ecobee Smart Security subscription, I don’t quite feel that this device was launched with the most polished experience. There are other competing options from well-established brands who offer subscription services that are simply more polished and have better quality footage. Alternatively, there are other options that use local or network storage which deliver similar features without a subscription service and with better fidelity and responsiveness. From my experiences using competitors’ products, I don’t feel as though Ecobee’s offering is compelling enough at the asking price to warrant my recommendation. However, if Ecobee adds support for HomeKit Secure Video and/or is able to improve issues with its video quality, I think there could be a stronger argument in its favor.
No, I would not recommend this to a friend.


Share this review:
0points
0of 0voted this as helpful.

Lightweight and designed for comfort, the INZONE H5 is ready for long gaming sessions. Coupled with immersive spatial sound and a crystal-clear microphone, victory is just a moment away.
Customer Rating
4
Excellent Plug & Play for PC, PS5 and PSVR2
on October 16, 2023
Posted by: Xephyroth
UNBOXING:
Inside the box of the H5 is the headphone, the USB-A dongle, a USB-A to USB-C charging cable, and a 3.5mm 4-pole cable for passive analog usage. Also inside, you’ll find the setup guide, and a few INZONE stickers.
BUILD:
The INZONE H5 is very similar to the H9 that I reviewed last year, but makes some important changes to achieve its much lower price point. My unit weighed in at 261g which is quite a bit lighter than the ~330g of the H9. The plastic has a matte textured finish akin to that of the PlayStation 5 console cover, and is really no different than the H9. Overall, it feels durable while also being lightweight.
On the right ear cup is the power button, chat and game mix buttons, and an LED indicator which can flash when powering on, powering down, or checking the battery status.
On the left ear cup is the USB-C charging input, a charging indicator LED, 3.5mm jack, and the boom microphone which you can lift up to mute, then move back down to re-engage.
The microphone does have a little bit of flexibility so that it isn’t touching your face. And since the only way to mute is to lift it up, there’s no need for an LED indicator at the tip.
The headband is a smooth gliding adjustment which some folks may like, while others may prefer to have clicking adjustments to ensure symmetry on each side. Regardless, the headband provides enough adjustment for larger head sizes. The ear cups also swivel to ensure they can rest naturally against your head without applying any undesired pressure.
Also, I did test it with PlayStation VR2 and found that it fits over the PSVR2 headset and was still comfortable, so if you’re looking at wireless options to pair with your PSVR2, this may be a good pickup for that purpose.
COMFORT:
The INZONE H5 uses fabric ear pads like the H7, and I found them to be quite comfortable. They have a relatively large oval-shaped opening and should be able to fit most ears since there is quite a bit more space under the pads where your ears will rest. The ear pads are very plush and form a surprisingly good seal against your ears, so they end up providing a decent amount of passive noise isolation. I personally quite like these ear pads, as they help reduce stress from the clamping force.
The headband has pretty thick, soft pleather padding that makes it comfortable for longer playing sessions without causing hotspots at the apex of my head.
My longest session with the H5 on was 3 hours straight without any discomfort, and I’m sure I could have continued using it for much longer. Your mileage may vary, but the INZONE H5’s lighter weight and plush padding delivers a very comfortable experience.
SETUP:
The setup process for the INZONE H5 headset is straightforward on both PC and PS5. The USB-A dongle has a toggle switch labeled “PC” and “PS5'' that you can set before plugging it in. If you’re using a Windows PC, you can download the INZONE Hub app to make adjustments to sound settings and microphone settings.
Once the dongle is plugged in, the LED indicator on the dongle will blink to indicate that it’s waiting for the headset to pair. Power on the headset by holding down the power button on the right ear cup. You’ll hear a chime to indicate that it has turned on, and then a subsequent chime indicating that it has been paired with the dongle. To power off, hold down the power button until you hear a chime.
If you’re using a PC, you’ll need to set your default output device to “INZONE H5 - Game”, while chat apps like Discord should be set to “INZONE H5 - Chat”. These individual output options exist so that you can use the hardware buttons on the right ear cup to mix chat audio and game audio.
SOFTWARE:
For PS5 users, the H5 integration is straightforward. From the H5 hardware, you can control the volume, mix game and voice chat audio, and flipping the microphone up will mute it. All of these actions will have a visual indicator in the PS5 software, but you’ll need to make sure the dongle is switched to “PS5”. This is because the “PC” mode will still work on the PS5, but will not have visual indicators and will only support the microphone and sound.
When using the INZONE Hub on PC, you can use different EQs and save them, but they don’t persist to the headset, so if you use different computers, you’ll have to set up those profiles again.
The INZONE Hub also provides Sony’s Spatial Sound which can have you take a picture of your ears to use a personalized sound profile when you have Spatial Sound enabled. You can also set Dynamic Range Control which is supposed to give you the option of making quiet sounds a bit louder which might help for certain games. I don’t personally use this.
Additionally, the INZONE Hub has controls for microphone gain and sidetone monitoring. Automatic Gain Control is the default setting if you don’t want to manually set your microphone volume.
SOUND:
The INZONE H5 has a pretty typical sound signature found on gaming headsets with a boomy bass response that bleeds into the midrange. The midrange presentation is otherwise decent, and the treble is recessed with a few spikes.
That being said, the H5 is effective for casual non-competitive gaming. While there are better headsets for highly cinematic experiences, I think the H5 does just get out of your way and let you focus on your game without thinking about complicated controls.
I played a number of games on PC and PlayStation 5, and overall, I think the H9 does a good job at getting out of your way and lets you just focus on the game. I honestly didn’t think about the fact that I was wearing a headset, and was just immersed in the games at hand. I can’t speak for competitive gaming, but I think for most games, the H9 presented audio in a reasonable way.
I’m not a fan of Sony's Spatial Sound feature, so it’s not something I can personally recommend using since it made the audio sound more narrow as opposed to creating a wide spatial effect.
For music, the H5 is fine for casual listeners. I personally avoid the built-in preset EQs in the INZONE Hub as they’re all laughably bad. However, you can certainly create your own EQ. I chose to dial back the bass, and increase some treble regions while also reducing some hot treble spikes.
Going from Wireless audio to analog 3.5mm, there is quite a difference. It’s clear to me that there’s some digital signal processing onboard the headset when audio is being processed wirelessly, as the analog audio sounds more harsh in the treble. This will really depend on your audio source, but plugged into a neutral system I found the 3.5mm audio to be fine for most gaming, but might be more contentious with certain types of music with strong treble energy.
MIC:
The microphone sounds reasonably good for a wireless gaming headset. You’ll get more mid-range and treble focus with a pretty low noise floor in my experience. I typically just relied on the Auto-gain and got good results, overall. And the sidetone implementation sounds reasonably good without any hissing.
BATTERY:
Sony claims that the battery life on the H5 can hit 28 hours. At lower volumes, you may exceed this estimate, but from my testing, I think Sony’s estimates are pretty active. And if you need to top up, Sony claims 10 minutes of charging can yield 3 hours of usage. But it’s also nice that you can use the 3.5mm analog mode if you run out of battery and can’t charge for some reason.
Should you deplete the battery or just want to top-up, you can do so with the included USB-A to USB-C charging cable, and you can continue to play while you charge. However, the H5 does not carry data over USB, so the dongle will still need to be plugged in or you’ll need to use 3.5mm analog audio while charging up.
CONCLUSION:
For the price, the INZONE H5 is a decent wireless gaming headset that can also function as a wired 3.5mm analog headset. While its sound profile isn’t going to win any awards, it is comfortable for long usage, and it does fit over the PSVR2 headset. Whether for PC or for PS5, it could be a decent pickup for a casual gamer who just wants a simple headset without a ton of complicated features.
I would recommend this to a friend!


Share this review:
0points
0of 0voted this as helpful.
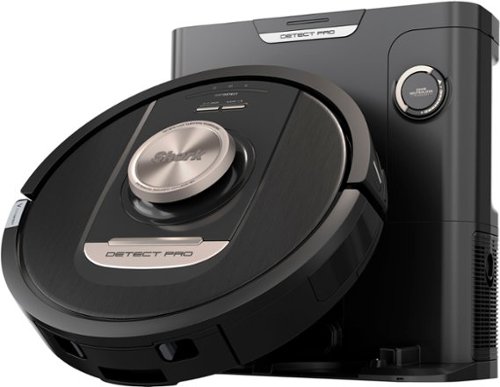
The Detect Pro robot vacuum is powered by 3 deep-cleaning technologies that enable the robot to maximize performance by sensing mess level, floor type, and edges & corners. DirtDetect sees even the hidden debris and automatically increases suction and cleaning passes to remove the mess on carpets and hardfloors. Now with NeverStuck technology, this robot will navigate around obstacles AND lift itself up and over thresholds and onto thick carpets. Not only can the robot deep clean, but you also do not have to worry about it getting stuck. Detect Pro finishes the cleaning mission every time and with each clean will empty itself into its bagless base that contains a HEPA Anti-Allergen Seal trapping dust & allergens inside. The odor neutralizer technology will also ensure the odor is trapped in the base for a fresher smelling home and making it the ultimate end to end solution for pet hair pick up.
Customer Rating
3
Decent Performance, But Expensively Barebones
on October 12, 2023
Posted by: Xephyroth
UNBOXING:
The unboxing experience of the Shark Detect Pro robot vacuum is pretty straight-forward. Inside the box, you’ll find the robot vacuum, the dock, 2 side brushes (one of which is a spare), and an odor puck which plugs into the dock.
One thing I didn’t love is the use of plastic peels to protect the robot and dock. Compared to the competition, I think Shark’s use of plastic is pretty excessive these days and I’d like to see more eco-friendly packaging.
But regardless, the unboxing experience was intuitive and there are graphics explaining how to get started.
BUILD:
The overall build is plastic across both the robot and the dock. The robot has some glossy plastic atop, and I’m not really sure why Shark chose to do this because glossy plastic ends up developing scratches over time.
You also have 2 buttons on the robot for docking and cleaning, and it employs a LIDAR sensor atop the unit for mapping out your home.
Under the robot are 2 wheels with a self-lifting mechanism to navigate over some larger door strips or thicker rugs, main and side brushes, a battery door, and cliff sensors to prevent the robot from going over stairs.
Meanwhile, the docking station has the dust bin, a HEPA filter slot, the dial for the odor puck, and of course the charging contacts.
CLEANING FEATURES:
The robot itself has a main brush on the bottom as well as one side brush on the right side. These days, many robot vacuums have two side brushes, so I think it’s a little strange that Shark doesn’t have this.
The main brush on the bottom has soft bristles which means it should be good at picking up loose debris and shouldn’t scratch up hard floors, but you should also not expect it to pick up sticky messes. This should also be good for
The side brush is mostly relevant for picking up loose debris close to walls and corners, but is less helpful if your primary purpose is on carpet mostly because these side brushes tend to just get warped or bent from friction against carpet versus against a smooth floor. In that case, it’s best to just remove the side brush and stick to using the main brush. The Detect Pro doesn’t appear to rotate the side brush while on carpet, but it’ll likely still come out a bit bent up on carpet.
SETUP:
The setup experience was overall pretty seamless. You can download the app and run through the guided setup process that helps you connect the robot to your home WiFi.
The Detect Pro solely connects to 2.4GHz networks. This is fine for me since I have my wireless router configured with a separate 2.4GHz SSID for devices like this, but those who have a single SSID with a dual band router may have to create a separate SSID with only 2.4GHz WiFi if they run into issues trying to connect to their network.
Once I got it connected, it guided me through a checklist to ensure I didn’t have any obstacles or loose cables in the way, and off to mapping my house! Well…not quite. My vacuum arrived with less than 40% battery, and you cannot begin mapping out until at least 50%. I opted to wait a couple hours until it reached 100% battery, and then began the mapping.
First time mapping is a good experience as long as you don’t have any loose cables. The Detect Pro did a good job exploring my floor plan and once it finished exploring, it made it easy for me to identify rooms on the map, and even set virtual boundaries for areas I didn’t want cleaned due to obstacles.
ROBOT PERFORMANCE:
I’ve let the Detect Pro run on schedule daily for several days and thus far, I would say it does a good job. It hasn’t gotten stuck, my floors look clean, and there is no foul stench thanks to the HEPA filter and odor puck.
One thing to note with many robot vacuums is that they tend to scuff/scratch up pretty quickly, and this one is really no exception. After only the first run I saw light scratch marks on the bumpers of the vacuum likely from grazing walls, bumping objects, etc. This is pretty commonplace across my experiences with numerous robot vacuums, but something to be aware of for newcomers making a first-time robot vacuum purchase.
Most of my testing is done on thinner carpet, and it performs pretty well. Checking the dust bin in the docking station, there are dust bunnies present and I’m sure within a few weeks I’ll want to empty it out.
During operation, the sound of the Detect Pro has more motor noise than I’ve heard on other vacuums. The vacuum seems like a pretty consistent noise, but there’s something else that gives off a bit of a clicking sound and I’m not entirely sure what it is.
Once the cleaning session is over, the robot docks with ease and self-empties into the dustbin onboard the docking station. The only time I had an issue was when a small piece of 3D printer filament got stuck while the robot was emptying its onboard dustbin. Once I removed it from the robot, it was able to dock and charge without issue.
As far as emptying the dustbin, it’s pretty easy. Press the button on top of the docking station to unlock the dustbin, and you can pull the dustbin out. Then bring it over to your trashcan and there’s a little latch on the side of the dustbin that you simply press to unlatch. The bottom door will swing open and all the dust will fall out into your trashcan. This system is very similar to many modern handheld cordless vacuums, and since there are no disposable bags to worry about, it saves on some waste, although some people might dislike that dust may embark into the air when you unlatch the bin. In any case, I don’t mind this system since it means I don’t have to buy more disposable bags.
APP FEATURES:
The app gives you the ability to add multiple robots, create schedules, start a cleaning for certain rooms, perform spot-cleaning, and also ping the robot in case it’s stuck and you can’t find it. These are all pretty common features on many robots, but the Detect Pro is still missing a good number of features that other robots have.
After setup, you can still edit your map, but you cannot add multiple map layouts, which means the Detect Pro isn’t a good option for those who want to use it across multiple floors since it will force you to re-explore the map if you move it.
For example, while you can schedule cleanings for every day of the week, you can only schedule 1 cleaning per day (at whatever time you want), but each scheduled clean is for the entire home. For many people, this might be fine, but for many others, they might want certain parts of their floorplan cleaned at different times of the day. Maybe the office is in the evening after a full day of working from home, and maybe the kitchen needs to be cleaned just after lunch, and perhaps there’s a guest bedroom that needs to be cleaned only a couple times per week. The SharkClean app simply doesn’t allow this kind of versatility, and it’s probably one of the biggest limiting factors right now.
In the app under the Schedule section, there is a Support FAQ where Shark addresses this limitation and suggests they “may possibly” add the ability to schedule by rooms or schedule multiple times per day, but they don’t express a commitment towards it, so at the time of writing this review, I wouldn’t purchase the Detect Pro if this feature is important to you. And looking back at some of their older robot vacuums with very similar features, reviews for those products shared this exact same feedback. This Detect Pro seems like a minor revision without significant feature improvements.
Another thing that is perhaps a little surprising to me is that there is no way to view the current location or progress of your robot vacuum. Perhaps you’re out running errands, but are expecting to have guests over soon and you begin a cleaning session. The app can only tell you that a cleaning is in progress, but it doesn’t actively tell you how much time has elapsed, where it has cleaned thus far, or where the robot is located.
Once a clean is finished, you can look at the history to see the area cleaned on the map, the runtime, and even a timeline of events, but I’d like to see more of these things in realtime to cover the use-case I previously exemplified above.
CONCLUSION:
Overall, I think Shark has a good start on their app and their physical hardware, but I felt it was too limited for the asking price. I’ve seen competing devices with more features and at a lower price. That being said, I think that for the features the Detect Pro does have, they are quite intuitive and easy-to-use.
Unfortunately, the Detect Pro does not get a recommendation from me because the competition is mature, more feature rich and still competitively priced. In my experience, there are older products that can do way more than the Detect Pro and those older products still tend to come with significant savings.
However, if you want something fairly barebones that is simple and elegant to use without a bunch of advanced software features, the Detect Pro will be happy to charge you a premium for that.
No, I would not recommend this to a friend.


Share this review:
-1point
3of 7voted this as helpful.

Orbi Wi-Fi 7 is in a class of its own, designed for a new era of entertainment, hybrid work, and smart home convenience. The Orbi 970 Series unlocks the power of Wi-Fi 7 with speeds up to 27Gbps, 2.4X faster than Wi-Fi 6. Exclusive, patented Quad-Band technology with Enhanced Dedicated Backhaul ensures Wi-Fi stays fast across all devices simultaneously. In addition, the Orbi 970 brings exceptional 360° Wi-Fi coverage across every corner of your home, regardless of the layout, from the front door to the back yard and the basement to the rooftop. It includes a 1-year subscription of NETGEAR Armor, all-in-one internet security protection.
Customer Rating
4
Excellent Performance but at an Extreme Price
on October 11, 2023
Posted by: Xephyroth
UNBOXING:
Firstly, the box is pretty big and decently hefty for this Orbi 970 system. There are 2 boxes within a larger box. The first box contains 1 router node and 2 satellite nodes, and the second box contains the 3 power adapters and a single ethernet cable for connecting to your router. The overall packaging was good, and the nodes fit snugly without concern for damage.
BUILD:
The chassis for each node is plastic, but I feel the plastic is decently durable with no glossy elements that would lead to cosmetic blemishes. Additionally, there are LED status indicator lights in the front of the unit towards the bottom, so it illuminates the surface it stands on. You also have a very basic power status LED on the back of each node.
Each node is 11.58in x 5.68in x 5.15in and weighs 3.96 lbs. These nodes are certainly not small, and they can also dissipate a decent amount of heat.
The router has (1) 10 gigabit WAN ethernet port to connect to your modem, (1) 10 gigabit LAN port for a client device, and (4) 2.5 gigabit ethernet LAN ports for client devices.
Meanwhile, the satellites each have (1) 10 gigabit LAN port and (2) 2.5 gigabit LAN ports for client devices. You can connect the satellite nodes to any of the LAN ports on the router if you prefer to use them as wired access points, or the satellites can connect wirelessly to the router.
Other than that, the router uses an undisclosed Quad-core processor at 2.2GHz, 4GB of Flash storage, and 2 GB of RAM. All 3 nodes have 12 high performance internal antennas with high-power amplifiers, and they all have quad-band WiFi with 6GHz, 5GHz and 2.4GHz bands with an additional dedicated 5GHz band as the dedicated backhaul for wireless communication between nodes.
SETUP:
Setup is pretty easy, albeit that may also depend on your own comfort with technology. You can set up via web browser or via smartphone app. I chose to perform the setup via the smartphone app.
The app provided guided setup instructions from plugging in the router, to setting up the satellite nodes, to connecting to your ISP. With my fiber optic internet, I knew that I had to connect via PPoE, for which I had credentials which I’d obtained from my ISP. The app gave me this option during setup and let me provide my username and password.
In a short amount of time and with very little friction, I was up and running with all nodes.
I do want to mention, you should avoid switching between the browser-based setup and app-based setup as you may end up repeating steps. Stick to one throughout the setup and you should have minimal issues.
Once I was through the setup, I also wanted to set up a dedicated 2.4GHz network for some devices in my home that only support that band. You can achieve this in the Orbi app by going to the hamburger menu then selecting Settings > WiFi Settings > IoT WiFi.
The Orbi app calls this an IoT (Internet of Things) network dedicated for smart home devices like robot vacuums, thermostats, and other devices that care more about signal strength and not bandwidth.
SETUP ISSUES:
In terms of issues I encountered, the first is more of a gripe than an “issue”. Whenever you reboot the Orbi 970, it can take quite some time for the router to re-establish a link with the satellite nodes. In my home, I set up the satellite nodes as wired access points to the router node. And despite that, I had to wait several minutes before the main router and satellite nodes were operable. Most people shouldn’t have to reboot the system frequently, but for the price you’re paying, I would have hoped it could perhaps be faster at re-establishing a connection.
One thing I didn’t like is that the Orbi App prevents the IoT network from having any spaces in the SSID. It’s a minor issue which can be bypassed by setting up this IoT WiFi network through the browser console. But this limitation caught me off guard since I wanted to maintain the same SSIDs as my previous mesh router system so that I wouldn’t have to go around my home and reconnect all my devices to a new SSID. But again, setting this up via the browser lets me get around this issue, but it’s very likely that some folks may not think to try that.
PERFORMANCE:
Once I set up my network, I was off to run some performance tests.
Within the app, you’re able to run a speedtest, and I was measuring about 2ms ping to the nearest server, and typically over 900Mbps for both download and upload speeds. So from the Orbi’s perspective, it’s getting excellent performance from my modem.
When testing a client device like a laptop or desktop, I deliberately set my WiFi card’s driver configuration to prefer a 5GHz + 6GHz connection to achieve the best possible bandwidth, and in my testing, I was typically able to get over 900Mbps download and upload speeds with around 4ms ping. This is substantially higher than what my previous mesh WiFi 6 system delivered, but you’ll also need to have a client device with a WiFi 6E or WiFi 7 chipset to achieve these kinds of speeds. And if you happen to have a 2.5 gigabit or 10 gigabit internet plan, you can theoretically achieve even better results than this from your ISP.
At the time of writing this review, there aren’t a ton of WiFi 7 devices in existence which makes the Orbi 970 system a pretty expensive investment to be on bleeding edge tech. But if you happen to have 10 gigabit internet access, have very high bandwidth traffic, or need internet access across a very large floorplan, the Orbi 970 system is worth a look.
Because it has a 5GHz dedicated backhaul, it should be able to sustain high-bandwidth traffic for up to 27Gbps of WiFi throughput and support up to 200 concurrent devices.
While there isn’t a ton of high bitrate 4K/8K content on streaming platforms, it’s conceivable that some folks may have high-bitrate transfers over their local WiFi network, and that’s where the Orbi 970 can especially shine.
Whether it’s transferring high bitrate camera footage from a computer to your network attached storage (NAS), or streaming high resolution PC Virtual Reality to a wireless VR headset like the Meta Quest, the Orbi 970 can handle this traffic and with low latency. Of course, this will also be dependent on the specifications of your client devices, so you can’t expect magic, but if you’re looking to purchase this system, then it’s likely that you also lean towards keeping technology in your home up-to-date.
OTHER NOTABLE FEATURES:
The first apparent feature of the Orbi 970 is the NETGEAR Armor security software which detects vulnerabilities and protects against them. It’s powered by Bitdefender which is a trusted cybersecurity company. However, this is not a free feature and is a paid add-on. A 1-year trial is included and activated out of the box.
The Orbi 970 also features the ability to host a VPN so that you can join your home network at any time. It’s only accessible through the browser console under the Advanced section. The browser console allows you to download the configuration package for use within an OpenVPN compatible client and also includes instructions for Windows, macOS, iPhone/iPad, and Android.
Another feature that can be important to operating the VPN is the Dynamic DNS. The IP address that your ISP provides you can change, so a Dynamic DNS will give you a static domain name that will route to your home IP address. This way, you’re always able to connect to your home VPN without issue and without having to know the IP address assigned to your modem.
If you happen to have a data cap or are simply interested in seeing your bandwidth usage, there is a monthly Traffic Meter which can help you see your daily usage as well as set data caps so that you don’t go over your monthly bandwidth cap.
MISSING:
The Orbi 970 marketing advertises a paid NETGEAR Smart Parental Controls integration, but I was not able to find this feature in either the Orbi app or the browser console. So at the time of writing, this feature is not available despite being advertised.
CONCLUSION:
The Orbi 970 is an excellent performing mesh WiFi system both in its ability to deliver high bandwidth throughput, as well as deliver on signal strength/range. It has some good features like VPN hosting for more advanced users, but forgoes features found on some competitors like the ability to directly host USB storage over a samba share.
And while the software experience is decent, it still feels a bit barebones compared to some of the competition.
At the current MSRP, you’re paying to be on the bleeding edge of WiFi 7 which doesn’t carry much value yet since there aren’t many WiFi 7 devices on the market yet. But if you need something to cover a large floorplan and would rather be future-proof, you will absolutely be paying a premium for the Orbi 970 mesh WiFi system, as I imagine the pricing will decrease over time.
No, I would not recommend this to a friend.


Share this review:
+5points
5of 5voted this as helpful.
Xephyroth's Review Comments
Xephyroth has not submitted comments on any reviews.
Xephyroth's Questions
Xephyroth has not submitted any questions.
Xephyroth's Answers

The sound bar for those with small spaces or minimalistic tendencies. The compact Yamaha SR-C20 sound bar fits easily in whatever space is available and can be wall-mounted for even more possibilities. Setup is easy with a simple connection to your TV while Bluetooth lets you stream wirelessly from your mobile devices.
What is the rated voltage for this product?
The sound bar for those with small spaces or minimalistic tendencies. The compact Yamaha SR-C20 sound bar fits easily in whatever space is available and can be wall-mounted for even more possibilities. Setup is easy with a simple connection to your TV while Bluetooth lets you stream wirelessly from your mobile devices.
Does this have the clear voice


Enhance your multimedia experience with this 15.6-inch Dell G7 gaming laptop. Its VR-ready NVIDIA GeForce GTX graphics board provides seamless, stunning images on the Full HD display, and its hexa-core Intel Core i7 processor and 8GB of RAM handle extended multitasking. Run applications efficiently with the 256B solid-state drive of this Dell G7 gaming laptop.
Has anyone successfully installed Ubuntu 16.04 LTS?
I have not, but that doesn't even matter because a quick google search of Ubuntu Certified Hardware shows that this model has officially been awarded the status of certified pre-install for Ubuntu. Which means Dell can sell it with Ubuntu pre-installed, and you can just as easily install it.
5 years, 9 months ago
by
Xephyroth
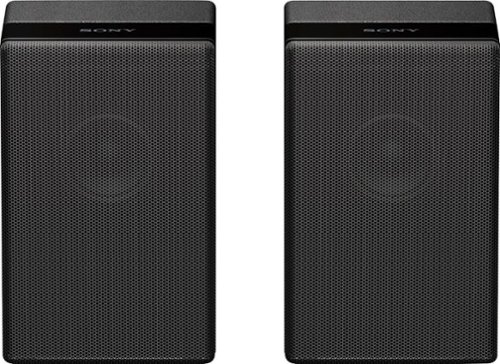
Complete your HT-Z9F surround system with this Sony rear speaker. Place it on a stand or shelf, or mount it to your wall for unobtrusive performance, and connect to other components wirelessly to keep unsightly cables out of your space. This Sony rear speaker's S-Master amp outputs 50W for powerful rear audio.
What is the length of the power cord for each speaker...do they use a cord or a wall wart?
These are wireless. They communicate wirelessly with the HT-Z9F soundbar. They only require power from your standard 2-prong wall outlet.
5 years, 10 months ago
by
Xephyroth
Bring the power of Google directly to your fingertips with the Google Pixel. A large 32GB of storage keep data secure, while unlimited cloud storage transfers data as needed, and it's completely automatic. The large 5-inch screen is protected by Corning Gorilla Glass 4 to ensure the Google Pixel remains scratch-free.
Hello, Is it sim free version? If it is not, will it be available to preorder?
Like all Verizon smartphones, this phone is unlocked. Luckily, Google has built in all the radio bands into this phone to allow it to be used on any carrier with proper LTE support—something that most Verizon-branded phones don't do. It is the same hardware in-and-out as the devices being sold on the Google Store. The only difference is that this Verizon version comes with a few Verizon apps (which can be uninstalled) and it also has a locked bootloader. That means that you cannot currently install custom ROMs or "root" your device. This device WILL work on other carriers, and I've tried it with only success.
7 years, 5 months ago
by
Xephyroth