ITJim's stats
- Review count120
- Helpfulness votes1,493
- First reviewNovember 23, 2013
- Last reviewMay 8, 2024
- Featured reviews0
- Average rating4.3
Reviews comments
- Review comment count0
- Helpfulness votes0
- First review commentNone
- Last review commentNone
- Featured review comments0
Questions
- Question count0
- Helpfulness votes0
- First questionNone
- Last questionNone
- Featured questions0
- Answer count18
- Helpfulness votes30
- First answerNovember 23, 2013
- Last answerMay 22, 2021
- Featured answers0
- Best answers3

Effortlessly track you and your family’s blood pressure levels in the comfort of your own home. Your measurements will be clear and easy to read with the XL display and backlight and can also be read aloud through the device’s talking feature. This product is engineered in Germany for accuracy of measurements and features.
Posted by: ITJim
from Maine
Disclaimer:
I am a member of Best Buy’s Technical Insider Network, TIN for short. Reviewers in this invitation-only program are provided products for the purpose of writing honest, unbiased reviews.
First impressions:
The Beurer BM50 Talking Blood Pressure Monitor is easy and convenient to use. Setup, operation, and proper usage are clearly defined in the user’s guide both in word and in drawings. The LCD screen is bright, the readings are displayed in large font, and the device dictates the readings loud and clear. The arm cuff can accommodate from 8.7 inches to 16.5 inches round which should accommodate your average adult. Finally, this unit has two memory banks allowing you and a partner to use a single device to independently track your readings.
Setup:
The unit does not ship with an AC power adapter. You will need to purchase this separately from Beurer. The BM50 does ship with four AA batteries. I have not owned the unit long enough to report how many readings I can take before replacing the batteries. The air hose is built into the sleeve. Plug the air hose into the side of the unit and then insert the batteries. The unit powers on and is immediately ready for use. I had the BM50 taking my blood pressure within minutes of taking it out of the box.
Operation:
Be sure to read and follow all the instructions in the manual before use. Otherwise, you will not use your new blood pressure monitor to full affect. The BM50 can track up to 100 individual tests per person. It can track a total of two people. The BM50 can display the average of your measurements over the last seven days, the last seven AM measurements, and the last seven PM measurements. You can access individual readings by repeatedly pressing the M button. The BM50 does not have any external data connections so it is not possible to upload your data to any kind of data tracking app. It would have been nice to have an electronic log for tracking, trending, and note taking.
The cuff is designed for single hand, possibly hand and chin, setup. Have a friend or family member assist you if you have any issues securing the cuff. I had to go with the hand and chin method the first few times until I got comfortable securing the cuff with a single hand.
Initiating a measurement is straight forward. Press any button on the BM50 to turn it on. You will know it is on because the device audibly announces, “The device is ready for use. You may start measuring.” Press the + or – buttons to choose user memory 1 or 2. Press the power button again to start the measurement. You will hear the mini-air compressor kick on, the cuff will tighten, and then the unit will start taking your systolic pressure, diastolic pressure, and heart rate. The until will then audibly announce your measurements once the reading is complete. The unit will also tell you your risk level based on W.H.O. guidelines. The risk indicator is represented by a light bar on the left side of the LCD screen. It is color coded green, yellow, orange, and red. A light on this bar will light up to indicate your risk level. The LCD screen places an indicator next to the light to reinforce the risk level reading. Beurer did everything they could to reduce misinterpreting your risk level.
Finally, the LCD lights up with a bright blue backlight. The readings are displayed in black. The font is large and easy to read for anyone who has less than perfect eyesight. My wife has terrible eyesight and was still able to read the LCD display. The BM50 will speak your numbers to you regardless of the quality of your eyesight.
Experience:
My overall experience with the BM50 was positive. For me, if the cuff was not properly fitted then the cuff would pinch during inflation. I also felt the cuff got a little tight when compared to other blood pressure monitoring devices I have used. You can abort the measurement and deflate the cuff by pressing the power button.
My wife’s experience with the BM50 was not so good. We tried to measure her blood pressure several times over the course of three days. The BM50 reflated the cuff three times during each session and always ended with an E2 error, “You speak or move during measurement.” In fact, she did not move or speak during any session. My wife’s arms are larger than mine but not large enough to fall outside of the cuff’s pre-marked tolerances. I tried taking a measurement on both arms. I used another blood pressure device from another manufacturer to rule her are and position out as culprits. I was able to successfully measure her blood pressure with a single cuff compression under the same conditions as the BM50. So, either I am not using the BM50 correctly with my wife or there is something else going on. The controls on the BM50 are so simple that there is nothing to check other than the batteries, the hose, and the cuff. All appeared to be in perfect order. To verify, I took another reading on myself with zero issues.
I noticed that the BM50 will try to recover from an error condition by first increasing the pressure in the cuff a total of two times. This lengthens the amount of time your arm is under compression. Each reinflation increases the pressure over the max pressure of the last inflation activity. Both my wife and teenager errored out and experienced what I would consider above normal compression.
Conclusion:
Conclusion:
This is a very easy to use blood pressure machine when it works. I really do like a lot of the features. Unfortunately, it’s usefulness is limited for my household.
The LCD screen is bright, clear, and easy to read. The audio is great for anyone with poor eyesight. The audio can also be turned up or off depending on the situation or need. The cuff is relatively easy to position by yourself. Though, as I said earlier, if your dexterity is less than ideal then you may want a friend or family member to help you out. Having access to the last 100 records including seven-day averages for all readings, AM readings, and PM readings. I would have liked a feature to export the data for tracking and trending purposes. The BM50 does not ship with an AC adapter. I find this strange but not a deal breaker.
Inconsistent operational success between users is surprising to me. It is great when it works. But it only works for me. As such, I cannot recommend this product.
I hope you found this review helpful. Thank you.
Mobile Submission: False
No, I would not recommend this to a friend.


Share this review:
+2points
3of 4voted this as helpful.

Your busy office needs a printer that’s fast, affordable, easy to use, and has great features. That’s why we developed the EcoTank ET-3850 – an innovative cartridge-free solution that uses high-capacity, easily refillable ink tanks. So you’ll worry less about running out of ink, and save a lot on replacement ink. The ET-3850 features an auto document feeder, fast printing with outstanding print quality, productive paper handling, a high-resolution flatbed scanner, and a large color display – making it the perfect printer for your home office.
Customer Rating

3
Great printing and Flatbed, Poor ADF and Reds
on September 17, 2021
Posted by: ITJim
from Maine
Disclaimer:
I am a member of Best Buy’s Technical Insider Network, TIN for short. Reviewers in this invitation-only program are provided products for the purpose of writing honest, unbiased reviews.
First Impression:
The Epson ET-3850 is lite weight when compared with other multi-function printers I have owned. Single page text and duplex page text print quickly and print to first page is as fast as any laser printer I have used. I was very surprised by how quickly full-page graphics print. Flatbed scanning is quick and detailed. However, colors are not accurate enough for my tastes. I found color accuracy issues with both scanning images and printing images. Scanning documents via the page feeder is terrible. Loading ink is super easy and mess free. The ink tanks hold enough ink to last a good long while under moderate use. See below for further details.
Setup:
It took me 20 to 30 minutes to setup this printer. Unboxing was easy but time consuming. There was a lot of protective tape used to prevent the printer’s moving parts, doors, and sliders from being damaged in transit. The printer includes four bottles of ink (Magenta, Blue, Yellow, Black), an installation CD, quick start guide, and the usual warranty information. See included photo.
You can setup the printer in a few ways: install the included software suite, configure from the printers control panel, or use the Epson app on your cell phone. I chose to configure the printer using the app on my phone. The app walked me through setting up the printer, filling the ink wells, priming the printer, setting up the network, and more. The app setup process is interactive and resembles a texting conversation. I included an image of one of the setup steps.
Loading the ink from the bottles was quick, painless, and clean. To see how clean, I laid a scrap piece of pure white towel on the table in front of the ink wells. Each color is loaded one at a time. The neck of the bottle fits snuggling into the tank head and forces the bottle’s seal to open. The tank is gravity fed and will auto stop filling when the tank is full. On bottle dripped a few drops of ink as I removed the bottle from the tank head. I removed this bottle too slow and tilted it to one side as I removed it. Otherwise, there was zero mess. The attached photo is the white after all tanks were filled.
The Ink priming process takes about 10 minutes. The print head alignment process takes about another ten minutes. I did not like the alignment process. It was four printed pages of being asked to tell the difference between six possible line configurations and picking out the best. The alignment images were so small that I had to inspect each printed page under a magnifying glass just to see them. Then, I spent a good minute or two trying to figure out which of the six picks were most correct. I think Epson could have accomplish the results with larger alignment images. Anyone without perfect 20/20 vision will have a very difficult time with this.
Finally, if you do not have a CD player then you can go to Epson.com/support and get all the software that ships with the printer including the printer drivers.
Printing:
Fantastic speed and clarity. Single page black and white zoom out of the printer. All ink jet printers I have owned print one line of text at a time. The ET-3850 seems to print a quarter of the page at a time. I cannot confirm if this is happening, but I stand by my statement that this a fast printer. I would say as fast as a fully warmed up and ready to print laser printer. Duplex printing is a little slow mostly because the printer must pull the page back into the printer and flip it over. The duplex mechanism is still close to what I have experience with a laser printer.
Color accuracy, however, needs improvement. My biggest gripe is Red. Reds come out orange and never match the original source material. For a test, I downloaded a simple color wheel. See attached images. I printed the color wheel using high resolution settings. The Red and Orange look almost the same. I scanned the image back into the system using both the Automatic document feeder (ADF) and the flatbed scanner. Each scanner read the image differently. Both samples are included in the attached photo. Finally, I photographed the printed color wheel with my Sony Alpha camera in full daylight. I realize the white balance in the photo is off but the differences between orange and red are still evident.
As a second test, I scanned in a book cover that had a very vibrant red to it. I then printed that scan and got a very weak red color like the color wheel. I did not include an image of this test because it did not prove anything different than what my color wheel images already reveal.
The next test was the difference between the ADF and the flatbed scanner. The ADF has color accuracy issues, paper jamming issues, and does an over-all crummy job creating an accurate scan. See attached photo. For this test, I used the book cover I mentioned in the last paragraph. You can see that the flatbed scan is crisp, clean, and vibrant. The document feeder is a printed copy of the book cover from the flatbed scanner. You can see the colors are dull, washed out, and the image is full of horizontal white lines and artifacts. The artifacts are more clearly present in the pure text example I included in the same image. I would compare the image quality of the ADF to that of a fax machine. The text I scanned is from a report that I printed from the ET-3850. The original hard copy looked crisp and without any artifacts. I did notice that the AFP did not smoothly pull the document through the paper feed and through the scanner. I think this led to both the poor scan quality as well as some of the paper jams I encountered.
Faxing:
The ET-3850 has zero faxing capabilities.
Interface Panel:
The interface panel is easy to use, quick between the menus, and well laid out. The display is not touch a screen. Everything is driven by a touch pad. The interface panel is on a hinge that allows that screen to be parallel with the floor for easy use. Then it can folded out of the way when not in use. The LCD panel does have a time-out and will eventually turn off. The power button light will not turn off under any power condition other than unplugged. The power button light is bright enough to light up a small room. If you find this annoying, then you will need to put a piece of tape over the power button. I was unable to find a setting that turned off or dimmed the power light.
Images:
Full page color prints on standard quality are almost as fast as a full page of black and white text. Fine detail prints take about three times longer. To be honest, I did not see much of a difference between standard quality and high quality. I did not see a setting to allow the printer to do borderless prints. It will print full page with an eighth of an inch white boarder around the image. The printed images are clean, lines are sharp, but color saturation can be muddy at times. For example, I printed the one and only image that I can find on the internet of the Battlestar Galactica from Blood and Chrome. On the screen, I could make out all the detail between the Galactica and the space station in the background. Detail was lost in center of the image where the high contrast features were overtaken the darker colors. The detail that did show was much darker than in the original image.
I also saw a similar affect with the image of the Enterprise B from the book cover of Star Trak Shipyards from Eaglemoss. The starship has a lot of dark blues. This caused parts of the ship to fully vanish against the darker background when I printed the image I made from the ET-3850’s flatbed scanner. Is this good enough for term papers and business reports? Yes. Is it good enough to print high quality printers for display in your office? No.
Finally, Reds are not accurate.
Final thoughts:
This printer may not be for you if you require the use of all the features this printer provides. The ADF mechanism is not the best I have used. Color accuracy, paper jams, and scan quality are all major issues for the ADF. Print quality is excellent if you don’t require color accurate reds. I also find detail lost in scenes where a lot of like colors saturate the image.
This may be the printer for you if your main goals are lighting fast prints great flatbed scanning capabilities. Epson does market this printer as a home printer and not a home office printer. If you do not need the ADF or faxing functions then this is a good printer for work from home school, or collage.
One thing that I really love about this printer is the ADF tray folds up into a flat surface. This may sound minor but ADFs waste space. This allows safe storage of laptops, papers, books, whatever you have.
Taken as a whole, the ET-3850 needs some work before I could recommend. If you need a solid MFP that is fast, holds a lot of ink, and can produce great looking reports then this is an easy printer to recommend.
I hope you found this review helpful. Thank you.
Mobile Submission: False
I would recommend this to a friend!


Share this review:
+104points
127of 150voted this as helpful.

The WD_Black™ P10 Game Drive for Xbox™ gives your Xbox the tools it needs to keep your competitive edge. With up to 5TB* of storage capacity, the WD_Black™ P10 Game Drive for Xbox™ is a top-tier external HDD built specifically for gamers looking to expand the potential of their Xbox so they can drive their game the way they choose. Included with your purchase is a 1-month membership of Xbox Game Pass Ultimate, with access to 100+ games on consoles and PC, plus online console multiplayer.****
Customer Rating

5
What I would expect from WD Black!
on August 1, 2021
Posted by: ITJim
from Maine
I am a member of Best Buy’s Technical Insider Network, TIN for short. Reviewers in this invitation-only program are provided products for the purpose of writing honest, unbiased reviews.
Note: The Black rectangles in the photos are deliberately placed in the images, by me, to remove personal information, activation codes, and serial numbers.
== Why Western Digital? ==
Reliability! Period. I have owned many WD drives, including Black drives, over the last 20 years. I have never had an issue with WD digital performance, longevity, quality, or reliability. They just work and they work for a long time! I own 2 WD Red 2TB NAS drives that have been under constant operation since 2013. I also have a WD Passport X USB 3.0 drive that has been my Xbox external mainstay since 2015.
If my goals are affordability, reliability, and capacity then the WD P10 Black is a no-brainer for me.
== Why a Mechanical Drive in this day and age? ==
Cost. I can get a lot of storage at a reasonable price with a mechanical hard drive. I can get the same capacity for ¼ the cost of an SSD. That matters to me. If you are like me then you do not have an unlimited gaming budget.
== The Drive ==
The Western Digital Black P10 2TB drive is not Western Digital’s fastest offering. It only offers a maximum read throughput of 130 MB/s according to WD’s spec sheet (140 MB/s according to the box art). My best guess is that the P10 is a 5400rpm drive. Why do I think this? First, WD doesn’t state in any of their marketing material the spin speed of the P10s. The P10’s throughput lines up nicely with other 5400 laptop HDDs that I could find online. Second, the D10s, WD’s super capacity external Xbox HDDs, are advertised as 7200rpm with a top throughput of 250 MB/s. Keep in mind that the P10 line covers from 1TB to 5TB of storage. The D10s are 8TB and 12TB respectively.
The P10 is slim. The case is a few centimeters larger, on all sides, than the actual hard drive housed inside. Please see included photo. The case is secured with very strong adhesive strips along all four sides of the clamshell. And then further secured with four screws. The clamshell is made up of hard plastic. The seams separating the clamshell would be imperceptible if not for the contrast between the white cover and the black body. The shell looks like it will do a good job of protecting the drive during travel or if accidently dropped.
The P10 is slim. The case is a few centimeters larger, on all sides, than the actual hard drive housed inside. Please see included photo. The case is secured with very strong adhesive strips along all four sides of the clamshell. And then further secured with four screws. The clamshell is made up of hard plastic. The seams separating the clamshell would be imperceptible if not for the contrast between the white cover and the black body. The shell looks like it will do a good job of protecting the drive during travel or if accidently dropped.
The sides and top of the hard drive are secured inside the case by strategically placed shock absorbers. They look like little bits of stiff foam that are secured to the drive and the inside of the case by the same adhesive tape as the clamshell. The shock absorbers do such a good job that I had to hold the drive in my hand before I could feel any drive vibrations. And even then, the vibrations are slight even under heavy usage.
The drive interface is USB 3.2 Gen 1. This is fully backwards compatible with Xbox One’s USB 3.0 interface and USB 2.0. Maximum theoretical throughput for USB 3.0 and USB 3.2 Gen 1 are the same: 5Gbps (625 MB/s). At full speed, the P10 will never saturate the bus.
== How did it perform ==
All measurements were captured on my Xbox One S console. I measured several games for this review but chose to focus on Star Wars Battlefront II and Titan Fall 2. Battlefront II is the most annoying game, in terms of load time, that I own. Any improvement in this space is a deal sealer for me. I did test other games, but these are the two that stood out the most to me. Keep in mind that the inclusion of the Passport X is because this has been my mainstay since 2015.
Battlefront II
From Xbox home screen to Sign in Screen:
- WD Passport X to splash screen – 1.16.80 minutes
o Note: It took an additional 30 seconds to go from splash screen to game menu.
- WD Passport X to splash screen – 1.16.80 minutes
o Note: It took an additional 30 seconds to go from splash screen to game menu.
- WD Xbox to Splash screen - 56.12 seconds
o Note: It took an additional 10 seconds to go from splash screen to game menu.
o Note: It took an additional 10 seconds to go from splash screen to game menu.
Supremacy game mode. Time was measured from map splash screen to unit selection screen. This was to eliminate the time Battlefront II takes to find a multiplayer match:
- WD Passport X to game screen – 55.77 seconds
- WD Xbox to game screen - 47.73 seconds
- WD Passport X to game screen – 55.77 seconds
- WD Xbox to game screen - 47.73 seconds
Titan Fall 2
From Xbox Home screen to game splash screen:
- WD Passport X to splash screen – 1:26.50 minutes
- WD Xbox to Splash screen – 48.12 seconds
- WD Passport X to splash screen – 1:26.50 minutes
- WD Xbox to Splash screen – 48.12 seconds
From Game menu to load campaign mission 2:
- WD Passport X to game screen – 46.97 seconds
- WD Xbox to game screen – (Mission 2) – 44.93 seconds
- WD Passport X to game screen – 46.97 seconds
- WD Xbox to game screen – (Mission 2) – 44.93 seconds
The biggest improvement I experience, for all games, was loading the game from Xbox Home Screen to the game’s splash page. I did not find as much of an improvement when it came to loading maps or campaign levels. The one place where I find load times do matter the most is in Battlefront II. Supremacy is a multi-level game where stage one occurs on the battlefield. Stage two transitions to one of the two team’s space battleships. The person with the fastest load time between stages gets first pick of the special “Tank” characters. The P10 did not help me get any closer to being the first to pick a “Tank” character. If your goal is first to “Tank” then you will find the P50 the better of the Western Digital investments.
== Portability ==
Portability is good. I own two Xbox Ones. The first is either a second or third generation Xbox One. The second is an Xbox One S. I had zero issues moving the P10 between both units. The first time running a game from the drive required some setup by each Xbox. But, after that setup was complete, every game stored on the P10 loaded up and was playable without issues. I have nothing to complain about.
== Setup ==
The P10 for Xbox comes pre-formatted as NTFS. Out of the box, you can use this drive directly with your Windows 10 PC. Some of my screenshots are from my Windows 10 PC. You will have to do the following to use it with your Xbox:
1) Turn on the Xbox and sign in
2) Plug the drive into an available USB port
3) Follow the on-screen directions.
2) Plug the drive into an available USB port
3) Follow the on-screen directions.
Note: The Xbox will not recognize the drive if you plug in the drive before turning on the Xbox. This will not be an issue post Xbox format.
Now, you can start loading your game library onto the new drive. In my case, I wanted to copy the contents of my WD Passport X to the P10. Xbox allows me to do this under the storage management menu in settings. I have about 1TB of games loaded on the drive. How long did it take to copy the entire contents of one drive to the other? No idea. But I did time 17 minutes for a 57GB game. Based on that figure, I turned off my stopwatch and let the Xbox run over night. Now I have two drives with identical content. One drive for each Xbox.
Regardless of how slow this may seem it is still faster than re-downloading all my content off the internet which is, for me, 12.5 MB/s. USB 3.0 is 625 MB/s. If I do my math right the transfer speed of the game mentioned above was 55 MB/s. (57GB = 57000MB. Divide this by 17 minutes to get 3353 MB/min. And then to find MB/s divide 3353MB by 60 seconds to get 56 MB/s transfer.
== Final Thoughts ==
High capacity, decent performance, and budget friendly is where the P10 fits into my Xbox ecosystem. Load times are longer than can be expected with an SSD. But that performance is going to cost you up to four times as much for an HDD of the same capacity. I have a budget to work within. Plus, unlike the Xbox Series X, my Xbox One S and Xbox One both have traditional HDDs. Getting an external high-capacity USB 3.x drive gets me more of what I already have. I can store more games and bounce the drive from Xbox to Xbox as needed. The drive is protected by a very strong case. And the physical drive is held tightly in place by stiff foam bumpers. This drive is protected better than most portable drives I have owned. And I did see a boost in performance to my load times. I would not hesitate to recommend a WD Black P10 to my friends.
Mobile Submission: False
I would recommend this to a friend!


Share this review:
+1point
1of 1voted this as helpful.
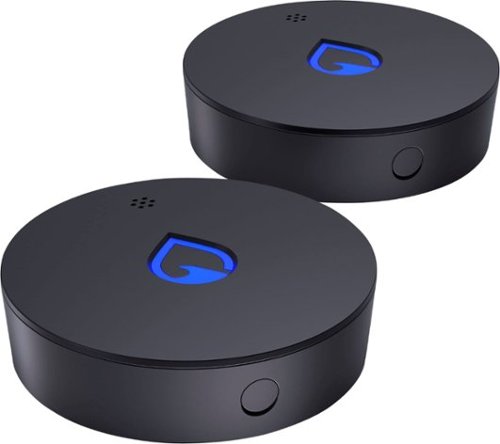
Don’t ever worry about leaks or floods in your basement, under your sinks, from your water heater and anywhere else around the house. Phyn Smart Water Sensors alert you audibly, visually and with SMS and app notifications to your phone the moment they detect water. Set your own alert thresholds for potentially damaging high and low humidity in the free Phyn app and customize settings to maximize battery life. Easily connects via Wi-Fi to your home network, no hubs necessary. Batteries included.
Customer Rating

4
Does what it says it does. Needs minor tweaks
on June 25, 2021
Posted by: ITJim
from Maine
I am a member of Best Buy’s Technical Insider Network, TIN for short. Reviewers in this invitation-only program are provided products for the purpose of writing honest, unbiased reviews.
= Why did I get this? =
My home was built back in the 1980’s; well back before foundations were built with water management in mind. As a result, my foundation has a few leaks that I have had to deal with over the years. The foundation also allows water to penetrate my basement in the form of water vapor. I leverage the free space in my basement as living space. Temperature and humidity are controlled via a heat pump. However, my heat pump is incapable of communicating to me metrics regarding temperature and humidity. The Phyn Smart Water sensor solves both issues for me; to a point.
= Device Placement =
I have two Phyn Smart Water Sensors. My plan is to place one in my furnace room around the area that water bleeds through my basement wall when the ground is heavily saturated with water. The spot has been patched several times over the years producing various levels of success. The furnace room also serves as extra storage space. I want to keep an eye on both relative humidity, temperature, and I want to be alerted if water enters the area. You will notice in one of my photos that the water sensor has three copper-colored feet. If two of the three feet contact water then a text alert is sent to my cell phone, an audible alarm sounds, and the Phyn logo on the top of the water sensor will pulsate red in time with the alarm. I tested the unit by pouring water on the floor next to the unit. The alarm was loud enough to hear if I was in general proximity of the sensor. It does not need to be as loud as a smoke detector because it also sends out text alerts when an issue is detected.
The second sensor is monitoring my living space. This is the space that gets the direct benefits of the dehumidification from my heat pump. I want to track the difference in humidity between the furnace room and my functional space so that I can make changes to the way air flows between the spaces. This will allow me to maximize the efficiency of my heat pump’s dehumidification feature. This should allow me better control over the entire environment. I placed this second sensor on a shelf midway in the room.
= Setup =
You need to download Phyn’s software to setup and use the water sensor. I am using software version 7.5.3 at the time of this review. Attached to this review is a photo of the entire user’s manual. There is a web address in the manual if you need more help. If you are like me, then you will need to go to Phyn’s site to find the words to the magical enchantment necessary to remove the battery cover. I have included a photo of the unit with the battery cover removed. I hope it helps. The instruction manual skips the part telling you how to remove the battery cover. There is a little arrow on the bottom of the unit that indicates that that the cover twists off. This arrow is molded into the case, it is shallow, and it is very hard to see. And this theme repeats itself later in the setup.
Next, start up the application and follow the setup instructions. You will need to create an account before you can connect the water sensor to your home network. Why this is important is beyond me. Oh, and if the account registration fails then you will never know because neither Phyn nor the app will tell you. This is how I found out that you need an active, logged on account activate the water sensor and connect it to my home network.
Once your account is active, setup is fairly easy. There is a button on the side of the unit. Pressing the button puts the water sensor into setup mode. Just follow the onscreen instructions. The water sensor has a 3D barcode on the bottom of each unit. You scan this with your phone’s camera. However, the 3D barcode has poor contrast with the background when your cell phone light flashes on it. It took me a few minutes to discover that I had to photograph the barcode from an angle. Otherwise, my cell phone’s flash washed out the barcode enough to make the barcode unreadable.
Finally, I setup a “home” for each water sensor, set my tolerances for alerts, and finally set my water sensor’s metrics capture frequency to 3 times a day. This is the worst for battery setting for battery life. But, I live in an area where humidity and air temperature can change drastically on a daily basis. I can always dial it back if I see a consistent pattern over the course of a month or two.
= Metrics and Reports =
The metrics are simple. The unit captures two data points at every reading: Humidity and Temperature. Go into the app to read the data point. The data points are plotted on a small graph that shows the trend for both temperature and humidity over time. I can also review any alerts triggered by water or if either of the two data points are outside of my established tolerances. Please see my screenshot for an example of the alerts page and the graphs
The app allows you to setup multiple water sensors. But Phyn decided that each sensor must be in a different physical location such as “Home 1” and “Home 2”. This is even true if I have sensor in different rooms at the same geographical location. The application will enforce this rule even if both sensors share the same physical street address. The graphs are tiny. They cannot be expanded. And the rotation of the screen has no impact on the size or number of data points I can see on the screen. I have no idea how this app will operate if I want to see multiple months of data. It could be useful to not only see multiple months of data but to also see multiple months of data from multiple sensors in the same home all from the convenience of a single screen.
I do like that the sensor will send me a text if an issue is detected. However, the data points are collected so far apart that, other than water on the floor, it could take up to 24 hours before I know if my room temperature or humidity have passed beyond my pre-defined threshold. So, if you considering this product put in a room where tight humidity control is a must, then this is not the product for you. There are other products on the market that will take up to the minute readings of air quality, temperature, and humidity. However, those items are less flexible location wise because those products do not operate on batteries.
= Final Thoughts =
The Phyn water sensor is a set and forget device. It does exactly what the manufacturer claims it does. I would like to see some improvements with the app and the setup instructions. I want to be able to look at the sensors of my home from a single screen so I can know immediately if there is anything I need to address. As is, I feel that I am spending too much time navigating screens and not getting the most out of the data. I also would like the option of capturing more data points throughout the day. Three times a day is just too few for me to get a good picture of the environment.
Mobile Submission: False
I would recommend this to a friend!


Share this review:
+1point
1of 1voted this as helpful.
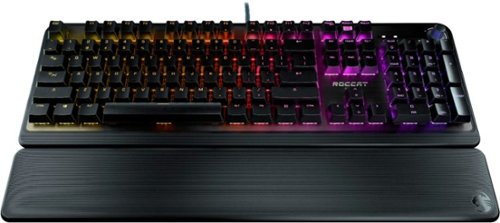
Ready to go mechanical? Look no farther than the The ROCCAT® Pyro Mechanical (Linear) PC Gaming Keyboard with Per-Key AIMO RGB Lighting, Brushed Aluminum Top Plate and Detachable Palm Rest. Its linear switches boast an optimized 2.0mm actuation point for a keystroke that is both responsive and reliable. Switches are tested to 50 million keystrokes, with a reinforcing brushed aluminum top plate providing added durability. Advanced anti-ghosting technology ensures gamers can press virtually all of the most-used keys simultaneously, with each of them registering and reacting in the heat of battle without fail. The Pyro is equipped with a detachable palm rest to suit both relaxed typing and aggressive gaming styles. Also featured is ROCCAT Easy-Shift[+] technology allowing deep control customization, doubling the function of every button just by holding down the designated modifier key (Caps Lock by default). The Pyro features the AIMO lighting engine, ROCCAT’s proprietary technology, with per-key illumination in 16.8 million RGB colors. AIMO reacts organically to your usage with vivid lighting displays right out of the box – without the need for extensive configuration. It also syncs with compatible products with state-of-the-art illumination scenarios flowing from device to device.
Customer Rating
3
Great Keyboard, Software needs usability pass
on May 28, 2021
Posted by: ITJim
from Maine
I am a member of Best Buy’s Technical Insider Network, TIN for short. Reviewers in this invitation-only program are provided products for the purpose of writing honest, unbiased reviews.
Setup:
Setting up the Roccat Pyro hardware is super simple. It is ready go right out of the box. Unbox, unwrap, plug in the USB cable into any running computer, and you will have a fully functional rainbow fest at your fingertips. The Roccat Pyro arrived while I was in the middle of my workday. I gotta pay the bills before ripping out the games. So, first experience with the Pyro was a day’s worth of typing on my work computer. The keyboard was recognized instantly as a keyboard and lit up under the rainbow bright default lighting profile. Done! Nothing to it!
Keyboard:
I really enjoy typing on this keyboard. The keys have good weight. The keys are not crowded. The surface area of the keycaps are about the surface area of a chicklet key on a laptop. The concave shape of each key fits my fingers well and prevents my fingers from slipping between keys. I played multiple games including Mechwarrior Online, Mechwarrior 5, Titan Fall 2, and Apex Legends. Titan Fall 2 and Apex Legends really put this keyboard through the paces. I spent most of my games pressing and holding W while also strafing from side to side, jumping, interacting with objects, and switching between weapons. I did not experience any ghosting. Everything, for me, felt quick and 100 percent responsive. This keyboard does everything I asked it to. And it performed without any issues or complaints.
I like the large volume knob. Windows and my headset have volume controls. But, prefer external, physical volume controls on my keyboard. The knob rotation is stiff and tactile. This is good because it will prevent you from blowing out your ear drums or fully muting your reflexively fine tune your volume. Additionally, the external volume control works on any computer without any setup on your part. This was equally true on my gaming laptop as well as my work laptop.
The per key lighting is bright and vibrant. I like the color bleed around the keys and. The number row also casts light onto the F-Keys for a cool reflective lighting affect. It is very Christmasy with the right color combinations. The Swarm software will allow you to adjust per key lighting. This includes per key light intensity.
I created a lighting profile for each game. It took me a few minutes to figure out how the profile creation system worked. There are zero instructions. But, once I figured it out, I found the experience to be simple and straight forward. I can set the Swarm software to auto detect my game and auto switch to the correct lighting profile. I could not get this to work for me. So, I had to manually switch between my lighting profiles. Once set, the Pyro did not have any issues with the color profile.
The keyboard has good weight. The elevation feet only have one height adjustment of a few millimeters. The bottom of the keyboard and elevation feet have rubber like traction pads. On a hard surface, like a wooden table, this keyboard is not slipping unless you shove it. The keyboard’s surround and bottom are all plastic. The keys rest on an aluminum top plate. There is a wrist wrest that ships with the keyboard. It is a handsome addition but, in my opinion, is not comfortable. It is made from the same hard plastic as the keyboard. I would have preferred some level of padding instead of the grate format Roccat went with.
Mystery Features:
This keyboard has two mystery features that I simply do not understand. First is Easy-Shift+. According to Roccat’s website, depressing the Easy-Shift+ key will unlock a host of features around my WASD keys. It is such an impressive feature that it is listed on the back of the Pyro’s box. The key can even be re-assigned in through Swarm. But what does it do? I have no idea. There are no printed or online instructions available for the Pyro.
Game Mode. What is Game Mode? Another mystery feature. This is a secondary function of the scroll lock key. A light next to Caps Lock and Num lock lights up when I press FN+Scroll. Otherwise, I have no idea what specialness this brings to my gaming experience.
Software Setup and Configuration:
The Roccat Swarm software is the connective tissue of the Roccat gaming eco system. Like Corsair, Logitech, Razor, and others, this is where you can configure your lighting profiles, connect them to games, connect the lighting effects to all other Roccat gaming hardware, and take advantage of features unique to the Roccat ecosystem. For example, you can set one of eight sound profiles for the keyboard’s key presses. No kidding. If you have ever had a fantasy that included a sci-fi laser sound coming out of your computer speakers every time you pressed a key on your keyboard, then Roccat’s got you covered.
The Swarm software allows you to set per key lighting, per key brightness, and the ability to assign half a dozen or so lighting effects. You can have up to five active keyboard profiles and, as far as I can tell, up to five saved keyboard lighting profiles. These profiles can also be assigned to specific games or applications by targeting the .exe for each game or application.
The software package has a lot of powerful features. You can create macros, re-assign Roccat default key bindings, and tie in AIMO. Roccat makes setting up simple lighting profiles simple and straight forward. You can choose from several prebuilt lighting effects or create your own customer effects. The custom effects can be setup per key, per common key groupings such as “All” and “WASD”, or per key. If you are doing a custom profile, then you will probably use all three in combination to create some truly unique profiles. Color profiles are not created in layers like some other ecosystems out there. Swarm’s keyboard layout interface is as simple as it gets.
Simple does not necessarily equate to great user experience. First, there are no instructions. There are some FAQs and some Q&A that can be referenced. But little to no helper text on any function in the software. Some functions such, as AIMO and Alienware integration, have links to external sites with “more information.” Every link leads to a 404 site not found error.
AIMO is Roccat marketing speak for Intelligent Lighting System. The Pyro has a global setting to turn on/off AIMO features. Like everything Roccat, there are no details telling me what AIMO really is, what benefit I receive by using it, or instructions on how to use it once I turn it on. The “more information…” link on the page is an instant 404 error in my web browser. According to Roccat’s website, “AIMO compatible gaming peripherals take advantage of our lighting engine, adapting to your play the more you use them and evolving over time.” And this means what exactly? I turned it on and did not see signs the Pyro was “adapting” as I played anything regardless how long I played.
The Alienware integration is not compatible with the Pyro. The only reason I know this is because I opened Pyro when the keyboard was not plugged into my computer. There is an Alienware screen when the keyboard is not attached and there is an on/off screen when the keyboard is attached. The full Alienware screen indicates compatible devices. Why the compatibility list is not available when the Pyro is installed is anyone’s best guess. I would have liked to a chance to test this feature since I tested the Pyro on my Alienware gaming laptop.
Finally, text needs to be bigger. Grey text on a black background in the smallest font you can use is not very useful.
Overall, I did not have a positive experience with the Swarm software. There are some cool and unique ideas in here that will enhance your enjoyment of your Pyro keyboard. The current iteration of Swarm really killed my experience with the Pyro keyboard. I recognize that Roccat is shooting for a unique ecosystem experience that you can only find with Roccat. There is some great potential here. But Roccat needs to take a serious look at their user experience before they will achieve their goal of offering a compelling software experience that compliments their products. Let alone differentiate themselves from their competitors.
Final thoughts:
I like the keyboard. It checks all the right boxes. The clickity clack of the keys are not over-powering or annoying. I like the feel of the keys. I like the weight and travel of the keys. 2mm depress and 4mm travel seem to be the current industry standard. The only keys with significantly shorter travel are the Cherry MS keys found on the R4 series Alienware gaming laptops. The colors are bright. The keyboard does not slip when typing or gaming. And all the keys are responsive no matter how many or how fast I mash down on them. I love the LED intensity and vibrancy. In my opinion, less Swarm, this is a solid keyboard and a joy to use.
Swarm killed the experience for me. Readable menus, helper text, manuals, working links to helpful information are all areas for improvement that would improve my experience with Pyro. I cannot recommend this keyboard until Roccat improves their software experience.
Mobile Submission: False
No, I would not recommend this to a friend.


Share this review:
+6points
8of 10voted this as helpful.

B&W PI5 true wire-free headphones are attractive, well-built, and they deliver a refined sound quality. Featuring Bluetooth 5.0 with Qualcomm aptX technology these earphones ensure reliable connectivity whether you are streaming from your smartphone, tablet or PC. Allows connection of up to two devices at the same time, however, only one device can be used to play or make a call at a time. Download the Bowers & Wilkins free headphone app, available for Apple and Android for further control of the sound and noise cancellation, right on your phone. The PI5 headphones feature the latest innovations in adaptive noise cancellation along with 4 built-in microphones that pick up ambient noise and cancel it with an equal, but opposite, audio signal and enhance the call quality. There are three levels of Adaptive Noise Cancellation – High, Low and Auto, that can be controlled either by the multi-functional button on the left earbud or via the app. Similarly, the touch-sensitive button on the right earbud allows you to enable voice assistance. The buttons also allows you to control playback and phone call functions with single (play/pause, answer call), double (skip forward, end call), or triple presses (skip backward). Another stand-out feature of these headphones is the intuitive detection sensors that put the earphones on standby or reconnect them depending upon whether they are removed or put back on. The PI5s come with a sturdy and attractive charging case for charging the earbuds when not in use. The case is equipped with two 350mAh rechargeable batteries. Each earbud has a rechargeable battery which provides up to 4 hours of wireless playback. Including the charging case, the PI5 can provide up to 12 hours of continuous playback.
Customer Rating
3
Potential to live up to the name. Just not yet...
on May 22, 2021
Posted by: ITJim
from Maine
Bower and Wilkins PI5 Review (3 Stars)
I am a member of Best Buy’s Technical Insider Network, TIN for short. Reviewers in this invitation-only program are provided products for the purpose of writing honest, unbiased reviews.
Setup – What did I test with?
The PI5s are easy and quick to setup. I synced these earbuds with my iPhone 6s, gaming laptop, and work laptop. The PI5s need to be in the charging case to make the initial sync relationship with your device. The connects with the PI5s are stable with all my devices. The True Wireless feature appears to be working as intended. However, I have had a few instances where the PI5s were forced off my device by a competing headset. This is probably due to wireless management rules on the device itself and not the fault of the PI5s.
Managing Sync Relationships
I will save you a lot of time. Use the B&W Headphone app to manage the PI5s sync relationships if you plan on using the PI5s with multiple devices. It is a pain to go into the Bluetooth app on the device you are leaving, disconnect the PI5s, go into the Bluetooth app on the receiving device, and press connect. Do this a few times and you will understand quickly why this is not the preferred method.
Open the B&W Headphone app and go to the “Connect” screen for the PI5. You can manage which device you want the PI5s to work with easy-peasy. It took me a week to figure this out. Why? Because the 3x7 pictural guide and the App’s helper text is inadequate. B&W does have a link to a user’s guide on their marketing page. Neither the included paperwork nor the App have a link to the user’s guide. The online guide does go deeper into some of the features of both the PI5s and the App. There is still plenty of room for improvement.
Sound:
These earbuds rock the bass. If you are the kind of person who enjoys feeling your music, then the PI5s will easily accommodate you. The PI5s also handle high volume with ease. I would caution listening to music at ear bleed volumes for long due to the strength of the bass. My preferred listening experience is moderate to low volumes. Even at low volumes bass is strong and present.
The PI5s strength is also its greatest weakness. The bass is so pronounced that the midrange gets lost with bass heavy content. For example, while listening to Meghan Trainers “Like I’m Gonna Lose You”, the bass notes and Ms. Trainers highs are front and center. But most of the mid-range felt like it was fighting for attention. Sturgill Simpsons vocals in Sound & Fury has an obvious auto tuner applied to it but these details are completely lost due to the heavy bass. If you are a bass head, then this is great! For example, Blue Man Group’s “The Complex” is a lot of fun due to the heavy reliance to PVC Pipe rhythms, drums, and screaming guitars. I even pulled up some random African drum pieces and they sound great; right in the sweet spot for the PI5s.
Pieces that do not have heavy bass tracks, or a strong beat, sound great. Classical music, for example, sounds great. Bach’s Double Violine Concertos, Mozart’s Piano Concertos, Vivaldi’s Four Season, and others were clear, full, and evenly spaced across the whole range of frequencies at any volume. But that evenness and clarity was lost when I switched back to something bass beat heavy like Electro Swing or K-Pop. I had to turn down the volume so as not to drown in the bass. This had the affect of reducing the rest of the content to a whisper.
Manual EQ and EQ presets would go a long way to solve this problem and allow the PI5s to shine across a variety of content. Unfortunately, this is not a feature in the B&W app. You can manage this somewhat if your music app has a built in EQ. Not all music apps have EQ. And B&W should offer this feature since they know the characteristics of the PI5 the best. I know that I would have enjoyed a greater variety of content if EQ, and in extension bass management, were made available.
Phone:
Phone calls are crystal clear on my end. The people I spoke with reported that my voice was clear but tunnelly. The earbuds have two microphones each. One facing the ear canal and one facing outward. The internal microphone is used to record voice. I own other earbuds that pick up my voice from inside the ear canal and do not suffer from this issue. I will not be using the PI5s for phone calls. Maybe this is something B&W can address through a software update.
Noise Cancelation:
What ANC? I could not tell the difference between ANC on or off. The biggest factor in noise cancelation for me was filling my ear canal with the proper sized silicon tip. Otherwise, ANC had zero impact on my listening and room experience. I could still hear my typing, the road noise outside my window, and the constant hum of my gaming laptop’s fan. Turning ANC “on” produces some white noise that I can only hear in a completely quiet room. Which, at that point, I do not need ANC. In my opinion, the ANC on the PI5s is inadequate.
Ambient Pass-Through, however, did work. There are three options: High, Low, and off. External noises sound a bit muffled due to the earbud and silicon tip filling my ear canal. Ambient High allows the external mikes to pick up everything in the room at a volume equivalent to what I would hear if I were not wearing the earbuds. Ambient Low performed the same task at roughly half volume. There is a bug with the Ambient volume control in the app. Several times the app reported an error communicating with the PI5s when I tried to move the Ambient Pass-Through from Low to High. Restarting the app resolves this issue.
Comfort:
B&W did a fantastic job making the PI5s and charging case look and feel like a premium product. The coloring, styling, look, weight, and absolute smoothness of all edges and connections are fantastic in my opinion. The last bit is the most important to me. There is nothing that kills the experience of an ear bud more than sharp edges in my ear. The PI5s are glass smooth everywhere the surface touches your ear.
The earbuds are designed to be twisted into the back of your ear just above the ear lobe. This keeps them in place. Activity such as eating, talking, moving your jaw around will loosen the PI5s just like other earbuds that rely on similar anchoring styles. Several times I had to check and adjust the PI5s in my ear. To B&W’s credit, the touch control surface is not sensitive enough to activate the touch control by touching the sides of the surface. This means that I will not accidently drop a call if I accidently activate the touch surface when adjusting the earbud in my ear.
There are three sizes of silicon tips that come with the PI5. The tips are soft and comfortable in the ear canal.
I can only wear the PI5s comfortably for about an hour. The PI5s place pressure on the cartilage on the top of my ear canal. This causes pain and discomfort within about an hour of wearing the earbuds. This is exasperated when I am talking or eating. I have the same issue with other earbuds I own that assert pressure on this same part of my ear. This may or not be an issue for you.
Controls:
The touch controls on the PI5s are simple. Play, pause, next, answer phone, hang up is about it. There are no volume controls on the touch surfaces. The touch surfaces are small. Thus far, I have had no issues accidently pausing music, jumping ahead to the next track, or dropping calls when adjusting the earbuds in my ear. This is an issue for me with other earbuds I own.
App Controls:
I have covered the App throughout this review. There are a lot of great features here that require additional instruction or helper text to get the most out of the PI5s. The user manual is available online on the PI5s marketing page. When I received the PI5s for review the user manual was not posted to B&Ws site. So, I had to figure out on my own what impact the different features had on my PI5s listening experience.
I would also like the ability to control the volume of the indicator sounds. They are simply too loud.
Final thoughts:
At time of this writing, I feel that the PI5s are a solid middle of the road earbud. As is, these earbuds are not for everyone. The PI5s need EQ and status volume controls. Call quality needs to be addressed. And please include the User Manual with the product. I should not have to accidently discover it. I truly feel the PI5s have the potential to be a great product, but, as it ships today, I would not recommend these.
Mobile Submission: False
No, I would not recommend this to a friend.


Share this review:
-2points
2of 6voted this as helpful.
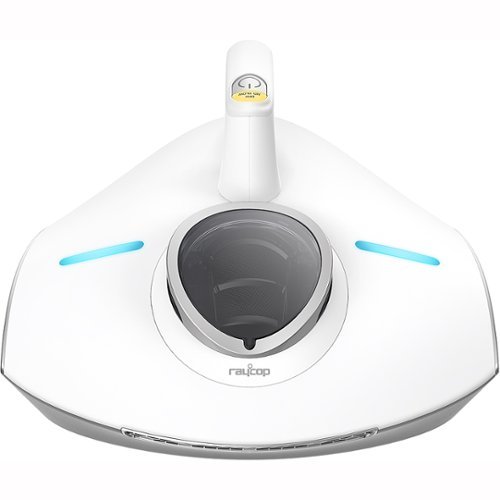
The first handheld allergen vacuum to use Steamless Heat Technology.
Customer Rating
4
It cleans like it says it will clean
on April 25, 2021
Posted by: ITJim
from Maine
I am a member of Best Buy’s Technical Insider Network, TIN for short. Reviewers in this invitation-only program are provided products for the purpose of writing honest, unbiased reviews.
The RAYCOP RS Pro UV+ Handheld Allergen Vacuum is a unique combination of a handheld vacuum and clothing iron. The body of the device resembles a diamond shaped robo-vacuum with a long handle running half the length of the device. This vacuum is uniquely designed to clean your mattress and pillows. It is designed to collect dust, dead skin, dust mites, and other contaminates that make it into your bedding while it sanitizes using heat and UV light.
Does it work?
I change my sheets, blankets, and pillowcases every weekend. I do not spend much time in bed. I close my eyes at bedtime and, what seems like seconds later, its morning. How much of a mess can I make just laying there all night? And, like you, I am more concerned with flies and mosquitoes buzzing around my head at night than I am about the millions of microscopic bugs feasting on my dead skin cells while I sleep. Occasionally, I will use my vacuum cleaner on my mattress. But, most household vacuums are designed for floors, furniture, and pet hair removal. The RS Pro is designed specifically to clean and sanitize your mattress and pillows. The attached photos are images of the dust box after cleaning my mattress and after cleaning my pillows. What looks like a white screen is naturally a black screen with wider holes. Yeah, gross.
Just for kicks, I used the RS Pro on a towel that my cat has slept on for the last two weeks. It is a tiny one foot by one foot square. I collected enough hair and dander to prompt me to clean the dust box. So, yes, I would say this works.
Does this remove and kill dust mites?
I have no way to test dust mite concentrations before or after using the RS Pro. I also cannot tell you how many dust mites, or the concentration of their dander, I captured in the RS Pro. I can tell you that that UV light and heat sanitize. And the RS Pro does both. The UV light is located directly behind the brushes and vacuum opening. There are air vents that blast the mattress and pillows located towards the back of the RS Pro. The UV light auto shuts off when the unit detects it has been removed from your cleaning surface. I put my hand under the hot air blower. It is not air drier hot but it does get hot. The instructions indicate that you should slowly move the Pro RS slowly back and forth across your cleaning surface. And they mean slowly. If you give your cleaning surface the once over, like you were pushing a floor vacuum, then you will miss out on all the benefits the Pro RS purports. So, functionally, the RS Pro does what it says it does.
Use:
Using the RS Pro is super easy. I must give a big shout out to whomever wrote the RS Pro user’s manual. Usually, with devices like these, you get a quick setup card, a URL to the companies website, and maybe a URL to the product user’s guide in micro print. Half the time there is no user’s manual to speak of. The RS Pro’s user’s guide is well organized, thought out, full of easy-to-follow pictures, and accessible for pretty much anyone. The guide shows how to clean your mattress and pillows. It also guides you to where you should focus your attention: head and foot positions. The manual clearly shows how to remove and clean the filters, clean the roller, and replace the UV Light. The manual is exclusively written in English. You will want to check with the manufacture’s website for additional languages.
The RS Pro is heavy for its size. Most of the weight is at the front of the unit. I did not find the weight an issue. There are two fins on the front bottom of the unit to keep it up off the mattress. There is also a wheel at the back of the unit to facilitate easy movement across the mattress. The unit is designed to allow for your pushing force to go into this wheel. My wife did comment on the weight being a factor for her. She could see her arm or back getting tired if she had a large mattress or a lot of pillows to clean. Otherwise, weight was not an issue.
My only other issue with the unit is the placement of the power button. It is located at the top of the handle. This forces me to keep my thumb to the side of the handle where I have less control over my grip and control over the unit. I must bend my thumb at the knuckle if I want to keep my hand in the optimal position. But, if I shift my grip, or lower my thumb to increase my control, then I risk shutting off the unit. I would have preferred the power button be located somewhere else on the casing so that I would not have to modify my grip when operating the RS Pro.
Maintenance and care:
You will clean the dust box every time you use this RS Pro. The dust box is easily removed from the RS Pro by pulling it straight up. The Micro HEPA filter is hidden behind a small door on the rear bottom of the RS Pro. And the filter is easy to pull out. The protective grill, roller, an UV lights are easy to access, remove, and service. The maintenance and care of the RS Pro is well thought out and accessible for anyone willing to take a moment to review the easy-to-follow instructions in the manual.
I would have liked to have seen the including of cleaning brushes. The instruction manual recommends cleaning the filter in the dust box with a toothbrush and the UV Light cover with another kind of specialized brush or cloth. It would have been nice if they included the optimal tools instead of leaving me to guess if a soft toothbrush is better or worse than a stiff bristled toothbrush. Are they both equally suited or am I risking something using one over the other?
Final thoughts:
Overall, I am satisfied with the RAYCOP RS Pro. It does pull a lot of nasty material out of my mattress and pillows. I was grossed-out when I saw what I was sleeping in every night. UV Light kills bacteria and other micro-organisms that do not tolerate UV Light. And the heat kills everything else. The proof is in the dust box. I have a few minor issues with the RS Pro that I think RAYCOP can fix in a future revision of their product. My final thought is I think I found a suitable replacement to using my regular vacuum to clean my mattress and pillows.
Mobile Submission: False
I would recommend this to a friend!


Share this review:
+5points
5of 5voted this as helpful.
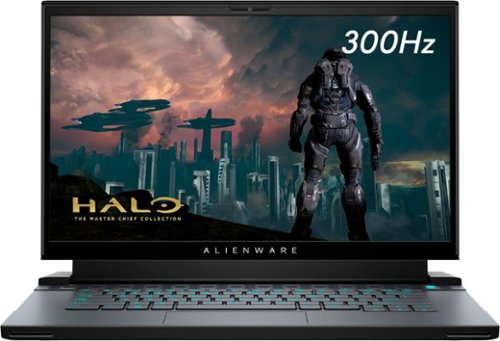
With the 10th Gen Intel® Core™ i7 processors enabling up to 8-cores and 16-threads of multi-threaded performance, the latest generation of Alienware m17 goes beyond its predecessor. Featuring the new NVIDIA GeForce RTX 3070 with Ultimate performance for gamers and creators. Realistic ray-traced graphics and AI-accelerated DLSS. Our latest thermal technology, Advanced Alienware Cryo-Tech, is an engineering approach where an Alienware system’s gaming performance is never compromised by means of electrical and mechanical methods while maintaining system stability during the highest performance states.
Customer Rating
5
Eating performance for breakfast!
on April 7, 2021
Posted by: ITJim
from Maine
I am a member of Best Buy’s Technical Insider Network, TIN for short. Reviewers in this invitation-only program are provided products for the purpose of writing honest, unbiased reviews.
Initial Impressions:
This is the most powerful laptop I have ever owned.
The laptop has a very impressive look. The keyboard, for this model, is full RGB per key assignable. The default keyboard layout is bright teal. The top and bottom of the case have a honeycomb pattern that serves as passive cooling for the CPU and GPU. Under the vents are a black mesh that hides the laptop components, filter out dust, and give the honey combs an attractive dept that I have not seen on other laptops. The Alienware logo shaped power button, LCD cover logo, and heat vent LEDs are also 100% RGB assignable.
The Alienware m15 R4 body is made from a magnesium alloy with a nice, fingerprint and smudge resistant flat black finish. The finish is also has a nice texture. From Alienware’s website, “This stain resistant paint formula is a High-Performance Clear Coat…” The mouse pad and keyboard keys are also fingerprint resistant. I have not seen a single fingerprint or smudge after a week of ownership. The finish is well done.
Gaming:
Gaming is awesome. This system ate all my test games, at max settings, without any trouble. I also saw an increase in framerates for some of my older, more difficult to drive games that are based on CryEngine. The games I tested are Mechwarrior online, Mechwarrior 5, Titanfall 2, Star Wars Squadrons, Middle Earth Shadows of War, Dragon Ball Fighter Z, and Battletech. All games played at 60 frames or better for the whole gaming session. It was very playable and without any graphics tearing or stuttering. I also tested a few of these games on my external 32” G-SYNC enabled gaming monitor running at 240Hz at a 1ms pixel refresh. Everything ran perfectly.
The LCD screen can operate at 300Hz and 60Hz, has a 3ms response, 1000:1 contrast, and, according to Alienware’s website, can do “300-nits 100% sRGB color gamut.” It does not look as good as my dedicated gaming monitor, but it is impressive for a laptop.
I did run into a few issues. I noticed a significant slow-down while playing Titanfall 2. Large objects in the foreground caused the game to go from silky smooth to sluggish until the large object passed into the background or off screen. It is possible that the older game is having an issue with the 300Hz panel.
I also noticed a green after-image when scrolling text or images in MS Word or on the web when Windows “night light” mode was active. At first, I thought my eyes were tired and playing tricks on me. Nope. Maybe this is something Alienware can address in a future driver release.
The keyboard is very responsive and comfortable to use. According to Alienware’s website, these keys were co-developed with Cherry. The keys feel very solid with a healthy amount of resistance. They keyboard does not have the same feel as a dedicated gaming keyboard with Cherry keys but it is really good for a laptop. The RGB lighting is as intense as other Cherry keyboards I have used. The lighting intensity is strong enough to prevent the keys character cutouts from looking anemic like I have seen with other gaming laptop lighting attempts. The gaming laptop industry is getting better as a whole. Alienware is leading the pack in RGB lighting.
Benchmarks:
Let me put my performance claims where my mouth is. In addition to the m15 R4, I own a home-built gaming desktop, a mid-range gaming laptop, and an entry level gaming laptop. Below are the processor, GPU, and 3DMark Time Spy scores for each system. Brand names and models left intentionally absent.
(Alienware m15 R4)…………………....Intel Core i7-10870H, nVidia RTX 3070……. Score: 10624
(Gaming Desktop)……………………..AMD Ryzen 7 3700X, nVidia GTX 1660 Ti…. Score: 6609
(Gaming Laptop)….……………………AMD Ryzen 7 4800H, nVidia GTX 1660 Ti…. Score: 5688
(Entry level gaming laptop)…….......…AMD Ryzen 5 2500U, AMD RX 560X………..Score: 1945
(Gaming Desktop)……………………..AMD Ryzen 7 3700X, nVidia GTX 1660 Ti…. Score: 6609
(Gaming Laptop)….……………………AMD Ryzen 7 4800H, nVidia GTX 1660 Ti…. Score: 5688
(Entry level gaming laptop)…….......…AMD Ryzen 5 2500U, AMD RX 560X………..Score: 1945
The Time Spy benchmark targets the GPU more than the CPU. I did run PCMark 10 on all systems. This targets the CPU more than the GPU. The top three systems are all 8 core, 16 thread processors. The Intel and Ryzen 3700X scored close enough to call them statistically the same. My conclusion is that the m15 R4 has some serious GPU processing power. Also of note is that the other systems come in at different price points below the m15 R4.
Cooling:
Gaming gets loud and hot. Not hair dryer loud but loud enough that you will want to game with headphones on. For heat, I measured 125℉ at the base of the blower bezel after 30 minutes of playing Mechwarrior 5. The spot I sampled is located dead on the blower bezel directly below the LCD screen. Trace your finger from the space between the F7 and F8 keys all the way to the base of the LCD screen. You’ll feel the heat before you hit the screen. The cooling system in this system is significant. The system pulls air from two large vents on either side of the laptops. The system also has a passive cooling system with a large vent on the bottom of the laptop and a small exhaust between the top of the keyboard and the LCD screen.
The keyboard got warm but not uncomfortable. The system will manage cooling for you. However, you can create a profile for your game themes that will set power draw and cooling per game. That way, if you are playing Mine Sweeper, the cooling system is not trying to cool itself like it would if you were playing the latest Call of Duty game.
How is the system during normal computing tasks? The system generates quite a bit of heat for tasks like web surfing and MS Office. Heck, the system got hot while editing the keyboard RGB assignments. The system will rev the fan up or down based on thermal load. In my case, the fan silent for normal, low power activity. I measured 108℉ while doing nothing more than type this review in MS Word. This is an area I feel Alienware can make some improvements with power handling. There is no reason the system should be this hot for relatively lower power applications.
Alienware Software Suite:
The software suite allows you to set keyboard themes and power profiles for your games. You can set your games from High Power/full power cooling to low power/silent operation. For me, the most exciting, and frustrating, part of Alienware’s software suite is the RGB profile system. The fun part about this is that you can set each key, including the Alienware logos and exhaust port LED, to any color you want. There are some nice shortcuts to select popular key groupings: WASD, Numbers, Function Keys, QWER, and “All Keys”. If you select “All Keys” then you can assign one of six default color profiles: Spectrum, Rainbow Wave, Scanner (Night Rider), Default Static Blue, or a solid color of your choice. However, if you want to combine one of the default profiles with some custom key color combinations, such as WASD, then you are stuck in static, per key color land. The reason is Alienware does not allow you to build your lighting profiles in layers like Razer and Corsair. I found this a little frustrating. Flexibility is limited to static key color assignments. For my default color pattern, see attached photo, I set a static color to the whole keyboard and then assigned colors to each key one at a time. I used the above key groupings everywhere possible. The issue here is if I do not like the base color then I have to start all over again. Even more frustrating is that I cannot select more than one key at a time via either a left-click and drag of my mouse or by holding down the Shift or CTRL key while selecting keys. The last color used also does not remain persistent. For example, if I want to assign a certain shade of red to a group of individual keys, I have to click the key, chose the color red, choose the next key, and select the color red again. Preferable behavior is the color is applied to any key I press until I change the color. This would speed up my workflow in the absent of group key assignments.
I do need to be fair here. This keyboard is the brightest, most vibrant, and most configurable keyboard I have seen on any laptop. There is room for improvement, but I must give Alienware credit for making this keyboard available at this price point. If they are serious about gaming, and they obviously are, they will take this feedback and improve upon the software side of their RGB experience.
Finally, the Alienware Command Center sallow you to overclock your laptop through Fusion. I have never been comfortable with overclocking my equipment. You will want to get familiar with Fusion if you are into overclocking your equipment. The home page is a good place to view your CPU, GPU, and Memory metrics. There are two pre-configured power overclocking profiles with the option to create your own.
Final thought:
I have never owned an Alienware product before. After a week I can tell that Alienware is about more than just raw gaming power. It is all the little things that add up to an amazing computer experience. I could discuss the amazing wireless network performance, sound, and experience. But I do not have room. Overall, I am really enjoying my first Alienware laptop. I think they did a great job.
Mobile Submission: False
I would recommend this to a friend!


Share this review:
+11points
12of 13voted this as helpful.
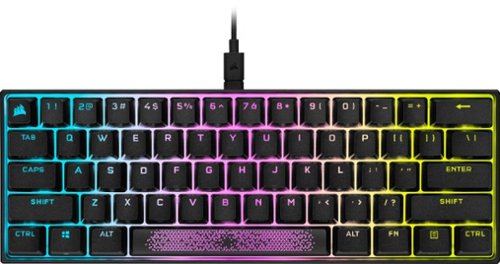
The CORSAIR K65 RGB MINI 60% Mechanical Gaming Keyboard combines top-level performance with portability. PBT double-shot keycaps deliver exceptional durability with a premium look and feel. With 8,000Hz hyper-polling enabled by AXON hyper-processing technology, CHERRY MX SPEED RGB Silver mechanical keyswitches, and expansive onboard shortcuts, the K65 RGB MINI offers big performance and functionality in a compact design. Vivid per-key RGB backlighting is fully customizable through CORSAIR iCUE software, alongside key remaps, custom macros, and immersive integration with select games. Save up to 50 profiles to take with you anywhere with 8MB of onboard storage. Full N-key rollover, Windows Key Lock mode, and a detachable braided USB Type-C cable make the K65 RGB MINI a high-performance gaming companion at home and on-the-go, so you can win in any space.
Posted by: ITJim
from Maine
I am a member of Best Buy’s Technical Insider Network, TIN for short. Reviewers in this invitation-only program are provided products for the purpose of writing honest, unbiased reviews.
Initial impressions:
I thought my Corsair K65 LUX RGB keyboard was small. The K65 Mini is only five rows high, does away with the traditional dedicated F-keys, Arrows keys, media player controls, any key that traditionally exists to the right of the Enter key, and any programmable macro keys that you find on some gaming keyboards. The keyboard has a rear facing USB-C connection. You can have this disconnected from your rig and in your travel back in seconds. I cannot do with my larger K65 LUX.
What do I lose by having such a small keyboard? Answer: a number-pad. That is it! Everything else has been worked into the keyboard as a Function key. FN+ (U,H,J, and K) are your arrow keys. You can refer to Corsair’s instruction manual for a full list of FN+ functions. The feature set of this keyboard is dense. There are FN keys to control mousing functions.
Corsair chose to print the alt-function graphic on the side of the each key. Not an issue in a well-lit room. It is an issue in a darker room. The RGB backlighting does not solve this issue. This is because the keys cast their own shadows up the sides of the keys. Therefore, it is nearly impossible to see the side graphics without the aid of an external light source.
The keys shape, texture, and actuation will be familiar to anyone who has used a Corsair gaming keyboard before. The keyboard I received uses the Cherry MX Speed keys. I do not know that exactly actuation force for these keys. However, I can tell you that the actuation force is more than Cherry MX Red keys that are on my K65 LUX keyboard. The good news is that it will take more force to commit an accidental key press. The downside is it may take a while for your fingers to get used to the increased force necessary to depress the keys. The keys themselves feel solid and actuation is smooth from top to bottom of keystroke. I do notice a strange metallic ring when depressing a key. The keyboard, like most gaming keyboards, is loud. But this is the first I have used that rang. It is not annoying. Just odd. There are key cap kits available for Corsair keyboards that include O-rings for that quiet the keys. If this is annoying, then maybe this is an option for you.
Gaming:
For my tests, I plugged the K65 Mini into my gaming computer that also hosts my K65 LUX. iCUE recognized both and treated each as an independent keyboard. My goal was to have another keyboard to compare to if I so wish. I ultimately ended up comparing RGB profile between the two keyboards so that I could sync up my game profiles for both keyboards. I did not do any gaming on my old keyboard during this period.
First, I loaded up Mechwarrior Online. This is my most robust gaming profile that I personally configured. About half the keys on the keyboard have specific color assignments and, in some cases, animations. To my surprise, the K65 automatically adopted as much of the profile as was possible. I had to remap a few keys in game because certain F-keys do not exist on the K65 Mini. The profile automatically activated when I loaded the game. I had to re-map a few in game key assignments to align with the limited keys on the K65 Mini. I was good to go within a few minutes. My in-game performance was as expected. All keys depressed were presented in game instantly. At no time did I notice any missed key commands or ghosting when depressing multiple keys simultaneously.
For FPS games, I turned to Titanfall 2, Fortnite, and Middle-Earth Shadows of War. I also chose to repurpose some iCUE profiles I downloaded from Corsair’s website instead of making my own custom profiles. There are a few reasons I did this that I will cover in the iCUE portion of this review.
For TitanFall 2, I chose a Call of Duty: Modern Warfare 2 iCUE profile I downloaded from Corsair’s site. I used FN+Z to cycle through the iCUE profiles until I landed on this one. Responsiveness was instantaneous. I did not notice any ghosting or missed key presses as I was running through the map, wall running, or Titan piloting. For Fortnite, I used a Fortnite iCUE profile that I also downloaded from Corsair’s website. The colors are light blue, purple, and include Rain and Type Lightning special effects. Again, gaming was smooth and without issue. I spent some time in the Easter lobby world jumping around and doing general silly stuff just to see how responsive the keyboard was. I did play a single multiplayer deathmatch game.
I was the first to be forced into spectator mode; if you know what I mean. Watching the remainder of the match made it clear to me that the path to victory was Macro creation and Macro management. I do not play Fortnite enough to make it worth my time to make macros. However, if you want to be competitive in games like Fortnite then you will want to invest some time writing macros. iCUE makes macro building relatively easy and pain free. You will find macro building under “Key Assignments” and “Hardware Key Assignments” in your K65 Mini gaming profile. Corsair should just call it “Macro” to avoid confusion. You can build these macros to live in your iCUE profile or build them directly into the keyboard’s hardware. That’s some nice flexibility if gaming on the run are and find yourself using a computer that does not run iCUE.
Next, Middle-Earth Shadows of War. For this, I created a new profile by copying the Fortnite profile. I also adjust the polling rate to 4000hz. The game played smoothly and without any issues. This game slower pace for me but still requires anti-ghosting. For example, I press W+D+L-Shift to sprint at an angle to my enemy. Then, while depressing all three, hit the spacebar to jump. Everything worked as expected.
Finally, I chose to see what 100% anti-ghosting and the new AXON processor could handle. As a non-gaming test, I loaded up MS Word to have a keyboard smashing exercise. I loaded a blank document in MS Word, picked a key for each finger, and then proceeded to simultaneously smash down all ten keys as quickly as I could. Word printed out every key, strangely in an exact repeating pattern, of all my keys for as many times as I smashed down on the keyboard. I think Corsair met their 100% anti-ghosting goal with their new AXON controller.
Comfort level:
The keyboard offers a comfortable typing experience. As mentioned earlier, the actuation force of the Cherry MX Speed keys are more than the Cherry MX Red keys. My fingers are still adjusting after a week of typing. It serves as a good reminder to take breaks during long gaming sessions.
I ran into a few challenges. My first challenge was keyboard size. I did not realize how much I visually depended on seeing the edges of my “normal” sized keyboards for an activity as mundane as finding my home typing keys. My second challenge was the use of FN+ (function) to navigate with arrow keys, the delete key, and access to my F-keys. It will take time to build muscle memory. The final challenge is the exclusion of a wrist rest. Many other gaming keyboards include a wrist rest. It may have reduced the portability of the keyboard but, if detachable, not by much. It is a comfort I have grown accustomed to. Otherwise, this feels like any other Corsair keyboard I have owned.
iCUE software:
Corsair makes rock solid keyboards. What makes them special is the iCUE software. This is a powerful programming suite for all your Corsair devices. iCUE manages all your Corsair products. My gaming PC consists of 6 Corsair RBG fans, the H100i CPU cooler, ST100 RGB headset stand, the MM800 RGB gaming mouse pad, K65 RGB keyboard, and the Carbide Spec Omega RGB case. I can customize each LED individually, as a group, or across the entire group of devices. For example, I can assign each light on each device individually or I can assign all devices to do a rainbow wave in sync. This includes customer color profiles for each game. For example, when playing Battletech, all my fans turn green, my keyboard theme activates, I have a chase light running along the mouse pad, and my computer case has a blue light chasing a red light from the bottom of my case to the top. The K65 Mini integrates perfectly into this ecosystem. Working with iCUE will take some work and experimentation. You can get some great results with little effort. For example, my default profile is a dim red color assigned to every key with a secondary layer using the pre-defined Type Lightening 1 lighting effects. This results in a keyboard with red lit keys that explode with multi-colors when I depress any key.
The iCUE software is also where you have access to adjust the pooling rate of the keyboard, setup macros, create and upload new hardware color profiles to the K65 Mini, disable certain key functions such as the Windows Key or Alt-Tab combinations, and many other functions.
Finally, you can leverage exported profiles provided by the community for some great affects. Sometimes it is easier to use someone else’s profile. It is also a good way to learn by seeing what others have done. There are also helpful videos in the iCUE help section. I recommend watching these.
Final thoughts:
I have not come close to scratching the surface on how feature dense this keyboard is. All I have done is list a few high points and a few places where I feel Corsair can improve the experience. Bottom line, Corsair did a stunning job of shrinking their already amazing keyboards into an ultra-portable package. If you are looking for an ultra-portable keyboard that has all the power and flexibility of a full-sized gaming keyboard, then I encourage you to give the K65 Mini a try.
Mobile Submission: False
I would recommend this to a friend!


Share this review:
+4points
4of 4voted this as helpful.

The HTM6 S2 Anniversary Edition delivers clear dialog and power in a compact form for Home Theater. Continuum mid-bass drive units provide make it easy to hear actors and robust bass lines for action films while Decoupled Double Dome Tweeters create an enveloping sense of space and clarity. Featuring upgraded crossovers for even more transparency and a unique trim-ring to celebrate this milestone, the HTM6 S2 Anniversary Edition is the most sophisticated, affordable center channel Bowers & Wilkins has ever made. The HTM6 S2 Anniversary Edition is the matching center channel for the 600 Series Anniversary Edition range of products. Over the last 25 years, the 600 Series has been our most affordable performance range of loudspeakers, and we’re celebrating our love of sound with acoustic improvements to the crossover network for overall greater levels of clarity and smoother high frequencies so you can enjoy a compelling listening experience across the range of products.
Customer Rating
5
Sounds Great, Looks Great
on March 5, 2021
Posted by: ITJim
from Maine
I am a member of Best Buy’s Technical Insider Network, TIN for short. Reviewers in this invitation-only program are provided products for the purpose of writing honest, unbiased reviews.
Looks:
The speaker is beautiful with the front grill off. I do not normally display my speakers with the grills off. I normally cannot stand the look of center channels in this price range with the grills off. I cannot say that about the HTM6 S2. I cannot imagine displaying this with the grill on. Look at the attached photo to see what I mean. B&W put a lot of thought into the visual experience for of the Anniversary 600 series speakers. See attached photo.
The HTM6 S2 is obviously made to fit into smaller spaces such in an entertainment center or on top. If you have a soundbar today then the HTM6 S2 should fit comfortable into your entertainment center.
Setup:
I have the HTM6 S2 connected to a Pioneer Elite VSX-90 receiver. It has enough power to drive my 5.1 surround sound bookshelf home theater system. The theater space is contained to a 10 foot by 9 foot space closed in by three walls. The back of the room extends all the way back to 15 feet but opens to the rest of the house on one side.
The system is calibrated using the Pioneer’s MCACC Pro room calibration and correction software. Most receivers these days have some form or room correction built in. Be sure to use it as part of your setup of the HTM6 S2. In my space, the speaker was overly bright until I ran room correction. This helped tame the speaker for my room acoustics. I further corrected the center by reducing the treble slightly.
Female Voices:
First, I must mention that I spent two weeks using this center channel with a variety of content. Below are a few highlights.
Overall, the center sounds great. It is better than any sound bar I have heard. The tweeter is clear, crisp, and reproduces the female voices pitch perfect. I watched Netflix’s anime series, “High-Rise Invasion”, which has a female driven cast, and was very impressed with the purity of the character’s voices. A few times the female voices hit those ultra-high squealy notes that only anime can give you. I did not notice any break-up or harshness. These high-pitched frequencies can really show off the breakup point of a speaker’s tweeter. The HTM6 S2 reproduced the high pitches with ease.
The HTM6 S2 shares the same tweeter as the rest of the Anniversary Edition speakers. This means that you will receive the same clarity with the same voices, or frequencies, as the voices and action pans around your listening position.
Male Voices:
For male voices, I chose Star Blazers 2199 and Netflix’s newly released, “Age of Samurai: Battle for Japan” as my test subjects. I chose Star Blazers because this anime puts the dialogue front and center in most scenes. There are also some nice spaceship flybys that sonically pan from the front left/right speaker, across the center, and exits through the opposite front speaker. The mammoth sounds of the spaceships sounded rich as they were handed off from speaker to speaker. Female voices sounded wonderful. Male voices were clear and concise. The series has very few low male voices. Overall, the programming was fun and engaging with this speaker.
I chose “Age of Samurai” because the series is almost exclusively male dominated narration. The narration is also shared between multiple male scholars with different types of voices. The higher pitched male voices sounded natural, full, and alive. The lower male voices showed a bit of constraint. I think this is because the speaker does not dig deep into those lower frequencies that give deep male voices their power. This did not get in the way of fully enjoying the content.
Up until this point, I had the surround speakers unplugged, the subwoofer powered off, and the crossover set to 50hz at the receiver. The center only goes down to 72hz before rolling off. I am guessing this is why lower male voices were struggling. I turned on the subwoofer, plugged in the surrounds, and then reset the crossover to 80hz. This solved my issues.
Final impressions:
The HTM6 is a capable, compact center channel. The sound reproduction is crisp, clear, and detailed. You will not be disappointed if you are building a system for a small to medium sized room. Be sure to run your receiver’s room correction software to get the best performance. The HTM6 S2 matches perfectly with my B&W 606 S2 Anniversary Edition speakers. The HTM6 S2 will also blend perfection with the other speakers in the line. I also recommend a subwoofer to get the most performance out of your theater. I could look at the front of this speaker with grills off all day long. If you are ready to move up from a sound bar, or TV speakers, and want to build an affordable 3.1 or 5.1 home theater solution, then you cannot go wrong with a full B&W 600 series Anniversary edition speaker solution.
Mobile Submission: False
I would recommend this to a friend!


Share this review:
+3points
3of 3voted this as helpful.
ITJim's Review Comments
ITJim has not submitted comments on any reviews.
ITJim's Questions
ITJim has not submitted any questions.

Perceive every detail of your music with this pair of JBL wireless headphones. The 10Hz to 22kHz frequency response lets you enjoy the full range of sound, while the in-line microphone provides an effortless switch to hands-free calls. Featuring 5.6mm dynamic drivers, these JBL wireless headphones supply rich, resonant bass for your enjoyment.
Are these noise cancelling for gyms that play really loud music?
No, they are not noise cancelling. They do come with three silicon ear canal adapters: small, medium, and Large. You can block out some sound if you use a connector that fits snuggly in the ear canal. This will muffle and not canceling outside noise.
5 years, 4 months ago
by
ITJim
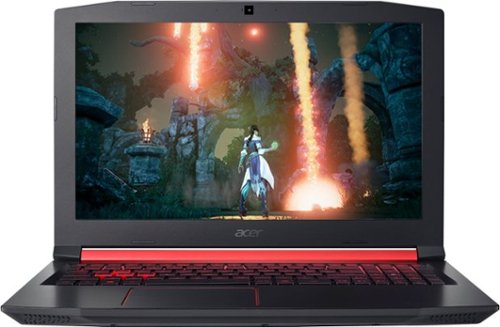
Enjoy engaging simulations and immersive visuals with this Acer Nitro 5 gaming laptop. The Radeon graphics card offers 4GB of dedicated video memory for efficient rendering performance, and the 2.GHz AMD Ryzen processor and 8GB of RAM provide ample computing power. This Acer Nitro 5 gaming laptop has a 1TB hard drive for your collection.
Not computer savvy. Love playing games but also surfing the web and photos. Just looking for a "standalone" that I can take anywhere...outside or in my room with no wires and connections. Is this good for that? And can I connect to a printer? Thanks!
If I understand you correctly, you want to know if you can surf the web, view photos, and connect to a wireless printer. Correct?
You can use this computer to surf the web, view photos, and connect to a wireless printer. You will need to a wireless network, of some kind, in order to surf the web without a wired connection. The printer could be connected to your wireless network or you could connect over bluetooth. It depends on your printer. My Acer Nitro 5 is connected wirelessly to my network, the internet, and my printer. If you are unsure of how to setup a wireless network, connect your laptop, or connect wirelessly to your printer, then I you will want to speak with your local Best Buy Geek Squad representative. They should be able to get you going. Hope this helps!
You can use this computer to surf the web, view photos, and connect to a wireless printer. You will need to a wireless network, of some kind, in order to surf the web without a wired connection. The printer could be connected to your wireless network or you could connect over bluetooth. It depends on your printer. My Acer Nitro 5 is connected wirelessly to my network, the internet, and my printer. If you are unsure of how to setup a wireless network, connect your laptop, or connect wirelessly to your printer, then I you will want to speak with your local Best Buy Geek Squad representative. They should be able to get you going. Hope this helps!
5 years, 6 months ago
by
ITJim
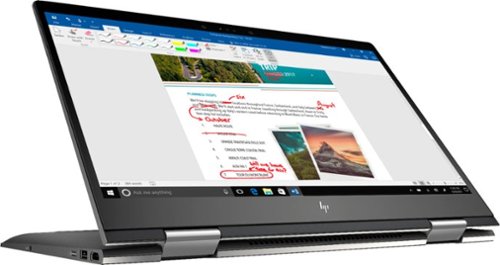
Optimize your productivity and entertainment experience with this 15.6-inch HP Envy convertible laptop. Its AMD Ryzen 5 processor and 8GB of RAM provide smooth performance, and its AMD Radeon graphics loads stunning gaming visuals. This HP Envy convertible laptop has 1TB of storage, and its Windows Ink feature lets you work with a digital pen. Learn more.
What is the full name of the cpu?
The CPU is a Ryzen 5 2500u. It is a four core, eight thread CPU with integrated Vega Graphics in a 15W TDP. You can find more information from AMD's website here: https://www.amd.com/en/products/apu/amd-ryzen-5-2500u
6 years, 5 months ago
by
ITJim
Optimize your productivity and entertainment experience with this 15.6-inch HP Envy convertible laptop. Its AMD Ryzen 5 processor and 8GB of RAM provide smooth performance, and its AMD Radeon graphics loads stunning gaming visuals. This HP Envy convertible laptop has 1TB of storage, and its Windows Ink feature lets you work with a digital pen. Learn more.
Does this laptop have a display port?
No. It has an HDMI output and a USB C connector that can do video with the right connector. Do a search on BB's site for: USB C to display port. There are several options listed.
6 years, 5 months ago
by
ITJim
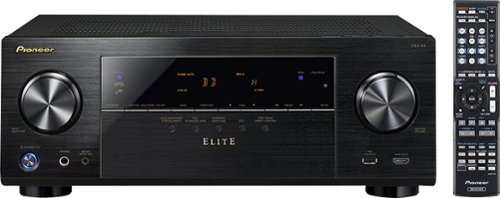
Learn moreabout Magnolia PremiumInstallation Connect to a range of Web-based music services via this Pioneer Elite VSX-44 receiver's built-in Ethernet LAN. Includes HDMI 4K Ultra HD and 3D pass-through technologies for compatibility with 3D TVs, Blu-ray players and gaming consoles and 4K Ultra HD TVs.
What sub woofer matches up well with Pioneer Elite VSX-44?
That really depends on your other speakers and your room. I'm using the ESW-C10 with B&W 685 Bookshelf speakers and couldn't be happier with the arrangement. The ESW-C10 is a bit big for my small room so I keep the volume turned down but it does a great job shaking the room during movies and mixes well with any music or TV programs I've thrown at them.
9 years, 2 months ago
by
ITJim
Maine
Microsoft Surface Tablet: Do more on the go with the productivity of a laptop in the compact size of a tablet. Create documents with Microsoft Office RT, sync files between Windows devices and video chat with friends and family. The built-in kickstand props up your tablet at just the right angle for easy viewing.
do i have to get a network package to buy the surface?
ive been told i need to buy a network plan with a monthly charge. Or can i just use wifi?
No Surface product has native support for a Cell carrier such as ATT, Sprint, etc.... All you have is WiFi. If you have internet in your home with a WiFi router or some other device to server your WiFi enabled devices, then you have everything you need. Just make sure your connection is password protected and encrypted. You can also turn off the WiFi on the tablet, Airplane mode, and use it offline. I hope that answers your question.
10 years, 5 months ago
by
ITJim
Maine
Microsoft Surface Tablet: Do more on the go with the productivity of a laptop in the compact size of a tablet. Create documents with Microsoft Office RT, sync files between Windows devices and video chat with friends and family. The built-in kickstand props up your tablet at just the right angle for easy viewing.
Can I download PFD files from Internet Explorer to the Microsoft Surface RT?
Can I download PFD files from Internet Explorer to the Microsoft Surface RT, then view them without internet connection?
Yes you can. First go to the Microsoft Store and pick up the Free Adobe Acrobat Reader application. Then you can open PDFs from your flash drive, desktop, network locations, or even the web. Do keep in mind that your ability to open some PDFs from the web is also dependent upon the source of your PDFs. Finally, the surface, as I have experienced with most tablets, do have a difficult time with very large PDF files sizes and very complex PDFs. This is typically an issue with the small amount of RAM you have on a tablet as compared to a modern PC. (2GB on Surface RT and up to 64 GB on a PC). The amount of RAM does make a difference.
10 years, 5 months ago
by
ITJim
Maine
Samsung Galaxy Note 2014 Edition - 10.1" - 16GB: This sleek, stylish tablet comes with a 10.1" Full HD touch screen to display movies, Web sites and more with impressive visual fidelity. The included S Pen is pressure sensitive and allows you to draw, write, edit and more as easily as if you were using a real pen.
Syncing with a Windows 7 Laptop.
Will this version of Samsung Galaxy Note 10.1 2014 Edition be able to sync with my laptop and thus allow me to control it from the laptop, like the Samsung Tab 2 allows? This also mean I would be able to view content like pics and music from my laptop to my tablet and vice or verser.
I've found that the Galaxy 2014 edition doesn't sync well with anything. Or I haven't found the app or the feature or the best kept secret desktop app that will allow it. I'm thinking of something like iTunes that will sync everything for me and backup my device.
I have found a few work arounds the may interest you.
1) You can upload all of your photos and files to an SD card. You can then move the SD card between the computer and the tablet. Kind of 10 years go I know but there you go.
2) You can plug your tablet directly into the laptop with the USB cable that is connected to your power cord. Then you can easily move items between the tablet and your Laptop using the very useful Windows Explorer App. Thank you Microsoft.
3) If you want to take control of your laptop from your tablet then you can download another nifty Microsoft tool called Microsoft Remote Desktop. You will also have to allow remote connections in Windows on our laptop to make this work. I've already taken over my desktop to edit photos from my tablet. It works very well. However, there is no pinch and zoom. So if you can't read a word when you pull it up on the screen then there isn't anything you are going to do about it. There are other remote desktop apps that may give you additional features. X2 is one I used for my Ipad and is also available on Google Play.
4)Laptop taking control of the Tablet? I haven't heard anything about this. I do know, however, that Samsung saved all the best software for this own devices. Sync easily between your Samsung laptop and your device. However, this is only software and Samsung could be a hero and release it to the rest of their paying customers. I've seen the Samsung Laptops. I won't be buying one anytime soon.
10 years, 5 months ago
by
ITJim
Maine