71 Questions & 122 Answers
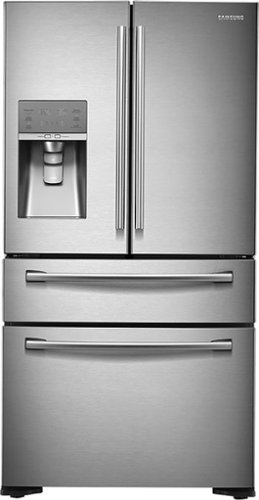
for Samsung - 22.6 Cu. Ft. Counter-Depth 4-Door French Door Refrigerator with Thru-the-Door Ice and Water - Stainless Steel
>
>
>
Ask your questions. Share your answers.
 All
All All
Allby
Posted by:
Anonymous
9 years, 3 months ago
Answers
A:
Many thanks to Anonymous for the great instructions for removing the Annoying Dividers. Your post is clear and easy to follow!by
Posted by:
OldDave
6 months ago
A:
the instructions the other people have given work great - very easy to do. Mine didn't have any philips head screws to unscrew to release the bars - once I got the plastic edging off it just came out. Great to have those stupid bars out of the wayby
Posted by:
Anonymous
6 months ago
A:
1 - pull inner tray out of flex drawer2 - turn it upside down on flat surface and investigate the tabs all around joining the two layers of the tray; make sure to label both layers of the tray to correctly join them back together later and to reposition tray correctly into the drawer afterwards. For instance, I labeled the back side of the drawer on both layers of the inner tray (see pictures)
3 - I only have a couple of flat screwdrivers so I also used a few jam/butter spreaders to help push multiple tabs; someone mentioned letting the tray come to room temperature first, that indeed helps
4 - gently go around the tray releasing the tabs in sequence and separate the two layers
5 - my tray did not have any screws that other contributors mentioned; the metal dividers were just loosely sitting between those plastic layers
6 - so I just had to lift the metal dividers up to remove them; easy-peasy
7 - flip the bottom layer on top of the top layer (upside down tray) making sure those labeled side are aligned
8 - the first long edge is easy, just work and slide the edge of the deep layer under the tabs of the frame layer
9 - now the remaining three edges will need snapped back in; I found that lifting the tray up to sit vertically on the counter made it easier to go around snapping tab by tab (sequentially) back into place
10 - just gently press both layers together at each tab to snap them back
Result - roomier drawer, no clumsy dividers, much better use of drawer space
Thank you, previous contributors, for your instructions. They really helped me.
Images for this Answer
(click to see full-size image)
(Click anywhere inside this popup to close it)

by
Posted by:
Tatiana
1 year, 4 months ago
A:
Yes! Yes! Yes! It can be removed. We have had this unit for 12 years and hated the spreader bars. They really reduce the useful capacity of the deli drawer. And no--we have tried every way imaginable and we have NOT found a way to store them "to of the way".Bad design.
Somebody above already answered this question how to removed them. Their directions are spot on. Remove the drawer. Flip it upside down and careful go around the edges and unclip the unit. TAKE YOUR TIME and go slow. Then remove the slider assembly by removing the 4 Philip head screws in the corner. CAREFULLY snap the unit back together again.
Make a note which way the drawer aligns in your unit (side air holes to the front) because if you return the drawer to unit backwards the drawer does not sit correctly.
Many thanks to the poster above with the instructions. WE HATED the drawer design and we lost a lot of space. Those bars are a pain in the neck.
by
Posted by:
bmcgnh
1 year, 10 months ago
A:
Yes! I removed them and it has improved the drawer space immensely! 1. Empty contents of the drawer. 2. Open the drawer and lift up on each side to take out the white plastic insert - the “guts” of the drawer. 3. Set it upside down on a flat surface and you will see that the border around the top (which is now on the bottom as it is upside down) is clipped on. It needs to be removed so that you can pull out the annoying rods. So, I used several flat head screw drivers and very very carefully kept going around as there are many clips - carefully pry them until you can get that border piece separated. Once separates, place the top border piece aside and now you need a Phillips screw driver to unscrew the bolt in each corner that has the plastic track that the rods run on. Unscrew them, lift the track up and jimmy the rod pieces out. Replace the plastic track that goes all around and rescrew. Now get that top trim piece back and carefully coax it over the drawer again. ...you just have to be super careful with unclipping and reclipping the top trim of the drawer, so don’t rush it and use several flat head screw drivers. Very doable with some patience and very worth it.it might help if you let the drawer come to room temp as the plastic will be more malleable. I just loaded my stuff back into the drawer and it is way way better!!! Sorry, I don’t take any pics as I was doing it, I didn’t know of it would work, but when you pull the white bucket of the drawer out and turn it upside down I think it will make sense. Worth the effort.by
Posted by:
Anonymous
3 years ago
A:
No, but can be positioned completely out of the way.7 years, 5 months ago
A:
Yes. The metal divider can be removed. It also has a center bar which allows you to slide it if you don't want a 50/50 split of the drawer. I keep lemons/limes on smaller side and all the fruit on larger side. It's really easy to do. And it keeps things separated however you wish. I love that drawer.by
Posted by:
from
Pa
 read all my contributions
Additional information about Peggy could not be loaded.
9 years, 1 month ago
A:
Thanks for your interest in the RF24FSEDBSR. The Smart Divider in the Flex Zone Drawer cannot be removed.- Ms. Samsung
by
Posted by:
Anonymous
9 years, 3 months ago
Q:
What does AA at the end of the model number mean?by
Posted by:
Anonymous
8 years, 8 months ago
Answers
A:
Thanks for the question. The letters after the "/" in the model number of Samsung appliances are part of the model code used for internal purposes, and doesn't indicate a difference in features or specifications. It's common for the "/AA", for example, to be left off the end of the model number in most cases.- Ms. Samsung
by
Posted by:
Anonymous
8 years, 8 months ago
Q:
Hi Thanks for the suggestion from the other posting. I am interested in this Counter Depth model that you highlighted. So:- at 23.6 is this the biggest counter depth fridge Saumsing has to offer?
- When is this first released?
- Any other latest counter depth model that Samsung offers (that's comparable?)
- It mentioned something about premium finish, anything special about ti?
- Is this true stainless steel? Any difference compare to other Samsung fridge like the older model like RFG297/8HDRS
- Does it have that SpaceMax thin wall insulation?
- Beside of spacemax/HE LED/Smaller IceMaker (both have twin zone)/, what are the newer feature highlights compare to RFG297HDRS (BTW, I'm not a fan of dual ice maker so that really is not a plus to me)
-Any difference between Cool select pantry and cool select zone?
I know this post is loaded with questions, while it's really tough to read pass the marketing words, and I'm a serious buyer! Thanks again!
by
Posted by:
Samsung Fans
10 years, 11 months ago
Answers
A:
Do not buy this product. The cooling system freezes and caused the fan to be very loud. Google it and you'll see all the problems. I have it and Samsung has done nothing to help.by
Posted by:
unhappy
5 years, 2 months ago
A:
Thanks for the follow up! The RF24FSEDBSR is Samsung's largest capacity counter depth French Door available, though the RSG257 counter depth side by side model can fit a bit more (24.1 cubic feet vs. 23.5 cu ft for the new French Door model). Released this month (May 2013), the RF24FSEDBSR is the only new counter depth-size model, though several other full size models have launched recently, as well. The finish is real stainless steel, which is considered a premium finish, and will be consistent with Samsung's full line-up of stainless steel appliances.The large capacity of this and other Samsung fridges is attributable, in part, to the thin wall construction and special insulation that was introduced with the RFG297 several years ago. Other than the features you mentioned and the counter depth size, the biggest difference between the RF24FSEDBSR and the RFG297HDRS is the middle Flex Zone Drawer, making the former a "4-Door" model compared to the "3-Door" design of the latter. Neither of these models has the Dual Ice feature, though the newer model does have the upgraded Ice Master ice maker which can produce up to 10 lbs of ice per day.
The Cool Select Pantry is a feature in the RFG297HDRS and several other 3-Door French Door models. This independently-controlled drawer within the fridge compartment has 3 settings: Deli, Fresh and Chilled. The Flex Zone Drawer in the 4-Door model has 4 settings (Meat/Fish mode, Cold Drinks, Deli/Snack or Wine/Party Dishes), and can be accessed without having to open the fridge conserving energy and making it convenient for both adults and kids.
I hope this answers all your questions. We appreciate your consideration!
Ms. Samsung
by
Posted by:
Anonymous
10 years, 11 months ago
Q:
I am looking for a refrigerator that has capability to store large amount of produce - both vegetables and fruits. Greens such as lettuce and kale seem to particularly need special conditions. The middle drawer of the counter depth four door refrigerator (23.5 cu ft) has 4 settings but none specific for produce. The standard depth French door 4 door whirlpool model does but I am limited to purchasing a counter depth refrigerator and as far as I have researched, whirlpool does not make a counter depth 4 door French door model. Your company and maybe a few others are it! Along with the two crispers in the main part of the refrigerator, storing produce is what I would use the middle drawer for - totally. Does the middle drawer of this model provide a setting appropriate for storing produce well?by
Posted by:
Anonymous
9 years, 8 months ago
Answers
A:
The middle drawer has 4 settings to choose from:42 degrees - Wine Party
37 degrees - Deli Snacks
33 degrees - Cold Drinks
29 degrees - Meat Fish
We keep the temp at 37 degrees and store all of our cheese, sandwich meats and snacks in it. It is wonderful for our kids. There are 2 vegetable/fruit bins in the main compartment of the refrigerator with humidity bar settings on them. I also have the Rubbermaid vegetable keeper containers to keep things fresher longer. I hope this helps.
9 years, 3 months ago
A:
I keep my lettuce, kale and swiss chard in the middle drawer. Works really well because they do not get crushed and the temp seems to be just fine for them. Plastic box of spinach that Sams sell fits perfect in the drawer.9 years, 5 months ago
A:
Thanks for your interest in the RF24FSEDBSR. The middle Flex Zone Drawer has four settings, including Wine & Party Dishes (42°F), Deli Snacks (37°F), Cold Drinks (33°F) and Meat/Fish (29°F). Samsung doesn't recommend storing fruits and vegetables under the “Meat Fish” setting; and lettuce or other leafy produce should be stored in the crisper drawers rather than in the Flex Zone Drawer.- Ms. Samsung
by
Posted by:
Anonymous
from
Ridgefield Park, NJ
9 years, 8 months ago
Q:
Not broken, screw came loose and the left end of flex freezer handle has detached ...how do I re attach? Snap on by pushing? or slides on?by
Posted by:
Anonymous
8 years, 11 months ago
Answers
A:
I'm sorry to hear your Freezer handle has come off. You should be able to put it back on over the screws that are still in the drawer, then slide it over as far as it will go, then tighten the screw using a hex wrench.If you have any difficulty replacing the handle, please call 800-SAMSUNG to speak with an agent who will be happy to help.
Thank you,
Ms. Samsung
by
Posted by:
Anonymous
8 years, 11 months ago
Q:
I want to fit large items like veggie trays and pizza boxes in the refrigerator. What is the usable depth of the shelves? What is the usable depth of the FlexZone drawer?by
Posted by:
t
10 years, 10 months ago
Answers
A:
Shelves in mine are counter depth - so it depends on how wide & long of a tray you have to put in it. I have fit a pizza box in mine but it was only for a medium size pizza and it had no problem.7 years, 9 months ago
A:
The back of the frig is a little curved. The depth of the shelve is between 14.5" to 16".by
Posted by:
from
Bergen County, NJ
read all my contributionsAdditional information about JC18 could not be loaded.
9 years, 10 months ago
A:
veggie trays and pizza boxes will fit easily into the shelves. FlexZone drawer depths are good for my use.by
Posted by:
from
san jose, ça
read all my contributionsAdditional information about sahh could not be loaded.
10 years, 9 months ago
A:
Thanks for the question. The interior of the RF24FSEDBSR counter depth 4-Door French Door refrigerator is 33" wide (wall-to-wall) by 16-1/4" deep (rear wall to front of shelf). The Flex Zone Drawer interior measures 28" wide by 14" deep. I hope you find these dimensions to be sufficient for storing your veggie trays and pizza boxes!We appreciate your interest in Samsung!
Ms. Samsung
by
Posted by:
Anonymous
10 years, 10 months ago
by
Posted by:
Anonymous
9 years, 2 months ago
Answers
A:
No, this is a counter dept. It is 36" wide.by
Posted by:
read all my contributionsAdditional information about isimportant could not be loaded.
8 years, 11 months ago
A:
No. This fridge is 36" wide and exactly 70" tall. Also, the fridge is 24" deep but you need about 2" behind it to allow for a water line.by
Posted by:
from
Colorado
read all my contributionsAdditional information about bazinc could not be loaded.
9 years ago
A:
No, this product will not fit in 30" wide space as the width of this product is 35.75 inches.9 years, 2 months ago
Q:
You indicate this model does not have the external water dispenser. Does it have an internal water dispenser?I do not see any pictures of this model on yours or Samsungs website.
Please verify that it does not have the Sparkling water dispenser.
by
Posted by:
Anonymous
10 years, 8 months ago
Answers
A:
It has an external ice and water dispenser.by
Posted by:
from
Dallas, TX
read all my contributionsAdditional information about BusyTexasMom could not be loaded.
10 years, 4 months ago
A:
Thanks for the question. There seems to be some misunderstanding. While the counter depth RF24FSEDBSR does not have the ability to dispense sparkling water, it does have a through-the-door ice and water dispenser that provides filtered still water. There are a number of photos of the RF24FSEDBSR (SKU #8391062) on this website, as well as on Samsung's site.At this point in time, the only model that has the ability to dispense sparkling water (in addition to ice and filtered still water) is the full-depth RF31FMESBSR (SKU #8391105). I've included links to both of these models, which I hope helps to clear up the confusion.
We appreciate your interest!
Ms. Samsung
Products from my answer

Samsung - 30.5 Cu Ft. 4-Door French Door Refrigerator with Sparkling Water Dispenser - Stainless steel
 (190)
(190)
Samsung - 22.6 Cu. Ft. Counter-Depth 4-Door French Door Refrigerator with Thru-the-Door Ice and Water - Stainless Steel
(678)by
Posted by:
Anonymous
10 years, 8 months ago
by
Posted by:
Anonymous
10 years, 8 months ago
Answers
A:
Yes, the model number is RF23HSESBSR/AA36" Wide, 23 cu. ft. Counter-Depth French Door Refrigerator with Sparkling Water Dispenser (Stainless Steel)
by
Posted by:
read all my contributionsAdditional information about isimportant could not be loaded.
8 years, 11 months ago
A:
Thanks for your interest in Samsung refrigerators. At this time, the only model with the SodaStream feature is the full size RF31FMESBSR, with a case depth of 31-1/8" and a capacity of 30.5 cubic feet. I'm unable to speculate about future plans for new models, but I'll be happy to pass along your suggestion to the appropriate team.- Ms. Samsung
by
Posted by:
Anonymous
10 years, 8 months ago
by
Posted by:
Anonymous
7 years, 9 months ago
Answers
A:
Yes, the interior drawer depth is 8.5''.7 years, 9 months ago
- 2024-05-08 T06:40:19.943-05:00
- bvseo_pps, prod_bvqa, vn_prr_5.6
- cp-1, bvpage1
- co_hasquestionsanswers
- loc_en_US, sid_8391062, prod, sort_helpfula
Best Buy is not responsible for answers provided by Community Answers, Customers, or other third parties. Accuracy not guaranteed.