ITJim
Top 100 Contributor
ITJim's Stats
- Review Count153
- Helpfulness Votes1,560
- First ReviewNovember 23, 2013
- Last ReviewMay 10, 2026
- Featured Reviews0
- Average Rating4.3
Reviews Comments
- Review Comment Count0
- Helpfulness Votes0
- First Review CommentNone
- Last Review CommentNone
- Featured Review Comments0
Questions
- Question Count0
- Helpfulness Votes0
- First QuestionNone
- Last QuestionNone
- Featured Questions0
- Answer Count17
- Helpfulness Votes31
- First AnswerNovember 23, 2013
- Last AnswerMay 22, 2021
- Featured Answers0
- Best Answers3
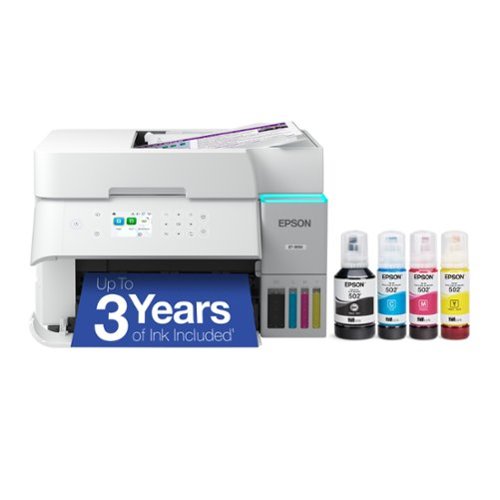
Introducing the EcoTank ET-3950 ~ The Perfect Printer for Busy Families. Say goodbye to expensive cartridges with the Epson EcoTank ET-3950, the newest innovation from a recognized leader in photographic printing. Combining simplicity with a modern design, the ET-3950 features advanced technology that enhances both performance and print quality, making it an ideal choice for home office printing~including content created by AI. Powered by PrecisionCore Heat-Free technology, the ET-3950 offers a duty cycle that~s twice as robust as its predecessor (1). And unlike conventional thermal inkjet printers, its unique permanent printhead is engineered to last the life of the printer. Designed to be simple and error-free, refilling ink is a breeze with large ink tanks and uniquely keyed EcoFit bottles~no mess, no stress and no ink bottle mix-ups. And with enough ink in the box to last up to three years (2), you'll enjoy affordable color printing without the hassle of frequently replacing cartridges. Featuring Ethernet and Wi-Fi for seamless connectivity, along with the user-friendly Epson Smart Panel app (3), you can easily print, scan, and more directly from your computer or mobile device (4). Choose Epson EcoTank, the #1 Best-Selling Supertank Printer (5). With more than 100 million units sold globally (6) across seven generations of innovation, EcoTank consistently delivers affordable, photo-quality prints, making it a reliable choice for all your printing needs.
Great Home Office Printer and Scanner
Customer Rating

5.0
The Epson EcoTank ET-3950 is a fantastic little home/home office inkjet printer. Text and image printing is fantastic. Color printing is good at normal print modes and amazing at high-resolution. Setup took some time but relatively easy and straight forward without the use of the Epson Smart Panel app. Physically, the printer is compact, has clean lines, and is relatively boring to look at. That may seem like a con but it isn’t. The Auto Document Feeder (ADF) is hidden away under a unique door system. The hide away ADF creates a flat horizontal surface to the top of the ET-3950 which increases both space savings and useful surface area for other things in the office. Printer calibration is unique and mostly automated. Overall, I am pleased with the ET-3950.
Setup:
Epson recommends the Epson Smart Panel mobile app to setup the ET-3950. I disagree. I found the Epson Smart Panel app setup process confusing. Choosing, “New Connection” from the setup screen lead me down the path to some Bluetooth troubleshooting AI chat bot. Huh? Instead, I opted to set up the ET-3950 via the printer’s LCD screen. Setup via using the ET-3950 LCD screen and control buttons proved straight forward and easy in comparison.
Total setup took about 40 minutes: 10 minutes to perform initial configuration and network connection, 20 minutes to load the ink and prime the pumps, and about 10 minutes to calibrate the print head and finalize setup. My Windows 11 and MacBook laptops found the printer on the network and loaded the appropriate drivers within a minute or two. On a side note, the ink bottles and ink loading mechanism that Epson developed is fantastic! It is easy to load the tanks with minimal risk of mess.
The Epson Smart Panel app on my phone had no issues connecting to the ET-3950 once setup was complete.
Printing:
I had zero issues printing documents and images. I am using common 8 ½ x 11 white printer paper that I bought in bulk from my local office supply store. Text is near-laser quality. There are some jaggies along long curves such as “)” and “O”. But, it is nothing that anyone is ever going to notice unless it is explicitly pointed out.
Color images are a huge surprise. I grabbed some high-resolution images of from the internet including an Iron Man image, a fan produced Star Wars Death Star Battle Scene, an image of a Dagot, and other random images. Normal, default color prints were a bit washed out color wise. The images printed clear, lines were clean, and there was zero print head banding on the page.
High Resolution color images were fantastic! Again, like with text, the color images were near laser quality enough that I would call them laser quality. I printed a huge image of a fan produced Star Wars Death Star battle with was rich in bright colors as many different shades of grey and black. The image was compressed from 4K resolution to the highest resolution supported by the printer. The results was a ready-to-display high resolution image that anyone would be proud to display. The image was clear. There was no sign of color bleeding. No print head banding, anywhere. There were a few instances where detail was lost. But this is most likely due to compressing a huge image to a lower resolution than anything to do with the printer.
Copying:
The very first item I scanned as a comic book cover. The book graphic novel size. As such, the ET-3950’s scanner cover hinge expands vertically to allow for thicker objects such as books. The scan of the image was quick. The reproduction was quick, accurate, and near the original colors of the book cover. I would say the copy was less intense in color than the original. Overall, good enough. The ET-3950 allows for some reproduction adjustments such as contrast. Meaning, it is possible to make adjustments to get the as-close copy that you want. Like with the high-resolution images I discussed above, the images looked good, clear, had plenty of definition, and, on their own, the images looked really close to the original.
Automatic Document Feeder:
The ADF can be a bit finicky. The paper needs to be inserted into the ADF just until the paper offers a slight resistance. Otherwise, the scanner app will report either a paper jam or a general error. For my testing, I used a combination of full-page images, single sided text, and double-sided text. The ET-3950 did a good job with the images. It did a good job with single sided text. Scanning pages with text on both sides generally scanned the primary text and the shadow of the text on the other side of the page. This was an issue when scanning with the Epson Smart Panel app on my iPhone. I did not find this to be an issue when scanning when using the Epson Scan Windows utility from my laptop.
Paper Tray:
Normally a paper tray is nothing to get excited about. However, Epson kind of made theirs something to get excited about. The tray itself will hold 100 pages. What you will notice is that the paper tray door is spring loaded. You will also notice that the output tray is not in your way like almost every ink jet printer on the market. In the case of the ET-3950, the output tray automatically deploys when the ET-3950 receives a print command. This is such a cool feature to watch in action. The output tray pushes the paper tray door open and then catches the output documents and images. The output tray does not automatically retract when the print job is removed. The user must manually initiate the auto retrieval function by pressing the double arrow button on the printer’s control pad. The LCD will have a message at the bottom indicating the correct button to press. Finally, the paper tray door closes as the output tray retracts. This leaves the printer with a clean, flat finish.
Control Panel:
The control panel lays flat against the side of the ET-3950. It is on a swing hinge that allows it to swing from vertical to horizontal and everywhere in between. This makes it easy to use. The color LCD is not the biggest I have seen. But it is adequate for its function and easy to read. The control panel has a cheap feeling film over the buttons. But underlying buttons are serious business. They are actual buttons and not the shallow capacitive buttons used on other printers. I think Epson made a good compromise between the overall clean presentation, functionality, and tactile feel.
Final Notes:
The ET-3950 has a lot going for it. Text, image, and photo quality are fantastic. Soggy paper is a thing of the past even with the most highly ink saturated pages. The flatbed scanner is fantastic for scanning and copying documents and images. Windows and Mac connectivity is simply and straight forward. If you are looking for an outstanding printer, then you won’t go wrong with the ET-3950. If you have a heavy reliance on the ADF feature, then you will want to look elsewhere.
I would recommend this to a friend!
-1point
0out of 1found this review helpful.
Share this review:
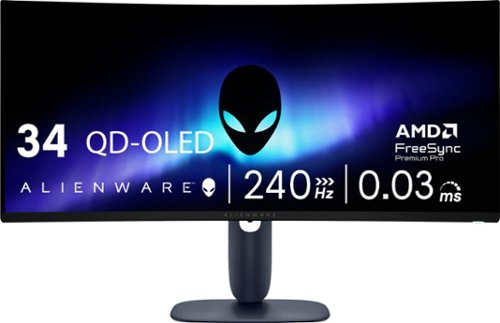
Alienware 34 240Hz QD-OLED Gaming Monitor - AW3425DW. Meet unmatched immersion with an ultrawide 34" QD-OLED, delivering greater speed and a striking new design.
A solid refresh of the AW3423DWF
Customer Rating
5.0
The AW3425DW is Alienware’s refresh of the AW3423DWF. What did Alienware refresh? First, the panel refresh has been increased from 165hz with a .1ms response to 240hz with a .03ms response. The HDMI ports have been increased from one to two ports. And both now support HDMI 2.1. One of the two Display ports was removed. The specification remains at 1.4. The number of high-speed USB ports has also been reduced from four to two. One port is USB A and the other is USB C. The monitor still has the USB B input and includes a cable to connect to your computer. The RGB “34” on the back of the AW3423DWF monitor has been replaced with a pictogram molding of Alien speaker for…something… The RGB Alien head remains the same. The display panel itself is thinner and lighter than the older AW3423DWF. And finally, Alienware updated the stand from the strange pitchfork design of old to a more traditional, space saving foot. Overall, if you loved the older monitor, or was priced out of the older monitor, then this refresh is an excellent entry point for anyone looking to upgrade their system to 1440 OLED goodness.
Gaming:
Gaming is amazing! Period. Colors are vibrant, the screen is fast, and graphics are smooth. If you are coming from the AW3423DWF, then you will be happy with the improved screen refresh and pixel response. The monitor controls allow quick transition from multiple screen performance presets including three customizable Gaming presets. All the presets are customizable. But having dedicated modes expands the options beyond the factory presets. It also allows me to the factory optimized presets while I optimize specific presets for specific games.
I played Mechwarior Online, Mechwarrior: Clans, Call of Duty Black Ops 6, Diablo IV, and Forza. I played these games using two different computers: The Asus ROG Strix G18 2025 gaming laptop sporting an Intel Core 9 275HX Processor with an RTX 5080 graphics card, and a home-built gaming desktop consisting of an Asus TUF Gaming X870-Plus with an AMD Ryzen 7 9800X3D processor supporting an RTX 4070 GPU. The laptop was connected via HDMI 2.1 and the desktop was connected via Display Port 1.4. Cables for both ship with the AW3425DW. Performance, including variable refresh rate via G-Sync compatibility in the RTX driver, was fantastic in almost every circumstance except one. I found, on both the HDMI and Display Port, that a variable refresh rate applied to a game or gaming screen FPS locked to 60 FPS caused a lot of screen flicker. This is the kind of flicker that can trigger a eye strain or a headache. The solution was to turn off G-Sync in the Nvidia driver. Thankfully, this was only true on a small number of older games that benefited more from a static screen refresh than from a variable refresh. Hopefully, Alienware can look into this and resolve the issue via a drive update.
Would I recommend the AW3425DW for gaming? Yes! Absolutely YES! I love this monitor for gaming! I loved it predecessor and, thus far, everything I loved about it is present in the AW3425DW.
Daily mundane stuff:
Gaming is probably 10% or less of my use for this monitor. Meaning, at least 90% of my monitor use is either Work related, web browsing, YouTube and Netflix, personal finance, Word, and Excel. My work laptop is connected to the AW3425DW for 8 to 10 hours a day, 5-6 days a week, in a dual Monitor/Laptop screen configuration. The laptop is a low-end business Dell Laptop that is absolutely nothing special. The connection is handled via the Alienware included HDMI cable. The laptop drives both displays, at full resolution, without any issues.
A white background with black text will bring color fringing to the forefront in things like webpages, Word, Excel, and other similar circumstances. This is a symptom of the screen’s pixel layout. I also found that thin and small text suffer from aliasing, or jagged edges. It is not terrible but not as clean as one would see from a tightly packed LCD screen or a higher resolution 4K monitor. The solution, least for me, is Windows Dark Mode.
How does Windows Dark Mode save the day? First, white text on a black, or dark grey, prevents color fringing along the top and bottom of letters and lines. It also addresses any jaggies that the white screen with black text may exhibit. It is not perfect, but the results are much cleaner and clearer text. Second, dark mode saves my eyes from unnecessary eye strain related to blasting myself with bright white light all day. It really helps! Finally, Dark Mode reduces power consumption. A black pixel is off and there is no backlight to worry about. Less electricity also lowers heat. Finally, I use one of the monitor presets to reduce both brightness and contrast to a comfortable, non-gaming level. All of which are important to me since my employer does not pay for, or even supplement, any of my electrical bills. The only thing I do not like with white text on black is the illusion that the text is ghosting as I scroll up and down the page. This is not the case with black text on a white background. Essentially, it is a tradeoff.
Glare:
Glare is not much of a concern for me. My home office has a window that faces the sun for most of the morning and into the early afternoon hours. The sun may hit the monitor from the side which does not cause an issue for me. Closing my shade is typically in response to the sun bother me specifically rather than indirectly via glare on the monitor screen. My overhead room lights also do not cause any issue for me.
Burn In Concerns:
As mentioned earlier, I used the AW3423DWF as a daily, fulltime monitor for two years without any burn-in issues. After using the AW3425DW for a week, I am confident that burn-in will not be an issue going forward. I employ a few best practices to offset burn-in issue including Windows Dark Mode, lowering brightness/contrast for office work, and auto hiding the Task Bar. The Task Bar can be of particular concern because, by default, it is the most static item on the screen and will eventually cause burn in issues if left alone.
As mentioned earlier, I used the AW3423DWF as a daily, fulltime monitor for two years without any burn-in issues. After using the AW3425DW for a week, I am confident that burn-in will not be an issue going forward. I employ a few best practices to offset burn-in issue including Windows Dark Mode, lowering brightness/contrast for office work, and auto hiding the Task Bar. The Task Bar can be of particular concern because, by default, it is the most static item on the screen and will eventually cause burn in issues if left alone.
Like the AW3423DWF, the AW3425DW will run a pixel refresh algorithm after every eight hours of continuous use. Alienware also devised a way to keep this feature from being a nag. At the end of my work day, after I power off my laptop, I allow the monitor to slip into sleep mode. This is about five minutes of no signal to the monitor. The pixel refresh process will run right before the monitor goes to sleep. The power button will turn green during this process.
To check monitor health, press the monitor joystick. There will be information boxes at the top of the screen including a monitor health indicator: Green, Yellow, or Red. If you are gaming for 2 days straight, or continue to turn off the monitor after use, then eventually monitor health will slip to red. If this happens, you will then get a pop-up asking to run the pixel refresh. And the monitor does not care at this point what you are doing. You can still skip it. My recommendation is to manually kick off a refresh at your earliest convenience. Keep your monitor healthy and you will be rewarded with the best gaming visuals available.
Setup:
Finally, the monitor stand. The old one took up a lot of space on the desktop. The new one takes up less space and works with your space instead of against it. The AW3425DW will also easily work with a monitor arm or third-party monitor mounting system. Mine is suspended over my desk with a monitor arm. The screws are provided by Alienware.
Conclusion:
First, I loved the original AW3423DWF. The AW3425DW is the same great monitor with updated specs, updated aesthetics, and in a lighter weight and thinner chassis. The monitor looks and performs amazingly with any game I threw at it. If you are into graphic design work, then I would avoid this monitor and look for either a 4K monitor or an OLED with a different pixel layout. The AW3425DW is excellent for my day-to-day office work when properly configured. And the automatic pixel refresh will keep the panel in top shape and working at peak performance for a good long time.
I would recommend this to a friend!
+3points
3out of 3found this review helpful.
Share this review:
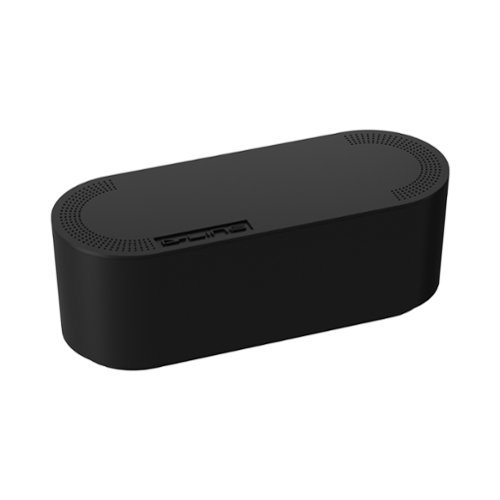
Use D-Line Small Cord Organizer Boxes to hide power strips and excess cable clutter. By utilizing D-Line Cord Organizer Boxes, wasted space is regained, appearance improves and cables become less accessible to pets and infants. Perfect for cable management around computer workstations, audio visual equipment or holiday decorations for example.
Gets the job done. Smartly built. Very Useful.
Customer Rating
5.0
My original plan was to place this box behind my subwoofer to hide a Panamax power strip and some cables that littered the space. Unfortunately, the small box is too small for this purpose. Instead, I chose to use this box to organize the cable nest which lives in my daughter’s bedroom. The D-Line small cord organizer box does a fantastic job with her mess. I also have a cord chewing rabbit that will fry his little fury face off if allowed access to a nest of unsecured cables.
First, the box is made up of hard plastic. The box supports a small power strip that fits on the bottom of the box. The cable organizer box is not bespoke for any one kind of power strip. Meaning, do not expect your power strip to simply snap into some holder at the bottom of the box. This is general purpose box that should work with a wide variety of small power strips. I also found that power strips with top facing outlets work well and power strips with side facing outlets do not work at all. You will want the larger of D-Line’s cord organizer box if you have a large power strip or a power strip with side mounted outlets.
The organizer box has two openings on the back corners of the box and one along the top rear of the box. I found these well positioned to easily support the power strips power cord. The opening seemed natural enough for the power cord so as not to put any stress on the cord. It also gives me an opportunity to hide the cable between the wall outlet and the wall. The topmost cable route provides ample room to run many cables up and away from the power strip. For my purposes, I had a laptop power supply cable, a fan power cable, and an iPhone charging cable existing from the top.
Any heat generated from the power strip or wall warts can easily escape from the box via the cable openings and through a series of vent holes along the top cover. Meaning, I am not worried about anything heating up due to poor air flow. The top cover is removable. It requires some force. You average two-year old should, may, probably will, but don’t count on it, find it difficult to open. It will definitely thwart the efforts of your average thumbless bunny. This also means the box will not fall apart if accidentally kicked, dropped, or poorly handled.
The box itself is much nicer to look at than an ugly cable octopus. I can push the box up against the wall and hide the short power cable. And I can run the cables up the wall to the desk where, again, I don’t see them. The only downside to this box is that it is a lint and dust magnet. Other than that, it does exactly what it is supposed to do. Next, I’ll probably grab the larger of the two boxes to address my subwoofer cable mess.
I would recommend this to a friend!
0points
0out of 0found this review helpful.
Share this review:
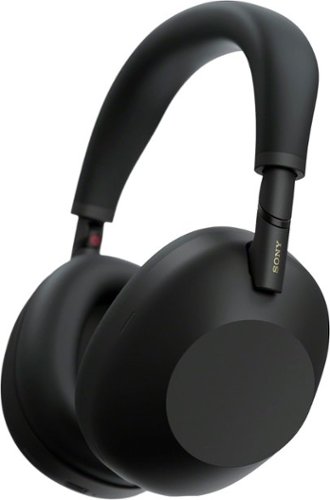
Powered by our next-gen processor and intelligent algorithms, the WH-1000XM6 premium headphones deliver studio-quality sound and our most advanced noise cancellation. Co-created with mastering audio engineers, every detail and note are heard as the artist intended. Enjoy a pure, uninterrupted listening experience anywhere with crystal-clear call quality and pro-level audio.
Sony earned their five stars
Customer Rating
5.0
Images for this Review
(click to see full-size image)


The Sony WH-1000XM6 headphones are awesome! Audio is crystal clear, accurate, expansive, and with excellent bass reproduction. Comfort is fantastic. I could wear these all day without much worry for discomfort. ANC does a fantastic job of filtering out ambient noise. And the app support is second to none. As an all-arounder, the Sony XM6’s checks every box. I have seen nothing at this price level or above that delivers as complete a package Sony does with the XM6.
The musicality of the XM6 headphones are nothing short of amazing. I tend to listen to headphones at low to low-medium volume. According to Sony Sound Connect, this is equivalent to 60db to 65db; a very safe level for all day listening. At my preferred volume, vocals were clear and airy, instruments were resolving, and bass was crisp, clean, and very well behaved. For example, listening to Wilson Philip’s “Hold On”, the vocals and harmonies were front and center, the beat never got in the way of the vocals, and the guitars were properly both in the background and supportive of the vocals. This experience was easily reproduced with any artist and musical genre. Beastie Boys’ “Intergalactic” is an excellent example of a bass heavy track mixed with Beastie Boys typical rapping signature. The bass track is so heavy that it could easily overwhelm a pair of headphone drivers. Not here. Separate and clarity were perfect.
Movies are equally fun. The Sony XM6’s allows for standard 2-channel audio that can be up-mixed to Sony’s own 360 Audio format. My primary streaming platform is Netflix. Netflix recently produced an animated series titled “Arcane.” This series is a cornucopia of neon colors, hard-edged artistically rendered characters, and has a surprising rich musical and special effects soundtrack. The series is mixed in 5.1 surround. I originally watched the series on my 5.1 home theater system. I fired up a few key episodes on my laptop to test both stereo (Standard) and Cinema (360) modes. This is controllable via the Sony Sound Connect Application. Standard mode offered what I would call a standard two-channel, two-dimensional presentation. Cinema mode was a completely different presentation. Dialogue was shifted from the left and right ear cups to front and center. Explosions were spacious and extended beyond the confines of the ear cups. There were more subtle sound effects that seem to weave in and out of the scene like an ocean wave. Overall, I cannot think of any reason not to watch Netflix with anything other than the XM6’s from here on out. Will these replace my home theater? No. But if you enjoy cinema then I think you will love the Cinema mode. I found it hard to go back to standard two-channel listening after using Cinema mode for a few episodes.
ANC is fantastic. Constant, consistent noise such as fan noises and vacuum cleaners are easily filtered out. The noise reduction may cause a slight background hum which will invade the ear cup when nothing is playing. It is almost inaudible at my normal playing volume. ANC with music, even at low volumes, completely drowns out voices. For example, I was listening to NPR with ANC turned on during my workday. My wife had company in the next room that was speaking as if they were alone in the house. I had no idea they were in the house until I took off the XM6s. They could have been right outside my doorway, and I probably would not have heard them.
Ambient noise mode does a great job of providing a transparent hearing experience. It is not perfect. For example, the wall reflections from a hand clap are boosted by the XM6’s 12 microphones. Otherwise, the transparency is nearly perfect. Other headphone manufacturers also offer near transparency ambient noise passthrough. However, Sony takes their ambient sound to the level. First, in the Sony Sound Connect app, I can set the ambient noise threshold. Meaning, I can control the balance between my music intensity and the ambient sound intensity. I can also set a filter to prioritize voices. This allows me to filter out noise while allowing voices to pass through. Sony goes as far as to allow Speak-to-Chat which will reduce the volume of the music, or other audio content, and auto switch to an Ambient conversation mode. The voice sensitivity and mode time out are fully configurable. The Speak-to-Chat feature can be a mixed bag. First it works awesome and does exactly what it is supposed to do. Second, clearing my throat will, even on low sensitivity, activate this feature. Making an under-my-breath comment will also activate the mode. If you are one of those who talk to themselves, or self-narrate their day’s activities, then you will find it best to leave this mode disabled.
Sound quality, musicality, comfort, ANC flexibility, and an immersive cinema experience are worth Sony’s price of entry for the XM6’s. But Sony did not stop here. None of this would be possible without industry-leading software. No one comes close to what Sony offers in this space. I touched upon flexible ANC and Ambient modes above. Other notable features are a 10-band equalizer with three programmable presets. Too little bass? No problem. Maybe you want the vocals to be a bit brighter? No problem. Or maybe you want different presets for classical, Jazz, and Rock. That is easy enough to set. Sony even includes a built-in hearing test that will allow you to discover your best EQ settings. However, the test depends on the listener providing their own music for the test instead of providing a standardized loop of sounds that would aid in a more accurate test.
Sound Connect will also take hearing and headset wearing measurements to optimize 360 Reality Audio and Spatial listening. This is done using your cell phone’s camera. It is quick, simple, and does a great job.
A sub tab in Sound Connect, “Discover”, has a feature called Safe Listening. This page is dedicated to sound pressure in the ear cup over time. The most helpful feature on this page, in my opinion, is real-time ear cup sound pressure level (SPL) measurements. Once registered, this information will be displayed on the “My Device” page under your playing musical selection. Personally, I think this data should be front and center at the top of the page. Why? This is invaluable data to maintain good hearing health. Hearing damage is cumulative. Also, for whatever reason, Apple Music does not normalize every track to a standard output level. Meaning, there are times I am riding the volume controls because track 1 is quiet and track 2 blows my doors off.
Overall, the Sony WH-1000XM6’s are amazing. They are fun, musical, supremely comfortable for all day wearing, have outstanding ANC, are light, have unassuming aesthetics, and have a level of flexibility that make the XM6’s unique at any price level. There is a lot more that the XM6’s are excellent at that I did not cover here. Phone calls, multi-point pairing, automatic phone to music switching, automatic source switching, touch controls, storage, the case, and so much more that I could go on for hours about how much Sony got right with the XM6’s. If you are looking for the best all-arounder coupled with a robust software package, then you will love the Sony WH-1000XM6’s.
I would recommend this to a friend!
0points
0out of 0found this review helpful.
Share this review:
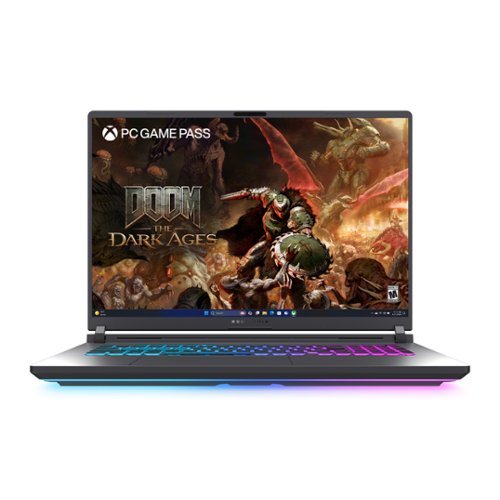
Unlock a next-level gaming experience with the ROG Strix G18. Featuring a 2.5K 240Hz Nebula Display with Pantone-validated color accuracy, it delivers stunning visuals. Powered by an Intel Core processor and NVIDIA GeForce RTX 5080 laptop GPU, enjoy seamless gaming and creative performance. With 32GB LPDDR5 RAM, a 2TB PCIe 4.0 SSD, and advanced ROG Intelligent Cooling, stay at the top of your game. The esports-ready keyboard, Dolby Atmos audio, and customizable RGB Aura Light Bar elevate every moment. Plus, enjoy easy upgrades and 3 months of PC Game Pass for the ultimate gaming experience.
Outstanding Performer
Customer Rating
5.0
Images for this Review
(click to see full-size image)

The ASUS ROG Strix G18 gaming laptop is a powerhouse for gaming. The G18 chewed through my favorite games like a hot knife threw butter. Its 3Dmark Time Spy benchmark score was 22,827. The Mobile 5080’s individual score was 21,815 while the Intel Ultra 9 275HX CPU score was 16,574. I keep reading reviews about how weak the Intel Ultra 9 is for gaming. Not only did this CPU bench well. It games well.
Gaming:
Mechwarrior Online, or MWO for short is a Direct X 9/11 game that is about 12 years old. It is also the game I play the most and am the most familiar with. There is No DLSS, no Ray Tracing, and no ALLM. Instead, this game is solidly in the class of system destroying, brute force, high horsepower graphics rendering that leverages TXAA anti-aliasing, Post-Processing, and, of course, max fidelity settings. Well, it was back in its day. At 2560x1600, the G18 completely owned MWO. FPS ranged from 130 to 90 with an average of around 100 FPS. In my experience, 130 is where this game tops out. Considering how poorly optimized this game is, 100 to 130 is perfect. Better yet, I was able to maintain this performance connected to my external 34” 1440 monitor.
Next, Diablo IV. This game runs great at medium high settings with DLSS turned on. DLSS is fine when walking around a town. When bossing or in a tough fight, where timing is everything, then DLSS simply gets in the way, and in some cases, will get your character killed. With DLSS on, I was steady around 130 FPS. With DLSS off, the G18 was able to maintain a steady 100 or higher FPS. Graphics settings were set to medium-high with some Ray Tracing on.
Finally, Call of Duty Black Ops 6. The first thing I did was run the built-in benchmark/calibration routine. I posted a screenshot so you can see all the numbers. The system scored 150 with DLSS on and 136 with DLSS off. For competitive play, turn DLSS off. It will save you a lot of frustration. Actual game play, the FPS hovered around 100 FPS. This was more than good enough to remain competitive. There was not screen tearing, no lag, and not ghosting on the screen. I actually had some of my best matches on the G18. That is, after I turned off DLSS. With DLSS on, I had some of my worst matches due to the lag or delay in real time, screen rendered information.
Overall, less DLSS, my gaming experience was excellent. DLSS has its place. Just not in online competitive gaming.
Fan Noise:
The G18 has five power profile modes that directly impact system noise. Amory Crate has three pre-configured profiles: Silent, Performance, and Turbo. Amory Crate also has a mode that works directly with Windows Power Plan. Finally, there is the option to build your own power profile. Silent is exactly that. Fans are off. The system will get warm but not hot. Performance mode has a range from quiet to loud depending on system load. Energy consumption increases on the system. This in turn causes more heat which demands the fans run to keep the system cool. While gaming, the fans ramped up to about 80% to 90%. I would recommend a good pair of noise canceling headphones while gaming. Turbo mode is full peak system power, peak heat, and peak leaf blower fan performance. At 100%, the G18 fans are loud. Headphones with good noise isolation is required. The fans running at 100% does a good job of keeping up with the heat. But, the system will still heat up and you will run into CPU throttling.
Overall, I feel that the Performance pre-set power profile is an excellent balance between energy consumption, heat management, and performance.
Keyboard and RGB lighting:
The keyboard is well laid out, comfortable to type and game on, and the keys have a good resistance and return. The only thing I do not like about this keyboard are the translucent Q, W, E, R, A, S, D, F, and space bar keys. In a dark room, or a room with poor lighting, it is nearly impossible to read the silk screened letter on the key cap. I found this challenging in situations where I need to see the key. For example, I use a rare key function in one of my games and want to visually confirm before pressing the key. Not all my games are FPS games. This is not an issue in a well-lit room.
The RGB, as a whole, is very well done. The letters, number, and words on the regular key caps are shine through. And each key cap allows light to purposely blead around the edges. The bottom of the G18 has four RGB light strips that can either coordinate with the keyboard RGB or act independent of the keyboard. I kept them on for a few days and then turned them off. The RGB strips are well done, well placed, and cast a lot of light. Asus provides a way to change RGB via some presets. It also provides the ability to turn the lighting off. One place where Asus seems to keep missing the mark is keyboard lighting customization. Aura Creator is a nice to have, assuming it will even detect your keyboard and chassis light bars, but it is insanely difficult to use to any effect. And tying custom profiles to games has always been a hit or miss exercise.
Sound:
The speakers are clear and good enough for laptop speakers. They won’t compete with a dedicated headset or dedicated external speakers. They are good enough for YouTube, pod casts, Netflix, internet radio, and other leisurely listening activities. While gaming, the fan noise will overwhelm the speaker audio quality. They are still useful for gaming. However, the competition with the fan noise will eventually force you into a headset.
Screen Performance:
I think Asus nailed it with the screen. Colors are bright and vibrant. The refresh rate at 240Hz is excellent. I did not notice any ghosting, artifacts, or screen tearing while gaming. Even the fast twitch movements associated with playing CoD6 was clean, fast, and completely immersive. The only thing that would make my experience better is upgrading the laptop’s screen to an OLED. Or connecting to an external OLED gaming monitor.
Upgradability:
I upgrade my laptops. Back in the day, laptops had doors and drawers to access hard drives, memory, CD players, and batteries. Today, everything has screws and plastic clamps which are time consuming, difficult to work with, and can often lead to scratches or other unintended damage. Thank you, thank you, thank you Asus for bringing “easy” back to user-accessible upgrades. The bottom cover has a latch that slides, clicks, and then the bottom cover simply slides off. It could not be any easier. Ram, battery, and SSD slots are easily accessible. The main board is protected by a secondary plastic cover.
Final thoughts:
This is a beast of a system. The system will get warm regardless of what power mode is selected. Under load, the system fans get loud. Gaming performance is excellent. Daily productivity is excellent. There are power saving features, such as CPU Core Configuration and nVidia Optimus, that will help make this laptop perfect as a workstation and gaming computer replacement. Overall, I am very happy with the G18. I think it is an excellent system.
I would recommend this to a friend!
+1point
1out of 1found this review helpful.
Share this review:

Upgrade your home theater experience with the Rocketfish 15 ft. In-Wall Male to Male RCA Cable with Shielding for Subwoofers and More and enjoy a high-level audio experience, reduced signal interference and a better overall performance. A step up from your basic RCA cable, it features digital coaxial technology, high-quality copper, 100% shielding, and corrosion resistant gold-plated connectors. The durable 22 AWG cable is also UL CL2 in-wall rated so you can feel good about your new setup.
Gets the job done without all the eye candy
Customer Rating
5.0
Images for this Review
(click to see full-size image)


I replaced a 20-year-old three-foot RCA Monster Cable that was originally used for a camcorder, remember those, with a Rocketfish RCA 15-foot shielded cable. The cable connects my MartinLogin 600X 10-inch sub to my Technics SA-600 integrated stereo/CD amplifier. This was fine when the stereo lived on my desk and cable length was not an issue. As my system grew, and my office needs changed, I found that I needed a rack to store all my gear. The rack stands next to my work desk. I need a longer cable.
The Rocketfish cable is made from a flexible PVC jacket that easily bends around corners, through cable runs, through walls (UL CL2 in-wall rated), and around furniture. For me, the cable needs to run from behind my rack, follow power and data cables to my desk, rest in a wire cable holder under my desk that runs the length of the desk, and be long enough to support the desk changing heights throughout the day. The desk is a motorized, variable height desk. The PVC jacket is smooth enough to resist friction from the other cables. It is also flexible enough to resist snagging on the furniture, laptop power bricks, and other items as the desk rises and lowers multiple times a day. This is important because the desk is powerful enough to cause damage if the cable were to get snagged on anything.
The PVC jacket is molded into the aluminum shell connectors. It is a handsome cable. But definitely not what I would classify as dopamine fueled audio jewelry. The ends of the cable are gold plated. They connect tightly to my sub’s RCA jack and my stereo’s RCA jack. I pulled on the cable and could not disconnect it with a good yank. Twist and pull seems to be the preferred method of disconnecting the cable. There is little chance that the cable will disconnect when playing the system hard. Finally, I tried to unscrew the gold-plated connectors. They would not budge.
My office has multiple laptops, monitors, stereo equipment, a charging station, printer, and everything is plugged into a Panamax power center. The subwoofer cable touches many of these power cables, touches two AC laptop power bricks, and shares cable hanger space under my desk with multiple data and speaker cables. That is a lot of potential EM interference that the cable could pick up. Since this cable is shielded, I do not hear any humming, snow, or static through the sub when the sub powered on and silent. When playing music, my bass is full, quick, and clean. Essentially, the cable is not getting in the way of my music. Which is exactly what one would expect from a good cable.
I would recommend this to a friend!
0points
0out of 0found this review helpful.
Share this review:
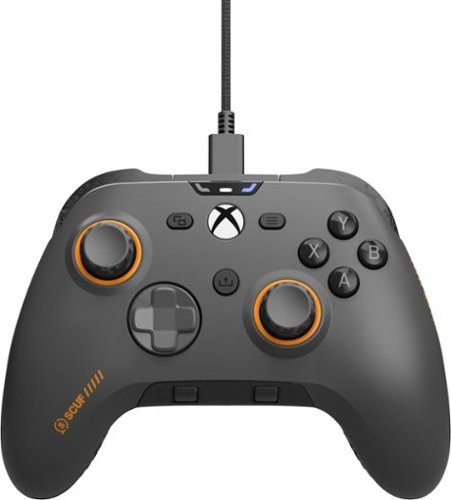
Valor Pro pushes performance on Xbox with optimized ergonomics and game-changing features. Stop sacrificing your aim. Keep your thumbs on the thumbsticks while you jump, slide, reload, and more. The wraparound bumpers are designed with more surface area allowing faster transitions between bumper and trigger. Elevate your audio controls by effortlessly managing all your sounds without taking your hands off the controller. Our new anti-drift Hall effect thumbsticks are designed to alleviate common symptoms of wear and tear. A non-slip grip helps during those high intensity situations while the new shape fits naturally in your hands for comfort. Valor Pro redefines gaming comfort and performance.
Great Experience. Great Feature Set.
Customer Rating
5.0
If the original Xbox controller and the Xbox Elite controller had a middle brother, or sister, it would be the SCUF Valor Pro. It is a little more premium in feel and function than the original Xbox Controller. And it has many of the advanced features of the elite at a fraction of the cost. What I like most about the Valor Pro is the size and feel are so close to the first party controller that it feels like a tricked out first party controller. It feels comfortable in my hands, is responsive, does not suffer the stick drift issues of the original Xbox and Elite controllers, and I feel that the paddle setup feels very natural. Below is my detailed review. However, if you are short on time, let me just say that the SCUF Valor Pro is a fantastic controller that does not require me to make any compromises by choosing it over a first party controller. If anything, it allows me to dip into the premium world, with a familiar look and feel, without breaking the bank. If you are in the market for a new controller then I highly recommend giving the Valor Pro a spin.
The meat of my review:
First, it is almost the exact same size as the original Xbox controller. In the hand, it feels exactly like an original Xbox controller. The handles of the controller are covered in a hard textured rubber type material that prevents slipping. The grips do a good job. The rest of the Valor’s surface is covered in a smooth, soft texture that provides some additional handling control. It is not grippy enough to impede my ability to reach for buttons, manipulate the thumb sticks, or activate the controls on the bottom of the controller.
The trigger and bumper buttons are smaller than the original Xbox controllers. Not a big deal since they are still spaced properly for my muscle memory. The trigger stops have two settings: long and short. The default setting allows the trigger to flow along its full range of motion. I found the default range of motion too deep for my liking and play style. The short setting is super short. There is almost no movement between rest and press. However, the short trigger setting has a higher resistance. I found that the increased responsiveness more than made up for the additional depression resistance.
The bumpers, XYAB buttons, and thumb stick buttons all have a familiar feel as any other high quality Xbox controller. The XYAB buttons are black and look good with against the grey background and orange highlights. The XYAB buttons do not appear replaceable. At least not easily replaceable like the D-Pad and thumb sticks. The thumb sticks are a bit stiffer than what I am used too. It took a good twenty minutes of COD6 before I felt comfortable. This was especially true with aiming down sight. The increased resistance made it difficult for precision aiming until I got used to the additional resistance.
The thumb sticks are interchangeable. The Valor Pro ships with two additional sticks. The sticks come in a medium height and tall size. Both replacement sticks have a concave pad to make it easier to control with the added height. The faceplate must be removed in order to replace the thumb sticks. Thankfully, the faceplate is magnetically attached which makes removal super easy. The sticks pull out and the replacements press on. I found that I need an exceptional amount of force to remove and replace the thumb sticks. The control surfaces of each thumb stick is also comfortable and feel well made. Finally, there is no tension control for the thumb sticks. What you have is what you have. I did find this a bit disappointing because I very much wanted to loosen them up a bit.
Anti-Drift thumb sticks. My avatar in Titan Fall 2 no longer drifts to the right. If you have ever played Titan Fall 2 with a first party controller, then you know exactly what I am talking about. The Valor Pro does not suffer stick drift. Consider this confirmed!
The paddle system is unique. I normally remove the paddles from any controller I own that has a paddle feature. Those without removeable paddles gets returned. I tend to play with a death grip on my controller. Which means the paddles just get in the way. I think SCUF had my play style in mind when they developed their paddle system. The paddles are thin slices taken out of the hand grips. Simply squeezing my hand is not enough to activate them so there is no worry about panic pressing either paddle. I found them to be very natural to use and did not require me to change my grip. Saying this, there are two buttons on the bottom of the controller. I did not like those so much because I would need to retrain my hands to use them. SCUF was thoughtful enough to make the buttons removable. The Valor Pro ships with replacement button covers to cover the buttons.
The controller is wired. The SCUF Valor ships with a 10-foot fabric braided cable. The cable is USB A on one end, for the Xbox or PC, and the controller end is USB C. I realize that using a cable in 2025 may seem a bit old school. However, it does allow for the controller to be lighter due to the exclusion of a battery pack. The controller will also never run out of power or lose power. If you are anything like me then you enjoy long multi-hour gaming sessions where any interruption can cause a panic attack. I cannot tell you how many times I lost my you-know-what in the middle of a match because I forgot to charge my controller the day before.
Unique features. The controller has a programing function. Essentially, I can reassign any button on the controller to a paddle. The bottom of the controller has a special program button. Press and hold the program button, press the button I want to map, and then press the paddle. Unfortunately, there is no PC or Xbox program that allows me to visually program the buttons. I also did not see any mention of programming macros to any of the paddle buttons. I know macro programming is popular on the PC side of the Call of Duty world and with other popular cross platform games. No joy here with the SCUF. And I am ok with that. I would rather play too my skills than play to my macro. At least I know that what I did, I earned.
There are also three profiles that are easy to access: Blue, Green, Red. Each profile is a different paddle configuration. A simple press of the profile button on the bottom of the controller will cycle through all three. This makes finding an agreeable configuration a snap if you do not want to go through the trouble of programming each paddle.
Overall, I really enjoy the SCUF Valor wired Xbox controller. What I was coming from was already a great controller. I found it to be a wonderful compromise between the original Xbox Controller and then Elite. Does it make me a better gamer? No. Not really. Better gear will increase enjoyment and may give me a leg up in some instances. But, I am still the same mediocre player I have always been.
I would recommend this to a friend!
+3points
3out of 3found this review helpful.
Share this review:

Rising from the successful Project Esther, feel the future of gaming immersion with Razer Freyja ~ the world~s first HD haptic gaming cushion. Powered by Razer Sensa HD Haptics, experience a full range of dynamic tactile sensations that fully syncs with your game, from forceful explosions to the subtle pulse of a heartbeat.
Increases immersion for my favorite games
Customer Rating

4.0
Images for this Review
(click to see full-size image)

Originally, I did not give the Razer Freyja much consideration when asked to review it. Then I learned that two games, Mechwarrior: Clans and Mechwarrior: Mercenaries, would have dedicated Sensa HD haptic game profiles. I had to have it. Unfortunately, the Sensa HD game profiles were not available at the time of this review. Fortunately, the Freyja has a few tricks up its sleeve to keep it relevant for all games. The Frejya, in essence, are three pairs of transducers that turn electrical impulses into physical impulses that jiggle your back and bottom in time to music and sound effects mostly in the bass and sub-base frequencies down to 30hz. The Sensa software reads the sound output from the game, isolates the proper frequencies, and then sends them wirelessly to the Frejya where six transducers turn that sound into vibrations.
Why is this important to me? I, and my fellow Mechwarriors, are always looking for ways to increase the immersive experience with these games. Imagine feeling the footfalls of a 100-ton battlemech as metal meets unyielding pavement in your cockpit two stories up. Now, image feeling the recoil from launching ordinance the size of a small car down range. Or imagine that same found impacting you? Upgrading to a larger monitor, adding an RGB programmable keyboard, installing RGB everything else, integrating powerful speakers and subwoofers, buying a surround sound gaming headset, and even integrating a VR helmet increases immersion. But nothing provides that raw immersive experience of feeling the vibrations of your mech’s footfalls rise up through your chair. Or the back of your gaming chair giving you a good jolt as you squeeze off an autocannon round. It is one step closer to the visceral experience from one that, up until recently, has been locked in the visual and sonic realm. The Freyja, after some adjustments, did an excellent job of delivering on that experience and adding that one dimension I was missing to connect me with my game.
In short, I am glad I did not snob this one off. Razer’s Chroma application will intercept the audio output stream for any application via the Sensa HD Haptics module and push that data to the Freyja. OK. Game on!
Mechwarrior Games:
The first game I loaded up was Mechwarrior 5: Clans. I chose a mission full of combat, city destruction, exploding fuel tanks, and a huge hamster ball shaped dropship that would make NASA’s Orion program envious.
I turned the haptic intensity to 4, started with the “Controlled” haptic preset, and then I hit the battlefield in my 75 Ton Timberwolf battlemech. And…sad face disappointment... I was expecting to feel every footfall up through my gaming chair as I marched my battlemech up the hill toward the city and adjoining spaceport. I expected to feel the chair rumble uncontrollably when walked through a collapsing building. I expected to feel the recoil from my weapons file in time with pulling the trigger. I did, to a point, but it was anemic. The drop ship’s engines should have been enough to launch me from my chair. But, here too, the haptic feedback was anemic. Upping the haptic feedback to 5 or 6 did not resolve the issue. But wait, I promise you a happy ending.
The Sensa app has four profiles for any game I want to configure. Controlled, Balanced, Dynamic are static, predefined profiles that can be used with any game or content. Custom, the fourth and last profile, allows a user to adjust the frequency and gain responses for a specific game. I cycled through Balanced and Dynamic with Mechwarrior: Clans. Balanced got me more of what I was looking for. Dynamic dialed everything up to 11! With Dynamic, everything from walking to shooting to walking through collapsing buildings had my chair jumping all over the place. It was a lot of fun until I realized that I was simply over saturating my feedback experience. Meaning, there was no isolation between what was happening on the screen and what was happening in the chair. Balanced provided the best overall experience. Once I found what worked for me, I then set about tuning the profile for the experience I wanted. I was able to balance the game so I could feel the feedback I desired while also minimizing the chaos I experienced with the Dynamic experience. Smily face time!
The same is true regarding Mechwarrior 5: Mercenaries. Even though the experience between Mechwarrior: Clans and Mechwarrior: Mercenaries are similar, Mercenaries does require a little extra fiddling to get an equally satisfying experience. The good news is that each game can be configured separately in the Sensa app. And the Sensa app will automatically choose the correct profile for me. This is like how keyboard, mouse, headset, and lighting can be configured, per game, in Razer’s Chroma and Visualizer today. The Sensa HD App has an Add Games & Program button which allows me to pick any game or application that I want to link a Sensa profile to.
Finally, I fired up my bread-and-butter Mechwarrior game, Mechwarrior Legends, aka MWO. This is where the Freyja really shined for me. The Dynamic profile worked best for this game. This is most likely due to the limited sonic experience compared to the other Mechwarrior titles. And that is a good thing. My mech’s footfalls were 100% isolated and easy to feel through the Freyja. Auto canons, such as rotary auto canons, were a meaty, satisfying punch to my back and seat. So meaty in fact that I had to turn down the haptic feedback after about an hour because I was physically feeling fatigued from the constant vibration. I played a few matches with my buddies and had a great time. The feedback did not interfere with my game or play style. It simply added a layer of immersion that I did not have before.
Diablo IV:
I did not spend all my time completely focused on Mechwarrior. Like Mechwarrior, the Freyja and the Sensa App do not have pre-built profiles. In this case, I used the Controlled preset. The very first feedback experience with Diablo IV was the opening splash screen where a sub-bass note is played while the Diablo logo is revealed. The whole seat vibrated sufficiently to make me feel as if I were part of the opening logo. I had to turn down the haptic feedback because the music itself kept overwhelming my senses. Once in game, the music was less of an issue and combat took center stage. Generally speaking, combat moves that include ground pounding, earthquakes, and explosions can get visceral depending on the haptic feedback settings. What really impressed me was how well the Freyja isolated the hoof falls of my horse as I road around the map. Overall, the haptic feedback was not overdone. It was just right to keep me engaged in my play while also not distracting me from the game.
Voice Communications:
My Mechwarrior team uses Discord for voice communications. The Razer Sensa HD Haptics app warns that speech may trigger the Freyja while using Balanced and Dynamic Audio profiles. And I’ll tell you that male voices will absolutely trigger the Freyja’s haptic feedback. It is an odd sensation when your chair is vibrating as men with deep voices are speaking. It became less of an issue during game play where the sound effects would drown out the haptic feedback associated with speech. This was not isolated to Discord. In game comms and even in game dialog were translated via Sensa to the Freyja. Unfortunately, there is no “dialog” filter in Sensa.
Music:
Music sucks with the Freyja. Simple music with a clearly defined beat, and nothing else competing with that beat in the low end, is good thought out of phase. Meaning, there is latency between when the beat is played through the speaker and headphone and when it is reproduced by the Freyja. I noticed this in my game play as well though I did not find it as important with gaming. If the piece if complex, for example the title theme for Pacific Rim, then the Freyja simply jumps all over the place and feels like a complete mess. Meaning, I would not watch the movie, “Pacific Rim”, sitting on the Freyja because the movie uses a lot of bass and sub-bass frequencies to reinforce the music, sound effects, and the onscreen action. For me, I’ll give this Freyja a pass when it comes to music.
Comfort:
How comfortable is the Freyja? The Freyja is comfortable enough for short gaming sessions. For me, two to three hours max before I need to get up and move around. I may even remove it depending on how I feel. The seat cushions are made of soft foam, but each cushion has a transducer in it. Which is hard. Eventually, I need to stand or add a cushion to my chair.
Second, there is no lumbar support. My chair has a lumbar support pillow which is still popular with many gaming chairs. I put the pillow behind the Freyja to add lumber support. Unfortunately, this pushed the middle back transducers into my back while pushing the upper back transducer away from my back. If I put the lumbar support pillow in front of the Freyja then I would have the opposite problem of losing contact with the middle back transducers.
Conclusion:
Overall, I am glad I added the Freyja to my gaming rig. I am satisfied with the additional immersion the cushion adds to some of my favorite games and franchises. It is not perfect. In game voices, voice communications such as Discord or TeamSpeak, and voice in cut scenes that have deep bass will translate to the Freyja. It will also not make you a better gamer. It does increase the immersion of my favorite games.
I would recommend this to a friend!
0points
0out of 0found this review helpful.
Share this review:

With faster read/write speeds of up to 7,250/6,300 MB/s*, larger storage capacity of up to 4TB with TurboWrite 2.0 and 73% ** greater power efficiency compared with the 990 EVO, the 990 EVO Plus makes large editing, file transfer or gaming tasks go smoother and faster. It~s the perfect productivity boost helping you tackle a busy day full of work (or play).
Good for gaming, good burst data rates
Customer Rating
4.0
Images for this Review
(click to see full-size image)

I set up the Samsung 990 EVO Plus as a second hard drive in my Asus ROG G814 gaming laptop.
The G814 shipped with a WD PC SN740 SDDP 1TB drive which closely matches the performance of the 990 EVO Plus. Hence, I did not feel it was worth my time to clone my boot drive to the 990 EVO Plus. It did not take me long to fill the drive up with games, applications, and files. I did already have a Samsung 980 1TB drive as a second drive which was replaced by the 990 EVO Plus.
The G814 shipped with a WD PC SN740 SDDP 1TB drive which closely matches the performance of the 990 EVO Plus. Hence, I did not feel it was worth my time to clone my boot drive to the 990 EVO Plus. It did not take me long to fill the drive up with games, applications, and files. I did already have a Samsung 980 1TB drive as a second drive which was replaced by the 990 EVO Plus.
Installing the 990 EVO Plus was straight forward. First, I offloaded my files from my older Samsung 980, removed the old drive from the laptop, replaced it with the new drive, and then rebooted the system. The Bios recognized the drive, asked me to accept the new settings, and then the system booted to Windows. Windows detected the drive and allowed me to partition and format the drive. I chose to partition the whole 2GB as a single drive.
Performance:
The max performance for my laptop appears to be between 5.5GB. At least that is the max benchmarked read performance reported by Samsung’s Magician built in benchmarking tool. Real world performance is a more complicated story. Burst data reads and writes range between 2.5GB/s and 3.5GBs for about a minute. After a minute then the drive takes a dive to between 400MB/s to 700MB/S. The performance can drop again If the read or write is sustained. I ran a few torture tests that lasted upwards of 10 minutes. Essentially, extended read/write operations are terrible. This will not impact my games, photo editing, or documents I work on. Load times will seldom exceed the burst data rate window. If I were doing video encoding, then this would move up to the non-EVO version of the 990.
I created three folders: 3GB Video files, 800MB video files, and 30K photos and files. Each folder contained at least 100GB of data. I did a drive-to-drive copy and an inter-drive data copy with each folder. Moving data from the 990 EVO Plus to my boot drive had the best sustained performance than any of the other tests. Moving the same folders from the boot drive to the 990 EVO Plus showed a bit slower sustained performance but good enough for my needs.
Folder to folder copy was a different story. Making a copy of each of the three folders followed the same pattern. Burst data rate of 2.5GB/s to 3.5GB/s was sustained for about 60 seconds. Then the data rate would nosedive to 400MB/s to 500MB/s. The step down in sustained data rates dropped twice during the 30K file run. I included a photo with the Windows Explorer file copy graphs for reference.
My conclusion is that burst data rates are excellent. Loading games, game levels, and swapping other content from the drive to memory are excellent. This is mostly due to the short transactional nature of the content. I played the likes of Diablo IV, Mechwarrior 5: Clans, MWO, Fortnite, and several other games from Xbox Game Pass, Steam, EA, and Blizzard without any stuttering or other odd behavior. Load times were really good.
Some Numbers:
I posted a photo of the file transfer tests I conducted using Windows Explorer. There is some overhead to Windows Explorer file copy that would explain some of the performance results but not all of it.
My Asus ROG Strix 18 has two full sized SSD drive slots. The primary drive space has a WD PC SN740 SDDP 1TB drive. My second drive was a Samsung SSD 980 1TB drive. The 980 was replaced by the 990 EVO Plus.
WD PC SN740 SDDP: Sequential Read MB/s 3514, Sequential Write MB/s 2820, Random Read IOPS 191894, Random Write IOPS 103271.
Samsung SSD 980: Sequential Read MB/s 4277, Sequential Write MB/s 4166, Random Read IOPS 195556, Random Write IOPS 109130.
990 EVO Plus: Sequential Read MB/s 5500, Sequential Write MB/s 5066, Random Read IOPS 148925, Random Write IOPS 105957.
Conclusion:
I think the 990 EVO Plus is a good choice for gaming, storage, and photo editing. The drive should work for video editing but not in instances where sustained data rates are required.
I would recommend this to a friend!
0points
0out of 0found this review helpful.
Share this review:
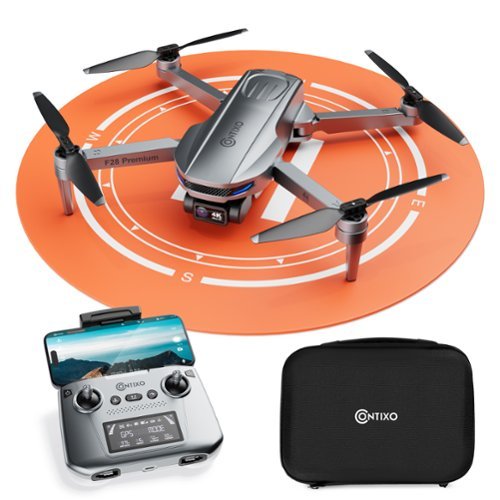
Elevate your aerial photography and videography skills with the F28-Premium Foldable GPS Drone featuring a 4K Gimbal Camera and advanced 3-Axis Gimbal for smooth, stable footage, even in challenging conditions. Its 4K Full HD Time-Lapse feature and panoramic shooting technology allow for stunning, crystal-clear visuals with adjustable angles from -90 to 0 degrees and an 85-degree field of view. Enjoy precise GPS control, multiple intelligent flight modes like Follow Me and Orbit Mode, and a flight range of 3600 feet with up to 30 minutes of flight time. Compact and portable, this foldable drone is equipped with dual-frequency connectivity, supports SD cards up to 128 GB, and is available on the Apple App Store and Google Play. The F28-Premium Foldable GPS Drone is your gateway to professional-grade aerial creativity~buy now and take your shots to new heights!
Solid Package. Great starting point.
Customer Rating
4.0
Images for this Review
(click to see full-size image)


The Contixo F28 is a great beginner drone for those who want to get into arial photography or are looking for an entry point into the hobby. The kit comes with everything needed to get started: Drone, lithium ion battery pack, controller, instructions, spare screws, spare props, screw driver, charging cable (wall charger not included), launching and landing pad, and a hardish case to carry everything around in. The quality of the unit is great for a drone that weights .55 grams. The controls are responsive. The F28 does a decent job of stabilizing itself as it transitions from motion to hover. Takes good photos.
Quality:
The Contixo drone and controller is made from lite-weight plastic. The only metal I can find are the joysticks, screws, and electronics. There are rubber pads strategically located around the control box to assist with a strong grip. The camera is suspended by a free floating armature that does a good job of keeping the camera level and vibration free during flight, during acceleration and deceleration, and while rotating the camera head. The motors and props push some serious air. I blew the landing pad away with every takeoff. I could also feel the turbulence as the F28 took off and flew away from me.
The F28 includes a black, cloth covered protective shell case. The case includes a molded interior to keep the F28, remote, and up to two battery packs safe and secure during transport. The case has a mesh lining with a zippered pocket allowing the secure transport of documentation, extra parts, and anything else that may be required to operate the F28. There is a bright orange, fold out landing pad for take-off and landing. Unfortunately, the landing pad is not heavy enough to prevent it from blowing away on takeoff or landing.
The included USB charging cable does not include a matching power supply. A standard phone charger, like an iPhone power adapter, will not be power enough to charge either the battery or the remote. You need a full 5V 2A power supply. A power supply capable of providing more than 5V 2A will also not work. It needs to be just right or the battery will simply not charge. Finally, the F28 battery is very finicky regarding which cable is used for charging. I could only get the battery to charge with the included cable and with a USB cable that shipped with my Corsair gaming keyboard. This is a real head scratcher because I have some very well made cables. Lesson: do not loose the cable that ships with the F28.
Flight:
Once properly setup and calibrated, the F28 is easy to control and very responsive. Calibration for the F28 only seems to work with GPS mode on and then only if there is a GPS connection. My first flight was with an uncalibrated F28 due to the heavy cloud cover interfering with GPS. I was eventually able to put the F28 into ATTN mode for manual flight. Unfortunately, weather has been a real issue for me during my time with the F28. As such, I was not able to take advantage of the GPS feature due to the heavy cloud cover and poor GPS signal. Regardless, my first flight, once air born, went pretty smooth. Both manual and auto take off were very smooth. Manual landing, however was rough for me. Thankfully, there is also an auto landing function built into the app. If GPS is active, then the F28 will return to it’s original take off spot when commanded to auto land.
My flight started with the speed set to Normal. Vertical lift and drop is fantastic. This drone will pop and drop instantly. The F28 does a good job compensating for momentum when dropping. There were a few times I caught the drone falling some after popping it up to my desired altitude. Any kind of turbulence will also impact the ability to the drone to maintain altitude. There were a few times where the drone would be pushed up or down depending if it caught an updraft or a downdraft. Once this happened the drone would continue in the direction it was pushed until I tapped the controls to course correct. This was also true if the F28 caught a breeze after moving left, right, forward, or backwards. The F28’s natural preference is to come to a complete stop and hover when the commands stop. This proved less of an issue for me when running the drone in Photo speed mode.
Photo speed is the slowest flight speed for the F28. If you are new to drones, like I am, than photos speed is the right level of training wheels. The F28 lumbers along providing a steady platform for photography. I was able to zoom around my yard, snap a few photos, and hit a few tree branches, side of the house, a bush. Doh! But no damage!
Racing speed is crazy fast; especially for a novice. I tried this in my backyard and ran into a tree before I knew what happened. Thankfully, it was a decorative fir tree which is nice and soft. I did try to zoom the F28 around my backyard on this mode but was unable to get any kind of fine control. I ran the F28 around my local soccer field. Man, does this thing cruise. The controls also felt a bit clunky and stiff for me achieve any level of finesse at this speed. The control sticks have a smooth four way motion but are really stiff on the diagonals. Smooth eight-way control is possible when controlling the F28 using thumb and forefinger on the control sticks. However, the ergonomics of the controller work against me trying to control the F28 in this way.
In addition to what I said above, there can be a bit of skating from side to side when the F28 gets caught up in any air movement. However, in still air, the F28 can start and stop on a dime. When the control sticks return to their neutral position the F28 will pull back in the opposite direction to force a hover. And it does a pretty good job. The camera also does a good job of remaining level when the F28 is compensating for momentum and leveling out.
Photos:
The F28 photos are ok. I was expecting much better than what I got. These are transmitted directly to my phone for storage. However, every time I take a photo, the app asks me for permission to store the photo on my phone. Major pain since this splits my attention between the drone operation and asking an obtrusive question on my cell phone screen. The F28 has an SD slot for local photo and video storage. It is worth investing in an SD Card for 4K video. The drone will not transmit 4K video to the app for storage on the phone. I included a few photos with my review for your inspection.
Camera
The camera is level with the horizon. The onboard sensor does its best to keep the camera level during flight, transmitting video, and with stills. Sometimes, the camara did tilt along the y-axis. This mostly happened if I landed roughly or <cough> <cough> hit something. There does not appear to be a mechanism that allows the F28 to recenter the camera. So, I was left rotating the camera by hand a few times to tease it back to center.
I witnessed a neat feature while holding the drone. When I was handling the drone, I noticed that the camera gimble continued to auto correct to remain level with the horizon. This was easy to see on my iPhone while trying to fly by camera. I was taking this for granted until I saw what the drone was doing in real time while in my hand. For clarity, the drone was powered on but the rotors were powered down. Safety first!
Finally, the F28 comes with a camera cover to protect the camera and camera assembly during transport. The camera cover also falls off after removing and replacing it a few times. It does a good job of protecting the camera and camera assembly when in storage. Just be sure to account for the camera cover when removing or storing the F28. It is a simple friction fit.
The F28 can also see through the cover. I do not recommend flying with the cover attached since the camera is designed to auto level as the drone flies and hovers. Also, as stated above, it will probably fall off and get lost.
Controller:
Like the F28, the controller is mostly plastic. Only the controller sticks are metal. The controller fits in my and like a game controller but without the ergonomics. The shape of the controller forces me to fly with my thumbs on top of the sticks instead of allowing me to comfortably control the sticks with my thumb and forefinger. My thumbs are like hammers compared to the fine control I could apply with thumbs and forefinger. The camera dials, in my opinion, are difficult to use. They only activate at the edges of their movement and nothing in between. They would be much easier to use if the rotation of the dials was shortened.
Battery life is good. I was able to get several flights before needing to recharge the controller. The top of the controller doubles as a phone holder. In combination with the Contixo app, the phone becomes part of the controller displaying video, maps, drone position, and other important metrics. It will hold up to a normal sized iPhone. The larger iPhone like Pros, Maxes, whatever the supersized screen iPhones are called these days, will not fit. The controllers LCD is bright, clear, and easy to read.
The control sticks are very well machined. The tips are covered in sharp ridges that will bit into your thumbs or gloves. The sides of the control sticks are also textured but are less aggressive. The sticks can also be unscrewed and replaced.
Final thoughts:
Overall, I think the F28 Premium is a solid package for those looking to get into the hobby of flying drones or aerial photography. The kit comes with everything needed less a power supply. The construction may be plastic but has proven to be durable enough to take a hit or two. The F28 is stable enough to take some steady photos. Phone integration is excellent.
I would recommend this to a friend!
0points
0out of 0found this review helpful.
Share this review:
ITJim's Questions
ITJim has not submitted any questions.

JBL - FREE True Wireless In-Ear Headphones Gen 2 - Black
Perceive every detail of your music with this pair of JBL wireless headphones. The 10Hz to 22kHz frequency response lets you enjoy the full range of sound, while the in-line microphone provides an effortless switch to hands-free calls. Featuring 5.6mm dynamic drivers, these JBL wireless headphones supply rich, resonant bass for your enjoyment.
Are these noise cancelling for gyms that play really loud music?
No, they are not noise cancelling. They do come with three silicon ear canal adapters: small, medium, and Large. You can block out some sound if you use a connector that fits snuggly in the ear canal. This will muffle and not canceling outside noise.
7 years, 4 months ago
by
Posted by:
ITJim
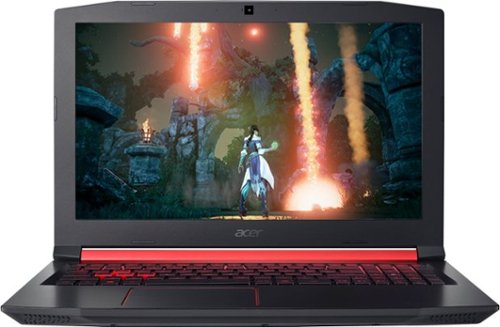
Acer - Nitro 5 15.6" Gaming Laptop - AMD Ryzen 5 - 8GB Memory - AMD Radeon RX 560X - 1TB Hard Drive
Enjoy engaging simulations and immersive visuals with this Acer Nitro 5 gaming laptop. The Radeon graphics card offers 4GB of dedicated video memory for efficient rendering performance, and the 2.GHz AMD Ryzen processor and 8GB of RAM provide ample computing power. This Acer Nitro 5 gaming laptop has a 1TB hard drive for your collection.
Not computer savvy. Love playing games but also surfing the web and photos. Just looking for a "standalone" that I can take anywhere...outside or in my room with no wires and connections. Is this good for that? And can I connect to a printer? Thanks!
If I understand you correctly, you want to know if you can surf the web, view photos, and connect to a wireless printer. Correct?
You can use this computer to surf the web, view photos, and connect to a wireless printer. You will need to a wireless network, of some kind, in order to surf the web without a wired connection. The printer could be connected to your wireless network or you could connect over bluetooth. It depends on your printer. My Acer Nitro 5 is connected wirelessly to my network, the internet, and my printer. If you are unsure of how to setup a wireless network, connect your laptop, or connect wirelessly to your printer, then I you will want to speak with your local Best Buy Geek Squad representative. They should be able to get you going. Hope this helps!
You can use this computer to surf the web, view photos, and connect to a wireless printer. You will need to a wireless network, of some kind, in order to surf the web without a wired connection. The printer could be connected to your wireless network or you could connect over bluetooth. It depends on your printer. My Acer Nitro 5 is connected wirelessly to my network, the internet, and my printer. If you are unsure of how to setup a wireless network, connect your laptop, or connect wirelessly to your printer, then I you will want to speak with your local Best Buy Geek Squad representative. They should be able to get you going. Hope this helps!
7 years, 6 months ago
by
Posted by:
ITJim
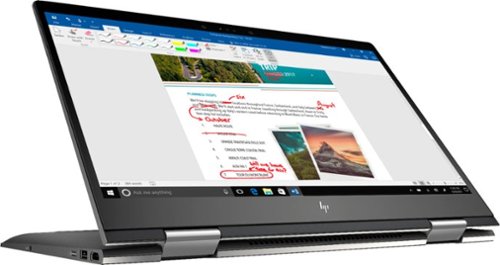
Envy x360 2-in-1 15.6" Touch-Screen Laptop - AMD Ryzen 5 - 8GB Memory - 1TB Hard Drive - HP Finish In Dark Ash Silver
Optimize your productivity and entertainment experience with this 15.6-inch HP Envy convertible laptop. Its AMD Ryzen 5 processor and 8GB of RAM provide smooth performance, and its AMD Radeon graphics loads stunning gaming visuals. This HP Envy convertible laptop has 1TB of storage, and its Windows Ink feature lets you work with a digital pen. Learn more.
What is the full name of the cpu?
The CPU is a Ryzen 5 2500u. It is a four core, eight thread CPU with integrated Vega Graphics in a 15W TDP. You can find more information from AMD's website here: https://www.amd.com/en/products/apu/amd-ryzen-5-2500u
8 years, 5 months ago
by
Posted by:
ITJim
Envy x360 2-in-1 15.6" Touch-Screen Laptop - AMD Ryzen 5 - 8GB Memory - 1TB Hard Drive - HP Finish In Dark Ash Silver
Optimize your productivity and entertainment experience with this 15.6-inch HP Envy convertible laptop. Its AMD Ryzen 5 processor and 8GB of RAM provide smooth performance, and its AMD Radeon graphics loads stunning gaming visuals. This HP Envy convertible laptop has 1TB of storage, and its Windows Ink feature lets you work with a digital pen. Learn more.
Does this laptop have a display port?
No. It has an HDMI output and a USB C connector that can do video with the right connector. Do a search on BB's site for: USB C to display port. There are several options listed.
8 years, 5 months ago
by
Posted by:
ITJim
Microsoft - Surface - 32GB - Black
Microsoft Surface Tablet: Do more on the go with the productivity of a laptop in the compact size of a tablet. Create documents with Microsoft Office RT, sync files between Windows devices and video chat with friends and family. The built-in kickstand props up your tablet at just the right angle for easy viewing.
do i have to get a network package to buy the surface?
ive been told i need to buy a network plan with a monthly charge. Or can i just use wifi?
No Surface product has native support for a Cell carrier such as ATT, Sprint, etc.... All you have is WiFi. If you have internet in your home with a WiFi router or some other device to server your WiFi enabled devices, then you have everything you need. Just make sure your connection is password protected and encrypted. You can also turn off the WiFi on the tablet, Airplane mode, and use it offline. I hope that answers your question.
12 years, 5 months ago
by
Posted by:
ITJim
from
Maine
Microsoft - Surface - 32GB - Black
Microsoft Surface Tablet: Do more on the go with the productivity of a laptop in the compact size of a tablet. Create documents with Microsoft Office RT, sync files between Windows devices and video chat with friends and family. The built-in kickstand props up your tablet at just the right angle for easy viewing.
Can I download PFD files from Internet Explorer to the Microsoft Surface RT?
Can I download PFD files from Internet Explorer to the Microsoft Surface RT, then view them without internet connection?
Yes you can. First go to the Microsoft Store and pick up the Free Adobe Acrobat Reader application. Then you can open PDFs from your flash drive, desktop, network locations, or even the web. Do keep in mind that your ability to open some PDFs from the web is also dependent upon the source of your PDFs. Finally, the surface, as I have experienced with most tablets, do have a difficult time with very large PDF files sizes and very complex PDFs. This is typically an issue with the small amount of RAM you have on a tablet as compared to a modern PC. (2GB on Surface RT and up to 64 GB on a PC). The amount of RAM does make a difference.
12 years, 5 months ago
by
Posted by:
ITJim
from
Maine
Samsung - Galaxy Note 2014 Edition - 10.1" - 16GB - Black
Samsung Galaxy Note 2014 Edition - 10.1" - 16GB: This sleek, stylish tablet comes with a 10.1" Full HD touch screen to display movies, Web sites and more with impressive visual fidelity. The included S Pen is pressure sensitive and allows you to draw, write, edit and more as easily as if you were using a real pen.
Syncing with a Windows 7 Laptop.
Will this version of Samsung Galaxy Note 10.1 2014 Edition be able to sync with my laptop and thus allow me to control it from the laptop, like the Samsung Tab 2 allows? This also mean I would be able to view content like pics and music from my laptop to my tablet and vice or verser.
I've found that the Galaxy 2014 edition doesn't sync well with anything. Or I haven't found the app or the feature or the best kept secret desktop app that will allow it. I'm thinking of something like iTunes that will sync everything for me and backup my device.
I have found a few work arounds the may interest you.
1) You can upload all of your photos and files to an SD card. You can then move the SD card between the computer and the tablet. Kind of 10 years go I know but there you go.
2) You can plug your tablet directly into the laptop with the USB cable that is connected to your power cord. Then you can easily move items between the tablet and your Laptop using the very useful Windows Explorer App. Thank you Microsoft.
3) If you want to take control of your laptop from your tablet then you can download another nifty Microsoft tool called Microsoft Remote Desktop. You will also have to allow remote connections in Windows on our laptop to make this work. I've already taken over my desktop to edit photos from my tablet. It works very well. However, there is no pinch and zoom. So if you can't read a word when you pull it up on the screen then there isn't anything you are going to do about it. There are other remote desktop apps that may give you additional features. X2 is one I used for my Ipad and is also available on Google Play.
4)Laptop taking control of the Tablet? I haven't heard anything about this. I do know, however, that Samsung saved all the best software for this own devices. Sync easily between your Samsung laptop and your device. However, this is only software and Samsung could be a hero and release it to the rest of their paying customers. I've seen the Samsung Laptops. I won't be buying one anytime soon.
12 years, 5 months ago
by
Posted by:
ITJim
from
Maine