TechMatcher's stats
- Review count220
- Helpfulness votes638
- First reviewNovember 3, 2015
- Last reviewJuly 2, 2026
- Featured reviews0
- Average rating4.4
Reviews comments
- Review comment count0
- Helpfulness votes0
- First review commentNone
- Last review commentNone
- Featured review comments0
Questions
- Question count0
- Helpfulness votes0
- First questionNone
- Last questionNone
- Featured questions0
- Answer count77
- Helpfulness votes101
- First answerNovember 3, 2015
- Last answerDecember 3, 2021
- Featured answers0
- Best answers12
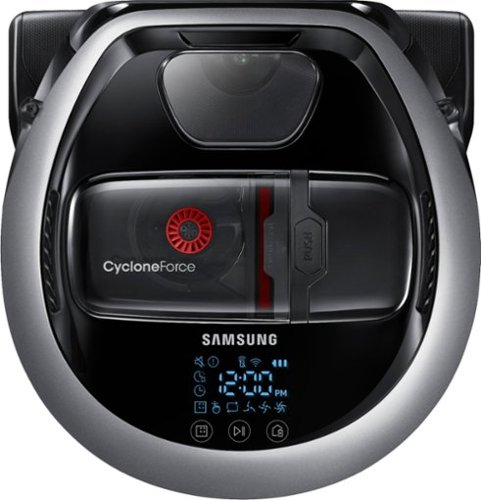
Clean your home with voice command or app-based programs by using this Samsung robot vacuum. Its digital camera and nine sensors let it find its way around, avoiding obstacles and mapping the most efficient path through your home. Wi-Fi connects this powerful Samsung robot vacuum to your smart home systems.
Customer Rating

5
The Superior Robot vacuum in my house
on June 3, 2018
Posted by: TechMatcher
from Minneapolis
Yes - I'm a bit of a tech geek. I have 3 robot vacuums - one on each floor of my 3 level home. Each vacbot is a different model - so this was a good test. So far - I think I like the Samsung vacbot the best - here's why.
1. It's got great suction and it is QUIETIER.
2. It cleans in corn rows (straight lines) unlike one of my other vacbots that just bounces off things.
3. It has both an App and Remote that allow me to drive it around, chase the cat, focus on a spot, etc. Neither of my two other vacbots have that.
4. Mobile app is very easy to schedule a cleaning time. "Ollie" cleans my floors tirelessly 6 days a week at 10 AM.
5. This vacbot was top pick in the Consumer Reports robotic vacuum roundup. I use Consumer Reports quite a bit when making purchase decisions.
The only bad thing about these vacbots is they are a little difficult to empty out the dust bin. On the Samsung, you actually have to disassemble a few parts to do it. It works ok - just adds a few steps to do daily.
Occasionally, all my vacbots get lost and I have to carry them back to the base station, not that big of a deal to me. Also, then sometimes get stuck by or under a lower piece of furniture - and the Samsung is not different in that regards.
Overall - I plan to "promote" Ollie to cleaning my main floor and "demote" one of my other bots to the basement. They are a little pricey, but will admit that I don't use my Dyson vacuum as much anymore except on tougher spots - you can't beat the suction power of a corded vacuum with a robot vac just yet.
Curious? Take a chance and see how it does for yourself! I bet you'll keep it!
My Best Buy number: 2178905958
Mobile Submission: False
I would recommend this to a friend!


Share this review:
0points
0of 0voted this as helpful.
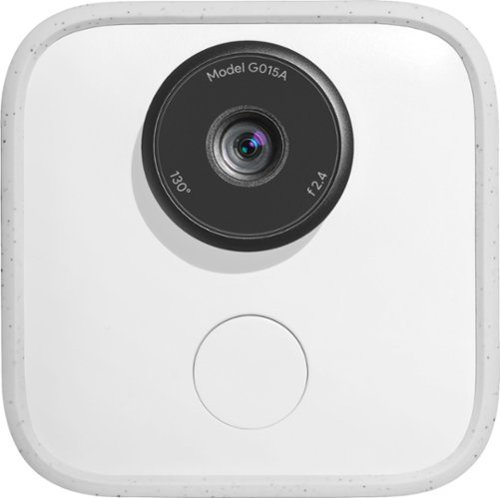
Capture and share special moments with Google Clips. Engineered to recognize faces and expressions, this clever camera automatically takes several-second-long audio-free motion photos, leaving you free to focus on the occasion. Enhanced with Super Res mode, the Google Clips device syncs data with your phone and lets you save any frame as a high-resolution still photo.
Customer Rating

4
Clever Camera - creative uses
on June 3, 2018
Posted by: TechMatcher
from Minneapolis
To be honest - I was a little unsure how to "test" this Google Clips camera. I already have my house monitored by 8 wireless cameras, so I wasn't sure of how to use or where to place it. After thinking a few days - BOOM - I had an idea!
In the last few days, I've been attend High School Graduation parties. I decided to clip the camera on the photo boards that the graduates are displaying - capturing candid shots of the guests as they walk past looking at the pictures! AWESOME! We got some pretty cool shots!
The camera itself is impressive. It has 16GB storage, a large 130 degree field of view and takes live photo shots! My only complaint is the 3 hour battery life. You have to recharge it everyday at a minimum - so just another thing I have to remember to plug in.
The concept is great - but I'd like to see an 8+ hour battery. I turned it on before the 4 hours grad party started so I could gather some of the setup, and burned through an hours and a half of the battery - so only could capture 90 minutes of the party....
I'd also like to see a few different mounts come standard. Perhaps a suction cup, larger clip and adjustable angle.
Overall - if you're looking for a new perspective on your photos - this is a very cool addition to parties, events and normal family life!
My Best Buy number: 2178905958
Mobile Submission: False
I would recommend this to a friend!


Share this review:
0points
0of 0voted this as helpful.
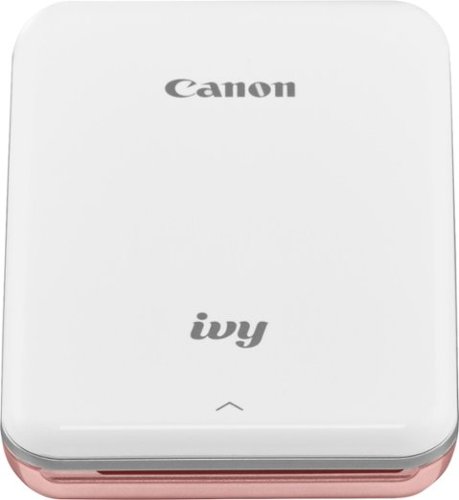
Share prints of your smartphone snaps with this compact Canon mini photo printer. It wirelessly connects to a smartphone app that lets you add frames, emojis and text to your pictures before you print them. This Canon mini photo printer uses special ink-free photo paper to produce clear, smudge-free images.
Customer Rating
5
Very cool and fun!
on June 3, 2018
Posted by: TechMatcher
from Minneapolis
Every once in a while a product come along that really impresses me. This Canon IVY mini photo printer is definitely one of those! I've impressed more that a few people at recent graduation parties by taking a selfie with the new grad and pulling this little printer out of my pocket and creating an instant photo for them! They absolutely love it!
There are a couple things to know:
1. Takes about 30 seconds to print a picture. Kinda long, but for the convenience and cool factor - not bad.
2. It holds 10 sheets of paper and you should buy paper by the 50 pack. You'll burn through them quickly at a party as everybody wants a photo shot.
3. The pictures are really convenient wallet size - people throw them in their wallet and carry them around.
4. Full charge takes a little over an hour.
The software (app) is basically a full featured software editor! You can add text, frames, graphics - very cool! This is one device I'm going to carry around with me - might even earn a spot in my backpack for a while!
A quick note is that I would recommended a bundle purchase of more paper, tether strap and a carrying case!
Nice job Canon - I can see lots of people using these!
My Best Buy number: 2178905958
Mobile Submission: False
I would recommend this to a friend!


Share this review:
+6points
9of 12voted this as helpful.
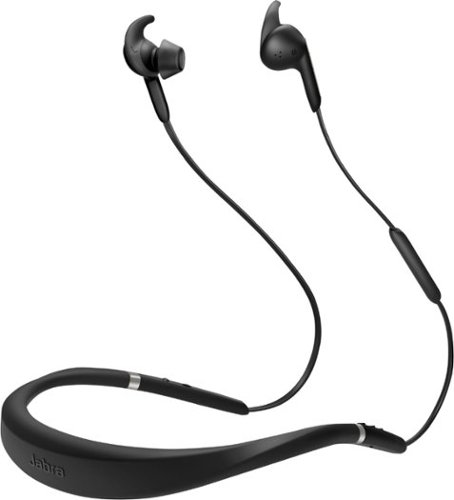
Count on crystal-clear voice communication with these Jabra Elite wireless neckband headphones. Three-microphone call technology and professional-grade active noise cancellation block ambient sounds, and they come with different-sized EarGels for a customizable fit. These Jabra Elite wireless neckband headphones support Amazon Alexa, Siri and Google Assistant for voice-activated control.
Customer Rating
4
Great sound, decent noise cancelling, fits well!
on May 29, 2018
Posted by: TechMatcher
from Minneapolis
Overall - great fit in my ears and very comfortable. Others have complained about comfort - but I guess it's really personal preference! Even with Active Noise Cancelling (ANC) turned on, I get just about 8 hours of run time and a quick 2 hour charge! These Jabra 65e's have "EarGel" ear pieces, helping to block out noise withing even being turned on and make them for comfortable for duration wearing!
The snug fitting buds hold tight to my sweaty ears even during workouts - a definite plus. The con is I find myself taking one ear bud out when trying to talk to people.
I commute on a public bus to avoid rush hour traffic, and these work just great for that! Block out all that unwanted bus and traffic noise.
Great for listening to audio books! The neck halo is comfortable, but eventually I'll likely upgrade to true wireless earbuds and not have the wire draping around my neck.
Great for listening to audio books! The neck halo is comfortable, but eventually I'll likely upgrade to true wireless earbuds and not have the wire draping around my neck.
My friends tell me the call quality is good - and could be easily used in the car - just be careful as you may not hear other driving sounds that are important to you! I find myself NOT using the hands free features and talking with on the bus though - looks to much like I'm talking to myself and to easy for others to hear.
Use the mobile app to tweak your listening experience a bit - not necessary but kind of cool.
Unfortunately, they did not come with a bag, pouch or case of any sort. A bit of a miss in my opinion as many of us will take these on the go and just have throw them in the bag or backpack with the rest of your junk. I suppose the quality build and materials can take it, but would have been nice to include a case.
My Best Buy number: 2178905958
Mobile Submission: False
I would recommend this to a friend!


Share this review:
+1point
1of 1voted this as helpful.
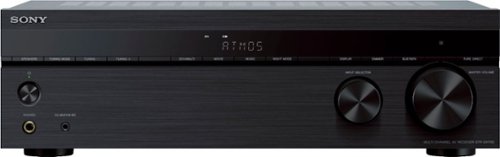
Give your home entertainment system a cinematic upgrade with the STR-DH790 7.2ch AV receiver. Experience the same all-encompassing surround sound you get in movie theaters at home with Dolby Atmos and DTS:X support. eARC1, 2 lets you enjoy these latest audio formats with one-cable HDMI connection from your compatible TV. Plus, superior picture quality to match with 4K HDR pass-through.
Customer Rating
5
Easy setup, stunning sound distribution!
on May 5, 2018
Posted by: TechMatcher
from Minneapolis
I’ve burned through several receivers over the last 20 years – and have kept upgrading my equipment to match the technology it drives – and this Sony DH790 is no exception as I needed it to handle my 4K TV and my first attempt at Dolby Atmos sound.
What is Atmos? It’s even greater surround sound – based on sounds objects vs sound channels. It’s been described as “To help deliver this vision, Atmos equipped cinemas have side speakers that start from the edge of the screen and go all around the auditorium, additional subwoofers and two speaker arrays going directly overhead. Since its launch Atmos has been installed on over 650 screens in 40 countries, including 9 screens in the UK, and 120 films have been made with Dolby Atmos soundtracks, including Gravity, Godzilla and X-Men: Days of Future Past.”
One of the first things I noticed with this unit is the accuracy of the sound setup with the microphone. Set the microphone on your favorite seat and run through your speakers – it’s adjust the sound automatically and accurately – more than I can say for many of the receivers I’ve owned. As experienced with many other users, I can finally hear my rear speakers for both movie viewing and audio listening!
With more than enough power, 4K and 3D pass through features and very reasonable price – you can go wrong if you’re in the market for a solid receiver!
My Best Buy number: 2178905958
Mobile Submission: False
I would recommend this to a friend!


Share this review:
-6points
19of 44voted this as helpful.
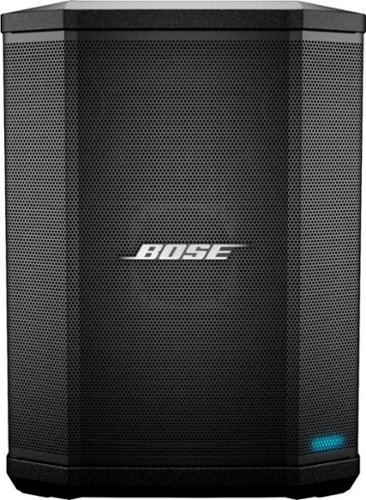
Whether it's streaming music wirelessly or plugging in a microphone, keyboard or guitar, the S1 Pro Portable Bluetooth Speaker and PA System is designed to be your go-anywhere music system for nearly any occasion. With rugged, lightweight materials, the S1 Pro speaker is designed to travel. A convenient carry handle makes it easy to get to the party, and once you're there, let the S1 Pro make it look easy. Place it on the ground, on its side, tilted back, or elevated. The speaker's unique multi-position design and built-in Auto EQ ensure that the music always sounds the way it should and that everyone can hear it. For the ultimate freedom, play for up to 11 hours using the internal rechargeable lithium-ion battery and go wherever the fun is happening. So, when it's your turn to bring the music, bring a pro. Bring the Bose S1 Pro.
Customer Rating
5
Excellent warm sound! Easy to use and carry!
on May 5, 2018
Posted by: TechMatcher
from Minneapolis
The device is perfect for me. For my job, I do lots of presentations to both small and medium sized audiences. On the side, I co-chair a local Technical User Group, coordinate the meeting, setup the venue and provide audio/video needs for the group. Enter the Bose S1 Pro Portable speaker! It’s Awesome!
Both corded and battery powered, Bluetooth enabled (so I play warm up music before my presentations right off my phone), and 2 input channels for which I use one for a microphone and the other for computer sounds. Just perfect. How’s it sound? Crisp, clean and full. The 4 speakers in this unit produce beautiful, even sound – even from the microphone.
For playing music – it’s not the loudest device – much quieter than you’d expect for its physical size but adequate for small rooms, ceremonies and gatherings.
I love that the speaker can be used in multiple positions – mounted on a stand, set on the floor, angled on floor or cabinet.
Overall – great warm sound, super easy and convenient to setup and use! I love it!
My Best Buy number: 2178905958
Mobile Submission: False
I would recommend this to a friend!


Share this review:
+5points
5of 5voted this as helpful.

ASUS Laptop: Experience powerful gaming performance in a slim, compact package with this 15.6-inch ASUS laptop. Its 16GB of DDR4 RAM and Intel Core i7 processor let you multitask between programs, and its GTX 1060 graphics card smoothly renders 3D scenes. This ASUS laptop has a 1TB HDD, 8GB SSHD and 128GB SSD for versatile storage options and fast boot times.
Customer Rating
5
Awesome upgrade!
on April 27, 2018
Posted by: TechMatcher
from Minneapolis
Hi All! I'm completely stoked about the new Asus ROG GU501 gaming laptop! My overall impression is it is a fast capable machine that will handle nearly any game you play - there are a few notes on that I'll discuss later. See my attached pictures of performance stats and the ROG gaming center screen - the latter allowing you to create profiles and override certain features to make your gaming experience better!
When playing either Fortnite or Witcher 3, this rig handled the games smoothly and easily. Project Cars however, when playing with 10+ other cars on the track struggled a bit and made it difficult to steer. I think games with this much realism require more memory and high end graphics cards to always operate smoothly.
The 6 core, 3.9Ghz system with 16GB RAM is on par with Asus high end gaming laptops. They usually feature a higher end screen with G-Sync and or more SSD drive space (GM501GS or GM501GM) but have most other components exactly the same.
The body of the laptop is sleek, black metal that may show scratches if you wear a metal watch or rings. The ASUS Aura SYNC backlit chiclet keyboard has all individually light rainbow LEDs that is fully programmable but the keys are a bit small for my preference for you full time. Most people will opt for a full size keyboard for a more natural feel.
One of the first things I noticed was the large speaker on this laptop. It's a full 2" right near the screen - one thing that makes this such a big unit. Sounds great! Dual array microphones it a super feature as well!
Overall again, this is a solid entry level gaming laptop for those wanna be gamers. It can be used as a full desktop replacement machine as well - and I'll likely use it as both. Aside from the occasional fan noise as references by others and a non-4k, non-touchscreen screen, this is an awesome unit and worthy of your consideration!
My Best Buy number: 2178905958
Mobile Submission: False
I would recommend this to a friend!


Share this review:
0points
0of 0voted this as helpful.

Only at Best BuyPull in HDTV signals from local stations up to 60 miles away with this Mohu Beam antenna. It's 23 inches long and looks like a sound bar to blend with your home entertainment equipment, and you can mounts it on the wall. This Mohu Beam antenna includes a signal amplifier for clear digital reception.
Customer Rating
4
Wow - Great picture!
on April 10, 2018
Posted by: TechMatcher
from Minneapolis
I'll admit I was a bit skeptical - I've paid for cable TV for the last 30 years! It took me all of 5 minutes to hook the MoHu blade up to my TV and set in on my window sill for initial testing purposes.
After power on the TV, switching inputs from HDMI to TV, going into the TV menu to select AIR vs CABLE for signal and then letting the TV auto-program itself - I was watching 50 channels FREE with very good sound and picture quality! I did notice a few of the channels produced a "digitized" picture with broken sound - that could be the initial placement of my antenna and signal. I noticed about 40% of the channels do not take up the full width of the TV screen, but the main local channels come in very clear!
Overall - very impressed and will play around a bit with antenna position. I'm paying over $200/month for cable + internet and bet I could reduce that to $40-60 per month for just internet! This device deserves some serious consideration!
My Best Buy number: 2178905958
Mobile Submission: False
I would recommend this to a friend!


Share this review:
+3points
3of 3voted this as helpful.
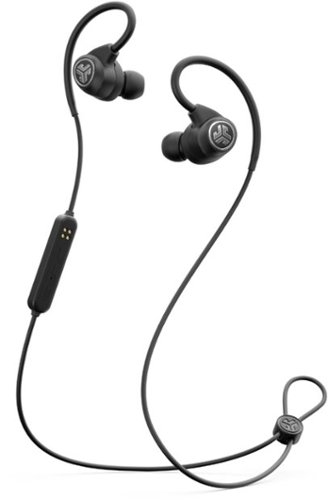
Amp up your workouts with these JLab Epic Sport wireless earbuds. Memory Wire ear hooks keep them securely in place during activity, and their six tip options and interchangeable Cush Fins let you make custom adjustments for an ideal fit. These JLab Epic Sport wireless earbuds have a 12-hour battery life for uninterrupted listening during long training sessions.
Customer Rating
5
Excellent for Exercising!
on April 10, 2018
Posted by: TechMatcher
from Minneapolis
I'm a sweater - meaning I sweat a lot working out. I've had many issues with finding earbuds that will stay in my ears for the duration of my activity due to my heavy perspiration. However, these EPIC Sports worked awesome, stayed snugly in place and have become my go-to earbuds when working out!
I attribute most of the fit success to the adjustable memory wire that you can mold to your ear to assist holding those earbuds in place. They also come with 5 ear tips and 3 cush fins to really get the right fit for your ear. Did I mention that are IP66 splashproof? Yup - that will handle my heavy sweating - just don't take them in the pool with you.
Sound quality is very good with the 8mm drivers in each earbud. There are 3 different EQ modes to choose from as well, so you are bound to like at least one of them. I haven't verified the 12 hour play time yet - likely I won't ever run them out as I recharge them weekly.
Added bonus - a travel case to protect them in your backpack! Definitely a solid performer that I will use often!
My Best Buy number: 2178905958
Mobile Submission: False
I would recommend this to a friend!

Share this review:
+8points
8of 8voted this as helpful.
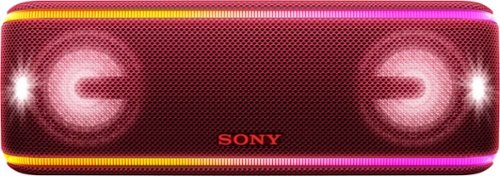
Start your own personal music festival with this Sony portable Bluetooth speaker. Its Bluetooth and NFC connectivity provide wireless access to your favorite music playlists, and its durable and rustproof exterior keep it safe at the beach. This Sony wireless Bluetooth speaker includes intuitive LIVE SOUND speakers that create a three-dimensional experience.
Customer Rating
5
Yup - Love it!
on March 25, 2018
Posted by: TechMatcher
from Minneapolis
I really like the new Sony lineup of portable, bass-focused, water/dust resistant Bluetooth speakers. The XB41 is the Grand-daddy of them all, boasting the longest play time, most lighting effects and most extreme party modes!
Right away, I paired it up and launched into some music from my iphone. The kids came running. I explained this one is mine. I dazzled them with the Fiesta app to produce different lighting effects and some DJ effects. I used the Sony Music Center to further enhance the experience and sent the kids away whining that they don't get it. Ha. Score one for dad!
The waterproof design makes it safer to be used near the pool, on the boat, in the bathroom during a steamy shower, etc. The fact that I can connect up to 100 more in a chain means the boat barge parties can really get going! Using it as a power source for my iphone is a wonderful feature as well. Nice job Sony!
The light effects are cool - especially if you turn down your normal lights and just let the speaker and maybe some beer signs guide you. If you don't like them, yes - you can turn them off with the app.
Overall - just love it. Go big - get the XB41. Here's picture comparing the sized to my desktop mouse.
My Best Buy number: 2178905958
Mobile Submission: False
I would recommend this to a friend!


Share this review:
+2points
2of 2voted this as helpful.
TechMatcher's Review Comments
TechMatcher has not submitted comments on any reviews.
TechMatcher's Questions
TechMatcher has not submitted any questions.
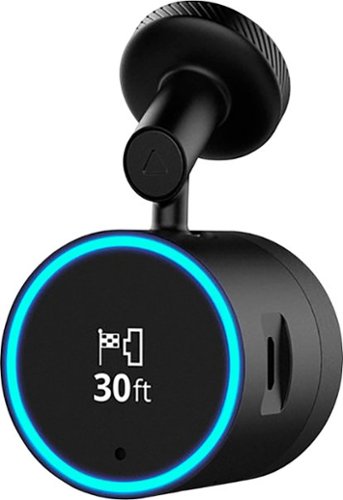
Garmin Speak~ Plus with Amazon Alexa is what you love about Amazon Alexa, now in your vehicle. Use voice control for hands-free access to music, news, navigation and more. Plus, a built-in dash cam gives you forward collision and lane departure warnings.
Can the lane departure tones be turned off? It's really really annoying! Goes off every time you come up on a car at a stop light. It's not realistic to stay 5 car lengths away from the car in front of you at a light...lots birds would be flipped at You!
Aside from muting the device itself, you can turn off selective features: https://www8.garmin.com/manuals/webhelp/speakplus/EN-US/GUID-EFD3414D-5D4A-4BB7-9496-ECAD2C4D994E.html
I don't see anything about just turning off the tone for that specific feature.
I don't see anything about just turning off the tone for that specific feature.
8 years, 4 months ago
by
TechMatcher
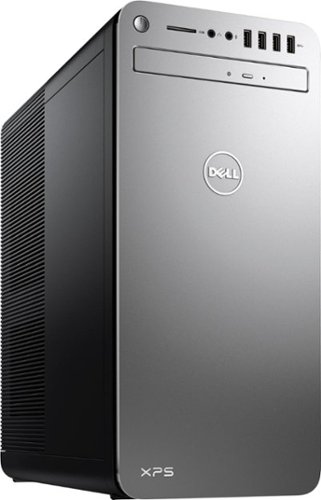
XPS Desktop - Intel Core i7 - 16GB Memory - NVIDIA GeForce GTX 1050 Ti - 2TB Hard Drive + Intel Optane Memory
What is the brand and model of the graphic card used in this machine?
Intel HD Graphics 630 - so it's built in. Not a dedicated card.

8 years, 11 months ago
by
TechMatcher
XPS Desktop - Intel Core i7 - 16GB Memory - NVIDIA GeForce GTX 1050 Ti - 2TB Hard Drive + Intel Optane Memory
Which version of Windows 10 does this come with, Home or Pro?
XPS Desktop - Intel Core i7 - 16GB Memory - NVIDIA GeForce GTX 1050 Ti - 2TB Hard Drive + Intel Optane Memory
What version of Windows 10 is it shipped with? Windows 10 Home ? or Pro?
XPS Desktop - Intel Core i7 - 16GB Memory - NVIDIA GeForce GTX 1050 Ti - 2TB Hard Drive + Intel Optane Memory
Since there is no graphics card, I'm curious to the max resolution. My Dell monitor is capable of 2560x1440. Will I need an add on card to get this resolution?
No - you don't need to add a graphics card. I'm running 2560x1440 resolution on my ASUS 2K monitor right now from this machine.
8 years, 11 months ago
by
TechMatcher
XPS Desktop - Intel Core i7 - 16GB Memory - NVIDIA GeForce GTX 1050 Ti - 2TB Hard Drive + Intel Optane Memory
Which version of the I7700 processor is it? (e.g. I770K 4.2 GHz or I7700 4.2 or I770T @ 2.9GHz)?
It is this one:
https://ark.intel.com/products/97128/Intel-Core-i7-7700-Processor-8M-Cache-up-to-4_20-GHz
https://ark.intel.com/products/97128/Intel-Core-i7-7700-Processor-8M-Cache-up-to-4_20-GHz

8 years, 11 months ago
by
TechMatcher
XPS Desktop - Intel Core i7 - 16GB Memory - NVIDIA GeForce GTX 1050 Ti - 2TB Hard Drive + Intel Optane Memory
Can I use TWO monitors with this or will I need an additional graphics card of some type?
Yes you could use two - you can use the HDMI and the Display Port and even the USB C port (which is display port).
8 years, 11 months ago
by
TechMatcher
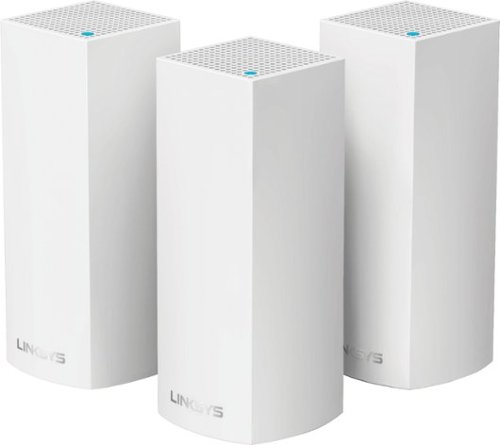
Make your home an internet haven with this versatile Linksys Velop wireless Wi-Fi system. Three identical tri-band dual-stream AC2200 routers, each equipped with a quad-core ARM Cortex-A7 processor, deliver lightning-fast internet. Equipped with Bluetooth 4.0/LE, this Linksys Velop wireless Wi-Fi system is simple to set up and pairs easily with computers, tablets and smart devices.
Will this system work in a metal building with walls, I have AT&T and currently use an M-Cell booster from them but it does not extend my service throughout the entire building.
Unfortunately, you never know for sure until you've tried it - as all structures and materials are a bit different. However, using a three node system like this starts you off with better odds that a single router! Give it a try and see how it works!
9 years, 5 months ago
by
TechMatcher
Make your home an internet haven with this versatile Linksys Velop wireless Wi-Fi system. Three identical tri-band dual-stream AC2200 routers, each equipped with a quad-core ARM Cortex-A7 processor, deliver lightning-fast internet. Equipped with Bluetooth 4.0/LE, this Linksys Velop wireless Wi-Fi system is simple to set up and pairs easily with computers, tablets and smart devices.
I currently have the latest AT&T Pace modem / router. Can the AT&T modem be placed into a bridge mode enabling just the modem function? From research, this is a very complicated procedure. I would prefer to return the rental AT&T unit.
I would agree with your second statement - and would always recommend that people purchase their own dedicated modem (cable or DSL) and then use a separate dedicated router configuration. You have more control that way - can keep your devices firmware updated regularily, and usually have better equipment!
9 years, 5 months ago
by
TechMatcher
Make your home an internet haven with this versatile Linksys Velop wireless Wi-Fi system. Three identical tri-band dual-stream AC2200 routers, each equipped with a quad-core ARM Cortex-A7 processor, deliver lightning-fast internet. Equipped with Bluetooth 4.0/LE, this Linksys Velop wireless Wi-Fi system is simple to set up and pairs easily with computers, tablets and smart devices.
The advertising states that Velop works with Alexa but I can find no information on how to set this up. Help?
Here's the link to enable the Linksys skills for Alexa. They're not in the Alexa app yet.
https://www.alexaskillstore.com/Linksys-Smart-Wi-Fi/41803
https://www.alexaskillstore.com/Linksys-Smart-Wi-Fi/41803
9 years, 5 months ago
by
TechMatcher