ITJim's stats
- Review count120
- Helpfulness votes1,493
- First reviewNovember 23, 2013
- Last reviewMay 8, 2024
- Featured reviews0
- Average rating4.3
Reviews comments
- Review comment count0
- Helpfulness votes0
- First review commentNone
- Last review commentNone
- Featured review comments0
Questions
- Question count0
- Helpfulness votes0
- First questionNone
- Last questionNone
- Featured questions0
- Answer count18
- Helpfulness votes30
- First answerNovember 23, 2013
- Last answerMay 22, 2021
- Featured answers0
- Best answers3
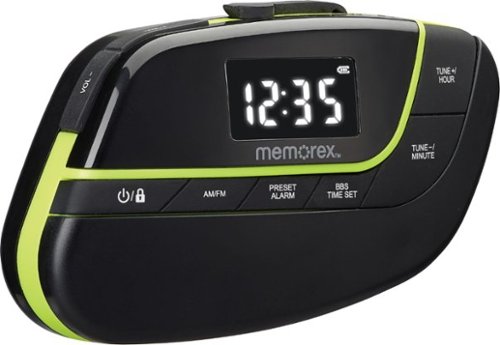
Listen to your favorite music on the go with this Memorex armband radio. The digital AM/FM radio offers access to multiple stations, while an LCD screen ensures easy navigation across different frequencies. This Memorex armband radio has a built-in bass boost system for versatile audio options and a digital clock to keep track of time.
Customer Rating

2
Good but not my new workout buddy
on April 19, 2020
Posted by: ITJim
from Maine
The radio is sporty looking. With batteries, the weight is comparable to a cell phone. The arm strap is sturdy, adjustable, and comfortable. At no time did I feel like the radio was going to run down my arm or fall off. The radio also feels like it would survive an impact or two if dropped on the pavement from standing height. It is easy to program. Just follow the included instructions. The included earbuds are comfortable in the ear.
The radio ships with three different earbud caps to accommodate multiple ear hole sizes. The earbuds also come with a silicon claw that helps the earbuds remain in your ears. I found the default earbud caps and claw to be comfortable. The radio is cable headphones only. No Bluetooth.
Tuning between stations is easy. Press the tuner button once to increase or decrease the channel by .1 increments. Press and hold either channel button will cause the tuner to move up or down the spectrum until it finds the next station. Presets, time, and alarm setup are just as easy as changing the channel. The included instructions outline the process for you. The radio is capable of AM and PM. It is not capable of picking up HD or digital channels.
Features I did not like. First, there is a constant hiss from the radio. It does not matter if the radio is tuned into a station, between stations, or if the volume is set to zero. The hiss is present regardless of programming material. I would have liked it if Memorex added a noise filter. Next, the volume level is just south of too loud at the lowest level. There are 16 volume levels from 0 to 15. 0 is off. The 1 setting is loud. Setting 2 is way too loud. I would like to have the volume start at a lower volume and get louder from there. I tried this with different wired headphones. It is the radio. Not the headphones.
The Memorex has a bass boost setting. The implementation is awful. The feature made the content muddy.
One final note. You must press the on/off switch to turn the radio on and off. Unlike your cell phone, or other modern smart audio devices, the content does not stop simply because you pull the headphones out of the headphone jack. You must turn off the radio via the power button or you will burn through your batteries.
Overall, for the price, this is a good beater radio. I’ll throw it in my hiking pack and use on hikes, camping trips, and during emergencies where cell reception is unavailable or limited. I can also hook these to any speaker that has a mini-stereo jack. The volume may not be as much of an issue because most portable speakers manage volume independently from the source.
Thank you for reading my review.
Mobile Submission: False
No, I would not recommend this to a friend.
Share this review:
+1point
1of 1voted this as helpful.
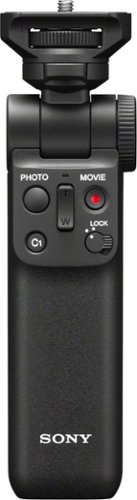
Take professional-grade pictures with this Sony wireless shooting grip. Bluetooth technology allows cable-free connection to compatible cameras, while the contoured design helps increase stability and comfort during use. This Sony wireless shooting grip has a flexible tilt function for positioning the camera, and the integrated legs spread to create a tripod for hands-free operation.
Posted by: ITJim
from Maine
I purchased the Sony Alpha 6100 camera about a month ago. I have been having a great time with it but felt that something was missing. Last week, I took a trip. I shot about a thousand photos and a dozen or so videos. There were a few instances where I wanted to take some low light photos. One was a night shot of a cruise ship. I needed a tripod but only had a table and a cruddy $10 flexible mini tripod. There is a reason why it is spends more time in my bag then anywhere else. I found it difficult to keep the camera steady using the cheap tripod. The image turned out awful.
I knew that Sony made a shooting grip but never gave it much thought. I used my camera a lot during this trip for both stills and video. Mostly, I found myself using my Sony Alpha like most people use a Go Pro; minus the extreme sports. The more I used the camera, the more I imagined how much easier it would be to operate the camera with the matching shooting grip.
When I returned home, I decided to invest in Sony’s GP-VPT2BT Bluetooth enabled shooting grip. I loved it from the first moment I attached it to my camera. No joking. I loved how the grip felt in my hand and, in extension, how the camera felt on the shooting grip! The tripod opened with little effort. It collapses into a handle in a second.
Setup? It took about a minute to go from Box to camera. It is that easy to install. If you can turn a screw you can attached this tripod. There is a CR2032 lithium cell battery that installs into the grip. This supplies the power for the remote camera functions. The shooting grip also comes with a nylon storage bag. Bluetooth setup took about 30 seconds. Everything just works after that.
The grip is comfortable. I can easily operate the camera with a single hand. The handle allows you to snap stills, use the zoom capabilities of your lens if it is supported, start and stop video recordings, and activate the Auto focus functions. The grip also has a lock switch so that you can deactivate all of the grip’s functions. This prevents accidently activating any functions while you manipulate the camera on the grip. I was a little confused with the C1 button. It activates the Alpha’s auto focus settings. The button allowed me to activate the auto focus menu items, but I still had to use the Alpha’s directional pad to navigate to the auto focus function I wanted to use. I was expecting the zoom rocker button to double as a navigation switch for any vertical organized menus. Not in this case.
The photo grip has two mechanical buttons that allow you to unlock, position, and then lock the camera into positions along both the X and Y axis. You can do this either in tripod mode or grip mode. The buttons move easily. There are stops built into each axis that will catch the camera. For example, the X-axis controls the direction the camera is facing along the horizontal axis while it is sitting on a table. Pressing the button at the base of the camera allows the camera to swing the 360 degrees in either direction. If you release the button, then the camera will automatically lock at 45 degrees. There are a total of four stops along the X-axis. You get a similar behavior along the Y-axis. The difference is that the stops are much closer together.
The tripod legs slip out smoothly. There is enough tension in the legs to allow for a controlled extension and retraction. You will need two hands to extend the legs. The bottom of each leg is rubberized. I have had zero issues with camera motion once setup. It is a very stable design. The grip’s control pad buttons are fully accessible and easy to use in this mode. I also have full access to all the camera’s functions. I love that I can swing out the Alpha’s LCD screen to allow a more comfortable viewing angle for my shots in both tripod and shooting grip modes.
The camera grip is also very stable when walking around with my camera. I have had tripods in the past that allow the camera to move around on the camera attachment. I have also been in situations where I had to level the tripod around the camera attachment instead of the other way around. The attachment is tight against the camera body with zero play. I love this. I also love that I can hold the camera level with my chest and snap photos and videos with little to no effort. All I do is pull out the Alpha’s LCD to a comfortable viewing position and start shooting. I was excited by the Alpha’s ability to shoot 4K video but not so excited that I had to hold it up near my face to get the shots I wanted. The photo grip turns my Alpha into a stable camcorder! I find this superior over my older Sony camcorder because I do not have to fight with the annoying, uncomfortable hand strap that stabilizes my camcorder to my hand. My auto stabilizing lens makes sure my videos are shake free.
I have two gripes about this grip. First, the limited functionality of the C1 button. Why? Second, the battery. I do not understand why Sony opted for a replaceable battery over a rechargeable one. Maybe it had to do with weight, expense, or some other reason. I would have liked to see rechargeable. I do not know how long these batteries will last. I do know that replacing the CR2032 can be expensive. The good news is that the shooting grip will function as a trip and a tripod without the control panel. So, loosing power does not mean the end of your photo journey.
I love this grip. I cannot believe I picked up Sony’s Alpha without the shooting grip. I won’t make that mistake again. It is worth the extra investment to me. I just wish I picked one up before my trip.
Mobile Submission: False
I would recommend this to a friend!
Share this review:
-1point
0of 1voted this as helpful.
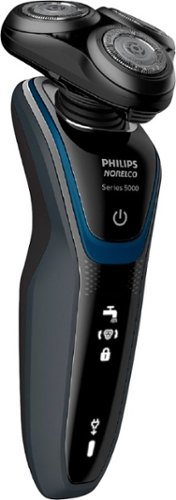
Keep your facial hair well groomed with this Philips Norelco Shaver 5300 electric shaver. The precise blades and independent shaving heads help ensure a close shave and make navigating around facial contours easy. This Philips Norelco Shaver 5300 electric shaver features Aquatec technology for a comfortable wet or dry shave.
Customer Rating

4
Great product with one drawback
on January 19, 2020
Posted by: ITJim
from Maine
My go to shaving technology for years has been razor blades such as Gillette. I have always liked the baby smooth feeling I get from a blade. However, using blades is getting expensive. Lifestyle changes have prompted me to revisit electric razors. And yes, this is an actual thing.
Overall, I like the Philips Norelco 5300 electric razor. My first electric was from a competitor that costs $20 less than the 5300. I was not satisfied with the less expensive model. The extra $20 for the 5300 is well worth the investment. However, the quality of shave is still not as good as a blade.
Feel and Operation:
Feel and Operation:
The 5300 feels good in the hand. There is a rubberized band that runs along the perimeter of the razor ensure the razor does not slip in your hand. The grip works equally well wet or dry. The three razor heads feel smooth to the face. I did not notice any pulling on my stubble as the razor heads passed along my skin. I normally feel this most under my nose, chin, and under my lower lip. I did notice a real difference in feel between wet and dry operations. I will cover this below.
Cleaning:
Cleaning:
Cleaning is super simple. Put the 5300 under the faucet, press the button release the cutting heads, and rinse. Done!
1-Day Growth shaving experience:
1-Day Growth shaving experience:
I decided to shave the moment the razor reached 100% charge. In this case, I only had 24-hour stubble. The shave was rough and irritated my skin. This is mostly due to my skin being used to a blade and not an electric shaver. Please keep this fact in mind if you are making the switch. It does take a few shaves for your skin to adjust to how you are shaving. It is not indicative of the quality of the 5300.
After the shave, my skin did not feel as smooth as a blade shave. But, that is not the end of the story.
3-Day Growth Shaving Experience – Dry Shave:
3-Day Growth Shaving Experience – Dry Shave:
This is where I really focused in on the shaving experience. I did wet and dry shaving using half my face for both. Pictures of before and after are included for your inspection. I also applied an accurate, scientific measurement that is generally accepted in many industries known as WAF or Wife Acceptance Factor. Yes, this is a real thing.
On a scale of 1 through 10, where 1 is baby smooth and 10 is porcupine, my three-day stubble was rated as a four by my wife. So, WAF factor equals 4.
I dry shaved the right side of my face. The 5300 was smooth against my skin. No pulling of my stubble regardless of where it was on my face. I also noticed there was no pulling of my skin. My skin was also less irritated compared to the 24-hour stubble shave I did previous. This is due to my skin getting used to the electric razor. It did take additional passes to get shave everything to my satisfaction. This included little hairs and rough spots that the were missed on the first or second pass. Overall, it took me three passes to shave the entire right side of my face.
WAF of 2. Remember, WAF 1 is blade shave.
3-Day Growth Shaving Experience – Wet Shave:
3-Day Growth Shaving Experience – Wet Shave:
The left side of my face was shaved using water and Barbasol shaving cream from a can. The water is applied to the skin first and then the shaving cream applied over the wet skin. The shave was baby smooth on all areas where the shaving cream was present. However, each pass of the 5300 removed the shaving cream. The 5300 pulled at the wet, shaving cream free skin making all but the first pass impossible.
This resulted in a WAF of 3. Please see included photos.
There was some shaving. The stiffer hair was shaven. The software hair was left behind. Conclusion. I will not be using the 5300 for wet shaving.
Final thoughts:
Final thoughts:
I like the 5300 as far as electric razors go. It is not as smooth as a blade shave. Then again, I don’t have to worry about nicks and cuts from an electric razor. The shave may not be as close, but it is more predictable and consistent. I used to use a blade for multiple shaves. However, each successive shave after the first increased the incident of cut skin and bleeding. Eventually, the blade was useless thus costing me money every time I had to replace. Additionally, I do some travel. It is far easier to transport an electric razor these days than a bladed instrument.
Overall, I am glad I spent the extra $20 for the 5300. The shave is close enough to a blade that my wife is happy. The shave is clean enough to pass as clean shaven at work. It is portable. Waterproof. Easy to clean. And the heads hug every contour of my face with ease. I will not be using this razor for wet shaving since I think the shave is inferior to dry shaving. Then again, my test includes a single brand of shaving cream and a single product line within that brand. Experiment and see what works for you.
I cannot give the 5300 a 5-star rating simply because my wet shaving experience was not ideal. It does give a good, consistent dry shave.
I hope you found this review helpful.
Mobile Submission: False
I would recommend this to a friend!


Share this review:
+61points
67of 73voted this as helpful.
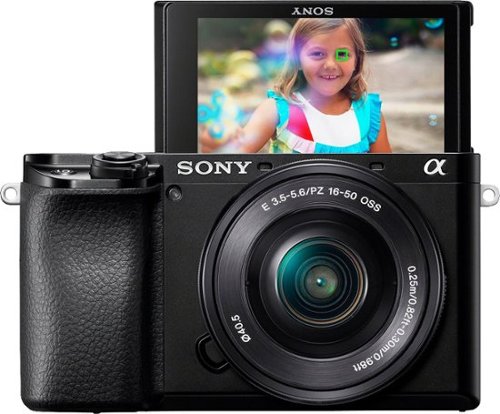
Take eye-catching photos with this Sony Alpha 6100 mirrorless digital camera with 16-50mm lens. The BIONZ X image processor coupled with the 24.2MP CMOS sensor ensures images of the highest quality. The 16-50mm lens offers a 24-75mm equivalent focal length range, making this Sony Alpha 6100 mirrorless digital camera ideal for portraits and even nighttime photography.
Posted by: ITJim
from Maine
Conclusion:
This is by no means a complete review of this camera and all its features. This is a feature rich camera that no single review will be able to fully appreciate.
I love this camera! It is versatile, compact, and takes excellent photos in all lighting conditions. There are hundreds of features and options built into this camera that will keep an amateur photographer like me engaged for the foreseeable future. There is a plethora of accessories that I can add to this camera to meet any needs that the stock camera does not currently fulfill. The Alpha 6100 is a flexible, feature rich platform that I am going to enjoy exploring for years.
What originally convinced me to own this camera? A friend of mine is a professional photographer. He photographs and videos professional trade shows and conferences. I noticed one day that he changed out his typical SLR and video camera for the Sony Alpha 6000. I asked him why. He told me that for half the money he could get almost the same quality as his more expensive cameras. Plus, he only needed one camera to do both video and stills. I did not need a new camera at the time. Today, my digital SLR is non-operational. I decided to jump on the Alpha 6100. I’m glad I did. I got a heck of an upgrade for the same money my old camera cost.
What do I like:
The camera is small, compact, and what I would call a dense .78lbs with the stock lens attached. The bump out on the right of the camera body is small compared to a traditional digital SLR camera. For me, this makes the camera awkward to hold. This may change with the addition of a larger lens. Stock, the camera is compact enough that my hands crowd close together. The Power Zoom on the included lens adds to my awkward handling. I have medium sized hands. Think medium sized adult winter gloves. I can see someone with large hands having a very difficult time handling this camera with the included E PZ 16-50 lens. This all being said, I find the compromise between weight and size acceptable for my needs. I can move easily between stills and videos with the touch of a single button. If I want to get fancy, then I can get GP-VPT1 shooting grip. This will allow me to point and shoot without worrying about any awkward handling positions. Sony’s site has a plethora of lenses, adapters, flashes, remote control, power options, and accessories listed for this camera. Many of these items are available on Best Buy. Sony’s site will tell you exactly what is compatible with this camera and the items part number. Better yet, I can put the camera on a tripod and remote view and shoot using Sony’s mobile app or desktop app.
One feature I liked is the Auto White Balance. Yeah, I know, auto white balance tends to be terrible for all cameras. The Alpha 6100, in my opinion, does a better job, at this price point, than most. Indoor
shots are still yellowish. Outdoor shots, however, are a different story. I took the camera on a hike along a snow-covered trail. I Left everything at full auto. The camera auto adjusted its settings for macro shots, portraits, and for different lighting conditions. The white balance was pretty good. Now, this could have been the position of the sun, the time of day, or having snow as the backdrop. Regardless, I am pleased with the results. I also took a few videos of a waterfall. The videos were clean, well balanced, and detailed. The sound was good for not having an external mic. Moving from still to video was super easy. There is a record button near where your right thumb will naturally rest while holding the camera. Press once to start recording. Press a second time to stop. It does not get any easier than that.
shots are still yellowish. Outdoor shots, however, are a different story. I took the camera on a hike along a snow-covered trail. I Left everything at full auto. The camera auto adjusted its settings for macro shots, portraits, and for different lighting conditions. The white balance was pretty good. Now, this could have been the position of the sun, the time of day, or having snow as the backdrop. Regardless, I am pleased with the results. I also took a few videos of a waterfall. The videos were clean, well balanced, and detailed. The sound was good for not having an external mic. Moving from still to video was super easy. There is a record button near where your right thumb will naturally rest while holding the camera. Press once to start recording. Press a second time to stop. It does not get any easier than that.
Auto mode has two modes: Intelligent Auto and Superior Auto. From Sony, “Intelligent Auto automatically identifies a scene’s characteristics and shoots a photo. Superior Auto beautifully shoots automatically while reducing blurring and noise.” As a test, I took two photos of my shed using each setting under natural lighting conditions. White balance threw a little grey into the shot but not much. You will want to consult with the online user’s guide for more details. I included the two shots with my review.
Another auto mode, SCN, gives you more control. This is an auto mode for all the camera’s major shooting modes such as Portrait, Sports Action, Macro, Landscape, and more. There are two ways to set the SCN’s shoot mode. First, you can take the long way around through the camera’s menu system. I found this method slow and clunky. The second way is via the Function button located above the D-pad. Press the button and then use the D-pad and built in scroll wheel to quickly chose your shoot mode.
The options here, as mentioned before, are enormous and much more than a simple Best Buy review can get into. I will say that the flexibility here is rich and appreciated for those of us who did not go to photography school. For those who did go to photography school then you will be happy to know that you can adjust any of the other modes on the camera to your heart’s content. For example, Program Auto, P on the dial, has eleven pages of options under the image setting and another 9 pages under the movie settings. Press the Function key and all the options directly related to your shot are available via a simple to navigate graphical interface. These include Drive Mode, Focus Mode, Focus Area, Exposure Comp., ISO, Metering Mode, Flash Mode, Flash Comp., White Balance, Creative Style, and Silent shooting.
The Alpha 6100 can also take panoramic photos, slow motion videos, and quick motion videos. I have no need, yet, to shoot slow motion or quick motion videos. Panorama, however, is pretty darn impressive. I took a panorama of my workspace, the camera must have taken 50 photos, and then stitched them together like it only took a single photo. The image was in focus and detailed. I did not like the default length of the panoramic shot. I wanted to stop early but the camera continued shooting until I had completed the pre-defined panoramic field. One issue I did run into with Panoramic is with anything moving in shot. For example, I took a Panoramic of a track and field facility. The people walking across the grounds during the shot had a double exposure affect. This may entirely be due to my lack of experience with panoramic photos, the camera’s software, or some setting I failed to turn on. Just be aware to take some sample shots of what you want to capture before you pull the trigger on the real shot.
The LCD screen is not a touch screen. This may seem strange in a world where cell phones have become the dominate photography tool. Sony delivers an excellent button layout to help navigate the screen. The buttons are all properly marked. The D-pad doubles as a scroll wheel. And the Scroll wheel has a selection button in the middle. There are also functions located to each compass point on the scroll wheel for easy access and navigation.
The scroll wheel is used to zoom through features, menu items, and options. You can quickly scroll through your images by rolling your thumb left or right along the scroll wheel’s track. You can also quickly zoom in, zoom out, and navigate an image that you want to take a closer look at after shooting. I thought it was a bit awkward when I first used it. After using it for a bit, I cannot image owning another camera without it. Home run for Sony!
Finally, the screen itself has multiple functions available. Pressing up on the D-pad switches between four screen layouts with differing levels of details including a preview of your image, shot features, information about your photo, and histograms. Pretty much whatever you want to know about your shot before pressing the shutter button is accessible.
The screen is attached to a mechanical arm that allows you to move the screen away from the camera body. This allows you multiple viewing angles while you shoot. The screen can also be flipped 180 degrees allowing for selfies. The Alpha 6100 automatically flips the LCD image when in selfie mode. Sony also added interactive features between the viewfinder and the view screen. There is a sensor in the eye piece that detects your eye, or something close to it, that, when triggered, automatically turns off the view screen and activates the view finder screen. All the same information is present. My old camera used to keep both on regardless of which one I was using. I always found this distracting. Thank you, Sony!
Sony made connecting your camera with your cell phone super easy. The camera will display a QR Code that your phone uses to establish a connection. Another QR Code is used to acquire the mobile app, Imaging Edge. You can control the camera from your phone, view photos, setup location information, check current news related to the app, review help files, and remote control the camera. Unfortunately, the app needs a major usability pass. For example, if I remotely capture photos then I cannot view any photos until I first shut down the app and restart the app. Some screens do not have a back button.
Another thing I cannot do from the app is set the camera’s photo function. I must spin the function wheel manually to get what I want. Then the options for that mode will be made available to me from the app. I would have preferred the ability to control all camera features and functions remotely. One word of caution. Turn the remote features off when you travel. Bluetooth is easily compromised. The good news is that there is an Airplane Mode under the Network settings in your camera’s menu. Turn this on when not using Wi-Fi or Bluetooth to protect yourself and your photos.
Another thing I cannot do from the app is set the camera’s photo function. I must spin the function wheel manually to get what I want. Then the options for that mode will be made available to me from the app. I would have preferred the ability to control all camera features and functions remotely. One word of caution. Turn the remote features off when you travel. Bluetooth is easily compromised. The good news is that there is an Airplane Mode under the Network settings in your camera’s menu. Turn this on when not using Wi-Fi or Bluetooth to protect yourself and your photos.
What I did not like:
The built-in flash is harsh. Period. I would avoid using it unless absolutely needed.
Mobile Submission: False
I would recommend this to a friend!


Share this review:
+6points
7of 8voted this as helpful.
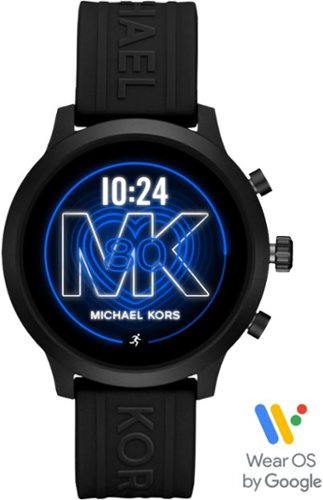
Keep time, track your fitness and increase productivity with this Michael Kors Access smartwatch. The water-resistant design offers protection in the rain or by the pool, and the Bluetooth connectivity lets you play music and make calls directly. This Michael Kors Access smartwatch has a 1.7-inch AMOLED touchscreen display for easy menu navigation and notification clarity.
Customer Rating

3
Great watch held back by Wear OS
on November 28, 2019
Posted by: ITJim
from Maine
The Michael Kors Access MKGO smartwatch is stylish, comfortable, and runs Google’s Wear OS. Wear OS is compatible with Android and iOS phones. I have this watch connected to my iPhone.
The watch has the clean, professional look that you would expect from a traditional analog watch. The watch body is made of aluminum. The edges are flat black, angle away from the watch face at about a 30-degrees until they meet an aluminum colored separator ring between the upper body and the lower body. The lower body is the same flat back as the upper body. The control nubs are black with aluminum colored stems. The included black silicone band is a nice touch and combines well with the ascetics of the watch. I personally do not like metal bands which is why I opted for the less expensive version of this watch with the black silicone band. However, the silicon band visibly shows dust and dirt build-up. You will want to clean it at least once a week to keep it looking as pristine as the watch.
The AMOLED touch screen is flush with the watch body, clear, and is bright enough to read in the daylight. There are brightness adjustments options in the watch settings, including a daylight setting, allowing you to make the watch as bright or as dull as you need. The watch will also detect light intensity of your environment and adjust the watch face’s brightness appropriately. Finally, there is an always on feature that will adjust your watch face into a black and white, minimalist image so that you can tell time whenever you look at the watch face while also maximizing battery life. The watch switches to this black and white image after a time out period. Any action you take with the watch will snap it back into full color and graphics mode.
There are about 56 different watch faces to choose from including some specific to Michael Kors. The Michael Kors faces will have an MK, Michael Kors, or both somewhere on the face. The watch faces are not as advanced, functionally or graphically, as you will find on the latest Apple Watch or Samsung Galaxy watch. The Michael Kors and Wear OS clock faces are mainly focused on telling time in a simple and elegant way. Some of the watch faces may show todays date, battery life, steps, alarms, alternate time zone, heart rate, and upcoming events. Most watch faces will only tell one, two, or three of the above.
Swiping from right to left will review up to five additional tiles. The tiles include any combination of Timer, Goals by Google Fit, Heart Points by Google Fit, Headline by Google News, MK Access, Weather, Next Event Agenda, and Heart Rate by Google Fit. Additional screens consist of settings, alerts, Google Pay, Google Assistant, and more.
My only criticism of the watch, itself, is the lack of documentation. The included instructions show how to connect the charger and tell you to download Wear OS to your phone. There are three buttons, one doubling as a scroll wheel, on this watch. What do they do?! Why am I guessing and experimenting?
Wear OS is a good start but really needs some polish both visually and programmatically. First, the good:
- Multiple Watch Faces offer some great flexibility and customization
- Always on clock face. Something Apple should do for all their watches.
- Tiles are sharp, clean, and minimalist.
- Incoming calls, text, and notification vibrations
- Wear OS is full of on watch tutorials for all features.
- Battery gets me through the day. Longer if using battery saving features.
Room for improvement:
- Bluetooth drops – must reset the watch to resolve. Google needs to fix this!
- Personal Assistant. Terrible experience.
- Watch time outs return user to watch face instead of returning to active app such as Google Fit.
- Tile responsiveness. If watch has not been used for a while there is a visible pause when moving from tile to tile.
- Heart monitoring needs to be more than 20-minute intervals.
I do like this watch. I love the look and feel. I would wear this to a job interview without a second thought. The Michael Kors watch looks like a real watch where the Apple Watch looks like sportswear. I do not like Wear OS. It is visually polished but needs to fit how I want to interact with it and not how Google wants me to interact with it. If I am using the fitness app then I expect the watch to return to the fitness app when I wake the watch from sleep. I already have a button that will default the watch to the watch face if I so choose to go there. I want my watch to work with me and not against me. If you are looking for a traditional style watch that has the added functionalities of a smart device then you may want to check this watch out. However, I cannot give a strong recommendation that this watch is for everyone.
Mobile Submission: False
I would recommend this to a friend!
Share this review:
+1point
1of 1voted this as helpful.

Build your muscles anywhere at any time with this lightweight Gorilla Bow travel resistance trainer. The compact, lightweight design ensures easy portability, and compatibility with a huge range of exercises helps tone muscle groups across your body. This Gorilla Bow travel trainer includes free video tutorials to get you started.
Posted by: ITJim
from Maine
Up until recently, my normal exercise routine included going to the gym. That is no longer an option for me. Today, my exercise routine must be carried out in my home where I have limited space. I have an exercise ball, a yoga mat, push-up handles, and not much more. I do not have the space for free weights, a treadmill, or fancy all in one exercise machines. Compact is king in my home. The Gorilla Bow fits that description.
The bow easily assembles and disassembles from three parts. The bands can be stored hanging, in the included bad, or curled up and thrown on a shelf. The bow, if stored assembled, can be placed into a corner where it takes up almost zero room. Or, I can easily disassemble it and store the parts on a shelf, under the bed, or in a bag. The Gorilla Bow comes with four bands, of varying resistance, to get me started; 10lb, 20lb, 32lb, and 50lb. The ends of each band are wrapped with a thick black protective and contain a giant bulb that prevents the bands from slipping past the bow’s restraints. The bow has two slots on either end that can accommodate a total of four bands. Loading the bow reminds me of loading a real bow. I easily load a band into one side of the bow, turn it over, place my boot on the loaded side of the bow, and then stretch the band into the corresponding groove on the opposite side. Easy.
I like that fact that I can load up to four bands at once. Not only does this reduce the number of bands I need to effectively use the bow, but it also allows me to mix different resistance exercises. For example, I can load all the bands that ship with the Bow for use with curls. Then, I can practice pulling back the bow, like you would do with an actual bow and arrow, using one of the bands or any combination of the bands. This way, I can minimize the need to swap out bands between exercises. The Gorilla Bow does come with a nylon band wrapper that will secure multiple bands for you. This is very handy for exercises where multiple bands will naturally come apart such as bench presses and rowing exercises.
I have owned the Gorilla Bow for about a week. Here are few things you may find useful for your decision. First, the tension ratings on the bands are stretched 2.5 times their at rest length. Stringing the bow puts very little tension into the strings. This directly impacts your exercise. Unlike free weights where 10lbs is 10lb through the entire movement. The Gorilla bow starts with little tension and increases that tension as you extend away from the bands. Then, the tension relaxes as your exercise moves towards the bands. I noticed this right away. A taller person may get more benefit from the smaller bands than a shorter person. My solution is to use more bands or pick up the larger bands. I picked up an additional 80lb band for those exercises where I felt I needed more consistent tension through my movements. And, I still have the option of adding three more bands, or picking up additional 80lb and 90lb bands later.
The lighter bands, though did not have a lot of tension for me, did prove useful for certain exercises. Essentially, I am not as strong in all areas as I think I am. For example, one of the videos on Gorilla Bow showed a boy man doing side bends. I never thought of doing these before. I figured the core exercises I was doing on my exercise ball covered these. I decided to give three sets of 10 a try using the 10lb band. They were easy. The muscle groups involved in the exercise were sore the next day! I have some work to do! Point: don’t believe uniform tension through the length of your movement is the only way to exercise your muscle groups.
The Gorilla bow comes with a card outlining six exercises. Go to their website, www.gorillabow.com/welcome for access to videos and workouts. I am not so much into the aerobic workouts using the Gorilla Bow. It is just not for me. But, you will get a lot of great ideas on where this can fit into your workout routine. Also, I would not expect to become as muscly as the people they have demonstrating the bow exercises. These people are professional body sculptors and instructors.
Finally, you will want to make sure you have space around you when using the gorilla bow. It is a big stick that will knock things off walls and put holes in windows if you are not mindful about your surroundings.
I am really liking this product. If fills a hole in my current workout routine. I hope to get years of solid use out of it.
Mobile Submission: False
I would recommend this to a friend!
Share this review:
+2points
2of 2voted this as helpful.
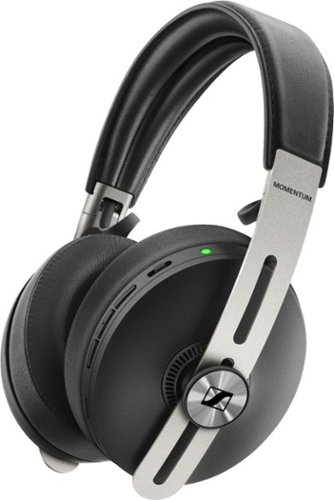
Enjoy the powerful, crisp sound of these Sennheiser MOMENTUM wireless over-the-ear headphones. The sheep leather headband and ear pads conform to the shape of your head, adding comfort for all-day use, and Bluetooth connectivity lets you stream music from various devices easily. These Sennheiser MOMENTUM wireless over-the-ear headphones have active noise cancellation that lets you block or listen in on external sounds.
Customer Rating
3
Good sound with problems
on November 2, 2019
Posted by: ITJim
from Maine
Sennheiser Momentum 3 Wireless Headphones
Setup: The instruction pamphlet will get you started. You will want to download the Sennheiser Smart Control application from either Google Play or Apple’s App Store. More on the app later. My headphones shipped 80% charged so were ready for use out of the box. I started by plugging them directly into my computer via USB-C and firing up my iTunes library. My thought is that I would charge them to 100% while breaking them in with my iTunes library. Later, I was able to easily connect the Momentum 3 to my computer and iPhone via the included proprietary three-way stereo cable. Bluetooth connectivity with my iPhone was equally easy to setup.
Music: Highs, mids, and lows are clear. I played a variety of content including Electro Swing, K-Pop, easy listening, 70’s power ballads, alternative, rock, classical, and some popular videos including The Lord of the Rings: The Two Towers. Highs were high. Mids felt rich and clear. Low notes felt tight and detailed. And those low, powerful waves of base you get from movies felt satisfying when the Momentum 3’s were hard wired into my computer. The “Two Towers” over Netflix sounded pretty good for headphones.
I started off my musical journey with Boston’s “More Than a Feeling”. I tested the music over Bluetooth and stereo cable connection using my iPhone and Apple Music. There is a difference in sound quality. Bass sounds deeper, highs sound clearer, and mids sound fuller on the stereo connection. I also noticed that the volume increased once I removed the stereo cable. Almost like the headset was trying to make up for the detail loss with increased volume. Again, everything was clear. I did this same A/B switch out with Sturgil Simpson’s Sound & Fury, Momoland’s “Bboom Bboom”, A Hat in Time & Plasma3Music’s “Trainwreck of Electroswing”, the “Ghost Busters” soundtrack, Lindsey Stirling’s album “Artemis”, Bach’s “Sanata for Flute and Continuo in E Minor, BWV 1034: II, Allegro”, and so on and so forth. In all instances, wired sound better than wireless. I expect this due to how awful Bluetooth is with music.
Additionally, every selection, regardless of wired or wireless, had this behind my ear quality that sometimes worked and sometimes did not. The harder, punchier music could overcome this with more volume. But, softer tracks, like classical, could not. I was not left with the feeling that I could kick back and feel immersed in my music. I felt like the music was coming from behind me regardless of material, sound canceling status, or equalizer setting. I did a comparison with other quality headphones I own. This is unique to these Sennheiser headphones. It is not necessarily bad. It is just different. You will also need more volume to achieve the same immersive listening experience as other similarly priced headphones.
The included cable is poorly shielded. I heard a buzzing sound over the cable while the iPhone was connected to the charging cable. This is the only headset I have that picks up this interference. I also have a wireless charging station for my gaming mouse. The stereo cable will pick up and transmit the frequency for the charging station if the cable is in proximity. It sounds like ping ping ping. This is not an issue for my other wired headphones. The cable is very thin and thus susceptible to picking up interference.
Volume: The headphones require adjusting with every musical source without exception. Bard’s Tale IV is a video game available on Xbox Gaming for PC. It has an A+ professional soundtrack that I wanted to test these headphones with. I connected the headphones over USB-C. I adjusted the volume appropriately. Then I switched to a wired connected for my Apple Music on my iPhone. I had to adjust the sound again. I then moved to Wireless with my iPhone. I had to adjust the volume again. I can understand changing the volume between devices. But, having to adjust on the same device left me scratching my head. We are talking wild swings in volume between connection types. Switching back to any of my prior sources yielded the same experience. The Momentum 3 does not appear to remember volume levels between devices. This is a pain for me because I am always changing between devices for different reasons. I do experience differences in volume with other headphones in the same class as the Momentum 3s. However, the wide swings in volume are unique to the Momentum 3s.
Smart Control App and Music Sources: Setting up the Momentum 3s with the Smart Control application was frustrating. My iPhone connected to the Momentum 3 without any issues during initial setup. The Smart Control app, on the other hand, kept dropping the connection. I had multiple experiences where the App would not connect to the headphones at all. The app did drop the connection very 10 to 15 seconds when it did make a connection.
For example, I am listening to Bach’s “Le clavier bien tempere” through Apple Music over Bluetooth and have no access to the features of the app. I have this same issue when connecting with the stereo cable or USB-C. According to the app, Sennheiser is aware of the issue and is working on a fix. I hope they come out with an update soon. Otherwise, what’s the point of equalizer functions and multiple noise canceling options if you have to turn off your music, disconnect any wires, connect to the app, make your changes, and then turn everything back on to see if the changes are to your liking?
The headphones can be used successfully without the app.
Smart Control Appp: There are three settings: Active Noise Canceling, Transparent Hearing, and Equalizer. The app will also tell you the battery level.
Active Noise Canceling will allow you to set Noise Canceling to Max, Wind, and Anti-Pressure. Max is exactly what it sounds like. This is the best noise canceling the Momentum 3 has to offer. The noise canceling is ok. It does block out the constant fan noise of my computer and some annoying background noises. It does a decent job of blocking out distant sounds like background conversations and moderate office background noise. I did use my Momentum 3 around my air fryer while crisping up some donuts. The volume of the air fryer was cut in half. Random noises, like keyboard key clicking, are somewhat muted. However, this is mostly due to the insulation provided by the ear cups and not the noise canceling qualities of the Momentum 3.
I did not test the Wind setting. I only noticed that this setting allowed a lot of outside sound into the ear cup.
Transparent hearing is a nice feature. This allows all outside sound to pass through the ear cups microphones into the ear cups without any processing. My audio source is automatically muted. I think this is the best iteration of this type of passthrough I have heard. I know it is the best of any headphones I own. The app allows me to modify this mode by allowing music to play, at a reduced volume, while transparency is turned on. I can see myself using this feature in the office when someone stops by to ask me a question.
Last is the equalizer. The equalizer is an interactive image with a small round circle on a flat line. You move the circle with your finger around the screen to influence the curvature of the line. One way increases bass and treble response. Move another way and you enhance mids by sacrificing highs and lows. You will favor one range or another depending on how you move your finger.
Hands free: The Momentum 3 is also capable of hands-free calling. I normally use either the wired ear buds that shipped with my iPhone or a wired stereo gaming headset that includes a mic boom. I get exception audio however I also hear the cable brushing up against my clothes. I tested the Momentum 3s by making a few phone calls. The feedback I received includes: Clear sound but my voice had a “speaker in the background” kind of quality. The quality was not as tight as I would expect from a dedicated directional mic. Hopefully Sennheiser can correct this when they fix their app.
Physical Controls: The Momentum 3 ear cup controls are solid. There is a switch that controls noise canceling settings, volume, a button that controls voice communications with your virtual assistant, and a multi-function button located between the volume controls. The multi-function button controls play, pause, track forward, and track back. The Momentum 3 ships with a sticker on the right ear cup with a basic description of what each button does. The included instructions go in depth regarding the use of each button. The button placement is convenient and easy to use. The buttons are rubberized, comfortable, and easy to depress. Below the buttons are the USB-C connection and a proprietary stereo jack that locks the stereo cable in place.
Folding the headphones for storage will turn the Momentum 3 off. There is no other “off” button. Removing the right ear cup from your ear will pause your content. However, this only works over wireless and USB. It also depends on the content. Taking the headphones off or removing the right ear cup from my right ear paused my desktop’s YouTube video playback. The video automatically restarted when I returned the ear cup to my right ear. This also worked with iTunes. However, it will not work with two programs simultaneously. Apple Music paused playback and replayed when connected over Bluetooth.
Comfort: I cannot wear these headphones for more than two hours. The ear cups are very soft, are comfortable, and the ear cups are adjustable for any head size. Unfortunately, they place too much pressure on my jaw. And there is no way to adjust for this with these headphones.
Overall, I am disappointed with my experience.
Mobile Submission: False
No, I would not recommend this to a friend.


Share this review:
-11points
13of 37voted this as helpful.
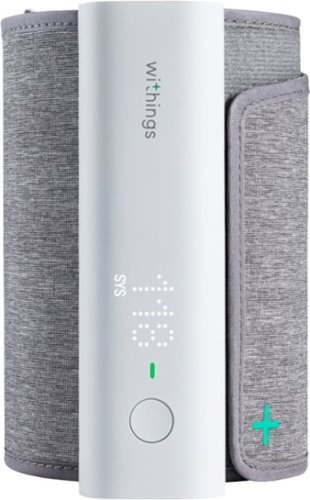
With BPM Connect, taking your blood pressure at home has never been so convenient. The device provides medically accurate blood pressure and heart rate measurements with immediate color-coded feedback on the device. BPM Connect synchronizes seamlessly via Wi-Fi and Bluetooth to the free Health Mate app, where you can see all your data history and share it with your doctor.
Posted by: ITJim
from Maine
Setup is easy. The monitor consists of a long white tube that contains the sensors, air pump, battery, and transmission device. You can use this device with or without the Withings Health Mate app. To unlock the full potential of this product you will want to download and connect the app to the monitor. This will allow you to capture data and monitor trends.
The systolic, diastolic, and heart rate are all displayed via LEDs hidden beneath the surface of the white tube. Press a button on the tube and the device goes into ready mode. Press it a second time and the device will fill the sleeve with air and take the measurements. The measurements are then stored in memory until they are offloaded to your app. The sleeve is adjustable just like the one you see in your doctor’s office.
You can connect this device to multiple accounts. This allows you to share the device with family or friends. You can then choose who the reading is for from the device. A list of peoples names will appear on the device after the reading is complete. I tried this feature out and was met with varying levels of success. My wife has a Withings account. Her name appears on the device after any reading for anyone. Pressing the devices button once should show either the next name or “Guest”. This worked for the first few times I used the device. Now, every reading defaults to my wife regardless of how many times I press the button. I do find this frustrating. The good news is that you can log into the app and delete any readings not yours. The bad news is that I keep losing my readings.
The sleeve is adjustable. The sleeve has a fabric outer shell that covers the air bladder inside. There is a metal ring that the sleeve passes through which allows you to adjust the size of the sleeve. The sleeve then seals against itself using Velcro. The instructions that comes with the Withings monitor will guide you through your first use. You will also receive a guided tutorial on how to use the monitor when you connect it to your app. Essentially, you follow the same instructions your nurse gives you when having your blood pressure checked at the doctors.
Activating the device is simple. Press the button once and the device activates. There are blue LEDs that light up under the tubes surface to indicate activation. Press it a second time to start the measurement process. You will hear the tiny air compressor motor whirling from inside the tube. The sleeve will tighten. A measurement is taken. Then the air pressure is released. Both my wife and I found the pressure higher than what we experience at the doctor. It can be uncomfortable if you are sensitive to this sort of thing. In comparison, the free monitors at my local pharmacy are punishing! I would say the Withings monitor to be somewhere between doctor’s office and pharmacy monitors.
The data is displayed on the device. It is also offloaded to the app as soon as you open the app. The app displays all the information in a simple list format. If you have multiple Withings devices then you can scroll down and see your measurements from all your devices. The blood pressure information will be displayed as Systolic over Diastolic. There is also trending data to the right of the reading showing how your last five readings compare to your most recent. You will get a color code indicating if your readings are normal, stage one hypertension, stage two hypertension, or worse. The device will also indicate, in matching color coding, what category the reading falls into. Tapping on the app’s reading will expand the information further. It also allows you to see trending data over a week and a month. I have not owned the device long enough to see if trending data is visible in units longer than a month. Finally, the trending data will indicate my highest and lowest values for a week or a month.
Overall, we like this product. It has proven very helpful for us to see how my wife’s blood pressure is changing over time. This is especially useful when she is put on medications that influence blood pressure. It is easy to setup and easy to use. The app also has lots of information about how to use the product including an FAQ, maintenance and cleaning guide, user’s guide, and helpful videos.
Mobile Submission: False
I would recommend this to a friend!
Share this review:
+1point
1of 1voted this as helpful.
Boost your confidence with this Upright Go 2 posture trainer. Integrated sensors detect when you're slouching to help train your body for better posture in under 14 days. Use the device by itself or sync with the Upright app on Android or iOS. With a portable design, 30-hour battery life and easy-touch adhesive to keep it safely in place, this Upright Go 2 posture trainer is ideal for all-day wear.
Customer Rating
3
May be helpful as part of a larger posture program
on September 27, 2019
Posted by: ITJim
from Maine
Purpose:
The purpose of the Upright Go2 Posture Trainer is to help you improve your posture by adding a haptic training device to your back. It is a small device, about the size of a Ritz cracker, that attaches to your back via a silicon adhesive. You calibrate the device by double clicking the devices activation button. Then the device will track whether you are slouching or not slouching for however long as you wear it. There are two modes: Training and Monitoring. Training Mode will prompt the device to vibrate if you slouch for longer than a second or two. It will keep vibrating until you return to a proper posture. In Monitoring mode, the device will simply gather metrics and upload the information to your phone’s Upright Go application. You can then review your day by day Upright vs Slouch metrics.
Setup:
Setup is easy. First, download the Upright Go application from either the Apple App Store or the Google Marketplace. You will find QR codes for both in the setup instructions. Turning the device on will sync the device with your phone and the app. Next, remove the silicon backing from device and attach to your back. I recommend that you aim for the spot on your spine between your shoulder blades. Finally, stand up straight and calibrate the device. Done.
The battery lasted me all day. I wore it for a week from 8am to 8pm. I charged it using the included USB cable every night. You will want to keep the clamshell case around. It is designed to store the device with minimal impact on the silicon adhesive backing. This is important because, with proper care, the adhesive will last five to seven days. There is a total of ten adhesive pads included in the box. There are also six alcohol pads to clean your skin before attaching. I found that the silicon by itself worked well without worry about any prep. Your experience may differ from mine though. Experiment and do what’s best for you.
Experience:
The device is a monitor. You must download the app in order to use the device. The app will capture the metrics of each use. The app gives you the option of uploading your metrics to Apple Health on your iPhone or iPad. This is good for those of you who want a single place to track all your health data. Upright Go displays all of your metrics in an easy to understand pie charts with corresponding timelines to show training, Upright, and slouching events. The information is organized by day. I did not find an option to show progress over days, weeks, or months. It is entirely possible that five days of data is not enough to unlock those graphs. Either way, I did not see any indication that the information was organized into anything other than individual days.
The app allows you to tell the device if you are sitting, engaged in moderate activity, or engaged in dynamic activity. Each of these three modes has a preset movement tolerance which tells the device if you are slouching or not. The app also allows you to adjust those tolerances. In Training mode, the device will vibrate when you reach the slouching mark. Monitoring mode will simply gather the information without offering any haptic feedback.
For my purposes, I kept the device in Training mode. I discovered early that attaching the device to the base of my neck was a poor choice. I found that most head movement triggered a slouching event. Moving the device further down my back, between my shoulder blades, proved to offer a better experience. While sitting, the device vibrated when I leaned in to view something on my desk or reached to far for my mouse. There were also a few times where I relaxed my back. This resulted in my back arching thus triggering a vibrating slouching alert. Moving was a similar experience. Walking around did not generate any alerts for me. I have good posture. However, tying my shoes, washing my hands, and preparing dinner generated all kinds of haptic feedback. Updating the device’s firmware through the App solved the “tying my shoes alert”. However, any activity that required me to reach or bend still triggered an alert.
The Upright Go app allows you to adjust the slouching tolerance using a 1 to 6 point scale. The higher the number the greater the angle from straight up you can move before triggering a slouching alert. You will have to play with these settings until you find what works for you. I left the defaults in place for a day or two before adjusting. The adjustments helped reduce alerts by taking into account how I naturally move.
There are limits to this device. For example, the device will not measure events such as leaning back in an office chair. Why is this important? One of the tips for calibrating Upgrade Go 2 is not to over-exaggerate your posture. If the unit cannot detect negative angles, then how does it know if you are overcompensating to avoid slouching alerts? I also found that I can slouch the bottom half of my body while sitting without triggering an alert. For example, I can sit on my couch with the leg rest up. This forces my torso to lean back and my hips to jut forward creating a negative angle situation for the Upright Go 2. I could also over-exaggerate my position by slouching into the chair like I would to take a nap. As long as the Upright Go 2 remained at its calibrated position or in a position that did not register, then the device reported a non-slouching event.
A second concern of mine is this device has no way of detecting factors that do impact good posture. Factors such as chin jutting forward, shoulders rolling forward, closed hip position that forces your butt to stick out unnaturally. Upright claims this device will help improve your posture though it only captures one data point on your back. I feel a better claim here is the Upright Go 2 is a tool that will help improve posture when used in conjunction with a set of instructions for better posture. I do agree that slouching is a cause of backpain. I regularly feel worse after a long day at the office computer where I tend to slouch the most. The haptic alert is a good reminder to tell me to stop slouching, pull my shoulders back, pull my chin in, and sit over my hips instead of in front of them.
Final thoughts:
Will this device lead to better posture? I think the device will help you pay more attention to your posture. This will be especially true during those long sessions at the computer where you are prone to shifting yourself into uncomfortable positions to deal with ever building aches and pains. Good posture does lead to increased physical comfort. However, the Upright Go 2 is not sophisticated enough to track all the points on your back that equate to good posture. The device should come with a brief guide to good posture. Then the Upright Go 2 would naturally assume the role of a monitor to both indicate when you are slouching and a to remind you to check your body for poor posture. I think Upright can easily address this concern through the tips and tricks portion of their app. Another easy fix for the app is long term trending. Day by day metrics are useful. Long term trends are also very useful and need to be addressed by Upright.
Should you purchase this product? That depends. You may not get anything out of this device if you already have great posture. If you suffer back pain and have poor posture, then this may be a great way to get some active feedback to help you work on improving your posture. It is like having a coach that taps you on the shoulder to remind you to stop slouching.
Mobile Submission: False
No, I would not recommend this to a friend.
Share this review:
+4points
4of 4voted this as helpful.
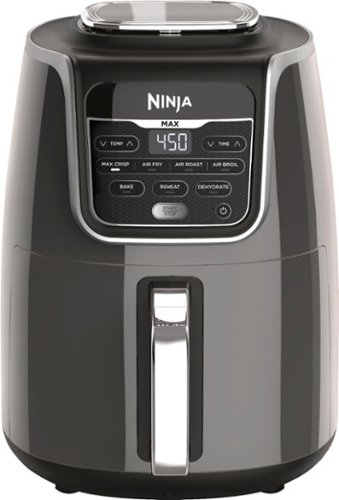
Ninja Air Fryer Max XL, a fast and easy way to cook your favorite foods. Cook and crisp 3 lbs of French fries, using little to no oil, in a family-sized XL 5.5-qt basket.
Customer Rating

5
Great first Air Fryer!
on September 4, 2019
Posted by: ITJim
from Maine
If you have never owned an air fryer then this review is for you. I have never owned an air fryer. I have wanted one for awhile but was a bit intimidated with the idea of frying in general. I live in the north eastern US where my home is sealed from the weather and cold eight months or more every year. There are certain foods that I will only cook in the summertime because I need the windows open to dissipate the smells and atomized particles carried off by the steam and splashing oils. Essentially, I do not want my home to stink like a fast food restaurant during the colder months of the year. So far, I feel that my fears were misplaced when it comes to the air fryer.
Setup:
Setup was super easy. Unpack, clean the basket, crisper plate, and the broil rack, insert basket and crisper plate into the main unit, and then plug it in. The first week of air frying left a chemical smell in the house. Most likely the unit was burning off any material left over from the manufacturing process. It would have been nice if Ninja had cleaned all heated surfaces before assembly and shipping. You will want to keep your windows open during this break in period.
Finally, you will need to read the instructions and the cookbook that comes with the unit! I cannot stress this enough! If this is the first time you have owned and operated an air fryer then do not skip this step. Delicious fries and hot wings are right around the corner. These books will help you get there as easily and efficiently as possible.
Usage:
Using the Red Ninja Quick Start Guide and cooking charts made pre-heating and cooking my food very simple. The Air Fryer resembles a compact convection stove. Convection cooking purposely circulates the heat in an oven to reduce cooking time and promote more even cooking. This also forces you to rethink how long to cook food that you normally throw in the oven or cook on the stove top. The cooking charts in the Quick Start Guide offer excellent guidance on common items such as fries, tatter tots, chicken wings, battered vegetables, and many more.
You will need to monitor your food no matter what the cooking time and temperature recommendations are. I found myself checking, flipping, or adjusting the food every four to five minutes. The flipping and adjusting are needed to ensure even cooking and crisping of my food. You will need to do this regardless of what you are cooking. Otherwise, you may find some parts of your meal burn while others remain squishy. Both will be fully cooked. The quality will not be equal or desired. Finally, the cooking time in the Quick Start Guide are guidelines. For example, large steak cut fries will take longer to cook then straw cut fries.
One final note. The air fryer will suspend cooking when you remove the basket from the fryer. It will then re-engage cooking when the basket is returned. You do not need to spend any time fiddling with the controls when you check your food.
Cooking and outcomes:
Straw cut fries – The very first thing I cooked were store brand straw cut fries. I find any fires baked in an oven challenging. They either come out cooked through but soft. Or they come through crispy but overcooked. There are few times where they come out just right. I followed the Quick Start Guide chart for 1lb fries: Max Crisp for 15 minutes. I took out the basket every four to five minutes, tossed the fries, and then returned them to the air fryer. I let them cook for 13 minutes because the color was turning that nice light brown that I expect from a good fry. They were prefect!
Chicken Wings: I fried two pounds of chicken wings. I added some canola oil to the frozen wings and splashed them around in a mixing bowl to distribute the oil. Do not use Olive Oil. The air fryer exceeds the smoking temperature of olive oil. Oil turns into some pretty bad stuff when pushed beyond its smoking temperature. I followed the same process as above for cooking. They came out prefect! I added my favorite sauce, cracked open a beer, and enjoyed a movie. They came out so good that the air fryer is my go-to for game day wings! Just be careful not to overcook. The air fryer will turn the meat tough if you overcook. So, keep an active eye on them.
Battered Zucchini – I beat two eggs with some almond milk and mixed some crushed Ritz crackers with seasoned breadcrumbs. I then cut up some zucchini in bit sized pieces. I covered them with batter and fried them using the air fry setting on the Air Fryer. I spit balled the cooking time and temp since I did not have a recipe for this. Again, I actively monitored the cooking process. The zucchini came out crispy. The breading was crunchy and the zucchini was a nice mix of toughness on the outside with a bit of a squish on the inside. I felt they came out great. Taste? Well, I screwed up. I used Almond milk with the mixture. Next time I will use a cooking wine or maybe regular milk. Almond milk really threw the taste off. Air fried vegetables came out perfect when I cooked them without batter. This included zucchini.
Alfredo shells – My wife and I got a bit creative. She likes making baked pasta in alfredo sauce. I was looking for something to test the bake function of the Ninja Air Fryer so I asked if we could try this. Again, there is no recipe. We just winged it and monitored it. I took out the crisper plate and used the basket as a regular pot. It took about 15 to 20 minutes but came out great for a first try. The pasta was still a bit tough so next time we will add some additional water or wine to the mixture to deal with the issue. I was expecting to burn the surface of the alfredo and pasta. It probably would have burned if I had not stirred the contents every four to five minutes.
Comments:
First, it is recommended that you pre-heat the air fryer 3 minutes before cooking. Not a big deal except there is no pre-heat button. Instead, you have to press the function button (Max Crisp, Air Fry, Air Roast, Air Broil, Bake, Reheat, or Dehydrate) first, then set the temp if you are not using the default temp, then manually set the time using the time up/down keys, then press start. Why? What a lot of button presses to perform a repetitive task that must take pace at the beginning of any dish preparation. I think Ninja should have gone the extra mile on this one. If I had to pick one thing for Ninja to incorporate into this next model, then this is it!
Second, this unit is big. Be sure to go to Best Buy and see it in person before purchasing it. If this is a product you plan on using on a regular basis then you will want to make sure you have room on our counter or other cooking/prep space to keep it handy for use.
Second, this unit is big. Be sure to go to Best Buy and see it in person before purchasing it. If this is a product you plan on using on a regular basis then you will want to make sure you have room on our counter or other cooking/prep space to keep it handy for use.
Next, the smell. I found that the smell of cooking food next to the unit was not a strong odor. However, the other side of my home filled with the odor of cooking food. What I cooked influenced the smell. Chicken and fries seem fine. The same with the pasta. Vegetables are pungent. The smell reminded me of pressure-cooking brussels sprouts. I hated that odor when I was a kid and I hate it now. Also, as mentioned before, the first few times of use will also have the factory smell mixed in with the odor of whatever you are cooking.
Cleaning the unit is easy. Pop out the basket and hand wash the basket and crisping plate with mild dish soap and a soft sponge. I would not recommend putting this in a dishwasher. My fear is that the non-stick coating will be slowly worn away.
Finally, invest in good silicon coated tongs. You will need these for flipping/rotating food in the pot during cooking as well as for extracting your food when done cooking. I cannot stress this enough. If you use a fork, then you increase the likelihood that that 450-degree basket will burn you.
Final thoughts:
I love this unit! I thought air frying was both a gimmick and a pain the butt. It is neither. Football season is upon us. As such, I have found my new football food maker. I am really jazzed about this. I am also excited that this thing works as advertised. The smell is tolerable. Thankfully, the smells do not linger for long. It also is not filled with atomized oil that gets all over everything as the hot air settles. I have a short wish list on how to make this unit better. My biggest regret is that I only have one. It will make those days of hot wings and fries a longer cooking session than I would otherwise like. But I do not have the room for more than one.
Ninja put a lot of thought into how this unit would be used. This is apparent in the recommended cooking charts in the Quick Start Guide. This same care and thought also made this unit accessible for someone like me; a first-time air fryer cook. I am enjoying the quality of my finished dishes. My best advice is; read the manuals, use silicon coated tongs, frequently check your dishes, and do not be afraid to experiment.
Happy cooking!
Mobile Submission: False
I would recommend this to a friend!

Share this review:
+21points
26of 31voted this as helpful.
ITJim's Review Comments
ITJim has not submitted comments on any reviews.
ITJim's Questions
ITJim has not submitted any questions.

B&W PI5 true wire-free headphones are attractive, well-built, and they deliver a refined sound quality. Featuring Bluetooth 5.0 with Qualcomm aptX technology these earphones ensure reliable connectivity whether you are streaming from your smartphone, tablet or PC. Allows connection of up to two devices at the same time, however, only one device can be used to play or make a call at a time. Download the Bowers & Wilkins free headphone app, available for Apple and Android for further control of the sound and noise cancellation, right on your phone. The PI5 headphones feature the latest innovations in adaptive noise cancellation along with 4 built-in microphones that pick up ambient noise and cancel it with an equal, but opposite, audio signal and enhance the call quality. There are three levels of Adaptive Noise Cancellation – High, Low and Auto, that can be controlled either by the multi-functional button on the left earbud or via the app. Similarly, the touch-sensitive button on the right earbud allows you to enable voice assistance. The buttons also allows you to control playback and phone call functions with single (play/pause, answer call), double (skip forward, end call), or triple presses (skip backward). Another stand-out feature of these headphones is the intuitive detection sensors that put the earphones on standby or reconnect them depending upon whether they are removed or put back on. The PI5s come with a sturdy and attractive charging case for charging the earbuds when not in use. The case is equipped with two 350mAh rechargeable batteries. Each earbud has a rechargeable battery which provides up to 4 hours of wireless playback. Including the charging case, the PI5 can provide up to 12 hours of continuous playback.
Is there an App to set the equalizer?

With the 10th Gen Intel® Core™ i7 processors enabling up to 8-cores and 16-threads of multi-threaded performance, the latest generation of Alienware m17 goes beyond its predecessor. Featuring the new NVIDIA GeForce RTX 3070 with Ultimate performance for gamers and creators. Realistic ray-traced graphics and AI-accelerated DLSS. Our latest thermal technology, Advanced Alienware Cryo-Tech, is an engineering approach where an Alienware system’s gaming performance is never compromised by means of electrical and mechanical methods while maintaining system stability during the highest performance states.
Is this a per-key RGB keyboard or a 4 zone?
With the 10th Gen Intel® Core™ i7 processors enabling up to 8-cores and 16-threads of multi-threaded performance, the latest generation of Alienware m17 goes beyond its predecessor. Featuring the new NVIDIA GeForce RTX 3070 with Ultimate performance for gamers and creators. Realistic ray-traced graphics and AI-accelerated DLSS. Our latest thermal technology, Advanced Alienware Cryo-Tech, is an engineering approach where an Alienware system’s gaming performance is never compromised by means of electrical and mechanical methods while maintaining system stability during the highest performance states.
Is the display having G-Sync?
For the 300Hz screen:
From Alienware's site:
"15.6" FHD (1920 x 1080) 300Hz 3ms 300-nits 100% sRGB color gamut"
https://www.dell.com/en-us/shop/cty/pdp/spd/alienware-m15-r4-laptop?~ck=mn
I do not see any indication of G-Sync on/off in the nVidia driver settings.
From Alienware's site:
"15.6" FHD (1920 x 1080) 300Hz 3ms 300-nits 100% sRGB color gamut"
https://www.dell.com/en-us/shop/cty/pdp/spd/alienware-m15-r4-laptop?~ck=mn
I do not see any indication of G-Sync on/off in the nVidia driver settings.
3 years, 1 month ago
by
ITJim
With the 10th Gen Intel® Core™ i7 processors enabling up to 8-cores and 16-threads of multi-threaded performance, the latest generation of Alienware m17 goes beyond its predecessor. Featuring the new NVIDIA GeForce RTX 3070 with Ultimate performance for gamers and creators. Realistic ray-traced graphics and AI-accelerated DLSS. Our latest thermal technology, Advanced Alienware Cryo-Tech, is an engineering approach where an Alienware system’s gaming performance is never compromised by means of electrical and mechanical methods while maintaining system stability during the highest performance states.
Is the ram upgradable?
From Alienware's user's guide:
Onboard system memory
NOTE: The memory is integrated to the system board and
cannot be upgraded after purchase.
You can find the user's guide on Alienware's support site.
Onboard system memory
NOTE: The memory is integrated to the system board and
cannot be upgraded after purchase.
You can find the user's guide on Alienware's support site.
3 years, 1 month ago
by
ITJim

HP OMEN Gaming Laptop: A thin and light premium gaming experience in an elevated design so you can play everyday. With an AMD Ryzen 7 processor, NVIDIA GeForce GTX 1660 Ti graphics and cooled by OmenTempest Cooling, it makes you think how it all fits into such a tiny little package."
Can this output 144Hz over hdmi?
Yes it can. I am using the HP Omen X 25f over HDMI as an external monitor.
Just be sure to use a HDMI 2.0 or newer cable.
Just be sure to use a HDMI 2.0 or newer cable.

3 years, 10 months ago
by
ITJim
HP OMEN Gaming Laptop: A thin and light premium gaming experience in an elevated design so you can play everyday. With an AMD Ryzen 7 processor, NVIDIA GeForce GTX 1660 Ti graphics and cooled by OmenTempest Cooling, it makes you think how it all fits into such a tiny little package."
Does it have Gsync?
This is not a Gsync monitor. At least I cannot find any information online or in the system drivers that tell me otherwise.
You can connect the laptop to a Gsync monitor and take advantage of all the features of Gsync with that monitor.
You can connect the laptop to a Gsync monitor and take advantage of all the features of Gsync with that monitor.
3 years, 10 months ago
by
ITJim

HP OMEN Obelisk by HP Desktop: Play graphically intense games with this HP OMEN Obelisk desktop computer. You can easily store large amounts of media and other data on the 1TB hard drive and install games and programs on the 256GB SSD for fast access. This HP OMEN Obelisk desktop computer has 16GB of memory for multitasking effectively, and the Intel Core i7-9700 processor handles resource-intense programs efficiently.
How many cores are there in this pc
8 physical cores. This processor does not support 16-way multitasking.
4 years, 10 months ago
by
ITJim
HP OMEN Obelisk by HP Desktop: Play graphically intense games with this HP OMEN Obelisk desktop computer. You can easily store large amounts of media and other data on the 1TB hard drive and install games and programs on the 256GB SSD for fast access. This HP OMEN Obelisk desktop computer has 16GB of memory for multitasking effectively, and the Intel Core i7-9700 processor handles resource-intense programs efficiently.
Is there a gtx 1660ti installed or not? What size pwr supply?
It says in the name that it is a GTX 1660ti. I can confirm that the video card is exactly as described. It is the 6gb version of the card. The Power Supply is 500Watts.
4 years, 10 months ago
by
ITJim
HP OMEN Obelisk by HP Desktop: Play graphically intense games with this HP OMEN Obelisk desktop computer. You can easily store large amounts of media and other data on the 1TB hard drive and install games and programs on the 256GB SSD for fast access. This HP OMEN Obelisk desktop computer has 16GB of memory for multitasking effectively, and the Intel Core i7-9700 processor handles resource-intense programs efficiently.
Does this computer have a memory card reader built in?
HP OMEN Obelisk by HP Desktop: Play graphically intense games with this HP OMEN Obelisk desktop computer. You can easily store large amounts of media and other data on the 1TB hard drive and install games and programs on the 256GB SSD for fast access. This HP OMEN Obelisk desktop computer has 16GB of memory for multitasking effectively, and the Intel Core i7-9700 processor handles resource-intense programs efficiently.
What is the operating system for the pc, and does it come with a virus protection app
Windows 10 standard. It ships with 30 days of McAfee.
4 years, 10 months ago
by
ITJim