ITJim's stats
- Review count120
- Helpfulness votes1,493
- First reviewNovember 23, 2013
- Last reviewMay 8, 2024
- Featured reviews0
- Average rating4.3
Reviews comments
- Review comment count0
- Helpfulness votes0
- First review commentNone
- Last review commentNone
- Featured review comments0
Questions
- Question count0
- Helpfulness votes0
- First questionNone
- Last questionNone
- Featured questions0
- Answer count18
- Helpfulness votes30
- First answerNovember 23, 2013
- Last answerMay 22, 2021
- Featured answers0
- Best answers3

The Shark Navigator Pet Pro Upright Vacuum is your answer to stubborn pet hair and heavy-duty cleaning tasks. With an extendable hose for up to 12 feet of total reach for cleaning above floors, 3XL capacity, and a self-cleaning brushroll for nonstop hair removal, this vacuum cleaner is made for a floor-to-ceiling deep clean.
Customer Rating

5
Great at collecting hair and dander
on September 4, 2019
Posted by: ITJim
from Maine
Setup:
First, thank you Shark for using cardboard inserts as packing material. It makes 90% of the packaging recyclable in my area.
Unpacking and setup are super easy. Just be sure to read the quick start instructions. There are also several spots secured by tape. Be sure to pull these before using the vacuum. There is also useful information on the tape. All but two of the attachments can be stored on the unit.
Operation:
This is my fourth Shark Vacuum. Every one of them have enjoyed long life with my family. But every vacuum cleaner eventually runs it course and needs replacing. This time around we chose the Shark Navigator Pet Pro ZU62. I have two bunnies and a cat. Bunnies are the worst when it comes to shedding. It never stops! We also have multiple rugs that require regular vacuuming to keep the hair and dander under control.
This vacuum does an excellent job at collecting all that pesky hair! My last shark had the fabric roller on the front as well as the hair collector. This one does not have the fabric roller. I was wary when getting this thinking that the fabric roller is the magic to Shark vacuums. I was right and wrong. The fabric roller is magical. The ZU62 doesn’t need it. It still gives that same high-quality cleaning that I have come to expect from Shark.
I enjoy the fact that the collection basket if three times the size of my old Shark. I appreciate the larger basket. It means that I must empty the basket less often. This is especially important during the winter months. I empty the basket on my sharks outside. The less frequently I must brave the harsh New England winter in my cleaning clothes the better.
The vacuum is also lighter than previous Shark models. This is the first thing my wife commented on when she used it for the first time. The weight with the old Shark was the weight. She always had to use the unit in standup mode because the motor and collection basket was too heavy for her to walk around the house with. This made cleaning things like stairs and furniture difficult for her. Those tasks became my tasks. Another great feature of this vacuum is the longer accordion hose. The old vacuum had a very short hose. We normally found ourselves dragging the vacuum around with us when we used the detachable wand or an attachment with the handle. I realize that we can solve this problem by detaching the motor and collection basket. Then again, it was too heavy for that. I can now leave the vacuum in the upright position while vacuuming my couch, the bottom and top third of my stairs, and it is much easier to vacuum the ceiling cobwebs and behind the entertainment center.
I have multiple surface types: hardwood floors, rugs, and tile. The hardwood floor setting does a great job on my hardwood flooring, tile, and Berber style rugs. Dirt, hay (yes, I said hay), and animal hair were removed easily from the flooring and rug using this setting. I used the rug setting on my deeper pile rugs in my living room and bedroom. Again, all the dirt simply vanished from the rug. I also have a home full of girls and women. They lose as much hair to brushing as the pets do to molting. Quite a bit of long hair was collected by this vacuum. I only see a few strands of long hair wrapped around the bristles after two weeks of usage. That is pretty good. I had to clean off the bristles of my old Shark every month or two due to hair, pieces of yarn, and even loose threads from our rugs getting wrapped around the bristles. I am not going to declare victory regarding Shark’s stated anti-tangle bristles. I have not owned the machine long enough to state that their no tangle technology works. I will say so far so good.
Movement around my floor is just as easy and wonderful as my previous Sharks. Controlling the Navigator ZU62 is a bit easier due to the lighter weight material. My only criticism is that there are no LED lights on this model. Light casts shadows unevenly on a floor. It is sometimes difficult to see dirt under tables, chairs, and cabinets. My wife and I did debate if the LED lights were important enough to outweigh the advantages of the larger collection basket, lighter weight, and the longer accordion hose. We chose to go without the lights. We still miss the lights and hope that future models will include the feature. They do come in handy when cleaning under furniture and when cleaning poorly lit rooms.
The only other con I found with this vacuum is the placement of the power button. Why did Shark move the power button, which also doubles as the floor type button, move it to the body of the vacuum from the handle. I preferred it on the handle. This may not be important to everyone. And a minor issue at best.
Emptying the collection basket is still easy to do. Separating the body from the frame is still easy to do. All the parts disconnected at the snap of strategically located buttons. And they all reconnect with a snap that locks the parts in place. Super easy!
Final thoughts:
I like this vacuum cleaner. I think Shark did another amazing job with this model. The longer accordion hose, the lighter weight, and the larger collection basket out weight the positioning of the power button/floor type selection button and the lack of LED lights. This vacuum does an amazing job of cleaning animal hair, reducing tangles on the bristles, and with general cleaning of multiple floor types. If you have a lot of pets, or a furry friend who sheds a lot, then I encourage you to give this Shark a try.
Mobile Submission: False
I would recommend this to a friend!
Share this review:
+15points
15of 15voted this as helpful.

Featuring a simple one-time setup under the mattress, Sleep is a sensor that helps improve sleep quality by offering advanced sleep cycle analysis, heart rate tracking, and snore and breathing disturbances detection. Learn how to improve your nights with a daily Sleep Score. You can also create a better sleep environment by taking advantage of a range of smart home capabilities that Sleep can support.
Customer Rating

3
Novel product but Metrics not very useful
on July 26, 2019
Posted by: ITJim
from Maine
Purpose:
I typically sleep fine. My wife, on the other hand, does not. She tosses and turns, snores, and usually wakes up fatigued. She also refuses to believe me when I tell her she is snoring. She has a Fitbit to track heart rate. But it does not offer anything other beneficial metrics when it comes to sleep. Then, I caught wind of the Withings Sleep Tracking Mat. It monitors heart rate, sleep cycles, and snoring.
Setup:
The device is a small mat with an air bladder. The device unfolders and lays flat between the bottom of the mattress and the box spring. We have a temperpedic memory phone mattress. It is heavy and dense. We were afraid the device would not be able to measure anything through the material. I was afraid it would not be able to detect a heartbeat. It turns out that my worries were unjustified. More on that later.
The device must be installed with the cable facing out. There is a microphone near the cable stem that allows the device to detect snoring. The cable is long enough to reach my closets wall outlet.
I promptly downloaded the Health Mate app from the Apple store, created an account, and connected to the Sleep Mat. The Health Mate app immediately walked me through setup and calibration of the Sleep Mat. Calibration takes approximately ten minutes. At this point I left the cell phone, with the app active, on my bed and left the room. Ten minutes later the Sleep Mat was ready to go.
Experience:
Does it work? The Health Mate app does allow for the connection of other sources of metrics from other health tracking apps/devices such as a smart watch. Unfortunately, I did not see an option to integrate anything other than other Withings products. I would have liked to have integrated the data from a Fitbit or Apple Watch with the Sleep Mat’s data.
My wife has a Fitbit that she uses to track steps and heart rate. We tested the Sleep Mat over the last week while she wore her Fitbit. We compared heart rate metrics from both apps. We found that the heart rate information matched closely between devices. However, the Health Mate graph does not to be a minute by minute chart like the Fitbit tracker is. I found gaps ranging from five to twelve minutes between readings. Is this correct? It may be the interface for the app is incapable of presenting granular information. I cannot believe the device is capture beats per minute using five to twelve minute intervals. I hope Withings fixes this in their app. We were able to match up a few times during her sleeping sessions. We found that the Sleep Mat and Fitbit data did match during their time periods within a beat or two.
Data that my wife and I found interesting are the measurements for light sleep, deep sleep, and REM. This information is represented by a chart showing how intense each sleep cycle is and its duration. You How does it know? I wish there was a clearer explanation than the mat monitors heart rate, respiration rate, sleep cycle, and snoring. It also says it monitors sleep cycles but that seems to be a bucket statement for unspecified metrics that most likely include heart rate and respiration.
Finally, my wife mentioned that the app did not capture the periods breaks in her sleep such as poddy breaks or letting the cat out at 4am. The app does report an unbroken night of sleep for 6, 7, 8 hours. It also gave her a sleep score of 90 or above for each night of sleep. The app does have some rudimentary information regarding what you need to know about sleep. There is zero information about how to interpret the metrics. I also found this disappointing. It makes the device and the metrics more novel than useful. There is a generic coaching portion to the app. The information is not personalized based on metrics.
Final Thoughts:
The device is simple to setup, calibrate, and collect metrics with. It will integrate with other Withings metric collection devices such as their watches. However, there is no education or guidance on how to interpret and then use the information. For example, if the pad detects that I am tossing and turning all night, then identify the pattern for and then give me some suggestions to reduce the activity? Is there an article about anxiety and anxiety relief that may reduce my restless sleeping sessions? Am I getting too much deep sleep? What should I know about sleeping too deeply for too long? Is it a problem? How about snoring four hours a night? There just seems to be a lot missing here that a data driven product should do but does not.
I have the data. What is next? I do not feel like this product has an answer yet. Maybe the capabilities I would find most useful are not part of the mobile app yet. It would great if I could share more detailed data with my doctor while I am with my doctor. I can do that with a smartphone and a more robust mobile app. I like this product, I like the metrics, but I cannot see past the novelty.
Mobile Submission: False
No, I would not recommend this to a friend.


Share this review:
+5points
11of 17voted this as helpful.
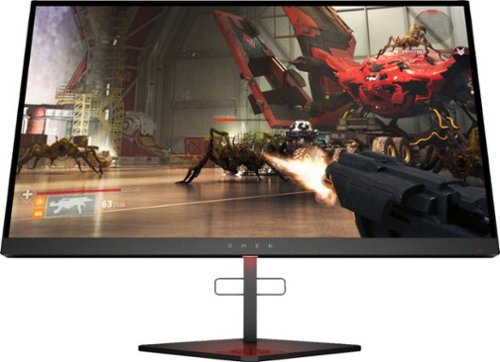
Experience immersive graphics with this HP OMEN X gaming monitor. The 24.5-inch 1080p display has a 240Hz refresh rate and a 1ms response time for smooth visuals. Adaptive Sync technology eliminates blurring and tearing, while the adjustable height and angle support simple customization. This HP OMEN X gaming monitor has a DisplayPort, two HDMI and two USB ports for versatile connectivity.
Customer Rating
5
Awsome gaming expereince!
on June 26, 2019
Posted by: ITJim
from Maine
Overall, excellent monitor with a great customer experience.
Really cool gaming monitor. Ultra-thin bezel. The accent lighting is not overdone. Onscreen monitor controls are easy to understand and navigate. Text and graphics are clear and crisp. I did not see any screen tearing with both Nvidia and AMD GPUs. There is one Display Port, two HDMI ports, two USB ports, a USB to Computer connection, and a Headphone jack. Finally, HP included a spot on the top of the monitor stand to hang my headset. Nice touch! So, let’s talk about this monitor!
Setup:
The monitor shipped in three pieces: the stand, a VISA bracket, and the monitor itself. The monitor slips easily into the stand. There is a piece of plastic that holds the adjustable arm in place during shipping. Remove this and you will be able to slide the monitor along the length of the stand. The monitor tilts side to side and forward and back. It will not swing from landscape to portrait mode. If you try, you will break the pins connecting the monitor to the stand.
There is a VISA compatible wall plate. There are zero instructions on how this is supposed to work. The four screws that ship with the monitor are machine screws. So, I’m guessing there is a compatible wall mount system this will work with?
I love the placement of the power button and on-screen controls. They are placed on the lower right back of the monitor. At first, I thought this was as dumb idea. The more I use the controls the more I like the placement. The power button requires a lite touch. The menu system is activated and navigated by a single joystick. The joystick, like the power button, requires a light touch. I like this better than the traditional push button design. The joystick makes it easy to navigate around the menu without putting any upward pressure on the monitor from pushing buttons. The joystick is also more accurate than the traditional push button design. No pressing the wrong button.
Setting the monitor up with Windows was a piece of cake. Windows recognized it instantly. I did test the monitor with an AMD graphics powered system and a Nvidia powered system. AMD instantly recognized the monitor as FreeSync. Nvidia instantly recognized the monitor as G-Sync. Of special note, the Omen X 25f is one of the few FreeSync monitors that Nvidia has qualified as G-Sync compliant. HP also includes a little sticker on the lower left corner of the monitor with NVidia’s G-Sync logo.
Experience:
I was able to set this monitor up with the default 60hz all the way up to 240hz. The monitor does not default to 240hz. You will have to change this in Windows and possibly in your AMD or Nvidia software. Once set, I loaded up my favorite games. I tested with Mechwarrior Online, The Division 2, Fortnite, and Apex Legends. I also tested video with Netflix and YouTube. Each game was configured to the highest settings my CPU and GPU could handle. I did not see any screen tearing. Images were clean and crisp regardless if the refresh was set to a static 144hz/240hz or to adaptive sync. Framerates were also high.
Colors looked good as well. HP includes multiple preset modes. Standard, Gaming, Movie, Warm, Cool, Native, Low Blue Light, and HP Enhance+. I will only focus on Low Blue Light and Gaming. These are the two I used the most. You can experiment as you see fit. The Low Blue Light option sets the monitor to a warm image setting. It also dims the display a bit. I often use this setting for everyday computing tasks. As such, I manually lowered the brightness. This monitor is bright. You can adjust the preset without impacting the other monitor modes. This is a great feature because it allows you to adjust each preset to match your personal visual preference.
The Gaming Profile instantly increases the monitor brightness and contrast to 80%. It also increases the monitor’s response time. I did see a visual change with my gaming experience while in Game Mode. Images were sharper and actions seemed more responsive. There was zero ghosting of my images as I panned quickly panned from left to right in two first person shooters I tested.
The HP Omen Command Center does give you some control over the monitor. I wish HP had allowed full control over the monitor settings from the Command Center. You have control over Lighting, Performance, and Picture Mode. Lighting Control allows control over the ambient lighting effect of the monitor. There is a down facing RGB LED that casts light on the HP Omen logo on the monitor stand and your desktop. There are several modes including static, animation, task lighting, and off. You also have control over the color displayed. Performance mode allows two options; placement of the monitor’s refresh rate and the response time of the monitor. The FPS is not a game counter. So, don’t expect to get exact frame rates for The Division. Response time is less straight forward. It is on a sliding scale from Normal to Fastest. I tried fastest and found a few of my games looked worse. Leaving the monitor at the default response time seems to work for all my applications.
Picture Mode is useful though a bit overly simplified. There should be an advanced mode here so that I can access all the monitor options. Instead, granular control is left to the joystick and the onscreen display. The good part is that you can flip through all eight monitor presets and get a description and a sample image representing what each mode will do.
Do not worry if you do not have Omen Command Center loaded. Windows will download it from the Microsoft Store automatically when it detects an HP Omen product.
Final thoughts:
I like this monitor! My games look awesome. My images are sharp and colorful. Menu navigation is easy. I can connect more than one computer to this monitor which is a must for my needs. The bezel is thin allowing me to stand multiple HP Omen monitors together with minimal distraction between them. The 240hz refresh does make a big difference with gaming performance.
Mobile Submission: False
I would recommend this to a friend!
Share this review:
+6points
6of 6voted this as helpful.
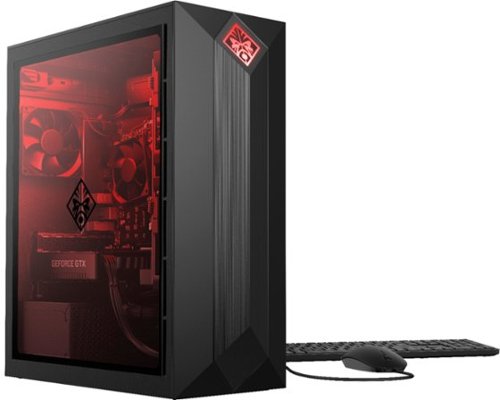
HP OMEN Obelisk by HP Desktop: Play graphically intense games with this HP OMEN Obelisk desktop computer. You can easily store large amounts of media and other data on the 1TB hard drive and install games and programs on the 256GB SSD for fast access. This HP OMEN Obelisk desktop computer has 16GB of memory for multitasking effectively, and the Intel Core i7-9700 processor handles resource-intense programs efficiently.
Customer Rating
5
Awsome 1080P Gaming Performance
on June 23, 2019
Posted by: ITJim
from Maine
The HP Omen Obelisk Gaming Desktop with Intel i7 9700 CPU, 16GB Kingston HyperX 2666MHz memory, and Nvidia 1660 TI 6GB graphics card are a powerful combination. First, I want to satisfy the benchmark crowd.
Benchmark Numbers:
PCMark10 – 5,829
3D Mark – Time Spy score of 6,191
NovaBench - 2521
SuperPosition – 1080P High – 8577
PCMark10 – 5,829
3D Mark – Time Spy score of 6,191
NovaBench - 2521
SuperPosition – 1080P High – 8577
Game performance:
Apex Legends – 1080P, high settings – 100+ FPS
The Division 2 – 1080P – High settings
FortNite – 100 TO 130 FPS Ultra Detail Settings
Mechwarrior Online – 60 to 100 FPS at Very High Settings and TXAA.
Apex Legends – 1080P, high settings – 100+ FPS
The Division 2 – 1080P – High settings
FortNite – 100 TO 130 FPS Ultra Detail Settings
Mechwarrior Online – 60 to 100 FPS at Very High Settings and TXAA.
These are the best benchmarks and performance numbers I have been able to achieve while on a budget. So, how does this translate into a super awesome computer experience?
Setup:
Setup was super easy. The 1660 TI graphics card has a Display Port, HDMI, and a single DVI connector. The graphics card can easily accommodate two HP Omen, or other, Displays. My primary display is an Omen X 25F 24.5” display connected via Display Port. My secondary is an HP Pavilion 25X 24.5” screen connected via HDMI. I have not seen any issue regardless of content or configuration. Both displays will support 144hz refresh so combining them into a single display should not prove an issue. The system also has five rear facing USB 3 ports, a single USB C port, and two USB 3 ports in a recessed top panel. More than enough ports for a gaming mouse, gaming keyboard, and gaming headset. The system does have an integrated Realtek Audio processor. There are rear facing and front facing Mic and headphone ports.
The included Mouse and Keyboard were the typical low end, get you by on a budget, devices. You will want to check out the Omen Keyboard and Mouse if you want to complete your Omen gaming experience.
Windows 10 setup is its usual simple, follow the bouncing ball, kind of setup. HP Jumpstart is the first program that pops-up after Windows 10 setup is complete. It will ask if you want to install some popular Windows 10 applications. Then, you will be asked if you want HP to use your information to register McAfee LiveSafe. You will want to download all Microsoft updates and install the latest Nvidia driver before you get to gaming.
Experience:
This computer is fast! I can go from cold boot to logon screen in about five seconds. Part of this speed is due to the NVMe 256GB SSD. You should expect similar performance with your games and applications if you load them to the C drive. I personally chose to load all my games to the 1TB Toshiba HDD. It is slower but it has all the space I need for all the games I load. The good news is that case has an extra drive bay for a third storage device. The good news is that the bay is toolless. The SATA cable and power cable for the extra drive is already installed. The bad news is that there is no adapter for a solid-state drive. What else would someone put in the additional bay? HP?
The case is small, handsome, and very well thought out. The case vents are located on the bottom, top and there are vents located at the front of the glass side window. The top connection pane is recessed into the top of the case so as not to stand out. The lighted Omen logo looks fantastic against the satin black finish. Cable management is good; not great. The power cables from the PSU to the motherboard and Video card are neatly arranged but still make a bit of a mess. I wish HP had decided to go with a power supply shroud like other gaming PC manufacturers. The good news is the backlighting does not extend to the bottom of the case. And, the background and wires are all black.
The GEFORCE GTX logo is front and center on the 1660 TI video card. You can also see the OMEN and HyperX logos on the different components. It would have been a nice touch if the NVMe Western Digital also stood out on a black PCB. The case lighting is a bit harsh. There is a single LED RGB light strip running along the top edge of the case. There is no light diffuser to soften the lighting effect. I think HP missed an opportunity by not including a diffuser to soften the lighting effect.
I love the window on this case. It is a screwless design. Press one button on the back of the case and the window leans out from the top of the case. Then lift the window free. So easy! I also love the Omen logo silkscreen on the window. Putting the window back is just as easy. I wish other manufacturers would come up with as simple and clean a system.
Finally, the system ships with a single stick of 16GB of Kinston HyperX Fury memory. There is an additional open socket for another stick. The most RAM I utilized during testing was 70% of memory. 16GB is enough for all modern games.
Gaming:
Gaming was fun. I collected FPS as I played through multiple games. Settings for all games were ultra-high. I started with the Division 2. I had to back off on the settings to medium-high. The gaming experience was still top notch with the settings slightly reduced. Apex Legends looked fantastic. Frame rates were high, color and special effects were spectacular, and I did not experience any screen tearing. I had the same experience with Fortnight. All game settings were set to Ultra. Butter smooth performance.
Both Apex Legends and The Division 2 are heavily multi-threaded. The Intel i7 9700 has eight cores. I had Task Manager running on my second monitor during game play. All eight CPU cores were pegged at 100% during gameplay. I was not expecting that. I could hear the fans blowing to keep the case cool. The sound was not overwhelming and in line with what I would expect from a system this heavily utilized.
The only game that gave me any issues was Mechwarrior Online. I did play the game with all fidelity settings maxed out. The FPS remained ranged bound between 60 to 80 for most maps. The CryEngine3 is bound to the single threaded performance of CPU. The game favors the i7-9700 in this case. For fun, I turned the graphical settings to this game all the way down. I got the same FPS experience. So, it is CPU bound and not GPU bound.
Overall, the HP Obelisk made every game I own look effortless and beautiful.
Omen Command Center:
The Omen Command Center is pre-installed. It detected the computer, my Omen Mindframe headset, and my Omen X 25f monitor. My biggest gripe with the Omen Command Center is that there is so little to command. This is most apparent with the Omen monitor. But, more on that in my monitor review.
The Omen Desktop section does show some basic system vitals: GPU Utilization and Temp, CPU Utilization and Temp, Memory Utilization, Download and Upload speeds. There is a lighting sections that allows you to customize the system lighting. Lighting is broken up into two zones: the Omen Logo and the case lighting. You can choose a static color (either basic or custom color), Animation, or turn the lights off. There are currently five animation. Each animation does have its own set of tweaks allowing you to flavor to your personal taste.
There is also an option here for Network booster. There is little information on this feature other than what is on the Omen Command Center screen. The Unit does have a Wireless adapter. I could connect it wirelessly to my router. This tool appears to work with the integrated network adapter (hard wired connection) and the wireless adapter. Priority traffic will flow along hardwired adapter and lesser priority traffic will flow along the WIFI. I was not able to enable this feature to test. There needs to be more help screens or a better description of this feature before I feel comfortable poking around. There is the ability to set network priority per application. Not sure I want to mess with that.
Final impressions:
The case is sharp looking. I love the side glass panel and how easy it is to remove and reattach. There are plenty of cooling vents to allow adequate airflow. Expandability is limited to an additional memory module, a third hard drive, and a larger video card. The system is a monster with 1080P gaming. Handsome addition to my gaming space. I encourage you to check this system out.
Mobile Submission: False
I would recommend this to a friend!
Share this review:
+10points
10of 10voted this as helpful.

Enjoy a theater-like experience in the comfort of your home with this 370W Samsung soundbar system. Wi-Fi functionality offers hands-free voice control with select devices for an easy intuitive user experience, while dual HDMI ports connect multimedia equipment. This Samsung soundbar system includes a wireless subwoofer that adds rich bass for immersive audio.
Posted by: ITJim
from Maine
I have owned several soundbars and sound plates over the years. The experience has been hit or miss. This time around, I chose to give the higher end Samsung HW-Q80R a go. I am glad I did. What a difference a little splurging makes.
Setup:
Physical setup depends on what you want to do with the soundbar. If your intention is to setup the soundbar on a TV stand, bureau/dresser, or table then physical setup will be relatively easy. Setup will become more complicated if you choose to wall mount the soundbar.
The soundbar does come with two brackets, two screws for attaching the brackets to the soundbar, and two holders that you screw into your wall. The responsibility of supplying drywall anchors, or other hardware to secure the holders to the wall, are on you. Samsung does supply a paper Wall Mount Guide to help with wall mount installation. It is a long rectangular piece of paper with printed measurements and holes marking the mounting hole locations. You tape the Wall Mount Guide to the wall, use your level to make sure the guide is level, mark your positions with a pencil, drill pilot holes for your screws where the guide indicates, and then you are ready to hang the holders to the wall.
Keep in mind that this soundbar has ceiling firing speakers for Atmos. If you place the soundbar on a bureau or table then make sure the soundbar is forward enough to clear the bottom of the TV. The same is true for wall mounting. You will want your TV mounted flush to the wall so not to interfere with the Atmos speakers. You may also want to drop the soundbar a few inches below the TV depending on how thick the TV is.
Equipment setup was slightly more complicated than a low end soundbar. The HW-Q80R has an ARC HDMI out port. This connects to your TVs ARC HDMI port. This allows the two devices to communicate with each other. Powering on the TV will power on the Soundbar and vice versa. Turn on the Blu-ray player then the TV and HW-Q80R turns on. And, sometimes powering on the TV powers on the Blu-ray player whether you want it to power or not. ARC does have a few issues.
The HW-Q80R has two additional HDMI ports. These are for connectivity to an Xbox, PlayStation, Nintendo, Steam Box, or other HDMI connected devices. I found that the Xbox must be connected directly to the soundbar over HDMI in order to leverage Dolby Atmos. You also need to download the free Dolby app from the Microsoft Store to use it. It is free for use with a home theater.
Performance:
Cinematic! Sound is coming at me from all directions. The 12 speakers in this soundbar are authoritative. Thankfully, the volume for each set of speakers can be adjusted. You can adjust the settings using the remote and the small LED display built into the right side of the sound bar.
The Smart Things app from Samsung can also be used with the HW-Q80R control certain functions. I could control volume, input selection, Base, and perform EQ for music. I was disappointed that I could not adjust the volume of each speaker set in the system. It would have made calibration faster and simpler. Hopefully, Samsung will release an update that allows granular control.
The Smart Things app from Samsung can also be used with the HW-Q80R control certain functions. I could control volume, input selection, Base, and perform EQ for music. I was disappointed that I could not adjust the volume of each speaker set in the system. It would have made calibration faster and simpler. Hopefully, Samsung will release an update that allows granular control.
Once calibrated, the sound stage simply took over the whole room. There is a lot of sound coming from a very small space. Audio sounded big and not compressed. I played Star Wars Battlefront II, one of the few Xbox Atmos enabled games, and was completely impressed with the audio performance. The HW-Q80R relies on the bounding sound off the walls and ceiling for affective surround sound delivery. I could tell a blaster bolt shot came from my off camera to my left. The height speakers were more difficult to distinguish. I felt like the front firing speakers were drowning out these speakers.
I then watched Ready Player One in 4K. Again, big sound. The bass from the sub-woofer is not as tight as to what I am used too. It is boomy. I had to move the sub away from the wall, out of the corner, and then turn down the base volume to get it calibrated for the room’s acoustics. I found the movie enjoyable once the base was brought in line. The bass soaked Mecha Godzilla scene did get its full due. It is no 12” dedicated subwoofer. But, for a soundbar subwoofer offering, it is pretty darn enjoyable.
I also played Pacific Rim and Lego Batman. Both movies have Atmos soundtracks. Dialogue was clear, the music and sound effects were in your face enjoyable, and the sub-woofer did not miss a beat.
Within minutes I was connected to iTunes on my phone and listening Bach’s Flute Concertos. I did have to go into the Smart Things app to set the EQ to Classical before getting an acceptable music experience. There is no way to manual adjust EQ using the HW-Q80R remote. I also had to adjust each speaker group’s volume to get the best performance.
Issues:
First, I cannot have unique speaker settings for each input. For example, if I calibrate the soundbar for the perfect movie experience then that calibration persists when I connect to iTunes to play my favorite classical number. If I switch the soundbar to Game Mode for my Xbox, then my Netflix video will use Game Mode until I explicitly make an adjustment. My TV is smart enough to use different video settings for Netflix, TV, 4K Blu-ray, and Xbox. Why not this soundbar? I hope Samsung releases an update to address this. It is so annoying that I am dropping a single star from this otherwise awesome product.
Second, there needs to be a night audio mode. Everyone knows I am watching a movie or playing a video game. This may not be a big deal if your neighbors are not in the same building as you. Otherwise, be ready for upset neighbors. You can set the sub to 0 and reduce the sound for the surround speakers. Or, Samsung could make a night mode that does it for you. I prefer the later because I do not need to continually mess with the speaker settings.
Final Thoughts:
Awesome!
I decided to aim for a top shelf soundbar and feel I got a top shelf soundbar experience with the HW-Q80R. Samsung literally blew me away. I did have to calibrate the system to my room’s acoustics and my own subjective preferences. Is the acoustic experience as ear bleeding wonderful as a traditional component system with large, dedicated speakers? No. Then again, it is not meant to be. The HW-Q80R wants to simulate that front row movie theater experience in a small to medium sized room. I feel it does a darn good job of it at this price point. You can also add the optional wireless Atmos enabled surround speakers if you want to add true surround or rear channels. The HW-Q90R is the same sound bar as the HW-Q80R but ships with the optional surround speakers. I chose the HW-Q80R because my space cannot accommodate the extra speakers.
I encourage you to audition the HW-Q80R if you are looking for a compact home theater solution.
Mobile Submission: False
I would recommend this to a friend!
Share this review:
+11points
15of 19voted this as helpful.
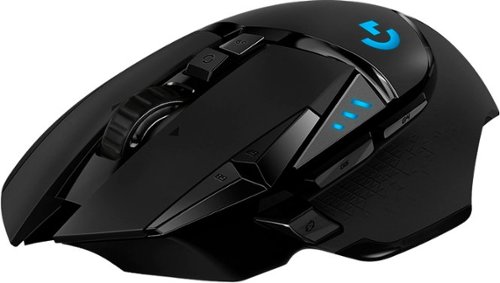
Now you can game faster and more accurately, with G502 LIGHTSPEED featuring superfast 1 ms wireless connectivity. A next-gen HERO sensor delivers 25k DPI class-leading performance and energy efficiency—get up to 60 hours of uninterrupted gaming. 11 programmable buttons help you optimize gameplay with custom keybinds and macros. Primary buttons feature metal spring tensioning for fast and crisp actuation. Six adjustable weights let you find the right mouse feel. LIGHTSYNC RGB gives you ~16.8 million colors to create an exciting and immersive gaming environment. The hyper-fast scroll wheel lets you speed through long menus and documents.
Customer Rating

4
G502 Lightspeed w/PowerPlay Gaming Pad
on May 20, 2019
Posted by: ITJim
from Maine
Highlights:
This mouse is fast, precise, comfortable, and has great aesthetics. Powerful software. Great hardware! Compact, portable design. Wireless or wired operation. Wireless charging with the addition of the PowerPlay gaming mouse pad. Lighting is simple but aesthetically pleasing. Aggressive looking. The downside includes confusing G Hub software interface and difficult to find documentation. I chose to get the matching PowerPlay mouse pad due to the wireless charging and the swappable fabric and hard surface mouse pad options. Please read on for my full review.
Setup:
I first setup the PowerPlay mouse pad. The transmitter is built into the mouse pad. The transmitter connects to the computer via a single USB cable. The G502 has a 1 3/8 Inch diameter cover on the bottom of the mouse that is interchangeable with the optional wireless charging puck that comes with the PowerPlay mouse pad. This puck also hides a compartment keeps the usb wireless transmitter safe when you are not using it. You will not need the USB adapter when connected to the PowerPlay. It is a great place to store the USB wireless adapter when not in use. The puck is held in place with magnets. This keeps the USB adapter nice and safe. It also holds the cover firmly in place. Swapping out the covers is very easy.
The PowerPlay instantly turned on when I turned on the computer. I turned on the G502 using the on/off switch located on the bottom of the mouse. The PowerPlay and G502 instantly connected. However, this convince did come with an interesting challenge.
I found that I was unable to use the USB wireless adapter with any of my laptops. After some experimentation, I found that the G502 and PowerPlay maintained connection regardless of distance and power status of my gaming computer. I had to turn cut off all power to my computer before I could use the G502 wirelessly with another computer. My computer continues to power USB devices while in soft power down mode. This is so I can charge my cell phone or wireless equipment when not using the computer. I was shocked by the transmission range of both products. I was over 20 feet away from the device and on another floor and still had a connection. I am glad I found a work around. It would have been nice if there was a KB article about this.
This will not be an issue for you if you purchase the G502 Lightspeed by itself. This proved to be a minor issue easily overcome by modifying my behavior. Go green and turn off your PC! The good news is that you now know the work around if you find yourself in a similar situation.
Documentation:
The included documentation for the G502 Lightspeed is laughably slim. There is a small foldout pictorial showing how to setup the G502 for the first time. There is also a pictorial showing the placement for the weights inside the mouse’s two compartments. I was surprised that there were no instructions to download the Logitech G Hub from Logitech’s website. Maybe I missed it?
The PowerPlay suffered a similar documentation drought. I can forgive this oversite with the PowerPlay. It is ridiculously easy to setup. Pictorials is really all you need.
The Logitech G Hub is another matter entirely. Logitech really makes you search for the G Hub Manual. I did find it. The Logitech G Hub is very powerful. I have been looking through the software for three days and still feel overwhelmed with the customization options. I can do anything I want with any button except for the scroll wheel lock button. Every other button seems fair game. And then, Logitech dropped the ball by hiding the user’s guide deep in the G Hub’s interface. Why Logitech? Please tell me why!? The manual looks well written and thought out. It is also written in multiple Languages. This is the meat and potatoes of your unifying API for your gaming products! It should be front and center in huge blinking red font on the home page of G Hub! Logitech should be proud of this.
G Hub Manual: https://www.logitech.com/assets/65550/ghub.pdf
G502 Mouse Manual: https://www.logitech.com/assets/65648/g502-lightspeed.pdf
G502 Mouse Manual: https://www.logitech.com/assets/65648/g502-lightspeed.pdf
Comfort:
The mouse feels good in my hand. Each button has a short travel distance between pressed and depressed. It takes very little effort to activate every button. I like that the two buttons to the left of the left mouse button are sensitive enough that I can rock my finger over them to adjust the mouse sensitivity up and down. This way I do not have to lift my finger to make a DPI sensitivity adjustment. Small movements are best while in the heat of pixel armageddon. The scroll wheel has two modes, free and restrictive. As you can guess, free means the mouse wheel freely spins with nothing but friction to slow it down. There is a button behind the wheel that will engage a limiter of sorts. Engaging the limiter prevents the mouse from freely gliding and adds a nice audible and tactile click. I like this mode because it gives me better precision with the games I play. It is also my preferred mode for normal computing sessions such as work and web browsing.
The mouse wheel also has a left and right button function. The left and right click are very sensitive. I mapped the mini-map function to the right-side wheel button and spent a game fighting with the in-game map constantly popping up. I then discovered that I clench my hand when in stressful situations. Time to unlearn some bad moussing habits.
I also like the way the mouse glides along the fabric PowerPlay mousing surface. I did not like the hard surface cover that came with the PowerPlay. I find the fabric pad to be more comfortable for my play and work style. I think Logitech made a good choice by including both moussing covers.
There is a button with a crosshairs symbol on it. This button instantly, and temporarily, sets the mouse to the lowest DPI you set for your profile. This is very helpful when sniping or other situations where precision is needed. I did not realize how useful this feature was until I had. I love it!
Lighting:
The G502 and the PowerPlay both have the iconic Logitech “G”. Both light up. I really do believe the lighting option is icing on the cake for an already attractive device. I do believe Logitech should have added more lighting. Maybe add an LED to the mouse wheel housing. The mouse does look great in a dark room. It also fits right in with my other lighted gaming gear. You can map lighting effects to each game you play and each application you use. Unfortunately, the learning curve to building profiles is unnecessarily steep.
There is one unique lighting feature that I really like. The mouse has three battery LED indicators. These double as DPI indicators. The furthest forward position is the maximum DPI defined in your profile. The furthest rear position is for the lowest profile defined DPI. The lights in between represent the in-between DPI settings. All I need is a quick glance during a gaming session to tell me which DPI I am on. I have also been using it during my daily computer sessions. Super helpful feature. The battery LEDS also sync with the G Hub lighting. You do not have the ability to individually control each battery indicator LED.
Software:
The software is a mixed bag. I run into this with every manufacturer’s “unique” software suite. From 40,000 feet, this software is not intuitive at all. However, spend a little time with it, and you will see that this is a very power, feature rich software suite; almost overwhelming. The drag and drop feature for each mouse button is cool. I was able to quickly setup my most common keyboard commands in seconds. Best part, I can setup button commands for every game and application I use. Logitech has many popular windows commands pre-defined. So, if you want one button to CTRL+C for copy, and another for CTRL+V for paste, then just drag those commands from the menu to the mouse button you want to assign the commands too. No need to build your own macro.
There is a dark side. It takes some real work, and patience, to decipher the G Hubs interface. I just happened upon the settings that allowed me to assign a profile to a game. Real pain. The documentation is also buried in the interface. Macros creation is setup as a wizard of sorts. You will perform a lot of trial and error before figuring it all out. The macro, once create, will be added to the Macro list for easy drop and drag onto a mouse button of your choice.
Finally, the software will display the remaining battery level in the form of a percentage. The PowerPlay will charge the mouse during use. I found that the mouse will continue to discharge even while on the PowerPlay pad. Maybe I will get more moussing time than with the mouse’s battery alone. Only time will tell. The PowerPlay does charge the mouse when I am not using it. The G502 will also deactivate itself while not in use. The lights will remain on as long as it has a connection to the transmitter. Finally, the mouse will discharge faster with LED lights on. You do have the option to turn them off in the G Hub software.
Final words:
The mouse is awesome! The weights allow me to adjust the mouse weight to my liking. Great use of space. I can add the four 2-gram weights, the wireless USB adapter, and the PowerPlay adapter without adding any bulk to the mouse. I love the aggressive look of the mouse. And it feels great in my hand. The PowerPlay is icing on the cake. I have zero complains about it. Logitech does have some work ahead of it for the G Hub software. Logitech also needs to put the documentation front and center! Hopefully, they figure out how to streamline the interface, incorporate more hover help, and build some contextual help into each page. It would go a long way to make the powerful features of the G Hub more accessible to more than just the hardcore gamers.
Mobile Submission: False
I would recommend this to a friend!


Share this review:
+27points
40of 53voted this as helpful.
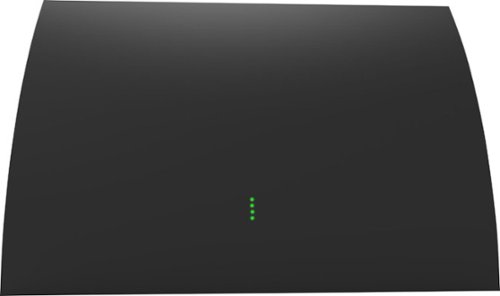
Enjoy major networks without paying a monthly fee with this Mohu Arc Pro indoor HDTV antenna. An integrated signal indicator helps you to find the optimal signal location, while the LED lights let you adjust antenna placement in real time for a more stable connection. This Mohu Arc Pro indoor HDTV antenna uses FirstStage amplifier technology which results in less distortion and stunning picture quality.
Posted by: ITJim
from Maine
Setup:
Setup was a snap. The product comes in three parts: the Arc Pro antenna, the stand that attaches to the back of the Arc Pro, and the power adapter/signal filter. The signal filter screws into the cable hook up on the back of the TV. The filter has a USB cable connector. The USB powers the signal filter and the antenna. Then the antenna’s built in cable screws into signal filter. The stand then attaches to the antenna. I placed mine on a bookshelf. The cable, with the filter attached, is about 10 feet in length. Unfortunately, this means the antenna needs to be relatively close to a TV that is 65” or larger. The closer the antenna is to my 65” flat panel TV the worse reception got. I more on this later.
The stand is designed to sit on a flat surface such as a table, shelf, or bookcase. The stand also has two mounting holes for wall installation. There were no screws or drywall anchors included with my antenna.
Unique problem this solves:
I get strange signal drops or signal disruptions when cars drive by my house. But it only happens in one room in my home; the living room. It is strange because the antenna is mounted higher than the road and the cars driving on it. I upgraded my Leaf 50 with a Leaf Supreme last year hoping that the larger antenna size would resolve the issue. It did not. I kept both antenna’s because I have more than one TV in my home. The power amplifier for both Leaf antennas only made the issues worse. I would either loose a channel completely or the TV image would pixelate. Hanging the leaf on different walls and windows would solve one issue but create others. And, as you know, the Leaf is meant for a fixed position.
I finally decided to give the Mohu Arc Pro a try. It is rated at 60 miles like the Leaf Supreme. I am a child of the rabbit ear years of TV watching. I know full well that the facing and positioning of an antenna can make a huge difference in signal quality. I connected the Arc Pro to my TV and ran through the auto channel search. I picked up four of the five channels I had with the Leaf Supreme. My Leaf Supreme is located at the top of my wall. The Arc Pro is located at eye level. So, pretty good for where I placed it. Even better is that I did not have any signal drops when cars drove by.
Next, I worked on getting that last station. I moved the antenna around the room. Running the auto channel function after each move. I eventually acquired the lost channel. The cable being only 10 feet long did interfere with where I could position the antenna relative to the TV. For me, this presents two challenges.
First, cosmetics. My TV setup is very clean. All cables are hidden behind the entertainment center and behind a cable runner. The Cable runner hides the antenna cable, power cable, and the HDMI cables from the TV to the rest of the entertainment center. 10 feet won’t cut it. I do not want to see the antenna cable. This may be a small gripe for some of you. However, I enjoy a clean looking setup.
Thankfully, the Arc Pro does work with a cable extension. The Arc Supreme shipped with a coupler that allows two coax cables to connect. You can probably find one at your local best buy. I took the cable from the Leaf Supreme and connected it to the 10’ cable of the Arc Pro. Since the cable is already integrated into the entertainment system I no longer need to worry about the cosmetics. The key take away is that the Arc Pro will play nice with a cable extension. Which leads me to point number 2.
Thankfully, the Arc Pro does work with a cable extension. The Arc Supreme shipped with a coupler that allows two coax cables to connect. You can probably find one at your local best buy. I took the cable from the Leaf Supreme and connected it to the 10’ cable of the Arc Pro. Since the cable is already integrated into the entertainment system I no longer need to worry about the cosmetics. The key take away is that the Arc Pro will play nice with a cable extension. Which leads me to point number 2.
The extra cable allows me greater placement flexibility. The closer the Arc Pro is to my TV the worse the reception gets. I lose all signals when the antenna is next to the TV. The same is true for any other antenna I have tried. The TV either physically blocks the signal or throws out enough interference to prevent the antenna to receive a clean signal. Then, there is that pesky signal disruption that happens when cars drive by. Long story short, I found a position in my home that allows me to rotate the antenna to maximize my signal quality for each station in my area. Cars driving disrupting the signal is also less of an issue. I still cannot get FOX.
Finally, you are probably yelling at me to get a roof mounted antenna. That would probably solve all of my issues. If only that were an option for me. Unfortunately, it is not currently an option for me.
Final thoughts:
I was weary about trying a smaller antenna. For my Livingroom, I found that the smaller Arc Pro does a better job than the larger Leaf Supreme. You may have a different experience. For me, the Arc Pro does a better job than its larger cousin. The story may be different if I lived on a hill with clear line of site to all the local broadcast towers. Instead, I live surrounded by houses, trees, and small hills. Therefore, the greater flexibility that the Arc Pro affords me is a better overall experience.
Thank you. I hope you found this review useful.
Mobile Submission: False
I would recommend this to a friend!
Share this review:
+2points
2of 2voted this as helpful.
Enjoy your favorite music and podcasts anywhere with this Sony PG10 portable wireless speaker. It features a splash-proof top with four built-in cup holders, and will be great for parties with outdoor party mode. Bluetooth connectivity allows pairing this speaker with up to three devices simultaneously, while the built-in rechargeable battery lasts for up to 13 playback hours.
Customer Rating
4
Nice with some cool features
on April 11, 2019
Posted by: ITJim
from Maine
Setup:
Unboxing and setup was very easy. The Sony PG10 is a single unit; no assembly. The box contains the PG10, an important information sheet written in pictograms, power cable, and the instruction manual. The built in rechargeable battery arrived with a 50% charge. It was ready play straight out of the box! Being a man of little patience when it comes to new toys, opted to go straight for the FM radio instead of going through the hassle of connecting iTunes over Bluetooth. I found out, ten minutes later, that blue tooth was just as easy to setup as the FM radio.
Unboxing and setup was very easy. The Sony PG10 is a single unit; no assembly. The box contains the PG10, an important information sheet written in pictograms, power cable, and the instruction manual. The built in rechargeable battery arrived with a 50% charge. It was ready play straight out of the box! Being a man of little patience when it comes to new toys, opted to go straight for the FM radio instead of going through the hassle of connecting iTunes over Bluetooth. I found out, ten minutes later, that blue tooth was just as easy to setup as the FM radio.
Features:
The PG10 has a number of features. It has FM radio (no digital tuner), Bluetooth, USB, composite audio connections, and a microphone jack. The buttons on the front of the unit are easy to navigate. The buttons are hexagonal, oversized, and made out of some soft rubbery material. The USB/Composite input housing and the power cable housing have covers made out of the hard plastic. Sony states that the top of the PG10 is spill resistant. The buttons and port covers leave me with the impression that some of that liquid resistance extends to the sides of the unit. I have no intention of putting it to the test for the sake of this review. I hope you will understand.
The PG10 has a number of features. It has FM radio (no digital tuner), Bluetooth, USB, composite audio connections, and a microphone jack. The buttons on the front of the unit are easy to navigate. The buttons are hexagonal, oversized, and made out of some soft rubbery material. The USB/Composite input housing and the power cable housing have covers made out of the hard plastic. Sony states that the top of the PG10 is spill resistant. The buttons and port covers leave me with the impression that some of that liquid resistance extends to the sides of the unit. I have no intention of putting it to the test for the sake of this review. I hope you will understand.
There is a function button to cycle through the different inputs/functions of the unit. The LCD screen will display the active function. It will display the radio station information. It will not, however, display any information about my music such as track title or artist. I would have expected to see this when connected to iTunes over Bluetooth. Instead, the Bluetooth function only displays the name of the connected Bluetooth device. I think Sony could have done more here.
The PG10 has two tweeters, located in the wings of the expandable “drink and chips tray” top. The unit will automatically switch between an open sound mode and a closed sound mode depending on the status of these wings. The system does sound different depending on the status of these wings. There is also a one second pause in audio when making the transition from closed to open and back. Open Mode, the tweeters sound more spacious and inviting. Closed Mode, the PG10 sounds like it is being stingy with its audio performance. The PG10 sounds like it is underwater. My preference is to keep the ears open in all listening environments. The woofer has some thump to it. I had to turn on Mega Base to get any real thump out the PG10.
Tuning, power, volume control for both speakers and microphone, Mega Base, and a play/pause button are also located on the front face of the unit. There is one unexpected feature that is also available. There are two buttons named Key Control. Instead of reading the instructions, like a normal person would, I chose to press the left button. I was playing Queen’s “we will rock you” at the time. Freddy Mercury’s voice immediately turned to mud. Ouch! So, I kept pressing the button until the PG10’s display read -6. Freddy’s voice got super super super deep. It was strange. It was so strange that I just had to press the right-side button until it was +6. Yes! Chipmunk Queen! What fun that was! My whole family laughed for a good ten minutes. I am guessing that this is a karaoke feature and not meant for regular musical enjoyments. However, definitely go full chipmunk on your favorite music. It’s a blast!
Connectivity:
Connectivity is super easy. FM radio just works. My iPhone instantly found the PG10. I was streaming from my iTunes account in seconds. I do have an old MS Zune that I do use with my Sony SRS-XB31 for multiple fun reasons. I had to connect my Zune via the composite inputs. The PG10 would not recognize the Zune as a USB device. Connection was easy with the right cable. The one major benefit to using the Zune is that it does have a Digital Tuner. I have a lot of Digital stations in my area, so the feature is important to me.
Connectivity is super easy. FM radio just works. My iPhone instantly found the PG10. I was streaming from my iTunes account in seconds. I do have an old MS Zune that I do use with my Sony SRS-XB31 for multiple fun reasons. I had to connect my Zune via the composite inputs. The PG10 would not recognize the Zune as a USB device. Connection was easy with the right cable. The one major benefit to using the Zune is that it does have a Digital Tuner. I have a lot of Digital stations in my area, so the feature is important to me.
Sound:
Please read all of this before making your conclusions. My very first sonic experience with this unit left my ears feeling sick. I was thinking to myself, “for the money this was the best Sony could do?” I tried everything from Rock to classical to Japanese K-Pop. Everything sounded metallic with heavy treble sauce. I did not find a way to adjust the speaker’s EQ or DSP settings from the speaker’s control panel. Those settings are controlled Sony’s Music Center app. The default preset was set to something called “excited”. “Excited” sound mode sucks for everything! I cannot believe the speaker shipped from Sony with the worst preset in the library. I cycled through the different EQ presets settling on “Chill Out.” It saved the day! Why Sony does not lead with this preset is a mystery to me. There are several presets available including a customer EQ preset. Play around and eventually you will find something that works for you.
Please read all of this before making your conclusions. My very first sonic experience with this unit left my ears feeling sick. I was thinking to myself, “for the money this was the best Sony could do?” I tried everything from Rock to classical to Japanese K-Pop. Everything sounded metallic with heavy treble sauce. I did not find a way to adjust the speaker’s EQ or DSP settings from the speaker’s control panel. Those settings are controlled Sony’s Music Center app. The default preset was set to something called “excited”. “Excited” sound mode sucks for everything! I cannot believe the speaker shipped from Sony with the worst preset in the library. I cycled through the different EQ presets settling on “Chill Out.” It saved the day! Why Sony does not lead with this preset is a mystery to me. There are several presets available including a customer EQ preset. Play around and eventually you will find something that works for you.
Wings open mode sounds better to me than wings closed. I tried this unit in my living room, den, basement, bathroom, on my deck, and on the tailgate of my truck. Open wings modes is the way to go. The more space this has to breath the better. Everything I played sounded acceptable. Do not expect audiophile quality. This is not that device. I feel that the speaker falls apart at volume. The vocals remain clear but at the expense of the rest of the music. Maybe this won’t be as much of an issue at a collage party where everyone is competing with the music. But, for casual listening, this is best played at medium to low volume.
The Mega Base option does increase the thump thump of rock, pop, and rap music. I found this feature put some authority into the music. It is not as powerful as a dedicated subwoofer but good enough for the garden and workshop. I think multiple PG10’s would be required to power an actual party like a dorm room gathering. Otherwise, the base from a single unit will be absorbed by your party attendees.
Applications:
The Sony Music Center application does a great job of controlling this unit. It will allow switching between inputs, gave me a quick launch button to Spotify and Fiestable, and EQ settings, and other options not directly accessible by the speakers control panel. I can also control the volume for each input. This is not a full remote control. For example, I cannot turn the speaker on or off using Music Center.
The Sony Music Center application does a great job of controlling this unit. It will allow switching between inputs, gave me a quick launch button to Spotify and Fiestable, and EQ settings, and other options not directly accessible by the speakers control panel. I can also control the volume for each input. This is not a full remote control. For example, I cannot turn the speaker on or off using Music Center.
I played with Fiestable for about five minutes. The app gives you motion controls over the PG10. It also allows you to use your smart phone as a microphone for Karaoke. You can turn up the volume up and down with a flick of your phone up or down. You can skip music tracks by flicking the phone back and forth. The last thing I want to do is flick my very expensive iPhone in any direction. I found none of these expanded features useful. Maybe you will.
Portability:
The unit is lite and easy to move around. There are built in handles located under the wings. Just fold up the wings, grab the handles, and off you go.
The unit is lite and easy to move around. There are built in handles located under the wings. Just fold up the wings, grab the handles, and off you go.
Final Impression:
Overall, I have mixed feelings about this unit. The sound is clear. The woofer will thump when Mega Base is turned on. I feel the sonic experience is too dependent on the EQ, volume, listening location, and the status of the wings. Sometimes it sounds great and other times it struggles. I will most likely use this speaker in places where I do not already have music such as the garden, my shed, and in my basement workshop. I did try playing this at party music levels and felt the unit struggled. The voicing was crystal clear at the expense of the rest of the sonic experience. I do like the look of the unit, connectivity options, its portability, and the mega base options. I hope to get many ears of service out of this.
Overall, I have mixed feelings about this unit. The sound is clear. The woofer will thump when Mega Base is turned on. I feel the sonic experience is too dependent on the EQ, volume, listening location, and the status of the wings. Sometimes it sounds great and other times it struggles. I will most likely use this speaker in places where I do not already have music such as the garden, my shed, and in my basement workshop. I did try playing this at party music levels and felt the unit struggled. The voicing was crystal clear at the expense of the rest of the sonic experience. I do like the look of the unit, connectivity options, its portability, and the mega base options. I hope to get many ears of service out of this.
I hope you found this review useful.
Mobile Submission: False
I would recommend this to a friend!
Share this review:
+2points
5of 8voted this as helpful.

Perceive every detail of your music with this pair of JBL wireless headphones. The 10Hz to 22kHz frequency response lets you enjoy the full range of sound, while the in-line microphone provides an effortless switch to hands-free calls. Featuring 5.6mm dynamic drivers, these JBL wireless headphones supply rich, resonant bass for your enjoyment.
Customer Rating
4
Solid sound, great presention, weak microphone
on January 6, 2019
Posted by: ITJim
from Maine
- Presentation -
JBL did an amazing job with the presentation of these earbuds. The hockey puck size case serves both as a protective case and a recharge station. The earbuds plug into the case and draw power from the built-in battery. The left and right earbuds are stored in the case corresponding with which ear the earbud is designed for. Between the earbuds are symbols indicating which earbud controls which common function. Under the earbuds are four LEDs that indicate the amount of power left in the case’s battery. The LED indicators on the earbuds and the battery glow when you return the earbuds to the case. Close the case and you will see a happy face through the top of the clamshell housing. I love this! JBL really took a lot of time and energy to craft a unique customer experience.
The earbuds seem big in the hand but hide well in the ear. I do not feel silly wearing these.
The earbuds will last 4 hours on a single charge. The base holds an additional 20 hours of juice. The four LED indicators will tell you how much power is left in the battery to make it easy to tell when you need to recharge the case. The case does come with an orange USB charging cable for connection to your computer or other USB power source.
- Feel -
The earbuds come with three sets of silicon plugs for your ear canal. You should be able to find one size that fits your ear comfortably. It also ships with two pairs of silicon sleeves of different thicknesses. These are used to enhance comfort and fit for different size ears. I have small ears and found the sleeves uncomfortable. I also went with the medium plugs for my ear canal. I found that I needed the extra girth in my ear canal to hold the earbuds in place. The charging port of each earbud rests against my ear. The charging port has a small lip surrounding the indent that houses the electrical connections. The lip chafes my ear if I have the earbuds too tight against my ear. This is the main reason I need the tighter fit in my ear canal. I would have enjoyed these earbuds better if JBL had removed the lip.
- Setup -
Setup was easy. I connected these with my iPhone in a matter of minutes. Just be sure to fully charge the case and the earbuds before trying to sync. Also, read the included instructions. You must sync the right earbud with your device first and then sync the right earbud to the left earbud. There are also several functions controlled by the buttons located in the center of each earbud. You will need to read the manual if you hope to get the most out of these earbuds.
The earbuds did fall out of sync with my iPhone a few times during testing. I use many Bluetooth devices and find that this a common issue with both iOS and Windows. However, the left and right earbuds do fall out of sync with each other from time to time. Sometimes, the fix was easy; turn off the earbuds and resync. Sometimes, I had to work through some combination of redocking the earbuds in the clamshell housing, pressing buttons for different time periods, removing the sync status from my iPhone, and then repeating until I found the proper combination of button presses.
- Sound -
Usually, everyone talks about how much bass headphones can produce. Sony would have you think that bass is the only important sound there is. The JBL Frees do produce solid bass. I was surprised how well they sounded for something this small at its current price point. I listened to some workout mixes that had solid base tracks and was satisfied with what I heard. My head will not explode from over pressurized bass waves but good enough. Mids seemed ok. Highs did feel a bit constrained. In all honestly, I’m listening to compressed music that is being further compressed over Bluetooth so there is going to be a lot of coloration and loose from the original audio signal. Bach’s Brandenburg Concerto sounded compressed in the mids. I played Lady ’95, from Styx, to see how Dennis DeYoung’s vocals stood up with these earbuds. The very high end of his range felt constrained. I then played Lindsey Stirling’s Electric Daisy Violin. The base was strong, vocals clear, and the violin sounds good.
Overall, I feel that I am getting the performance I would expect from earbuds of this size and price point.
- Use -
I use these earbuds mostly for working at my desk and working out at the gym. I can hear what is happening around me at the office. I must turn up the sound if I want to block out the office noise. Unfortunately, the tradeoff is hearing damage. They can get painfully loud. I have them turned down to the lowest level of my iPhone’s audio and found them loud enough. I will turn to noise canceling headphones if I want to block the world out.
I have not had any issues using these at the gym. They stay in place as I use the workout machines. They also offer enough music to keep me in the workout zone. Sweat does not seem to bother them. I do take these out when I’m stretching or swinging my head around during aerobic exercise. I do not know if they will fly out of my ears. I do not want to worry about it. What I do not know is if I can rinse these off. They are rated as sweat proof. That does not mean I can simply drop them in a bowl of soapy water or under a running facet to clean. Be sure to check with JBL before cleaning.
- Phone -
These earbuds stink for voice transmission. Listening to a phone call is mono; right earbud only. Sound is of the same quality as the music. The mic sensitivity on these earbuds are weak. I was forced to abandon the earbuds due to mic’s weak gain. The person on the other end reported that I sounded far away and was difficult to hear. I used my normal speaking voice for testing. The experience did improve when I spoke louder than normal. This would not be an issue if I were one of those people who liked making my conversations public. I do not. These earbuds are useless to me for hands free communications.
- Final thoughts -
I like the sound of these the best when compared to other earbuds I have owned. Unfortunately, I will continue to use my wired apple earbuds for hands-free communications. I wish JBL chose to smooth out the charging ports so that the earbuds would be more comfortable with smaller ears. I have found a way to manage the issue so that the earbuds do fit comfortably in my ears. Hopefully, JBL will improve upon this with future releases. I love the clamshell storage and charging case. It is just cool! The designers really did their homework and made something unique, fun, and portable. I can throw this in my work bag and not worry about damaging the earbuds.
Overall, I like these earbuds and will get a lot of musical enjoyment from these in the office and at the gym. I hope you found this review useful.
Mobile Submission: False
I would recommend this to a friend!
Share this review:
+11points
21of 31voted this as helpful.
Collaborate with teammates using this Razer BlackWidow Elite mechanical gaming keyboard. An ergonomic leatherette wrist rest provides support for marathon play sessions, while the fully customizable keys let you create your own unique system for gaming. With dedicated media keys and a multifunction digital dial, this Razer BlackWidow Elite mechanical gaming keyboard offers responsive operation.
Customer Rating
3
Awesome Hardware, Software is rough!
on January 5, 2019
Posted by: ITJim
from Maine
Presentation:
The presentation for this keyboard is first rate. Razer went out of its way to ensure that your eyes were captured by the glowing keycaps and media controls over anything else. The lines of the keyboard are precise and clean. The keyboard cable is wrapped with a tight nylon weave that is stiff enough not to lazily loop around your desktop. Razer made sure to add a notch into the back and both sides of the keyboard. There are cable guides that channel the cable to either side so that you can dictate where you want the cable to escape back to your system. Routing my cable to the left side of the keyboard allowed me to keep my desktop looking clean and available for what I felt was important for my gaming experience. Numbers, letters, and text on all keys are thin and elegant. My previous keyboards were an old Microsoft Sidewinder keyboard and a more recent Corsair gaming keyboard. Both had larger translucent lettering on the keys. I was afraid that the thinner translucent lettering would be an issue for me. I found that certain visual effects work well with the thinner lettering. For example, the Fire Chroma profile looks sharp with the thinner letters. The keycaps limit the amount of light splashing on the keyboards surface. There is just enough light bleed to give the appearance of glowing embers beneath each keycap character.
The keyboard does ship with a wrist wrest. It is sharp looking with very clean, straight lines. Razer’s logo adorns the center of the wrist rest. The cover of the wrist rest is a material that simulates leather. It feels nice and looks sharp!
The bottom of the keyboard has five non-slip pads to keep it in place while typing and gaming. It will slip with enough force. But, did not slip during typing or gaming. There are two feet at the back of the keyboard to control the tilt. To my surprise, there are three heights to choose from. The keyboard can lay flat on the table, raise the back by ¼ inch, and then to ½ inch. These are approximate measurements. ¼ inch works best for me.
There are five white LEDs under the Del, End, and Page Down buttons that I wish Razer enhanced some. The lights are bright! The symbols under the LEDs are hard to read when the lights are off. They are impossible to read when lit. I wish Razer took the effort to dim the LED and highlight the function’s logo. The lights are Caps Lock, Num Lock, Scroll Lock, Macro, and Game.
Feel:
The keyboard is heavy, inflexible, and difficult to move once placed on a proper gaming surface. The wrist pad feels great! One of the most comfortable I have used! You should, however, always type with your wrist up to avoid injuries linked to repetitive motions. The wrist wrest does have six non-slip pads; the same as on the keyboard. The wrist rest magnetically attaches to the front of the keyboard. I can use the wrist rest away from the keyboard, if I want, without any issues. But, when I want things nice and tight, the magnets offer additional stability.
The key caps, as mentioned earlier, are elegantly printed. Razer states their green switches require 50 grams of forces to depress. This is more force than the Cherry Red switches from my last keyboard. I can type close to 100 words a minute. I found that I missed keystrokes when I first typed with this keyboard. My fingers also tired out quicker. I did eventually get used it. Just be sure to take plenty of breaks until your fingers are up to full strength.
Each key generates a high pitched “click” when depressed. Cherry Red switches are lower pitched and may seem quieter than this keyboard. If you are gaming in your dorm room, next to your sleeping roommate, then you may want to check out a keyboard that uses Razer’s Orange switches. Orange is rated as silent; no audible click. I heard that Razer does sell this keyboard with Orange switches.
I can rest my fingers on the keys without accidently depressing a key. There is also a slight travel between rest and the click. Sometimes you want to bounce your finger on a key before committing to the click. This keyboard will support that behavior. It will take a little practice to master the movement though. The keys do have nice travel from rest to depressed. They also bounce nicely back into position. The media nobs are a nice touch. I love the that the volume wheel has a mute button built in. Personally, a volume control on the keyboard can, and does, make or break the sale with me. I think it is smartly placed, moves well, and the integrated mute button is right where it needs to be.
Gaming:
Commands were executed without any delay. I could hit multiple keys during gameplay without any commands being lost. I could rest my fingers on a key and then choose when to depress when I wanted too and not let the natural weight of my fingers make the decision for me. The keyboard feels and games great!
I created a few custom lighting profiles for my games. I tried some “game specific” profiles. I did not create any macros due the issues I faced creating lighting profiles. All these features and functions come down to the Synapse 3 Beta software and documentation. Razer has some work head of them in this department.
I created a few custom lighting profiles for my games. I tried some “game specific” profiles. I did not create any macros due the issues I faced creating lighting profiles. All these features and functions come down to the Synapse 3 Beta software and documentation. Razer has some work head of them in this department.
Software:
The keyboard is first rate. Synapse 3 Beta is aweful! My experience ranged from nightmare to horrible. Razer needs a few more customer experience passes before they take “Beta” off the name.
My experience. The Synapse software offered to install on my computer when I plugged the keyboard into my gaming computer. The software installed without any difficulty. I did have to sign in with my Razer account. This is to allow me to sync my profiles across devices and computers from anywhere in the world. I found out later you cannot use a Chroma profile unless you are actively signed into the Synapse 3 app. I should access to everything offline if I choose!
First thing I noticed was the lack of documentation. For some reason, Razer feels that their software package is intuitive. It is anything but. This is where a walkthrough video would have been helpful. A follow-up tutorial video would have been fantastic. The included printed document is wholly inadequate. There is a manual hidden in the settings page. Good luck stumbling across it. It took me a week before I found it. It was marginally better than the included printed documentation. Searching Razer’s support site a waste of time. And YouTube did not offer anything useful. I “do” expect more from Razer!
As part of the package, I installed the optional Razer Cortex. This is where my first round of issues began. Cortex will allow you to capture metrics and speed up your computer for optimal gaming. Unfortunately, optimizing your system includes shutting down non-gaming specific functions and deleting “non-critical” files. Using this feature destroyed my Windows 10 image. Long story, short, be very careful with this application. I had to re-install windows to get my system back online. I will take some responsibility for this one though. I should have known better than to play with system voodoo that promises improved system performance and framerates.
I tried to create a few profiles after I got my system back online. This is where Razer really needs to improve its user experience. The software package is very powerful. You can do a lot with it. But it is confusing as all heck how to create a profile, save it to the keyboard, and recall it at will. The process is frustrating.
For example, I set out to create a gaming profile for one of my favorite games. I go into the Keyboard section. There is a customize heading and lighting heading. The Customize section does not allow you to customize anything except to load Profiles into the keyboard’s memory. As far as I can tell, you also cannot use this screen to jump between profiles. The lighting heading is a little more interesting. I can set the keyboards brightness and choose between quick effects and chroma effects. From here, I can jump between my different keyboard affects, both Razer created and my own Chroma profiles, but it does not seem to have any affect on the profiles listed at the top of the screen.
I can create a custom profile from the Chroma screen. It is easy once you “discover” how to do it. Attaching the profile to a profile or game is also a “discoverable” process. It should not be. In my opinion, Razer needs a serious customer experience pass with Synapse. Creating Chroma Layouts, creating profiles, attaching each to my games should be easy, intuitive, and well documented.
Final thoughts:
Many products today live and die by their user experience. The hardware is excellent! Outstanding for my needs. I will get years of use out of this keyboard. If I had to make a recommendation on the software experience alone, then I would advise that you look at another gaming company that puts more effort into documentation and training videos. Razer does have links to videos in their studio software but its all marketing BS. Bottom line, the software needs some polish. It is powerful. It is also silly difficult to setup profiles and assign games to use those profiles. There are too many screens that lack direction, purpose, and documentation. It is my hope that Razer unifies their interface and user experience before they take “Beta” off the name. Until then, I cannot rate this keyboard higher than three stars.
I will only recommend this keyboard after Razor smooths out the Synapse experience.
Mobile Submission: False
No, I would not recommend this to a friend.
Share this review:
+4points
5of 6voted this as helpful.
ITJim's Review Comments
ITJim has not submitted comments on any reviews.
ITJim's Questions
ITJim has not submitted any questions.

B&W PI5 true wire-free headphones are attractive, well-built, and they deliver a refined sound quality. Featuring Bluetooth 5.0 with Qualcomm aptX technology these earphones ensure reliable connectivity whether you are streaming from your smartphone, tablet or PC. Allows connection of up to two devices at the same time, however, only one device can be used to play or make a call at a time. Download the Bowers & Wilkins free headphone app, available for Apple and Android for further control of the sound and noise cancellation, right on your phone. The PI5 headphones feature the latest innovations in adaptive noise cancellation along with 4 built-in microphones that pick up ambient noise and cancel it with an equal, but opposite, audio signal and enhance the call quality. There are three levels of Adaptive Noise Cancellation – High, Low and Auto, that can be controlled either by the multi-functional button on the left earbud or via the app. Similarly, the touch-sensitive button on the right earbud allows you to enable voice assistance. The buttons also allows you to control playback and phone call functions with single (play/pause, answer call), double (skip forward, end call), or triple presses (skip backward). Another stand-out feature of these headphones is the intuitive detection sensors that put the earphones on standby or reconnect them depending upon whether they are removed or put back on. The PI5s come with a sturdy and attractive charging case for charging the earbuds when not in use. The case is equipped with two 350mAh rechargeable batteries. Each earbud has a rechargeable battery which provides up to 4 hours of wireless playback. Including the charging case, the PI5 can provide up to 12 hours of continuous playback.
Is there an App to set the equalizer?

With the 10th Gen Intel® Core™ i7 processors enabling up to 8-cores and 16-threads of multi-threaded performance, the latest generation of Alienware m17 goes beyond its predecessor. Featuring the new NVIDIA GeForce RTX 3070 with Ultimate performance for gamers and creators. Realistic ray-traced graphics and AI-accelerated DLSS. Our latest thermal technology, Advanced Alienware Cryo-Tech, is an engineering approach where an Alienware system’s gaming performance is never compromised by means of electrical and mechanical methods while maintaining system stability during the highest performance states.
Is this a per-key RGB keyboard or a 4 zone?
With the 10th Gen Intel® Core™ i7 processors enabling up to 8-cores and 16-threads of multi-threaded performance, the latest generation of Alienware m17 goes beyond its predecessor. Featuring the new NVIDIA GeForce RTX 3070 with Ultimate performance for gamers and creators. Realistic ray-traced graphics and AI-accelerated DLSS. Our latest thermal technology, Advanced Alienware Cryo-Tech, is an engineering approach where an Alienware system’s gaming performance is never compromised by means of electrical and mechanical methods while maintaining system stability during the highest performance states.
Is the display having G-Sync?
For the 300Hz screen:
From Alienware's site:
"15.6" FHD (1920 x 1080) 300Hz 3ms 300-nits 100% sRGB color gamut"
https://www.dell.com/en-us/shop/cty/pdp/spd/alienware-m15-r4-laptop?~ck=mn
I do not see any indication of G-Sync on/off in the nVidia driver settings.
From Alienware's site:
"15.6" FHD (1920 x 1080) 300Hz 3ms 300-nits 100% sRGB color gamut"
https://www.dell.com/en-us/shop/cty/pdp/spd/alienware-m15-r4-laptop?~ck=mn
I do not see any indication of G-Sync on/off in the nVidia driver settings.
3 years, 1 month ago
by
ITJim
With the 10th Gen Intel® Core™ i7 processors enabling up to 8-cores and 16-threads of multi-threaded performance, the latest generation of Alienware m17 goes beyond its predecessor. Featuring the new NVIDIA GeForce RTX 3070 with Ultimate performance for gamers and creators. Realistic ray-traced graphics and AI-accelerated DLSS. Our latest thermal technology, Advanced Alienware Cryo-Tech, is an engineering approach where an Alienware system’s gaming performance is never compromised by means of electrical and mechanical methods while maintaining system stability during the highest performance states.
Is the ram upgradable?
From Alienware's user's guide:
Onboard system memory
NOTE: The memory is integrated to the system board and
cannot be upgraded after purchase.
You can find the user's guide on Alienware's support site.
Onboard system memory
NOTE: The memory is integrated to the system board and
cannot be upgraded after purchase.
You can find the user's guide on Alienware's support site.
3 years, 1 month ago
by
ITJim
HP OMEN Gaming Laptop: A thin and light premium gaming experience in an elevated design so you can play everyday. With an AMD Ryzen 7 processor, NVIDIA GeForce GTX 1660 Ti graphics and cooled by OmenTempest Cooling, it makes you think how it all fits into such a tiny little package."
Can this output 144Hz over hdmi?
Yes it can. I am using the HP Omen X 25f over HDMI as an external monitor.
Just be sure to use a HDMI 2.0 or newer cable.
Just be sure to use a HDMI 2.0 or newer cable.

3 years, 10 months ago
by
ITJim
HP OMEN Gaming Laptop: A thin and light premium gaming experience in an elevated design so you can play everyday. With an AMD Ryzen 7 processor, NVIDIA GeForce GTX 1660 Ti graphics and cooled by OmenTempest Cooling, it makes you think how it all fits into such a tiny little package."
Does it have Gsync?
This is not a Gsync monitor. At least I cannot find any information online or in the system drivers that tell me otherwise.
You can connect the laptop to a Gsync monitor and take advantage of all the features of Gsync with that monitor.
You can connect the laptop to a Gsync monitor and take advantage of all the features of Gsync with that monitor.
3 years, 10 months ago
by
ITJim
HP OMEN Obelisk by HP Desktop: Play graphically intense games with this HP OMEN Obelisk desktop computer. You can easily store large amounts of media and other data on the 1TB hard drive and install games and programs on the 256GB SSD for fast access. This HP OMEN Obelisk desktop computer has 16GB of memory for multitasking effectively, and the Intel Core i7-9700 processor handles resource-intense programs efficiently.
How many cores are there in this pc
8 physical cores. This processor does not support 16-way multitasking.
4 years, 10 months ago
by
ITJim
HP OMEN Obelisk by HP Desktop: Play graphically intense games with this HP OMEN Obelisk desktop computer. You can easily store large amounts of media and other data on the 1TB hard drive and install games and programs on the 256GB SSD for fast access. This HP OMEN Obelisk desktop computer has 16GB of memory for multitasking effectively, and the Intel Core i7-9700 processor handles resource-intense programs efficiently.
Is there a gtx 1660ti installed or not? What size pwr supply?
It says in the name that it is a GTX 1660ti. I can confirm that the video card is exactly as described. It is the 6gb version of the card. The Power Supply is 500Watts.
4 years, 10 months ago
by
ITJim
HP OMEN Obelisk by HP Desktop: Play graphically intense games with this HP OMEN Obelisk desktop computer. You can easily store large amounts of media and other data on the 1TB hard drive and install games and programs on the 256GB SSD for fast access. This HP OMEN Obelisk desktop computer has 16GB of memory for multitasking effectively, and the Intel Core i7-9700 processor handles resource-intense programs efficiently.
Does this computer have a memory card reader built in?
HP OMEN Obelisk by HP Desktop: Play graphically intense games with this HP OMEN Obelisk desktop computer. You can easily store large amounts of media and other data on the 1TB hard drive and install games and programs on the 256GB SSD for fast access. This HP OMEN Obelisk desktop computer has 16GB of memory for multitasking effectively, and the Intel Core i7-9700 processor handles resource-intense programs efficiently.
What is the operating system for the pc, and does it come with a virus protection app
Windows 10 standard. It ships with 30 days of McAfee.
4 years, 10 months ago
by
ITJim