Share KusMoG's profile
KusMoG
KusMoG's stats
- Review count77
- Helpfulness votes316
- First reviewOctober 24, 2013
- Last reviewFebruary 13, 2026
- Featured reviews0
- Average rating3.9
- Review comment count1
- Helpfulness votes0
- First review commentMarch 29, 2017
- Last review commentMarch 29, 2017
- Featured review comments0
Questions
- Question count0
- Helpfulness votes0
- First questionNone
- Last questionNone
- Featured questions0
- Answer count1
- Helpfulness votes5
- First answerOctober 3, 2020
- Last answerOctober 3, 2020
- Featured answers0
- Best answers0

Enter a new era of mobile gaming with the power of a full-fledged pro console controller. The Kishi Ultra forges into new terrain as the greatest mobile controller ever created. Meticulously designed with console-class ergonomics, immersive haptics, and Razer Chroma RGB, the Kishi Ultra delivers a true console experience with zero compromise.
Customer Rating

4
Like a PlayStation Portal when used with a tablet
on September 4, 2024
Posted by: KusMoG
The Razer Kishi Ultra feels great to hold in your hands thanks to the full size ergonomic grips. The buttons also have a mechanical click to them instead of a mushy feel. They feel responsive and don't feel cheap. They actually feel like a gaming console controller.
The arrangement of the controller's sticks and buttons makes it really familiar to an Xbox controller, so it makes it feel pretty natural for Xbox Game Pass, or Steam Link gaming on your phone. When you're not playing it with console cloud gaming, the Kishi Ultra retains the console user experience with the Razer Nexus app, which is a frontend portal for all the games you have installed on your mobile device. For games compatible with an Xbox controller, the Nexus app has a setting readily available to enable or disable Xinput mode so the controller is seen as an Xbox controller by the game. On top of that, the Nexus app presents your games with a console-like user interface, like a Nintendo DS, even having haptic feedback with the motors inside the grips.
Above each of the grips there is a LED strip that lights up in different colors with different lighting modes. It's customizable through the Nexus app. You can have it cycle through different colors over every few seconds, keep it static with one color, have it pulsate in different colors or the same color, or just turn off the lights altogether if you find them too distracting or are concerned with the battery consumption it takes from your phone.
There is a USB-C port for passthrough wired charging *and* to use as a wired controller on a Windows PC. Unfortunately, this port does not support Samsung's fast charging nor does it transmit data for your mobile device.
One of the advantages about the Kishi Ultra compared to other mobile device controllers is that the Kishi Ultra is designed with large devices in mind. It easily expands to my S22 Ultra's width with a spring-based expanding backbone, and can fit up to an 8" tablet such as an iPad Mini. When paired with an 8" tablet you can pretty much get an experience similar to the $200 PlayStation Portal. So the Kishi Ultra has that going for itself with its own high price tag. And since the connection is made by USB-C and not bluetooth, there is no input lag.
I love that the Kishi Ultra has four holes, 2 on the left, 2 on the right, to let sound from your mobile device pass through. On the original Kishi, there were only 2 on the right side, none on the left. This had the left speakers of my S22 Ultra sounding muffled while the right was clear. With the Kishi Ultra, the speakers from both sides now come through clearly and evenly.
On the bottom of the left side of the controller there's a standard audio jack for headphones as well.
I only have a couple of issues with the Kishi Ultra. The first is its backbone design. I worry about its durability when carrying it around inside a bag with other things because its backbone is just made of hard plastic. I worry that under certain pressure, it could end up breaking. Like for instance, if I put it in my backpack and I lean against the subway door because it's rush hour and really crowded. Will the controller hold up being sandwiched between my back and that subway door and whatever other stuff I may have in my bag that may get in between the grips and applying pressure against the backbone like my metal water bottle?
The other issue I have is with its fit with different phones. It doesn't fit all phones securely, nor will it work with all phone cases. The number of allowed fit configurations using its different sized rubber phone holder pieces is way too limited. I had to remove my case to get my S22 Ultra to fit the Kishi Ultra and have it align properly with the USB-C plug. But that's not the end of it. After I've fit it in, the rubber grips that hold the phone aren't grippy enough to prevent the left side of my phone from sliding down occasionally. And if you're a person that handles a controller aggressively when you play, you can find your phone sliding down the grip pretty frequently. On the right side, the mobile device is held in place by the USB-C plug. But constant moving and sliding could wear out/loosen that plug over time. There's nothing else on the left side of the controller to hold the controller other than the rubber inserts because the Kishi Ultra was designed to be used with tall 8" tablets, where its height extends beyond the height of the Kishi Ultra itself.
Other than those concerns, the fact that you can get a PlayStation Portal like experience with the Kishi Ultra thanks to its premium look and feel, as well as use it as a wired controller for PC gaming, I would recommend it. Just be careful with packing it away when on the go because I don't have a lot of confidence in the plastic backbone.
I would recommend this to a friend!
Share this review:
0points
0of 0voted this as helpful.

Gear up for greatness with Galaxy Watch Ultra, a premium new smartwatch built for top-of-the-line performance. Climb the highest peak. Bike the long way home. The durable titanium design is our toughest yet, able to stand up to the rigors of your workout ~ even ocean swimming.~ Maintain your healthy lifestyle with new features enhanced by Galaxy AI~ that give your performance an edge, including an Energy Score~ that helps you start each day in the know and improved Heart Rate Tracking~ that helps you hone in on your heart health during your favorite cardio activities. Challenge yourself to do better than before on a run or a bike ride with a tracker that compares your current performance to your last one.~ Wherever you decide to go, blaze new trails with an improved GPS~ that makes navigation a breeze and a battery that keeps you moving ~ it~s our longest lasting yet, up to 100 hours.~ Plus, you can stay focused on your workout while keeping in touch with call and text capabilities right on your wrist.~ Get the extra motivation you need to conquer your goals with Galaxy Watch Ultra.
Customer Rating
4
No rotating bezel, but FAST and long battery life
on September 3, 2024
Posted by: KusMoG
Let’s get the elephant in the room immediately out of the way: the Galaxy Watch Ultra copied a lot from its competitor’s Ultra watch. But that watch isn’t compatible with Android phones while the Galaxy Watch Ultra is. So, if you were envious of the other watch, know that the Galaxy Watch Ultra takes a lot of design cues from it.
The watch has a square encased in a square but the display itself is still circular. Some people call it a squircle. Some call it cushioned. The display has a 1.5” diameter, which is the same size as the Galaxy Watch 7 44mm’s display. The Galaxy Watch Ultra is only labeled at 47mm because it includes the case, but as you can see, that method of marketing is deceptive. There is a clear advantage to the 47mm over the 44mm but it has nothing to do with the display and more to do with the other internal hardware.
Internally, the larger space allows the Dynamic Lug System, which is used for switching bands on the Ultra, to fit. Band installation is fool proof. You simply push the band into the watch until it clicks. No more finding tiny pinholes, and aligning the band’s pins to fit inside them like traditional bands or the Galaxy Watch 7. Removing bands on the Galaxy Watch Ultra is as simple as pressing the eject buttons on the back of the watch. At the same time, they will never eject accidentally no matter how hard I forcefully push the watch against my skin or clothes.
Unlike its doppelganger from another company, the Galaxy Watch Ultra has speakers that you can play content with. It comes with LTE, so if you use it with a mobile plan, you can use it independently without your phone to stream music from apps like Spotify while you’re on a run. The speakers are also convenient for playing back voice memos. Or for your alarm to wake you up when you wear the watch to sleep. What makes the Galaxy Watch Ultra different from the previous generations of Samsung watches is that the Ultra has the best sounding speakers yet. They’re the loudest and open sounding that they don’t sound like they’re coming from inside a tin can. Not just for music and video, they also enhance the quality of phone calls with the watch. Calls can be heard as clear as a phone’s speakerphone and people on the other side of the line couldn’t tell I was using my watch to answer their call. At no point did either of us ask to repeat anything because the calls were so clear.
Despite the heavier weight, the Galaxy Watch Ultra is very comfortable to wear. Maybe it has something to do with the stock watch band evening out the around your wrist. I’m not sure. The watch band itself is very breathable and doesn’t irritate my skin. The part of the band that holds the tail end of the band in place is metal, but more importantly, it stays in place when worn. I never have to fidget with it, worrying about it sliding off and not keeping my band in place like other watch bands of this type. The disadvantage of this is that it hits the palm rest and edge of my laptop. I worry about it scratching my laptop, so I usually take it off. This can be remedied by using a different watch band.
The processor is one of the highlights of Samsung’s latest release of smart watches, which includes the Watch 7 and the Galaxy Watch Ultra. With Samsung’s previous releases, I’ve never noted the processor’s performance, but with the Galaxy Watch Ultra (and I assume the Watch 7 as well since they use the same processor) the improvement is a lot more noticeable! Everything feels so much more responsive. Apps like Samsung’s Internet browser are the big winners for this. Unfortunately, if you’re using it as a Wi-fi device, the Watch Ultra will prioritize the Bluetooth tethered connection with your phone over actual Wi-fi so using the Internet app will still appear sluggish due to it using the internet data over bluetooth from your phone. There is no way to keep it on Wi-Fi because while you can connect to it manually, it will eventually automatically disconnect. Wi-Fi is mainly used for updates as was the case with the older Wear OS Wi-Fi Galaxy Watches.
What separates the Ultra from the 7 are a few things. One of them is the battery life. I ignored Samsung’s Watch6 line because they didn’t release a watch that was comparable to or better than my Watch5 Pro. Not even with the Watch6 Classic, which saw the return of the physical bezel. The Galaxy Watch Ultra uses a 590mAh battery, the same rating as the Watch5 Pro. Using the Photo watch face with no monitoring complications except for battery, I was able to fit 2 workouts across 2 days, with a battery life span of 44 hours. However, with the Ultra Info Board watch face, which has the heart rate monitor, compass, and battery complications, under the same usage I got 41 hours of battery life. With that said, it lasts one whole day with a session of sleep easily under heavy usage. I found this more or less similar to my Watch5 Pro.
The Ultra also has a Quick button which isn’t present on the Watch 7. It’s a customizable button that’s unfortunately extremely limited to Samsung’s own Health app and a few system functions- Stopwatch, Flashlight, Water Lock. Or you can set it to no function at all. It’s setting it to the Health app that makes it truly convenient because you have the option to assign it to a specific exercise. Even better than that is during workouts, a single press of the Quick button will pause or resume the workout tracking. A double press records a lap when running or biking. And my favorite: a press and hold will finish the exercise. I no longer have to slide a menu open to pause or end an exercise, which was so inconvenient. It’s a shame Samsung doesn’t allow you to assign the button to third party apps. But if the quick button suits your needs, it’s a moot point.
Holding the Quick button for 5 seconds activates a siren which is loud and piercing. My issue with it though is that after it’s activated, it uses up 10 seconds to make a blaring sound- like a warning sound- before it gets to the piercing siren sound. I imagine for dire emergencies when you need immediate attention from people that can be very frustrating and counterproductive.
Holding the Quick button for 5 seconds activates a siren which is loud and piercing. My issue with it though is that after it’s activated, it uses up 10 seconds to make a blaring sound- like a warning sound- before it gets to the piercing siren sound. I imagine for dire emergencies when you need immediate attention from people that can be very frustrating and counterproductive.
Unlike the 7, the Ultra is made of titanium instead of aluminum, so it’s more durable and resistant to dents. However, it still won’t help prevent scratches so keep that in mind, especially with the black paint on the bezel. Both use sapphire crystal glass which make them very resistant to scratches, which is great to have when you’re touching the screen a lot of the time. Bear in mind, sapphire crystal isn’t for preventing damage on impact, so it can still crack.
I can’t speak to the accuracy of its health monitoring other than the heart rate monitor matches what I get on a treadmill when I’m running at the gym. It has other gimmicky monitoring like ECG and sleep apnea, but the watch itself warns you of its accuracy and that it shouldn’t be substituted for actual medical equipment. To monitor sleep apnea, you need to sleep with the watch twice over a 10 day span. After that, if you don’t have sleep apnea, the Watch Ultra simply tells you it didn’t detect it. I can’t tell you what it tells you or what information it provides if you do since apparently, I don’t experience sleep apnea for the watch to trigger it.
The library of apps and watch faces is one of the main reasons to choose a Wear OS watch over a fitness watch and the Galaxy Watch Ultra is arguably the best one currently on the market. It runs on the latest Wear OS 5 thanks to its partnership with Google. Besides having the latest features, it also ensures compatibility with the newer apps that get released or updated, unlike some other Wear OS watches out there. Historically, Samsung has been great with releasing updates for its Wear OS watches as well.
The cons going against the Galaxy Watch Ultra is despite it being marketed as a fitness watch for fitness enthusiasts and adventurers, it doesn’t deliver the way other sports smartwatches do. For starters, there is no physical control option for when you’re really drenched. Many have complained about the absence of the physical bezel on the Watch Ultra but it’s more than that. They could have added buttons for physical control navigation. They could have made the Quick button a rotating crown. They didn’t. Without it, using it in the rain or when you’re drenched in sweat, becomes a challenge as the liquid will register accidental inputs and make it behave erratically. And that itself can be a deal breaker for the serious athlete or adventurer.
For ECG and sleep apnea tracking, it can only be done with a specific list of Samsung phones since it’s isolated to the Samsung Health Monitor app, which is not compatible with any other Android devices, including older Samsung phones.
The Watch Ultra’s battery life pales in comparison to some smartwatches in the market but you have to consider that those watches don’t offer the same user experience as the Watch Ultra either. Their OS can feel more basic and sluggish. Their app library is nowhere near as expansive or active as Wear OS. You’re also paying significantly more for the battery life and wearing a heavier watch compared to the Watch Ultra. So there’s no easy recommendation for everyone since everyone’s different. I wouldn’t recommend the Watch Ultra for the serious athlete because its fitness data and lack of physical controls for navigation is a deal breaker when you can find them on other sports smartwatches. But for the casual user that works out, it’s probably the best you can get for Android phone users. You will be paying more for the battery life, stronger titanium build, and the quick button, but the price is comparable to what other companies charge for this sort of watch- cheaper in some cases. It’s up to you to decide whether it’s worth it.
I would recommend this to a friend!


Share this review:
+3points
3of 3voted this as helpful.
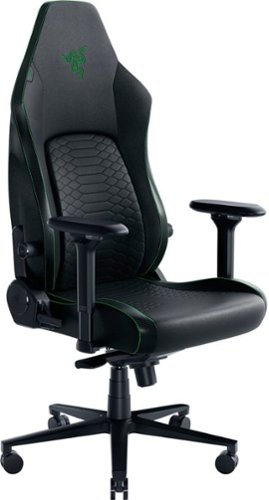
Unlock the ergonomic edge you need for posture-perfect hardcore gaming with the Razer Iskur V2. Armed with an adaptive lumbar support system and a fully adjustable lumbar curve, experience personalized support that caters to your unique body shape and a wide range of sitting positions.
Customer Rating
4
Comfy, doesn't tip; quality issues over time?
on August 6, 2024
Posted by: KusMoG
The Iskur V2 was easy to install with the instructions on a large fold-out, easy to read sheet. It took me 30 minutes when I took my time, and maybe around 40 minutes overall from its unpacking. The screws are already preinstalled in the locations they're supposed to be in. You'll need to unscrew them and re-screw them to make the attachments during the installation, but it leaves no room for guess work like most other installations, where you're wondering if you're working with the right screw or not.
I found the chair very comfortable but from reading other reviews, it seems very subjective for this chair. The chair's cushioning is definitely on the firm side, but that's not to be confused with hard. Your seat won't sink in much when you sit. If you prefer a plush, soft seat it may not be for you. When my mom tried the chair, she said it felt like sitting in a car, and I agree. And that's what I liked about the Iskur V2. But unfortunately, it made me disappointed that the caster wheels didn't have locks, so they're not the best to use out of the box from racing sims when used with pedals. The casters are replaceable but that's an additional cost for me, on top of the hefty price of the Iskur V2 to begin with, not to mention the stock casters would end up not being used if I replaced them.
The material of the Iskur V2 is listed as EPU leather, which without getting into the scientific specifics, is faux leather. But it feels very premium as if it were leather. It feels like sitting in a luxury car. And the material makes it easy to clean for accidental liquid or food spills with a wet wipe.
The armrest is listed as "4D" which I'm pretty sure means 4-directional. You can adjust the position of both armrests in 4 different directions:
-left and right
-away and close to you
-up and down in height
-diagonally inwards towards and outwards away from you
for each direction there are 3 fixed positions for you to adjust them to.
I loved this because I can find a comfortable position to rest my arms and elbows when I'm playing long sessions. But what I didn't like is how rattly the armrests were because of its ability to adjust. I'm also suspicious of the material that the armrests are made of. The look and feel like the material on cheap office chairs I've used, and from my experience with those, over time and heat from sunlight from an open window, it cracks and peels. I can't say for certain the same will happen with the Iskur V2 because for all I know they're probably different materials, but it's something that's a concern for me. That aside, the armrests feel comfortable on the skin and for resting during long sessions.
The headrest is extremely soft, plush, cool (temperature-wise), and comfortable. I could definitely fall asleep on it comfortably because it feels like a dream. The headrest's position is adjustable with an elastic band that's length adjustable. I found this inconvenient if people of different heights will be using the chair. But I feel like I may be able to use it as a pillow for flights or car rides.
The chair folds all the way back to 152° according to Razer but it felt like 180° to my brain because of how comfortable I felt lying down on it when it was fully folded out. I could easily find myself sleeping on it if I had guests over and not enough beds. To make it even more comfortable I would just use it with an ottoman for my legs to rest, but for me being 5'9" my legs were still comfortable with the height adjusted. But what I absolutely loved is how I never felt like the chair would tip backwards while I was leaning back on the chair or lying down, even with my feet rested on my ottoman. It never felt like it would tip even when I leaning the chair back from its base. The weight of the base supports my weight well, and I weigh 187 lbs. There is a switch(? not sure what it's really called) on the left side under the seat that allows you to lock the position of the backrest from its base, and even when it's locked in the position where the back is fully lowered to its limit from the base, it never feels like it's going to tip backwards. It's such a great feeling knowing that I never have that worry. I just feel comfortable in the position I want it to be in and I can focus on gaming or whatever else it is I'm doing instead of fearing for my safety lol.
The adaptive lumbar support is the highlight of this model and unfortunately it's a mixed bag. It's implementation is unique in that it's a partially floating and separate component from the rest of the backrest of the chair. This was intentional by design because it allows you to rock your back left and right instead of stuck in one fixed position, where you can also feel hot and uncomfortably stiff over time. There is a dial on each side of the chair that allows you to adjust the lumbar support. The left dial adjusts the lumbar support up and down the backrest, while the right dials adjusts how far the lumbar support extends outwards from the backrest. With the combination of both, you can find the precise position for the lumbar support to fit the specific curve of your back. And since it's adjustable, the chair can adapt to the curve of any user's back. The problem is, because of it's floating design, it feels fragile. I have concerns of its longevity. The warranty coverage is for 3 years, but it's only for certain parts, without mentioning which parts, so hopefully it covers the floating backrest as well. When adjusted to certain positions the chair creaks because of the design of the floating backrest, which I found annoying once I noticed it. Rocking my back left and right while lying down would also produce an unsettling pop from the lumbar support too. But when I used the Iskur V2 in my most common positions, which is upright during gaming, and slightly folded back while watching TV, it was silent and very comfortable. But for the previous issues I mentioned, I have a real concern about issues developing over a longer period of time.
The Iskur V2 felt like love at first sight to me... until after the honeymoon. I would definitely recommend considering the Iskur V2 because it is very comfortable if it fits your preference like it did for me. Just take the issues I highlighted into serious consideration because you're making a sizable investment.
I would recommend this to a friend!
Share this review:
0points
0of 0voted this as helpful.

Meet ProArt P16 ~ your ultimate creative companion for the studio and on the move. Its OLED touchscreen ensures precise color accuracy for flawless proofing, while versatile I/O ports seamlessly connect all your peripherals. This NVIDIA Studio-validated laptop packs GeForce RTX 4060 graphics and AMD Ryzen AI 9 HX 370 processor with 50 TOPs NPU, a pairing that will supercharge all your creative endeavors. With AI-enhanced creative features and a long-lasting battery, ProArt P16 transforms any setting into your studio.
Customer Rating
4
Powerful and long-lasting! Wished it was 120 Hz.
on August 2, 2024
Posted by: KusMoG
*Design*
Made from an aluminum body, it’s lightweight, but feels solid and durable, with no creaking or flexing under normal use. Its black finish is attractive and fingerprint resistant. It doesn’t feel metallic and feels comfortable on the skin, soft and silky smooth. Aside from the usual OEM stickers found on Windows laptops, the branding on it is very unassuming and professional. Status lights are curiously found on the back of the laptop and hidden by the hinge when the display is folded open. It only seems to be useful while the laptop isn’t in use. The keyboard is backlit with 3 levels of brightness and the option to turn the backlight off. However, I found the minimum setting for the backlight to be too bright. The backlight also doesn’t illuminate the Shift function labels on the keys.
The keyboard itself has considerably more travel than other ultra slim laptops, while still being silent. There is no numpad, but this allows for front-firing speakers on the sides of the keyboard as well as the touchpad in a centered position, to prevent accidental input while typing while looking straight on to the screen.
The P16 comes with an infrared camera compatible with Windows Hello for facial recognition login, which works in the dark, and more convenient than fingerprint login.
*Display*
The display is a glossy touch screen OLED with slim bezels and measures 15.8” diagonally. It’s pretty reflective, so it’s not ideal for use opposite a window or light source. Its native resolution is 3840x2400, which is a 16:10 aspect ratio. It’ll produce black bars for 16:9 presentations, but the extra vertical space makes it better for content creation, giving you a larger workspace. Because it’s a 4k display against a 16” display, you won’t spot individual pixels (or at all) at 150% scale or higher. The display has a refresh rate of 60 Hz which is acceptable for content creation, which is what the laptop was designed for. However, I find it a very curious decision that ASUS chose a touch panel over 120 Hz since it doesn’t really leverage touch input very well, while at the same time, proves to be very capable of 120 Hz for gaming. Feels like a misstep to me.
I don’t have a protractor, but if I had to guess, the hinge looks like it only goes as far back as 30°. There’s also some wobble when the display is touched. It also does not come with a stylus. I’m not aware if it even supports one. When I tried using my Samsung phone’s S-pen, it wouldn’t work.
I found the touch display best for making quick selections in editing programs with buttons like Photoshop, and keep the touchpad in my editing workspace. Since the hinge doesn’t fold flat to 180° or 360°, the P16 doesn’t work well for drawing with touch input.
I didn’t notice any text fringing.
The display is Dolby Vision certified, and is able to play Dolby Vision content.
For a model aimed at content creators, I was surprised that its default color profile was oversaturated. This seems to be a popular configuration marketed for casual users because of its vivid exaggerated colors that makes images pop. But creators looking for accurate colors will want to switch to a different profile such as sRGB, which is great for web content, or Display P3, which is great for graphics and video editing.
*Inputs*
Left side:
-proprietary 200W power port
-full sized HDMI 2.1 port
-USB 4 Type-C port
-USB 3.2 Type-A port
-3.5mm audio jack
Right side:
-USB 3.2 Type-C port
-USB 3.2 Type-A port
-full sized SD card slot
Left side:
-proprietary 200W power port
-full sized HDMI 2.1 port
-USB 4 Type-C port
-USB 3.2 Type-A port
-3.5mm audio jack
Right side:
-USB 3.2 Type-C port
-USB 3.2 Type-A port
-full sized SD card slot
Charging is done from the left side of the laptop, and the only way to take advantage of the P16 at full power is using the stock 200W power adapter. The USB 4 port only charges at up to 100W, which will cap the CPU and GPU. The cap isn’t as bad as it sounds because it’s still a powerful laptop even with the cap. You just won’t be able to take full advantage of the hardware’s capability.
Other laptops in the market come standard with 2 Thunderbolt 4 ports. Due to this being a Ryzen laptop, one of its USB-C ports is only USB 4 and not a Thunderbolt port. ASUS also skimps out compared to the competition by making its other USB-C port 3.2. This USB 3.2 Type-C port on the right side has power delivery, but isn’t capable of charging the laptop, which is a shame. It would’ve been nice to be able to charge the laptop from either side of the laptop had they included 2 USB 4 ports instead.
Thankfully the P16 comes with a full sized SD card slot, which most professional cameras use. This avoids you using a USB reader, which would protrude from the laptop. You can always use a full sized SD card adapter with a microSD card.
*Connectivity*
It comes with WiFi 7 but unfortunately maxes out at 2882MB/s up&down. I've seen others do 5000MB/s. It also has Bluetooth 5.4, which is the latest version.
It comes with WiFi 7 but unfortunately maxes out at 2882MB/s up&down. I've seen others do 5000MB/s. It also has Bluetooth 5.4, which is the latest version.
*Performance*
When set to Performance mode, which can only be run while plugged in using the stock 200W charger, the P16 is impressively powerful, but the fans blare non-stop, making it a pretty noisy laptop. It’s not a high-pitched sound or anything offensive, but it’s a noticeably aggressive sound of fans spinning. The laptop doesn’t get too hot as long as the vents on the bottom of the laptop aren’t blocked. It’s best used on a flat desk and not recommended on a bed while in Performance mode.
While in Performance mode, I was able to play Shadow of the Tomb Raider in max Custom settings, which is more demanding than its preset Ultra settings in native 3840x2400 resolution and get a stable 60fps. In 1080p with those same maxed out settings, I could get 144fps. Sadly, the display is only a 60 Hz panel. The P16 would’ve easily been capable of 120 Hz gaming. Since the P16 was designed for content creation, 60 Hz is more than fine. Movies and videos usually top out at 60 fps. 120 Hz would mostly benefit for mouse movement and scrolling but the benefits are negligible to most users, and the hit it takes on the battery lessens its worth.
When running on battery, the P16 caps its CPU and GPU and probably not by choice. Unlike some other laptops that hard caps the hardware to prevent overheating the P16 appears to do no such thing. It will go as far as its power source is willing to take it.
For comparison, the following are the Cinebench 2024 scores while plugged in vs on battery:
Plugged in Battery
GPU: 10123 7642
CPU (multi core): 1209 835
CPU (single core): 114 100
I didn’t experience any thermal throttling. However, the laptop does throttle when the battery is at 5%.
Other than Performance mode, the laptop runs cool and very silent, especially in Whisper mode, where the fan never seems to go off. Through the MyASUS app, your hardware configuration is customizable. You can run on the integrated graphics card exclusively for longer battery life.
It’s also nice that the integrated graphics is a Radeon variant, while the discrete GPU is a Geforce RTX 4060, particularly for software that has benefits for one type over the other.
The SSD is speedy with a 5048 MB/s sequential read, 3638 MB/s sequential write. It has a random read of 55 MB/s and random write of 124 MB/s.
*Battery*
Using the 200W stock power adapter, it takes 1 hour and 45 minutes to charge from 0% to 100%, though it hits around the 90% mark after around 1 hour.
Using a 100W USB-C charger, took about 4 hours to charge from 0% to 100% but hit around 90% after around 1 hour and 30 minutes.
The battery life itself varies greatly depending on the mode you use and what you’re doing but otherwise excellent when you need it to be without the laptop feeling sluggish.
When streaming video non-stop at 76% brightness and 50% volume I got about 9 hours of battery life.
When gaming in 4K using the discrete GPU with HDR on and no caps (Windows mode; Best Performance power plan) it lasted only 1 hour.
*Sound*
The sound out of the box sounded terrible to me. It sounded too isolated. But this was the sound profile for its “Music” setting. When I switched it to “Dynamic”, the sound was amazing. It utilizes Dolby Atmos, which gives the audio depth without sacrificing detail.
The speakers also get very loud without any distortion.
The microphone on the other hand isn’t very impressive. My recorded voice sounds too processed and unnatural. It does do a good job with noise cancellation though, eliminating sounds like an air conditioner.
*Touchpad*
The touchpad is very responsive but unfortunately lacks haptic feedback. Taps can be done anywhere on the touchpad, but physical button clicks can only be done on the bottom portion. The touchpad is very responsive and feels smooth to touch. It has a unique DialPad touch feature built in to the top-left portion of the touchpad that needs to activated via a simple drag from the top-right corner of the touchpad gesture. I have never accidentally triggered this gesture personally, although perhaps your mileage may vary. When the DialPad is turned on, it gives you a touch dial that comes with preset functions for specific apps like Photoshop and Word, while also allowing you to customize the dial with functions and apps that you assign on your own. This gives your shortcut access to commonly used functions via the DialPad.
The touchpad is very responsive but unfortunately lacks haptic feedback. Taps can be done anywhere on the touchpad, but physical button clicks can only be done on the bottom portion. The touchpad is very responsive and feels smooth to touch. It has a unique DialPad touch feature built in to the top-left portion of the touchpad that needs to activated via a simple drag from the top-right corner of the touchpad gesture. I have never accidentally triggered this gesture personally, although perhaps your mileage may vary. When the DialPad is turned on, it gives you a touch dial that comes with preset functions for specific apps like Photoshop and Word, while also allowing you to customize the dial with functions and apps that you assign on your own. This gives your shortcut access to commonly used functions via the DialPad.
*AI*
AI on computers feels like a work-in-progress beta at this point in time. Although Windows Copilot+ is available on the P16, it doesn’t appear to be fully implemented. For example, Live captions is present. When you enable it, it makes you go through the setup process as if it’s working and will auto-translate foreign language audio when it hears any. It even goes as far as downloading and installing a translation pack. But it never translates anything.
Microsoft’s Cocreator & ASUS’s Musetree are more of a novelty than something of practical use, especially for a digital artist that’s looking to create their own thing. AI adheres to a style that makes it look obvious that it’s AI.
We'll have to wait for practically useful NPU software.
I would recommend this to a friend!
Share this review:
+8points
8of 8voted this as helpful.

Jabra Elite 8 Active Gen 2 Bluetooth true wireless earbuds come with a Smart Case that is equipped with an advanced chip that provides seamless audio streaming from a treadmill, television, or the in-flight entertainment system on a plane. Plug case into 3.5mm or USB-C jack to stream content wirelessly to your earbuds to enjoy spatial sound powered by Dolby Audio. Elite 8 Active Gen 2~s are designed to withstand your toughest workouts. Tested against US military-grade standards with rigorous cycles of thermal, shock, dust and water treatment, they give you excellent performance in any environment. Completely watertight even when fully submerged in water, the wireless earbuds can withstand huge clouds of dust and survive drops from 3 feet totally intact. With ultimate grip through Jabra ShakeGrip, they stay secure in your ear all day without the need for ear wings. Powerful 6mm speakers ensure the audio is clear and rich no matter what you~re listening to. Powerful Adaptive Hybrid Active Noise Cancellation (ANC) automatically adapts to the environment you~re in, filtering out unwanted interference from wind and other extremes. The wind neutralizing HearThrough technology muffles any wind interference, delivering cleaner, sharper sound wherever you are. Natural HearThrough also provides an open ear experience so you can stay in tune with your surroundings without compromising on sound quality. Leave your phone at home but take your music with you. Download your music to your smartwatch, connect your earbuds, and head out for a phone-free run. Your connection will stay solid and stable no matter what, so you can push yourself to the limit without bringing your device along for the ride. And with Bluetooth Multipoint, you can seamlessly switch between your phone or smartwatch without needing to reconnect. 56 hours (ANC off) of battery in earbuds + case & Fast Charge to get 1 hour of battery in 5 minutes. Need to know the weather forecast or take a call on the go? Simply tap the earbud and ask your preferred Voice Assistant, without having to reach for your phone.
Customer Rating
4
Exceptional battery life. Case=best BT transmitter
on July 24, 2024
Posted by: KusMoG
The earbuds are very light and don’t feel heavy in my ears. The outside material feels slightly grippy like rubber, but also soft and smooth. It feels comfortable on skin. They protrude a tiny bit that if you lay your ears against a hard flat surface, the earbuds will make contact with it, which could result in erroneous inputs, since the outside end has a physical button underneath its waterproof seal. But it’s small enough to be worn while sleeping on a firm pillow comfortably with my ears. They never fell out while I’m rubbing my ear against the pillow as a side sleeper. While running on the treadmill all sweaty, I’ve never felt in danger of them falling out. I can’t shake them out of my ears when I violently shake my head downwards from either side.
The earbuds appear durable, but only time will tell if they actually are. My concern is if the outside layer could tear over time, especially with repeated presses of the physical buttons or if they were dropped on a rough and tough surface like concrete, which we have plenty of here in NYC.
They have an IP68 rating and are waterproof. I was able to shower with them on after using them while I was at the gym with music playing and had no issues. Funnily enough, the time I did encounter an issue was when I washed the earbuds underneath running water. If you get water in the earbuds, it will mess with noise cancelling and produce a high-pitched squealing sound. I had to shake out with water droplets to fix that issue. While they’ll survive underwater activities like swimming or snorkeling (Jabra says they’re safe with salt water), because of the way Bluetooth works, you won’t get a stable connection, much in the way of a listening to Bluetooth audio with a steel door in between the device and earbuds.
The battery life is the star of the show for me, personally. With ANC on, I was able to get up to 9 hours at most, and 8 hours on average at 75% volume. That’s the kind of battery life I’ve come to expect with ANC off.
Unlike its older models, the Elite 8 Active can play audio from each earbud independently. So you can listen to either earbud while the other is charging in its case or dead.
Unlike its older models, the Elite 8 Active can play audio from each earbud independently. So you can listen to either earbud while the other is charging in its case or dead.
I always struggle with describing sound quality but they sound great to me. It leans slightly on the warmer side of neutral. Which I think is great for working out with. It doesn’t muddy classical music, but you do lose some detail with highs. Lows are great but the bass is clean and not exaggerated out of the box. Using the equalizer or one of the Bass boost preset, it can achieve that exaggerated thumping bass.
There’s no high-resolution audio codec so if you have or subscribe to streaming services with high resolution lossless audio, you’ll lose detail.
There’s no high-resolution audio codec so if you have or subscribe to streaming services with high resolution lossless audio, you’ll lose detail.
Multipoint connections have worked seamlessly for me. It can connect to up to 2 devices at a time. When you play audio from one device while the other is currently playing audio, it will pause the previous device. It will also show a notification button (on smart devices like a smartphone or tablet) to switch back the audio, in case you didn’t intend it to hijack the connection. My main gripe is that you have no way of knowing what the other device is you’re connected to. It doesn’t tell you on the app, nor via audio notification. All it well tell you is “2 devices connected.”
The ANC (active noise cancellation) is pretty good and does well to block out noise while you’re playing music. Without music, it dulls the loudness of sound effectively. But it doesn’t block high pitch sounds well, like talking.
The Hearthrough sounds great and clear – very natural, except for when you talk. Your own voice sounds muffled or nasally when you speak. That itself makes it uncomfortable for me to use in a real-world scenario when talking to others because it gives me the false sensation that others have a hard time hearing me because I have a hard time hearing myself. But when I’m not talking, it’s excellent, with natural sounding outside noise.
Spatial Audio is a complete joke. There is BARELY any difference with it enabled. I’ve frustratingly toggled it on and off for what felt like hours trying to recognize a real difference but it’s so subtle to be meaningful or impactful. It’s supposed to widen the sound stage but it barely does. The Dolby Atmos function on my phone is noticeable, whereas the Elite 8 Active sounds like no change. Which brings me to another thing. The app has Dolby Atmos branding on it. Yet Jabra markets Dolby Atmos as a feature reserved for its Elite 10. It’s designed to confuse the consumer, and in the end, a moot point, because on the Elite 8 Active it sounds like there is no spatial audio with it enabled. On top of that, there is no head tracking.
The Jabra Elite 8 Active has built-in Google Assistant, which allows you to use Google Assistant without interrupting anything you’re doing on your device. It will also read your notifications to you. But this segues into something that annoys me the most about these earbuds. The controls.
The physical buttons on the earbuds are underneath the outer seal. This is what makes them waterproof. Since they’re physical buttons, you’ll hear the clicks each time you press them. But since they’re physical, you won’t accidentally trigger functions while you’re adjusting the earbuds. But the control customization, while they exist on the app, leaves much to be desired. The volume is controlled by holding the left button for volume down, and holding the right button for volume up. But the volume controls only exist if you turn Google Assistant off. If you turn Google Assistant on, you lose volume controls with the earbuds. They don’t give you the option to remap the Google Assistant function to something else like a double-press or triple press. Google Assistant is locked to holding the right button. To me, that’s absolutely ridiculous that I’m forced to choose between 2 highly convenient functions.
If you use Spotify, the earbuds support Spotify Tap, which you can enable from the app. Once again, Jabra locks this function to the “double press left button” gesture. It can’t be remapped elsewhere.
If you use Spotify, the earbuds support Spotify Tap, which you can enable from the app. Once again, Jabra locks this function to the “double press left button” gesture. It can’t be remapped elsewhere.
The charging case is rated IP54 so it’s only splash and dust resistant. They’re not waterproof like the earbuds, but they’ll withstand a drizzle or light rain. The earbuds take about 50 minutes to charge in the case from 0% to 100% and can hold up to 5 full charges. The case can charge wirelessly, with the LED conveniently facing up so it’s easy to see, or via USB-C.
The highlight feature of the Gen 2 that makes it clearly distinctive from the original Gen 1 is the fact that the case can stream to any analog audio device using LE Audio with the low latency LC3 codec. You’ll need the USB-C to 3.5mm audio cable that comes with it though because that appears to be the only thing that will get the case to recognize the analog device. I tried using a different third-party USB-C to 3.5mm cable I already owned and it didn’t work. If you need to length the included cable, you can do so with extension cables from either the USB-C side or 3.5mm side. Stereo analog adapters for the 3.5mm side to accommodate other sizes will also work. It’s the cable itself that’s important.
Its functionality was flawless. It’s the best kind of Bluetooth transmitter because you don’t have to pair it with your earbuds- they’re permanently paired. To activate the transmitter, you simply press the button on the case while it’s connected to the analog device. It’s a solid connection; no drops from my experience. Best of all is there’s no dip in sound quality either like some Bluetooth transmitters, where the volume becomes quieter. The ideal use Jabra has in mind is with workout equipment, and I agree. You’ll now be free to move around without worrying about cables in your way or tethering you. But you can now use your wireless earbuds on legacy devices as well, like older handheld game consoles, and portable radios and Walkmans. ANC and Hearthrough still work no matter if it’s connected via USB-C audio or 3.5mm analog. Just don’t lose the cable.
Its functionality was flawless. It’s the best kind of Bluetooth transmitter because you don’t have to pair it with your earbuds- they’re permanently paired. To activate the transmitter, you simply press the button on the case while it’s connected to the analog device. It’s a solid connection; no drops from my experience. Best of all is there’s no dip in sound quality either like some Bluetooth transmitters, where the volume becomes quieter. The ideal use Jabra has in mind is with workout equipment, and I agree. You’ll now be free to move around without worrying about cables in your way or tethering you. But you can now use your wireless earbuds on legacy devices as well, like older handheld game consoles, and portable radios and Walkmans. ANC and Hearthrough still work no matter if it’s connected via USB-C audio or 3.5mm analog. Just don’t lose the cable.
The microphone sounds clear when I record memos on a voice recording app, but with phone calls the sound quality takes a dip. You can still hear others clearly and others can hear you, but the sound itself sounds more processed. It’s possibly due to the ANC at work, which does do a good job at blocking out background noise.
Jabra did a great job with what’s said to be their final entry in the consumer market with these earbuds. Where they dropped the ball was with the control customizations. Volume control, Google Assistant, and Spotify Tap are completely locked to specific buttons and cannot be customized. Secondly, its spatial audio is the worst implementation I’ve heard across any device, whether it be phone, tablet, full sized headphones, or earbuds. If you already own the Gen 1, I’m not entirely convinced the ANC improvements are worth the upgrade because even if it one ups Gen 1, I’ve heard better from other brands. Supposedly Jabra’s own Elite 10 Gen 2 is better at ANC, and it has the LE Audio smart case.
If everything you listen to is through Bluetooth, which is the case for many these days, it may also not be worth the upgrade to Gen 2.
Otherwise, everything else about it is great. The battery life with ANC enabled is worth the price of admission for me.
If everything you listen to is through Bluetooth, which is the case for many these days, it may also not be worth the upgrade to Gen 2.
Otherwise, everything else about it is great. The battery life with ANC enabled is worth the price of admission for me.
Pros:
-Excellent 8-9 hour battery with ANC on
-Comfortable
-IP68 rating making it safe to shower with or wear in heavy rain
-Excellent LE Audio transmitter with case works with any analog audio source (adapter-friendly to accommodate different plugs or length)
-Excellent 8-9 hour battery with ANC on
-Comfortable
-IP68 rating making it safe to shower with or wear in heavy rain
-Excellent LE Audio transmitter with case works with any analog audio source (adapter-friendly to accommodate different plugs or length)
Cons:
-Button customization limited to playback controls and ANC/Hearthrough
-Spatial audio barely noticeable
-Button customization limited to playback controls and ANC/Hearthrough
-Spatial audio barely noticeable
I would recommend this to a friend!
Share this review:
0points
0of 0voted this as helpful.

The most flexible laptop, reimagined ~ Surface Pro empowers your creativity and productivity with responsive performance designed for seamless multitasking, intuitive touchscreen, and built~in AI assistance through Copilot. Using the Windows ecosystem, it helps you work more efficiently across your apps and devices, with all~day battery life~. All wrapped up in an ultra~portable design, Pro adapts to the way you create, collaborate, and do more than you ever imagined.
Posted by: KusMoG
It took over a decade but this is the first Microsoft Surface product (which means the entire family: tablet, laptop, hybrid [Surface Book], Windows on ARM) I've ever had an initial overwhelming positive reaction to. The Surface Pro 11 feels like what the Surface Pro *SHOULD HAVE BEEN* when it was first released all those years ago to compete in the tablet market. Its Android and iOS competitors were always more responsive and the battery life longer lasting. It seemed like all the Surface had going for itself was that it was a full-fledged Windows PC in a tablet form-factor. The problem with that was there was always significant compromises. They were too slow compared to real laptop, which was intentional to extend its battery life. When it was fast, the battery life suffered, and it either generated more heat, you got more fan noise, or both. With the Surface Pro 11, the Surface is finally fast and responsive without compromising battery life, heat, or fan noise.
The design has changed slightly compared to its predecessors in that the edges are more rounded now. It's more gentle on the hands when you're holding it, although there's a gap in the edges there for ventilation on the top and sides, and the kickstand on the bottom. Because of that gap, it creates a thin aluminum sheet that can dig into your skin when you're holding it. The rounded edges protrude more to prevent you from feeling that "sheet" but if you hold it a certain way, it can be felt.
It feels absolutely solid, with no flexing, not even around the kickstand area.
The bezels are thin on 2 sides only: the left and right when viewed in landscape. The top has a thick bezel to house the front-facing camera. The bottom has a thick bezel to attach the Surface Pro keyboard and give it its angle. So when used with the keyboard, the only thick bezel seen is the top bezel. The thick bezels do actually help when viewing the tablet in portrait mode since that's where you're gripping. Your hands won't be in the way of content on the screen.
The display is behind hard glass and is OLED. Its display resolution is 1920x2880 120Hz display with dynamic refresh rate, so you're capable of setting the display to 60Hz, 120Hz, or a variable refresh rate that will display up to 120Hz when it needs to. The OLED display looks beautiful, with the trademark inky blacks for excellent contrast, with a caveat. When viewing bright-colored content, white being the easily susceptible, you can see a textured looking layer under the glass. It looks like a bunch of oily dots. It's most evident when you look close but if you're the type that's sensitive to visual imperfections you're unfortunately going to notice it. Personally, it doesn't bother me but your mileage is going to vary. If you think this will bother you, I suggest taking a look at a sample display at a local Best Buy to see if it will actually bother you.
The maximum brightness in HDR is 900 nits. The device is Dolby Vision certified, and you can find its certification labeled in the Windows settings, but I wasn't able to get Dolby Vision content to work. Just HDR10. When I open the Microsoft Store app, "Dolby Vision Extensions" is in my Library, but if you go to the app's listing you'll see a warning that reads, "This app will not work on your device." You can't even search for it in the store because it doesn't see the Surface Pro 11 as a compatible device. Without "Dolby Vision Extensions" working properly on Windows, you cannot view Dolby Vision content, which is the case with my Surface Pro 11.
The maximum brightness in HDR is 900 nits. The device is Dolby Vision certified, and you can find its certification labeled in the Windows settings, but I wasn't able to get Dolby Vision content to work. Just HDR10. When I open the Microsoft Store app, "Dolby Vision Extensions" is in my Library, but if you go to the app's listing you'll see a warning that reads, "This app will not work on your device." You can't even search for it in the store because it doesn't see the Surface Pro 11 as a compatible device. Without "Dolby Vision Extensions" working properly on Windows, you cannot view Dolby Vision content, which is the case with my Surface Pro 11.
The star of the show here is the Snapdragon X Elite processor. The Surface feels snappy, like a desktop PC or a powered laptop. There isn't throttling while it's on battery. At least not until the battery hits 6%. And this is all while the tablet remains cool and silent. The caveat with this is that this is only with native ARM apps. When running x86/x64 apps, the Surface becomes a similar experience to what you've come to know and will grow to hate if you haven't already with Intel-based Surface tablets. Battery life takes a hit, the tablet becomes noisier from the fan, and it's hotter.
While only streaming video with the brightness at 75% and volume at 18%, I got 8 hours and 20 minutes of battery life. This appears to fall in line with Microsoft's test used in their marketing claiming up to 10 hours of active web usage which doesn't even explicitly mention streaming, and had its brightness at a measly 150 nits.
While gaming with an ARM64 app, I was able to get 4 hours and 55 minutes of battery life. The Surface never got hot; just warm. The fan went off but it was whisper quiet, drowned out by the audio from the game I was playing.
While gaming with a x64 app under Microsoft's x86/x64 emulation, I got 3 hours and 5 minutes of battery life. This is about on par with Intel-based PCs. The tablet got hot, and the fan was getting pushed hard.
When in sleep mode, I experience no battery drain after 13 hours. Compare that to an Intel tablet, where I lost 6% of battery in sleep mode during those same 13 hours.
Windows on ARM has come a long way in that now most casual users can get by on it, especially if you do most of your work from a web browser. But if you're using it for work, you'll have to seriously assess your usage because if you rely in x86/x84 apps not everything works perfectly. When it does, it's fast and feels like you're working on a normal Intel PC. But most VPN software do not work under emulation, including enterprise ones like Citrix, and SonicWall NetExtender, or consumer ones like NordVPN. Adobe hasn't released its entire library with ARM64 versions.
But for casual use, the Surface Pro 11 is absolutely fantastic, and a positive sign that Windows on ARM is the future of Windows PCs.
But for casual use, the Surface Pro 11 is absolutely fantastic, and a positive sign that Windows on ARM is the future of Windows PCs.
The speakers sound great and present a wide and engaging sound stage BUT there are only 2 speakers. Furthermore, their placement is on the top left and right of the tablet when viewed in landscape mode. This presents an awkward listening experience when used in portrait mode. Audio effectively becomes mono since there's nothing to discern the left and right sides. On top of that, the audio is off-center.
The Surface Pro has WiFi 7 with a max bandwidth of 5Gbps, which is overkill for internet connections since for many users, your internet won't reach those speeds. But for your local network, provided you have a WiFi 7 wireless router, the speed is spectacular. If you have a 10GbE port on your desktop PC, you can finally put it to good use and transfer large files like 20GB 4K video wirelessly in seconds. And with more WiFi 7 devices on the way, it's set for the future of WiFi instead of holding itself back with the older and slower WiFi 6e protocol.
Storage comes by way of a 512GB m.2 2230 SSD, which is the shorter sized m.2 SSD. It's replaceable and easily accessible, hidden behind the kickstand, where you'd normally find the SD card slot in older models. The Surface Pro 11 has no SD card expansion this time around.
The biggest disappointment of the Surface Pro 11 is Copilot+. Nothing it offers is reliable or practical enough for real world usage. The feature I was most looking forward to was Live Captions, which has the ability to auto-translate any audio you play, including internal audio. The problem is the captions are displayed in a very awkward way where it spits out several words at a time. With TV's closed captioning, and other captioning services like on YouTube, they're displayed one word at a time. Microsoft's Live Captions makes it hard to read for me. Translations are also iffy but that's par for the course with these sort of live translation for now. It is nice how you can place the captions wherever you want on the screen though, since it's floating. So if you're looking to watch that TV series or movie that was never translated to your language, you can do it with Live Captions. You'll just have to stomach its horrendous way of displaying the real time captions.
The AI camera filters felt more like a novelty than something that's actually useful. If you're using apps like Zoom, they already have features like this natively in the app. I couldn't find any practical use for Windows' Studio effects.
Copilot itself is wildly inaccurate for information. Its database it pulls from is often not up to date.
The future is bright for Windows on ARM, and I can't wait for more developers to finally release their software for it.
Previous attempts for Windows on ARM were downright awful to the point that it seemed like Windows was never going to work with ARM. The Snapdragon X Elite is finally proof that ARM is not only capable of Windows, it makes Windows better. Easily the best Surface tablet I've ever used.
It's Microsoft themselves that is actually holding back Windows, with their massive oversell of Copilot+ and not delivering. Quite frankly, I'm not even sure if the NPU is being used.
I would recommend this to a friend!
Share this review:
0points
0of 0voted this as helpful.
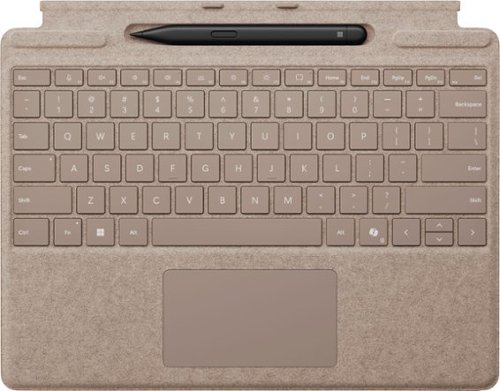
Next-level versatility comes in the perfect pair ~ Surface Slim Pen (2nd Edition) stores securely and recharges in the premium keyboard, featuring a large glass touchpad and luxurious, Alcantara material covering. Ready to pair with Surface Pro (11th Edition), Surface Pro 9 and Surface Pro 8.*
Customer Rating
4
Perfectly natural for Surface Pro, if you need it
on June 30, 2024
Posted by: KusMoG
One of the top main complaints about the Surface Pro type covers since its initial release is that it should have been included with the Surface Pro to begin with. But most Surface Pro buyers would not purchase it if it were the total cost of the devices, so I think Microsoft has had the right idea in selling them separately.
With that said, you really have to consider how you use a keyboard and stylus to decide if it's worth the money for you. Don't purchase it just because you see the media and promotional materials pairing them all together. That's the beauty of them being sold separately.
This particular product bundles the Surface Pro keyboard with the Surface Slim Pen 2, and is compatible with the new Surface Pro 11th edition, so its size covers the tablet screen perfectly. They're both also compatible with certain older models such as the Surface Pro 8 and Surface Pro 9. I've only personally tested them with the new Surface Pro 11th edition.
The Pro keyboard still uses the suede/microfiber-feeling material known as Alcantara. If you've used one of these keyboards before you should be familiar with the pros and cons. It feels premium and comfortable to touch but the material will wear over time. I don't expect any different from this keyboard.
The Pro keyboard is powered by the Surface Pro itself, which it magnetically connects to, so you never have to worry about charging it as you would with Bluetooth keyboards. It will always be ready to use. The keyboard is also backlit despite its very thin profile, and you have the option to turn it off. I found typing decent with the Surface Pro keyboard but it will bother users who expect more key travel. There's just no way around it with a device as thin as this is.
There is now a CoPilot key located on the right side of the keyboard where the Context menu key used to be on older keyboards. Unfortunately I haven't used it much because CoPilot hasn't been practically useful to me since it makes a lot of errors for my particular use case. But your mileage may vary. Microsoft is betting on AI and that's where the computing market is general is heading, so if they don't abandon it like Cortana (which arguably evolved to CoPilot anyway) maybe it will grow to be useful and I can be glad the dedicated key exists. There's no native way to remap the keys, but you probably can using third party software.
The touchpad is large enough and glass, which feels great, but it doesn't have haptic feedback because there isn't the motor for it. That's reserved for the more expensive Flex keyboard model.
There is a pen storage well placed above the keys and now left exposed for easy access to the Slim Pen 2 whenever you need it. Not only does it hold the Slim Pen 2 magnetically, it charges it as well.
The Slim Pen 2 has a flat design, which I'm not the biggest fan of. Through online research, I found out this design is that of a carpenter's pencil. The thing is, one wouldn't use a carpenter's pencil to write or draw if they had the choice. So it seems like they chose this design so it's flat enough to conceal within the type cover. I can get used to it, but it's not my preference. I also found the button a bit hard to press, but that can be a good thing because I won't accidentally press it while I'm using the pen.
Pressure sensitivity is nice but I'm not an artist nor do I draw. I don't know how to elaborate in a meaningful way for artists that would use the Slim Pen 2 to draw unfortunately. But it does ink at variable thickness based on the amount of pressure you use while writing/drawing with it.
The top end of the pen serves as a digital eraser, which is nice and feels intuitive.
The cool thing about the Slim Pen 2 is its haptic feedback. Previously people would suggest using a textured screen protector to simulate the pen on paper feel, but I never liked how those change the look of the screen just for the sake of that. With the haptic feedback, the pen feels like there's friction while writing/drawing with it, which just enhances the user experience.
I can comfortably recommend it to Surface Pro users who type on-the-go, and have a need to use the pen a lot. But as a reminder, if that doesn't fit your profile, you don't HAVE TO spend that much. If you don't see yourself using the pen much or at all, don't get this. Get the cheaper model with just the keyboard. If you use the Surface Pro as a tablet most of the time and don't see yourself using a physical keyboard, or more comfortable using a bluetooth keyboard with better key travel. Otherwise the Surface Pro keyboard with Surface Slim Pen was made for the Surface Pro, especially the 11th edition. Literally.
I would recommend this to a friend!
Share this review:
0points
0of 0voted this as helpful.

Our latest premium video doorbell offers enhanced security and convenience. Choose between up to 8 months of battery operation or continuous hardwired monitoring. Enjoy more than crystal-clear 2K 5MP resolution live view, a super-wide 180 degree angle view, full-color night vision, two-way audio, and filter person, package, vehicle, and pet detections.
Posted by: KusMoG
The Tapo TD25 is a relatively cheaper option in the video doorbell market, if you're going by MSRP before discounts, and one of the ones that does not require you to have a subscription in order to store and download your history of recorded events. I think part of the reason why it's cheaper than the others in the market is that it does NOT come with a SD card. Which is not necessarily a bad thing. Other products will come with a SD card and claim it's free, but they're obviously more expensive. Furthmore, you may not be getting a SD card with the largest capacity or best speed. With the Tapo TD25, at least you'll get to choose your own SD card to your liking.
It comes with an indoor chime so that's adding more value to it. You can adjust the volumes for both the doorbell's ring and the indoor chime's ring invidually; even silence them if you wish. There are 11 ringtones to choose from for the doorbell, and 7 to choose from for the chime. There are some odd chimes among them though. Ringtone1 is Jingle Bells. Ringtone5 is the NBC chime! Ringtone7 is the Tmobile ringtone!
What's also nice is that you can set up the Tapo TD25 with a hardwire setup OR wireless using its non-removable battery. I live in an apartment with no existing hardwire setup, so wireless was the only way to go for me. It comes with 3M VHB adhesive, a horizontal angle wedge, and a vertical angle wedge.
I love that the doorbell's front face is all black now, unlike its previous models, although the sides and back is still white.
Setup is done entirely through the mobile app. It doesn't have a desktop app or a browser portal. The instruction manual also exists entirely within the app.
The Tapo TD25 connects to your existing network via WiFi on the 2.4 GHz band. There is no ethernet jack, nor is their any other WiFi band support.
The microSD card it uses needs to be a class 10 or faster. The format it uses is FAT32, but don't bother formatting it yourself on a computer. The app can format the SD card properly as well as add the necessary system files it needs to operate, all in one process. The maximum storage it can handle is 512GB.
The video quality is a mixed bag. It's presented in a fishbowl presentation with a fisheye effect. The top and bottom are flat, and the sides are circular (think of a fishbowl shape). The sides are also distorted in that the image is curved along its circular shape (Google "fisheye lens" or "fisheye effect"). It makes things look like something from a funhouse mirror. So the video examples you see from Tapo's marketing, including the back of its own box, are blatantly deceptive. They look NOTHING like them.
Otherwise, the video is pretty clear and in full color when you set the full color mode on. It's in black and white by default.
It is also clear in darkness thanks to its spotlight which turns on when it's triggered by motion. The motion sensor, which is the big blocky bottom portion of the doorbell, does not need light to work. However, either the motion sensor is too slow to activate or the doorbell is too slow to wake up, because I can never seem to capture the subject early enough, and there have been times where the video doesn't capture their face because they already have their backs turned when the recording started. I've tried setting the options with the highest sensitivity, short retrigger time (0 sec), longest clip length and record buffer, to no avail. If a thief is aware of this by recognizing the Tapo's distinctive model from a distance, it can use that one second blind spot time to quickly steal a package and never appear on your Tapo TD25's camera.
The package detection wasn't quite useful for me because despite placing the doorbell camera 4 feet above ground as per their instructions, the camera still doesn't capture what's directly in front of my door where packages would normally be left. The camera only begins to capture from about a foot and a half away from itself. In my case, it would be the public hallway, and no delivery person will ever leave a package there, where it's blocking the path of people walking. Using the vertical wedge only shortens the distance to 1 foot and 4 inches. If I placed the doorbell lower, it makes it awkward for vistors to press the doorbell button, and it wouldn't be focused properly to capture their face from the front.
There are no pets in my apartment, so I wasn't able to test pet detection, though the feature exists.
Playback of the video is disappointing on battery mode. There is no ability to rewind or forward when playing a clip from the app. You can only do so if you download the clip from the app to save it locally on your mobile device. From there, you can open the video with a video app and play it like any normal video. I imagine when it's hardwired, since it does 24/7 recording, you would get DVR rewind/fast-forward functions. When saved to your device, it's in a standard HEVC mp4 format.
What's also disappointing is that the app notifications do not have a thumbnail preview. It's only available behind a paywall when you subscribe to TP-Link's cloud service, which also gives you cloud storage for your recordings.
What's also disappointing is that the app notifications do not have a thumbnail preview. It's only available behind a paywall when you subscribe to TP-Link's cloud service, which also gives you cloud storage for your recordings.
It has an intercom mode which sounds clear. You can even use prerecorded messages to reply to a vistor at the door, or record a message of your own on the app to use for whenever.
The Tapo TD25 has a geofencing feature to allow recording and notification to activate only within your specified zones, but I was unable to test this since I live in an apartment floor with only 2 units, myself and my neighbor, and geofencing is impractical for the amount of little space and inactivity within my hallway outside of my front door.
Battery life appears to be excellent. After roughly a week, it hasn't dipped below 90% yet, although your mileage will vary. I live in ana apartment with little foot traffic. A house on a busy street will be an entirely different story, and one I'm unfortunately unable to test or simulate.
It has Google Assistant support but it's very limited. It can only do voice notifications for events. It won't show you video if you have a Google Nest Hub. You can use a voice command to have the Google Nest Hub show you the doorbell on demand though. And the convenient thing is the video will not time out, so you can leave it open for as long as you want. But of course, this will put a huge strain on the video doorbell's battery life. You will need to close it manually by telling the Google Nest Hub to stop, or manually closing the video on the display itself.
Pros:
-No mandatory subscription for recorded events
-Seemingly great battery life
-local storage
-excellent night vision
-No mandatory subscription for recorded events
-Seemingly great battery life
-local storage
-excellent night vision
Cons:
-severe fisheye effect
-no rewind or fast-forward functions for playback within app; needs to be downloaded and viewed from a separate video player for that
-recording starts too slow to capture events when they happen
-severe fisheye effect
-no rewind or fast-forward functions for playback within app; needs to be downloaded and viewed from a separate video player for that
-recording starts too slow to capture events when they happen
That last con is a dealbreaker for me when used wirelessly. But for hardwired, I would say consider it. But there are better options that also offer local storage out there for just slightly more money.
No, I would not recommend this to a friend.
Share this review:
+4points
4of 4voted this as helpful.
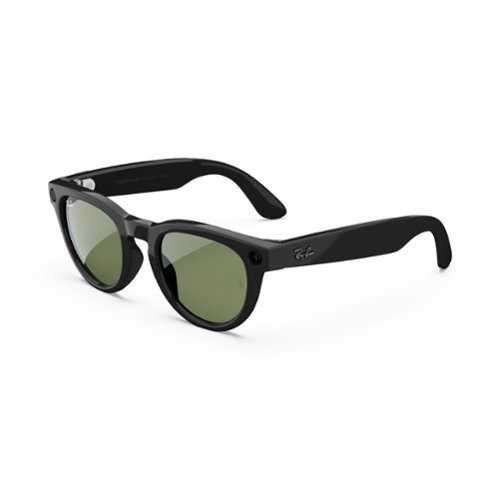
Tap into timeless style and advanced technology designed to help you move effortlessly through life. Collaborate with Meta AI* on ideas and answers based on what you see. Capture photos and videos from your POV, listen to music, make calls and even send texts on the fly~all without taking out your phone. From legendary Wayfarer to trendsetting Skyler, these are statement-making frames with a slim, comfortable fit that are perfect for everyday wear. Whether you~re remembering a parking spot or translating foreign languages in real-time, get the most out of life with Ray-Ban Meta glasses.
Customer Rating

3
Stylish and fun, but AI isn't great, hard to frame
on May 30, 2024
Posted by: KusMoG
I’ve noticed Meta’s website mention it takes 75 minutes for the glasses to charge in the case but for me it only takes 49 minutes. This leads me to believe the Meta Headliner Low Bridge sunglasses I have are of a new model. So please bear this in mind. My review is for my specific model.
The low bridge fit is a game changer for me. I’ve never paid attention to bridge fit before. I would just pick a style I like and if it fits my head, I go with it. But with some of my glasses, they slip down my face, and I find myself often pushing them back up. With these Headliner low bridge fit sunglasses, I’ve never had to adjust them. They sit nice and comfortable on my nose. There are no adjustable silicone nose pads. It’s just the plastic frame that protrudes and acts as the nose pad.
The glasses’ width is 5-5/8” but the width of my head from the edges of my ear to ear is 5-7/8” so it is a snug fit on me and I am expanding the arms with my head. The sunglasses do not have a spring hinge so they’re not meant to expand outside of its natural width.
The glasses itself look and feel like normal Ray-Bans, down to the material. Where you would normally find silver tabs or rivets on the temple of the glasses, you’ll find a camera on the right (left when worn) and LED on the left (right when worn), both of the same size and shape. Neither the camera or the LED stand out to look out of place. They’re extremely discrete, and look like they’re part of the style of the glasses, not having anything to do with technology. It’s only obviously apparent that they are not regular sunglasses when the camera is active, where the LED shines bright white and pulsates to attract attention, but isn’t distracting to others.
The lenses are green (Polar G-15 Green) but not in an obvious way. Its green is very discrete and a quick look would get you thinking they were black. The lenses are NOT polarized so they won’t combat glare from bright light, like bright sunlight, which is what people look for with driving sunglasses. But since they’re not polarized, it won’t distort your vision when looking at LCD screens such as a monitor or your phone.
The case is typical Ray-Ban affair, with its classic tan color and snap-lock, which are magnetic on these. It appears to be made from faux leather. The inside is lined with a soft material that feels like the underside of some leathers to prevent scratching when the glasses are in the case. I was kind of disappointed it didn’t come with a microfiber cloth. They charge via USB-C.
Installation is done from your mobile device using the Meta View app. There’s a QR code on the inside of the sunglasses’ box to download the app. Bluetooth pairing can only be done while the glasses are in its case. You can pair them with Bluetooth devices without the app but they’ll only act as Bluetooth headphones. It does not have multipoint though and can only connect to one Bluetooth device at a time. The app also serves as a manual, imports media to your mobile device, and Meta AI. There is no on-device AI. It’s all through from the Meta View app and the device it’s installed on.
Your media is downloaded to the Download>Meta View folder on an Android device.
Your media is downloaded to the Download>Meta View folder on an Android device.
There’s 32GB of flash storage but if you have auto-import enabled, which it is by default, it’s more than you actually need for one session given the limited battery life it has.
A 1 minute video will take up 110MB. You can take up to 34 minutes of video per session. So that’s about 3.74GB
Media importing can be done from the glasses or inside the case (via auto-import) but importing from the glasses is done by the slower Bluetooth. Importing from the case is done over the dramatically faster Wi-Fi, but you’ll need to set up the Wi-Fi connection within the app first.
The camera is limited to shooting in portrait mode and a fixed focus. It’s also located on the left temple of the glasses when worn (right if you’re looking at the glasses from the front). This makes framing your target, whether it be for photos, videos, or getting Meta AI to reference something you’re looking at, extremely difficult. What you see is NOT what you get. Everything is off-center and zoomed out. Because it captures a lot of area space, if you ask Meta AI to identify something small from far a distance, it will fail. Videos are limited to 60 second clips. What’s odd is, nothing prevents me from starting another video clip immediately after the preceding 60 second clip ends. I was able to do this for 34 straight minutes, until the battery dropped to 10% where camera functions are disabled. It warned me of heat afterwards, but it was after the battery was drained to 0% and charging in its case. But even then, the cooling process only made the charging time longer by 2 minutes.
Meta AI feels like it’s in beta. It uses my phone for location, of which I granted it permissions to, and yet it doesn’t have my correct location, whereas all the other apps on my phone do. When I asked Meta AI what time the Dunkin nearest me closes, it gave me the hours for the location 20 minutes away from me.
There’s one 6 minutes away from me that. Translation is currently limited to 5 languages: English, Spanish, French, Italian, and German. Because of the camera’s fixed large capture size, the text would either need to be large or you would need to have your glasses really up close to it to make the text appear large and isolated for it to be able to correctly refer to it. But the camera location makes framing a guesswork. Your eyes are NOT the viewfinder. When you’re targeting a subject you’ll want to be facing about 15 degrees to the left off-target for your actual target to be centered for picture/video taking or AI identification. You’ll also have to capture the subject while being straight. When I tried capturing a photo while leaning on my sofa, my eyes don’t see the TV slanted because my pupils adjust. The camera is fixed so it won’t adjust. My photo came out slanted. So it is NOT what you see is what you get. Because of this AI will often refer to an incorrect subject when you ask it to look. Meta AI also does NOT have the ability to look up prices for objects you look at, although it says it’s on the way.
Meta AI has no smart control ability and will not be able to control your smart devices. It can’t even do simple functions like set a timer or an alarm.
When I asked Meta AI who won the Rangers game it correctly identified Game 4 of the NHL ECF but incorrectly told me that the Rangers won 3-2. My phone’s AI correctly told me the Panthers had won 3-2.
The glasses do not have the ability to activate your digital assistant on your phone that many Bluetooth headphones can do. Instead, all they have is Spotify Tap and Calm support. You cannot set up gestures to activate your own apps.
The pause and play gestures will work on (almost?) any app, which is a single tap of the right arm of the glasses. Volume control is done by the right arm forward or back. A 3-finger tap can be assigned to activate the Meta AI manually instead of by voice.
The capture button is a physical button located on top of the right arm by your temple. A press will capture photos, while a press and hold will start video recording. You have the ability to switch these actions around from the app, but that’s all the customization they allow for the capture button. Press the capture button again while video recording ends the recording. Otherwise, it’ll keep recording for 60 seconds.
Pictures look decent, but they’re nowhere close to measuring up with smartphone cameras. The photos taken were not meant for zooming or cropping at all. Doing so will reveal a ton of softness and loss of clarity. The same goes for video. It does a respectable job in low light conditions. Not too much noise but a lot of softness. It works best in natural light, outdoors.
Sound is remarkable for this form factor. It reminds me of Meta Quest’s open-ear speakers but better in that they can go much louder. The sound stage is wide thanks to its open design. There’s depth and clarity. It doesn’t sound tinny or weak. Bass is present and clean but it will disappoint listeners that enjoy powerful thumping bass. Listening to Kendrick Lamar’s “Backseat Freestyle” and the bass drop 13 seconds in barely thumps. It’s like the frequency is too low for it. But listening to Blu DeTiger’s “All I Ever Want Is Everything” album and the bass sounds alright. It’s engaging but you can’t feel the bass.
There’s no avoiding sound leakage, but whether it’s a real problem depends solely on your listening environment. I live in NYC and I have no issues with playing audio at high volume with traffic noise masking it. In silence, 20% volume makes my audio indistinguishable but it depends on the content.
There’s no avoiding sound leakage, but whether it’s a real problem depends solely on your listening environment. I live in NYC and I have no issues with playing audio at high volume with traffic noise masking it. In silence, 20% volume makes my audio indistinguishable but it depends on the content.
Call quality is excellent and clear. There is also noise cancelling with microphone.
Marketing claims for battery life appear to be accurate. I was only able to get up to 4 hours of battery life no matter if I turned voice activation off or not.
When using it for Bluetooth audio only, I got 4 hours and 10 minutes of continuous use.
When using it for video recording only, I got 34 minutes of continuous use (I would start another video recording immediately after one ended) up until the 10% mark, when camera functions stop. I got an additional 20 minutes using it for Bluetooth audio for a total of 54 minutes from 100% to 0% during that outing.
With voice activation on and using it with mixed moderate use, I got 4 hours.
Charging the glasses from 0% to 100% took 49 minutes. The case itself holds several rounds of charging. I still haven’t been able to drain it to 0% yet and I’ve fully charged my glasses from 0% with it at least 3 times.
The Meta Ray-Bans look great but the tech feels like great options for sunglasses like anti-scratch coating or Transitions. The tech part feels too limiting but if you’re fine with its shortcomings, they may be perfect for you.
I would recommend this to a friend!


Share this review:
0points
0of 0voted this as helpful.

LG UltraGear OLED introduces the World~s First VESA Certified Dual Mode gaming monitor. On the large 32" screen, Dual Mode allows PC gamers to experience graphics-driven games in detailed 4K/UHD at up to 240Hz or gamers can play super fast-paced games in Full HD at up to 480Hz with a quick press of a hotkey. The innovations don't stop there. With Pixel Sound, this UltraGear's exceptional, lush audio comes at players from the OLED screen rather than speakers from underneath or behind the gaming monitor. The OLED screen is also is certified VESA DisplayHDR True Black 400 which enables gamers to experience HDR in games as developers intended with stunning, rich black levels and bright, deep color contrast to produce the on-screen visuals gamers crave. The 32GS95UE will be the centerpiece of your battlestation with a gorgeous, virtually bezel-less design, that's height, tilt, swivel and pivot adjustable. With plenty of connectivity options it's easy to see how this UltraGear is essential gear for an amped up battlestation.
Customer Rating
4
Pixel Sound is impressive! But no USB-C or Dolby V
on May 20, 2024
Posted by: KusMoG
-Installation-
Simple and toolless if using the stand. It comes in 3 parts: the display, the neck of the stand, and the base of the stand. The stand is assembled by 2 D-ring screws found underneath the base that screw into the neck half. The display snaps into the assembled base securely with tabs. Removing the display from the stand is as simple as pushing a spring button on the back of the display down and pulling the display off it at an angle. You can also easily mount the monitor but you’ll need a Phillips head screwdriver to remove the four screws that cover the mounting holes. It uses the standard VESA 100x100 mount.
Simple and toolless if using the stand. It comes in 3 parts: the display, the neck of the stand, and the base of the stand. The stand is assembled by 2 D-ring screws found underneath the base that screw into the neck half. The display snaps into the assembled base securely with tabs. Removing the display from the stand is as simple as pushing a spring button on the back of the display down and pulling the display off it at an angle. You can also easily mount the monitor but you’ll need a Phillips head screwdriver to remove the four screws that cover the mounting holes. It uses the standard VESA 100x100 mount.
-Appearance-
Understated in an attractive way, distraction-free with a flair of gamer aesthetics designed to be minimal in distractions. The gamer aesthetics I’m referring to are the 2 LED light strips, which LG calls “Hexagon Lighting” on the back of the monitor that are customizable to 21 different colors across the spectrum. You can set 4 different static color presets, cycle between those 4 colors, or turn off the lighting.
With the lights off, it looks really professional, and would fit right in an office work environment.
With the lights on, it’s best utilized on an island desk if you’re trying to show it off, or against a wall in a dark setting. The lights will reflect off the wall and emit a glow of that color from behind your monitor.
There is no branding on the display itself, and the bezels are slim at ¼” with the bottom bezel slightly wider at 3/8”. There is no chin.
The branding you’ll find on the monitor is glossy logo on the back of the display that does not light up, the neck of the stand, and the foot of the stand. The branding on the stand is so understated though, you’ll have to look hard to see it. The only branding that pops is a Nvidia G-Sync sticker on the bottom of the neck of the stand, which you can always peel off, but is also somewhat out of the way as it is.
There is no Power/standby LED
-Stand-
Functional, practical, and rock solidly sturdy. The base is metal that gives it substantial weight but is covered in a hard plastic. It still looks and feels premium. Nothing about it is flimsy. There’s no creaking or flexing when I move the monitor around or make adjustments to it.
The stand has a hole in the neck of the stand for cable management that measures 3” across, and 7/8” vertically.
The monitor can pivot so you can view the display in portrait mode. From landscape to portrait, it clockwise, with the inputs being on the left side.
It can tilt and swivel but the angle adjustment allowed was clearly designed for a single seated person. It doesn’t tilt enough for you to view it comfortably while standing looking down at it. And even more disappointingly, the swivel angle is even more limited; not enough to share the screen with someone sitting right beside you.
At its lowest height adjustment in landscape, its height is 19.75”. But since the vent is on the top, you’ll need more clearance than that.
The space between the bottom of the monitor and the stand at its lowest height adjustment is about 3.25”. It won’t get as low as the stand. At its highest adjustment, that space is 7.875”, with a height of 24.57”.
Since the base of the stand is flat and solid, you can put stuff on top of it.
-Cooling-
The monitor is cooled by a fan that is inaudible during actual use since it gets easily drowned out by a premium quality quiet computer fan like my Noctua NF-A20. You’d only hear it in complete silence.
The exhaust vent is located on the top of the monitor, though you won’t feel any breeze; just exhaust heat. The intake vent is on the bottom.
You won’t feel any heat around most of the monitor except for the center, where the heat is clearly concentrated to. Within that heat zone, it’s coolest on the bottom, hottest in the absolute center, and hot in the top.
-Burn-in measures-
There are 4 different OLED Screen Move modes, where the display will periodically shift the pixels in a different direction but seemingly never in a way you notice it happening after the first initial shift when you make the selection. Curiously, by default, this option was turned off.
As previously mentioned, it’s cooled by a fan. I can’t tell if it’s in combination with a heatsink but the sides of the monitor are cool to touch with no heat from the front or back of the display. The center may be a concern because that’s where the heat lies, including the front of the display.
Sadly, the warranty coverage for burn-in pales in comparison to its competitors offering just a 2-year coverage. The warranty does cover burn-in, as confirmed with several LG representatives I’ve contacted myself but they’ve been more coy about it compared to the competition, that proudly advertise a 3-year OLED burn-in coverage.
-Inputs-
2 x HDMI 2.1
1 x Displayport 1.4
2 x USB-A (5Gbps)
1 x USB-B (5Gbps) to connect to PC and allow data connection to the USB-A ports and to update firmware
1 x headphone jack
I found it disappointing that it didn’t have USB-C, which could’ve been used to daisy chain USB-C monitors. USB-A doesn’t support Displayport Alt.
-Display-
It uses a matte coating, which does an excellent job preventing reflections and glare. I have my monitor diagonally adjacent to my 65” TV, which is behind me. I also have my monitor almost directly underneath a ceiling light, of which there are 4 in the room. Unlike with a glossy display, I never see any reflections, just the content on my screen.
Colors look accurate and do not appear muted although it may seem that way out of the box due to the manufacturer default settings combined with Windows 11’s default settings. However, it does not match up with a glossy panel if you’re looking for vibrancy. But here’s the thing that I experience: reflections ruin my enjoyment of a glossy display because I can see myself on the screen. So there is a market for matte displays. And the 32GS95UE is great because it’s matte coating has little to no noticeable negative impact on color. The coating is also resistant to oily substances like fingerprints and makes the screen easy to clean.
Contrast is excellent, with no blooming. Blacks appear as true blacks. Whites are more accurate than the Whites on my S22 Ultra, which uses a glossy panel and looks more yellow by comparison. However, if you’re looking at a largely white screen, the matte coating does appear more evident. Otherwise, it’s largely unnoticeable unless you’re actively looking for it.
Brightness is average. It’s not poor nor is it great. It struggles against natural light even with peak brightness set to high and the brightness set to 100, diminishing contrast quality the brighter it is. But with indoor lighting that wasn’t an issue for me.
Windows 11 will have SDR brightness set to 40 by default if you have HDR enabled, which makes your desktop appear dark (in my case, too dark) since Windows 11 objects such as its Desktop is still SDR content. You’ll want to adjust the SDR content brightness to your liking from the Windows 11 Settings.
Text quality is great and legible, even at 100% scaling. There’s hardly any text fringing except for white fonts (such as the default Windows system text color) but you’d have to be really up close to the monitor (like about 5 inches or closer) to notice it. At higher scaling, it’s even less noticeable even from up close. I never felt any eye strain or fatigue after several hours of continuous use.
HDR with HDR content looks great. I didn’t experience black crush with my display. I used a “Black Clipping 4k UHD HDR 10 Calibration” video on YouTube and 64 was a true black. 68 was dimly flashing. This was while I was on Gamer 1 mode.
-Sound-
Expected Pixel Sound to be a gimmick, but it isn't. It's one of the best sounding speakers on a monitor. They're actually front firing, and sound immersive. They also get plenty loud at just 30%. And still clear at 100%. They don't sound tinny. Bass is present and not muddy. With stereo speakers sounding this great and on the monitor, it makes for a clean setup as opposed to desktop speakers.
Expected Pixel Sound to be a gimmick, but it isn't. It's one of the best sounding speakers on a monitor. They're actually front firing, and sound immersive. They also get plenty loud at just 30%. And still clear at 100%. They don't sound tinny. Bass is present and not muddy. With stereo speakers sounding this great and on the monitor, it makes for a clean setup as opposed to desktop speakers.
-Gaming-
It has a crosshair feature, which wouldn’t be detectable by software. It also has an FPS counter, which actually reports the refresh rate. The only way for it to report actual frame rate is if you have Adaptive-Sync (which is variable refresh rate, or VRR) on.
Gameplay was smooth on 4K at 200fps. I haven’t experienced any input lag, screen tearing, or flickering.
With HDR gaming, such as Shadow of the Tomb Raider, I’m able to see the dark details without any kind of overexposure.
Dual-Mode allows you to switch between 4K 240Hz to a 1080p 480Hz with the press of a button, as opposed to switching out 2 different such monitors. The switch takes just under 4 seconds after you press the button. Each mode is seen in Windows as different monitors, so their display settings are independent of each other.
1080p 480Hz also gives you the option to switch to a 27” or 24” sized display which helps with your field of vision for games where you need full screen awareness like first person shooters. It’s clearly the mode designed for competitive coming. However, for some reason, both display in 27” and 24” modes is not as sharp as the full screen 1080p. It’s not a huge deal with games but it’s pretty noticeable in Windows, where everything looks softer.
1080p 480Hz also gives you the option to switch to a 27” or 24” sized display which helps with your field of vision for games where you need full screen awareness like first person shooters. It’s clearly the mode designed for competitive coming. However, for some reason, both display in 27” and 24” modes is not as sharp as the full screen 1080p. It’s not a huge deal with games but it’s pretty noticeable in Windows, where everything looks softer.
-Conclusion-
You should only consider a monitor this if you’re a gamer that's in the market for a Dual-Mode monitor. This is the first one to market. The visuals look great in SDR and HDR after calibration. The monitor itself looks great and professional.
If your lighting environment handles glossy well, then you’re probably better off waiting.
Pixel Sound sounds amazing and a serious standout feature.
The 2 year warranty when competitors offer 3, lack of USB-C, and lack of Dolby Vision were really disappointing to me for such an expensive device that should be future proofing itself.
3.5 stars
I would recommend this to a friend!
Share this review:
-1point
0of 1voted this as helpful.
KusMoG's Review Comments
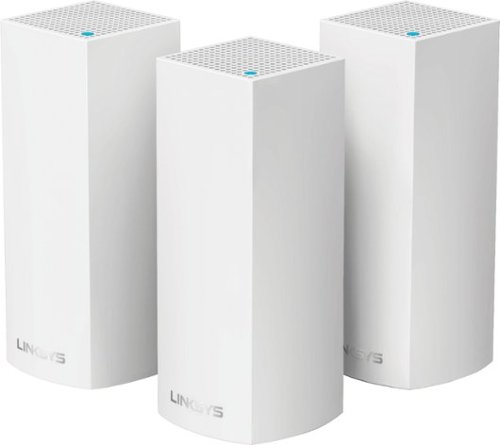
Make your home an internet haven with this versatile Linksys Velop wireless Wi-Fi system. Three identical tri-band dual-stream AC2200 routers, each equipped with a quad-core ARM Cortex-A7 processor, deliver lightning-fast internet. Equipped with Bluetooth 4.0/LE, this Linksys Velop wireless Wi-Fi system is simple to set up and pairs easily with computers, tablets and smart devices.
Overall3 out of 5
3 out of 5Optimized for distance, not speed. Limited admin
By KusMoG
First off, let me preface by saying that I'm coming off using an EA9500, a traditional router that costs $100 less than a Velop 3 pack. I also live in an apartment building with a highly congested 2.4GHz space; so bad it affects speeds dramatically and makes the connection highly inconsistent.
With that said, I wasn't really impressed with the Velop at all, for the amount of money it will cost you. It runs on 2.4 and 5.0GHz bands but which your device is connected to is entirely managed by the Velop mesh router themselves. You can't select it yourself. So for some *stupid* reason, even though my Galaxy Note 5 is capable of connecting to the 5.0GHz band, it connects me to 2.4. Because of this I get a slower and inconsistent connection due to the 2.4GHz congestion in my building.
There's also no web administration page, so you can't configure your Velop Wi-Fi from a computer. You need to do it through their app. That means your doing all the heavy lifting of port forwarding and such, from your phone. I'm not sure if they have an app for tablets.
As far as range goes, it will do the job. You will get a strong signal as long as you are near one of the nodes. But the catch is it only extends the wireless signal for as well as it currently performs in your environment at 100% signal and you have no control over which wi-fi band it connects to, like you do with a traditional router. So if your 2.4GHz band wi-fi is terrible to begin with at 100% signal, I suggest you stay very far away from this unless you want buyer's remorse.
I can only recommend the Velop wi-fi 3-pack to users, most especially with wi-fi dead spots in their home, that have great consistent connection in terms or speed and reliability on both 2.4 and 5.0GHz band with a traditional router at 100% signal. This mesh router will be music to your ears since it will be capable of extending your wi-fi range through your house with minimal signal loss.
I can't stress this enough but this router isn't 5.0GHz friendly. I suspect it recognizes when a device is a phone and connects it to the 2.4 GHz band to prioritize distance. It just doesn't offer the flexibility and power administrators want to manually control these connections. I'll be putting all my wireless devices back on my EA9500 because it clearly outclasses the more expensive, less admin-friendly Velop.
KusMoG
Attention Kristine the Linksys Support rep
March 29, 2017
Hi Kristine,
So I called the number you gave me and spoke with a Linksys representative named Kim (Badge ID# 21791) and she agreed with my review. She said it was a product limitation and that users are not able to select the wi-fi band since it's designed to run on a singular network. She also said there is a web UI but it's virtually the same as the app and offers no additional settings or features. So I stand by my review.
It's an awful lot of spend to spend to have so little control. 2 5.0 GHz bands exists on the node but it's USELESS if and when the Velop decides on its own not to connect using that band, instead choosing the inferior 2.4GHz band. This router is a huge step back for IT professional users.
0points
0of 0voted this comment as helpful.
KusMoG's Questions
KusMoG has not submitted any questions.
KusMoG's Answers
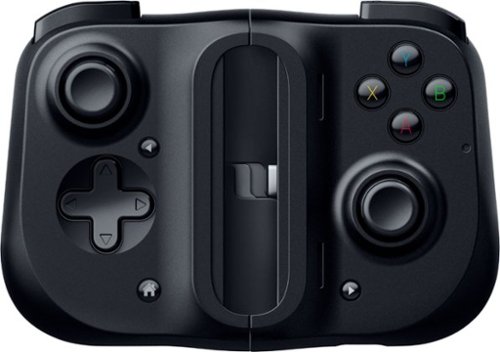
Bring your A-game anytime, anywhere. Introducing a universal mobile gaming controller that fits most smartphone devices, designed to bring console-level control to your on-the-go gaming. With this controller by your side, wherever you go, victory will follow.
Will it fit the Galaxy Note 20 ultra
Yes it will. The Galaxy Note 20 Ultra, while not officially listed as supported, probably because it wasn't available for Razer to test at the time, is the Kishi's limit.
5 years, 9 months ago
by
KusMoG