BobinVA's stats
- Review count158
- Helpfulness votes452
- First reviewDecember 19, 2014
- Last reviewJune 10, 2026
- Featured reviews0
- Average rating4.1
Reviews comments
- Review comment count0
- Helpfulness votes0
- First review commentNone
- Last review commentNone
- Featured review comments0
Questions
- Question count0
- Helpfulness votes0
- First questionNone
- Last questionNone
- Featured questions0
- Answer count28
- Helpfulness votes23
- First answerAugust 12, 2016
- Last answerJanuary 22, 2022
- Featured answers0
- Best answers2

OpenFit continues the Shokz open-ear concept to let users enjoy all-day comfort and hear their own soundtrack while staying open to the world around them. OpenFit offers an ultra-lightweight, open-ear construction to hear both your own audio and every sound around you with crystal clarity. DirectPitch technology produces a full audio experience to immerse yourself in your favorite songs, podcasts, and audiobooks. A flexible ear hook design combines stability and comfort. Moments are precious, and OpenFit gives you the freedom to hear every one of them.
Customer Rating

4
The evolution of open-ear listening
on July 4, 2023
Posted by: BobinVA
I’m a big fan of Shokz headphones—this is my fifth pair, so I’m definitely on board. If you know Shockz (formerly Aftershokz), then you know that they made a name for themselves producing high-quality bone-conduction headphones. These allow you to keep your ear canals free so that you don’t lose touch with your surroundings—as a runner and biker, this is especially important to me for safety reasons. It’s always been a given that I would have to give up sound quality for special awareness, and I didn’t mind that, but always wished the sound quality could be better. Don’t get me wrong, Shokz has improved the sound quality of their bone-conduction headphones with each release, enough that I’ve traded up several times, but they were never the headphones I’d choose if I just wanted to shut out the world and enjoy my music. The Openfit earbuds are their attempt to bridge the gap and bring serious sound quality to open ear headphones.
Normally, my top two criteria for evaluating earbuds/headphones are comfort and sound quality. All the features in the world don’t matter if they sound bad or if you won’t wear them because they’re uncomfortable. One of the best things about bone-conduction headphones is their comfort. You can literally wear them for hours and not even know they’re there. I have a lot of earbuds, some of which are pretty comfortable, but even the best of them are fatiguing after a while, plus I just don’t like having something in my ears that long. Even with recent technology additions like “hear through”, it’s just not practical to have buds in my ears all day. As I’ve already said, bone-conduction headphones don’t win in the sound quality category, but the ability to maintain situational awareness has always trumped that for me, so I’ve stayed with them.
The latest offering from Shokz is the Openfit. These are their first true wireless earbuds. They’re not bone-conduction, but they are still open ear earbuds, meaning that they don’t sit in the ear canal like regular earbuds. Instead, they utilize hooks that go around your ear (called Dolphin Arc hooks), with tiny speakers sitting right inside your ears, directing sound into the ear canals. The hooks are amazingly secure, and I did not manage to dislodge them shaking my head, running, or bending all the way over. In addition, they’re super comfortable, covered in a substance Shokz calls “liquid silicone”. It is very soft and adapts to the size of your ear, making them comfortable enough to wear for hours on end without fatigue. They even work well with glasses, which is something I was worried about. Out of the box, I wore them for 3 hours straight with only a little “tiredness” on the backs of my ears, but that may have actually been due to the combination of the earbuds and my glasses. These may be the first earbuds I really could wear all day, but I haven’t gone that far yet.
Pairing them with your phone the first time is very easy, as they go into pairing mode when you take them out of their compact charging case, which features USB-C charging, but not wireless charging. Strangely, Openfit does not support multipoint pairing like their other headphones do, so you’ll have to delete the pairing with your phone and then pair them with another device if you want to use them with something else. This is a minorly annoying oversight, given that Shokz knows how to do this.
So, the Openfit check the comfort box, but how good do they sound? I paired them right out of the box and started listening. I used my normal music app, which features customizable EQ. They sounded good, but didn’t wow me. I decided to try the app to see if it had any additional magic to add. When the app started up, my music was still playing, but it asked if I wanted to update the firmware, which I did. When the update finished, I picked some EQ settings in the app, and wow! What a difference! I’m not sure whether the app or the update (or both) did the trick, but it really made the Openfit sound great! They aren’t going to cause you to stop using your studio-quality IEMs, but these have sound that bone-conduction can only dream of! Highs are crisp, mids are clean, and bass is good but not great (need to leave some room for improvement). Other reviewers have mentioned how some bass sounds, particularly kick drums, don’t sound quite right, and I agree. I liken the sound to what I would get when my speakers got too old and the foam would dry rot, leaving the cones to vibrate without any dampening. It’s like that, although not exactly and not all the time. I’m hoping that Shokz will be able to fix this with a firmware update in the future. Overall, though, these sound really great, and I’m willing to trade a little sound quality for the ability to comfortably wear them as long as I want and still maintain situational awareness.
Call quality is great, and my wife, who usually complains about earbud call quality, said I sounded great. She couldn’t tell I was talking to her via earbuds. Speaking of calls, it would be nice if there were a way to mute myself during calls, but this is not available.
The touch controls are very good, once you get used to the angle of the earbuds in your ears. Unfortunately, your choices on how to use them are somewhat limited. By default, you can double-tap to play/pause your music or podcast. Long pressing on the right bud will skip to the next track, while the left will go to the previous track. There are a few other configuration choices in the app, but you can’t have the ability to control the volume, track skipping and voice assistant together at the same time, nor can you choose which side you want for things like voice assistant. Hopefully, Shokz will add more options in the future.
I really do think Shokz has hit their goal with the Openfit. They’ve got an IP54 rating for water and dust resistance, which should mean they’re fine for running and workouts, but I wouldn’t submerge them. Speaking of workouts, one of the annoying things about bone-conduction headphones is that the headband on the back of your head would push the buds out of place if you laid your head on a bench. Not so with the Openfit, since there is no headband to contend with.
If you’ve already got a pair of bone-conduction headphones, especially the OpenRun or OpenRun Pro, you may not need these unless the sound quality or other features are calling to you. I’m deducting a star for the issue with bass sounds and lack of multipoint pairing, but I hope that both of these will be corrected in the future. The Openfit are perhaps the best all-around earbuds on the market today, and for most things, they’ll be my new go-to earbuds. They’re a bit pricey right now, but hopefully that will come down over time as well. If you’re trying to decide if you should get these, it comes down to your specific use cases. If you value situational awareness and are willing to trade some sound quality to get it, these are the best combination of those two things. If your main use case is sitting down to lose yourself in the music, but you want to run while listening to podcasts now and then, you might be happier with traditional earbuds. There are so many different choices these days, but I think Shokz has a winner on their hands with the Openfit. I’ll be using these alternately with my OpenRun headphones to see which I prefer over the long haul, and which version I’ll keep buying when the time comes.
I would recommend this to a friend!
Share this review:
0points
0of 0voted this as helpful.
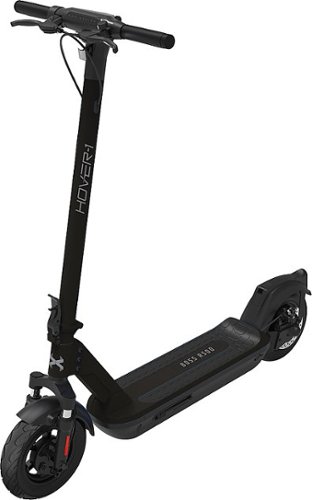
With its advanced dual front and rear suspension and 10~ honeycomb tires, the Hover-1 Boss electric scooter delivers a remarkably smooth ride to maximize your comfort. Boss~s 500W brushless motor propels it to 20 mph and the rechargeable lithium-ion battery gets up to 24 miles of range on a single charge. The premium LED display is easy to read and shows the Boss~s current speed, speed mode, battery level, odometer, and more. Keep your Boss safe from theft with the remote lock security feature via the Hover-1 E-Mobility app. Simply press the ~Lock~ key in the app, and the throttle will not engage until you unlock it. If your Boss is locked but you want to grant access to a friend or family member remotely, you can do that too! Take control of your commute or your weekend getaway with the Hover-1 Boss.
Customer Rating
4
Great looking scooter with a premium build
on June 21, 2023
Posted by: BobinVA
Electric scooters have suddenly become a big thing. In our town, electric scooters by Bird are scattered all over the place, and I’m often passed by them as I run on our “rails to trails” bike path. Recently, I saw some guys zipping down one of the roads downtown, and I thought it looked like fun, so I took the leap and got the Hover-1 Pro Boss R500. I didn’t do a lot of research into the many models of electric scooters available today, but when this one became available to me as a member of the Best Buy Technical Insiders program, I jumped at the chance to pick one up.
The R500 arrived in a very nice-looking box and was well protected inside. The scooter is almost fully assembled, with the exception of putting the handlebar assembly into the steering column. This is done by pushing the wiring into the column and inserting the handlebar assembly, then fastening it with the included screws. Hover-1 does include a pair of hex keys for this purpose, but I found it much easier to use my own hex tool so that I could get more torque. After tightening the 4 screws (extras included), I was ready to go.
The R500 is a very nice-looking scooter, with a matte black finish and silver/white lettering on the model I got. It has a maximum weight capacity of 264 lbs, which thankfully leaves me with plenty of room to spare. The 10-inch wheels are very solid and feature a disc brake in the rear, and I think maybe a drum brake in the front. There’s an LED front headlight and a red taillight in back. At the head of the steering column is the LED display, which includes the odometer, speedometer, mode, and battery meter. All of this is controlled by the single power button, by which multiple presses allow you to control things like lights, cruise control, etc.
The steering column folds down and locks in place with a hook so you can pick it up and carry it. Carrying is certainly possible, but you won’t want to do that for long, as the R500 weighs in at 47 pounds. I suppose that’s partly due to the size of the battery, since the R500 has a stated range of up to 24 miles and a top speed of 20 mph. There are 4 modes, selectable by toggling the power button:
• Pedestrian mode (0-3 mph)
• Eco mode (0-9 mph)
• Drive mode (0-15 mph)
• Sport mode (0-20 mph)
• Pedestrian mode (0-3 mph)
• Eco mode (0-9 mph)
• Drive mode (0-15 mph)
• Sport mode (0-20 mph)
Out of the box, you are not able to start the scooter by simply pressing the throttle. That’s because the R500 is designed to accelerate only after you’ve kick-started it moving like you would on a non-motorized scooter. This is for safety reasons, but you can turn this off in the app (more on the app in a moment). The R500 features a powerful 500W motor, and you can really feel it. I had plenty of power to go right up the small hill near my house, and it was easy to reach 20 mph on a flat road. You can still feel the bumps, but it’s a pretty smooth ride, and it’s easy to forget that you’re actually going 20 miles per hour. If you want to lock in your speed, you can turn on cruise control and save your thumb from having to hold the throttle down constantly. For riding at night, the light provides plenty of illumination, but I would have liked for Hover-1 to include a better LED headlight. Nonetheless, it gets the job done, and oncoming traffic can easily see you coming. The brakes are responsive without being twitchy, and I never felt like I was going to be thrown off the scooter in a sudden stop.
Hover-1 also provides a smart phone app. The app allows you to control all of the functions that you can control on the LED display, and even a little more, such as turning on the front and rear lights independently or enabling “throttle to start”. The most important function of the app, in my opinion, is the ability to lock the scooter. This would prevent someone from just jumping on it and taking off, but of course you’ll need a lock to prevent someone from picking it up. A nice feature is that the app alerts you if the scooter is moved while still locked, which would presumably indicate someone is attempting to steal it. I was amused when the app told me that my car was moving. Depending on how you’re using the scooter, I guess it could be your car!
Whie I’ve only had the R500 for several days, I’m very pleased with it so far. It’s easy to just hop on the scooter and take off, and it’s a very pleasant way to navigate a town. It’s deceptively fast, and has plenty of power for going up a small grade. It has shock absorbers for both front and rear, making for a smooth ride, although I don’t think I’d recommend any off-roading on this one. For urban commuting or joy-riding, I think the R500 is more than up to the challenge. The key with things like this is longevity, so if the R500 can stand the test of time, I’ve got a winner!
I would recommend this to a friend!
Share this review:
0points
0of 0voted this as helpful.
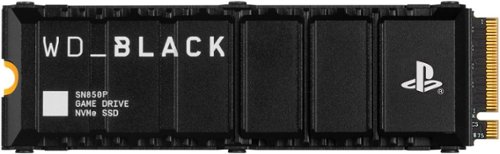
Officially licensed for the PlayStation5 console, the WD_BLACK SN850P NVMe SSD for PS5 consoles allows you to store more titles with worry free installation. Instantly add up to 4TB of storage to hold more of your favorite games. With an optimized heatsink built specifically for the PS5 M.2 slot, you won~t need to worry about compatibility. Experience uninterrupted gameplay as your WD_BLACK drive runs cool with quality you can trust. The WD_BLACK SN850P NVMe SSD for PS5 consoles is certified and tested for PlayStation 5 consoles so you can store more, play more, fast.
Customer Rating

5
Fast storage with a built-in heatsink
on June 17, 2023
Posted by: BobinVA
In case you haven’t noticed, games have gotten enormous! With digital distribution of games, publishers are no longer limited to the space on a DVD or Blu Ray, so it’s not uncommon to find games that require upwards of 100 GB! Because of this trend, the internal storage on my PS5 was almost full and I had to do something about it.
The WD_Black 1TB SSD offers a cost-effective way to expand the storage of a PS5. For only $20 more than the previous version of this drive, you get double the storage. There’s also a 2 TB version, but I got the 1 TB version. Having used M2.SSDs with my laptop in an external enclosure, I know how hot they can get, which is why I was happy to learn that this one from Western Digital includes a built-in heat sink that is small enough to fit into the space available in the PS5. Installing it was simple: slide off the side of the PS5, plug in the SSD, then use the screw and spacer already inside the PS5 and you’re good to go!
Upon starting up the PS5 after installing my new storage, the PS5 lets you know that you need to format the drive. This took only a few seconds, after which time the storage was available. I’m happy to report that the full 1 TB of space was available, and there were no “free trials” or other sort of bloatware on the drive (probably a “feature” of having to format the drive before use).
While I don’t have the ability to measure performance, I could not notice any difference in speed compared to the internal console storage. I moved several games to the new storage to free up space on the console. Note that even when you move a large game to the SSD, some game data (such as saved games, etc.) must stay in console storage. Moving gigabytes of game assets took just a few seconds. I also compared the performance of downloading new games to both internal storage and the SN850P, and I could see no difference in the time it took to download massive game files. Sony gives you the option to download all future games to the SSD, which is a convenient option. It’s great that the PS5 handles the additional storage so nimbly and easily.
I’m super happy with the expanded storage, and it couldn’t have been easier to add it and start using it. If you’re running short on space, the SN850P is a great option, providing tons of additional storage at a reasonable price. The built-in heatsink means you can capitalize on all that extra space without having to worry about it running too hot and jeopardizing your game files. Plus, it has the official Sony PlayStation branding, which tells you that Western Digital worked closely with Sony to make sure it’ll work seamlessly with your PS5. Now to get some of those games I’ve been hearing about…
I would recommend this to a friend!
Share this review:
0points
0of 0voted this as helpful.
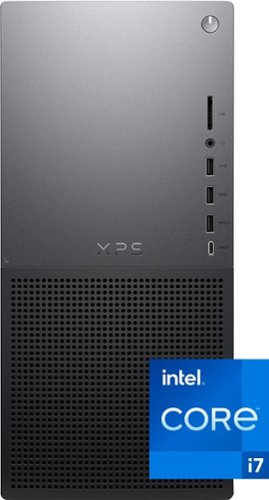
Achieve outstanding performance and expandability with the new Dell XPS 8960 Desktop. Built with powerful processors, memory and graphics, this desktop acheives maximum performance to support your tasks.
Customer Rating
4
Gaming-capable machine in a business suit
on June 6, 2023
Posted by: BobinVA
My trusty old Dell desktop computer was retired many years ago and we haven’t had a stationary desktop computer since then. Both my work and personal computers have been laptops for years, so why would I now get a desktop? I’ll mention my reasons (in case you’re searching for your own), and then I’ll share my experiences with this new entry from Dell.
Desktop computers have a few advantages that no laptop will ever match:
• Easier upgradeability
• Better thermal management
• Cheaper for the same performance
• Loads of ports
• Easier upgradeability
• Better thermal management
• Cheaper for the same performance
• Loads of ports
The tradeoff for all of this is that you go where the computer is, not the other way around. Is it worth it? That’s what I’m here to find out.
The Dell XPS 8960 is the latest upgrade to the previous XPS 8950. The version I’m reviewing features a 13th generation i7, 16GB of memory, and a discrete NVIDIA GeForce RTX 3050 video card. As someone who enjoys gaming but could not call myself a gamer, the Dell XPS 8960 gives me the opportunity to play all of the many games I’ve collected over the years but couldn’t always play, depending on my laptop hardware configurations. Games like NBA 2K21 ran flawlessly, and Civilization VI ran more smoothly than on any of my other machines. While I wouldn’t have expected any chess game to give a computer problems, Chess Ultra is a game that has proven very finicky on my laptops, but the 8960 ran it without a hitch. The 8960 is ostensibly a gaming machine, but it has understated “business” looks that appeal to gamers of all ages. For me, that allows it to fit into my home décor much more easily than it would if it featured clear side panels and colored LED fan lights. If you’re looking for that king of gaming machine, you won’t find it here.
Setup is pretty standard for a Windows machine. Bringing over my One Drive files was a breeze, as was getting setup in Edge and Office 365. Dell took an interesting approach to storage on this machine. It includes a 512 GB SSD, as well as a 2 TB hard drive spinning at 7200 rpm. This is a great solution that provides a super-fast SSD for boot-up and storage of processor-intensive programs while also giving you plenty of slightly slower storage with a 2 TB hard drive. I actually like having a real hard drive, since it’s still possible to recover from a catastrophic failure with a physical disk, which is not possible on a fully digital solution such as an SSD. The downside of Dell’s approach is that the SSD is relatively small if you want to take advantage of the faster performance by installing your games to the SSD. It’s been a while since I’ve actually had to think about more than one hard drive in a computer, so I was just installing games left and right without much thought. It wasn’t long before I was running out of space on the SSD and had to move some of the games to the hard drive. This gave me the opportunity to test the games on both the SSD and hard drive, and I’m happy to report that, while the hard drive was a bit slower, if you’re careful not to put your most intensive programs there, you’ll be fine. You’ll just have to do a little planning to decide what goes where. The nice thing is that there’s an empty slot you can use to add another SSD or even another hard drive if you want, so storage definitely won’t be a problem on this machine. The inside of the machine is pretty roomy, but its compact size makes it less spacious than a typical tower configuration. I like the size of the XPS 8960, as it makes it easier to incorporate into most rooms.
I mentioned the RTX graphics card earlier. This card features 4 Display Ports and 1 HDMI port. I know that DP may be the more popular option in the gaming world, but I would have preferred at least one more HDMI port. I also found that the USB-C port did not support display output natively, and this seems like an oversight to me. I could use an HDMI to USB-C adapter in that slot to add another monitor, but why doesn’t that port handle video on its own?
I mentioned the RTX graphics card earlier. This card features 4 Display Ports and 1 HDMI port. I know that DP may be the more popular option in the gaming world, but I would have preferred at least one more HDMI port. I also found that the USB-C port did not support display output natively, and this seems like an oversight to me. I could use an HDMI to USB-C adapter in that slot to add another monitor, but why doesn’t that port handle video on its own?
This is a pretty quiet computer, but when the fans kick in, they are pretty loud. They usually spin up when I’m putting a big load on the processors, and then spin down after a short time. It’s not so loud that it’s unbearable, but it’s definitely noticeable.
The system comes with a wired keyboard and mouse, which you’ll need to complete the initial setup. After that, I paired my Bluetooth keyboard and mouse, and put the wired versions away. The ones in the box are clearly not meant to be high-end peripherals, but they get the job done.
It’s not really a fair comparison, but I wanted to compare Geekbench results on this machine, to those I previously got on my Surface Book 3 a few years ago. The SB also has a discrete video card, but it’s not even in the conversation with the XPS 8960, as you would expect. The SB single-core score was 944 versus 2576 for the XPS. The multi-core score of 3255 for the Surface Book 3 was matched with a multi-core score of 15, 287 on the XPS. Without the thermal constraints of a laptop, Dell was able to give it a lot more power. Another piece of anecdotal evidence is the time it takes to create a passage guide using the Logos Bible software. A passage guide is basically pulling excerpts from your library on a particular topic or passage. The Surface Book 3 did this in 14 seconds, which is great, but the XPS 8960 handled it in 5.69 seconds! Running an Excel test consisting of 100,000 VLOOKUP formulas took an average of .05 seconds, compared with an average of 2.5 seconds on the Surface Book—50 times faster! Everything I did, from working with Office files, to compiling code in Visual Studio, to using Adobe Photoshop Elements, to playing games, worked flawlessly, smoothly and quickly.
The Dell XPX 8960 is causing me to shift my mindset back to my older way of thinking. I like the idea of having a desktop as a “home base”—a place where files can be stored to be shared, and which won’t carry the risk of being left behind in a hotel or taxi on my laptop. Plenty of storage means I can store more photos without having to worry about running out as soon, and there’s no program that I have to run with reduced settings due to performance issues. I’ve been working at home since the pandemic, and that means I have an office space set up all the time. Given that, it’s now much more practical to have a desktop computer in that space, running 24/7 and ready to go (although it did crash and reboot hours after I wrote this). If you’re going to do that, I highly recommend the XPS 8960 for that setup. It’s a great gaming machine for all but the most demanding gamers, but it’s also a more than capable business machine that can handle anything you can throw at it.
I would recommend this to a friend!
Share this review:
0points
0of 0voted this as helpful.

From simple tweaks to advanced artistic options and adjustments, it~s never been easier to create photos you~ll love to share. Bring motion to your photos with Adobe Sensei AI*, add peek-through overlays, and showcase your photos with new collage and slideshow templates. Plus, go beyond your desktop with new web and mobile companion apps (English-only beta), and enjoy faster installation and performance plus Apple M1 chip support. You~ll find all your photo essentials in this easy picture editor.
Customer Rating
4
Solid update, but you may not need it
on November 15, 2022
Posted by: BobinVA
Adobe has updated its Photoshop Elements software for 2023, and I decided to get this version. Like the yearly updates on other software packages, there aren’t always a lot of new additions each year, and thus I usually skip some of the upgrades, and maybe get the new version every other year. I think I must not have been thinking about that when I picked up the new 2023 version, as I’m currently using the 2022 version. So, this review will focus mainly on the differences between those versions. For those of you thinking about upgrading from the 2022 version, I hope this will be helpful. For those purchasing for the first time, your decision will be harder, since you have to compare Adobe’s offering to those from other companies, such as Luminar or Zoner Photo Studio or Paintshop Pro.
Photoshop Elements is aimed at photo hobbyists, those of us who need to make a few changes to our photos to make them look better, while Adobe targets more advanced photographers with their full Photoshop package or the online tools in their Creative Commons subscription suite. I’m not a fan of the subscription model, so I’m very happy that Adobe still offers Elements for a one-time reasonable purchase price. Photoshop Elements includes much of what you’ll find in the full Photoshop package, but at a much better price point and without a subscription. Whether you need the higher-end features is what you must determine.
Photoshop Elements 2023 retains the same look and feel as its predecessor. The main things added for this year’s version are:
• Add motion to pictures – this allows you to make part of your photo, such as ocean waves or a waterfall, look like it’s moving. The effect is pretty good, and this is a fun effect. This one is fun to put in an electronic photo frame that can handle video.
• Peek through overlay – adds a somewhat realistic foreground object, creating the illusion of depth. This is a pretty impressive and easy tool, but don’t expect particularly realistic results. If you’re shooting for something that could have actually been in the shot, you’ll find that the options are limited. Instead, I think this is more useful as a way to put a “frame” around your photo.
• Guided edit search – this is a deceptively useful tool. Suppose you’re not sure what guided edit you want, but you know you don’t want to do it manually. The new search tool allows you to use key words to find the one you want out of the 61 guided edits that are available. In my usage of this new tool, it often brought up several possible options, which caused me to try things out I might not have otherwise tried. This is a great way to learn more about the power of Elements. In my opinion, this may be the best new feature this year, as it helps you discover ways to apply an edit that you may not have thought of on your own.
I’m moving to shooting most of my shots in RAW, and this part of the program appears to be unchanged. The Camera Raw plugin lets you make some preliminary edits, but the heavy lifting is done in the Photoshope Elements editor. Elements has come a long way in allowing amateurs like me to make pretty sophisticated edits without a lot of work. That’s one of the things that I really like about Photoshop Elements: you can use powerful tools to make quick and easy (and impressive) changes, but you still have a full suite of very powerful, professional level editing tools at your disposal. This allows you to be in charge of how deep you want to go. I love that this is left up to the user, and not decided for you by software developers. Of course, you can’t do everything that the full Photoshop can do, but there is an awful lot that is available.
The new features are nice, but not compelling for those who are using the 2022 version. Unless you specifically need one of the new features, I think you can safely wait to see what the next version brings. For those who are diving into photo editing for the first time, you really can’t go wrong with Photoshop Elements, but it’s worth taking a look at the competition. My experience with other tools is that they offer similar feature sets, but usually try to rope you into a subscription if you want to do anything of a more advanced nature. Other tools may offer easier ways to do the most common edits, but there is a wealth of helpful information available for Photoshop, since it’s been around so long and has become the de facto standard.
In conclusion, I’m glad I picked up this version, and I’m enjoying the new features, but I don’t think I would have been too much worse off to have waited until next year. If you’re new to photo editing and willing to put in some effort, you’ll be happy with Photoshop Elements and the results you can get. If you have a recent version of Elements, you’ll need to weigh the value of the new features. Happy shooting!
I would recommend this to a friend!
Share this review:
+2points
2of 2voted this as helpful.

The Google Pixel Watch has a beautiful circular, domed design and new experience with Wear OS by Google.~ Live healthier with sleep, heart rate, and activity tracking on Fitbit~ and get things done on the go with Google Assistant, Maps, Wallet, Calendar, and Gmail.~ Works with most phones running on Android 8.0 or newer.
Customer Rating
5
A smart watch with Google's attention to detail
on November 7, 2022
Posted by: BobinVA
The Google Pixel watch is an exciting new addition to the world of smart watches. Our household has had the Apple Watch as well as several Garmin “semi-smart” watches for Android, but the Pixel Watch is our first full smart watch for Android. Our hope was that it would provide seamless integration with the Pixel phone, so read on to find out how that went.
In the box, we found the watch, a disc-shaped charger, and an extra half of the band. This is actually a very thoughtful inclusion, as it allows you to move to a smaller diameter band without having to buy something immediately. This also prevents those with smaller wrists from having to have a bunch of the band sticking out and interfering with a good fit. Swapping out the band was easy and provided a satisfying click to indicate that you’ve gotten it seated correctly. The band is smooth silicone rubber, and pairs nicely with the black circular face of the watch. This creates a very polished look on the wrist.
Setup was quite easy. Pairing with the Pixel phone worked immediately, and required the installation of 3 apps on the phone to get full functionality: Google watch app, the Fitbit app, and the Find My Device app. As usual, this is just a quick trip to the Google Play store. Signing in with our Google account got things started and allowed us to choose the apps we wanted to have on the watch. To use the Fitbit features, we had to create a Fitbit account and connect it to the watch. This was simple, and involved answering some questions to allow the watch to know our fitness goals.
Google has created a feature that I think is pretty handy: tiles. This allows you to have up to 15 pre-set apps that are always available just by swiping to the left or right. This is nice, because you can put your most-used apps in the tiles and avoid having to scroll through the full apps list to get to those apps. It’s interesting that not all apps can be placed into tiles. Google says that new tiles for installed apps are available in the tiles editor on the watch, but not all installed apps have corresponding tiles. Hopefully, tile access will increase for available apps. It’s also easy to access settings and tools by swiping down, and this provides easy access to things like flashlight, wallet, and a host of other settings.
Google is emphasizing Fitbit integration, and this is clear. Coming from using a Garmin fitness watch, it takes a bit of getting used to, and doesn’t seem to offer as much without paying for a premium membership. The Fitbit app does offer a lot of information, with everything from step count, to heartrate tracking, to sleep tracking. All of it seems to work well, but there is sometimes a delay in how fast information is synched from the watch to the phone. From what I understand, this is something that has characterized Fitbit for some time, even before Google bought them. While I don’t typically get into detailed fitness tracking, the Pixel watch’s fitness integration seems to work well, and compares favorably to what I had with my Garmin. One nice thing is ability to configure heart-rate zones and goals, such as step-count goals. Fitbit divided my goal into steps per hour and then gave notifications to keep me on track. That is a very nice feature that makes you wonder why every other manufacturer hasn’t done that! I’m still getting used to the sleep tracking features, but so far it doesn’t seem to be as smooth as the Garmin. For example, getting up in the middle of the night to use the bathroom was counted as the end of my sleep, which is not what happened. Hopefully, I’ll be able to fine-tune this and get it dialed in.
The Pixel watch excels at useful phone integrations that just make life easier. For example, it’s super easy to use Google Assistant right from the watch. While walking around in Washington, DC, it was easy to get walking directions right on the watch. I was even able to take phone calls right on the watch! This may seem a bit silly, but it can be the difference between missing an important phone call because you went upstairs and left your phone downstairs and taking the call you’ve been waiting for all day. For those over a certain age, this will remind you of the Dick Tracy watch that so many kids dreamed of having one day. That day is here!
Google promises 24 hours of battery life and has recently clarified exactly how to get that out of the Pixel watch. In my real-world experience, that seems pretty accurate, but that’s without the always-on display. I’ve been trying to setup Google pay on the watch but haven’t succeeded yet. I keep getting “something went wrong”, and a message that my bank needs to verify my identity. Hopefully we’ll be able to get this sorted out, because I’d like to use this feature. Setting it up on my Pixel phone was easy and works well, so it doesn’t make sense that it would be this difficult on the watch. Google seems to be treating the wallet on my phone and the wallet on my watch as two separate items—why?
I love that I can dial 911 by pressing the crown 5 times. This is something that provides additional peace of mind, knowing that I have an option even if I’ve left my phone in the other room. Fall detection is supposed to be coming, so that’ll add even more value. I can even control my home’s devices that are connected to Google Home, as well as using the watch as a remote for taking pictures with my Pixel phone. You can also download music directly onto the watch and listen via paired earbuds even without the phone nearby. Those are the kinds of things that you never thought you needed until you find out that you have them.
Is this the watch to take on Apple? I haven’t used a Samsung Gear watch, so maybe that one is already a strong competitor. The Google Pixel watch is attractive, integrates well with Android phones, has all the thoughtful touches that a smart watch should have, and provides the functionality to make your days easier. Google has set the price for the wifi version at $349, which is a bit high compared to some other options available, but not terribly so. An LTE version is also available. The things that I’ve seen most complained about are the size of the watch and the battery life. The size works for me, since the size of the Pixel watch is just what I wanted. As for battery life, that will depend on how you use it. For a watch that promises to track everything day or night, figuring out when you can charge it can be a bit of a challenge.
I really like this watch and am thrilled to have it. Like any tech these days, it’s not perfect, but Google has delivered a fantastic package with Fitbit integration, Google Assistant integration, and lots of helpful functionality in a minimalist package that is stylishly elegant. If you’re in the market for an Android watch, do yourself a favor and check out the Google Pixel Watch.
I would recommend this to a friend!
Share this review:
0points
0of 0voted this as helpful.
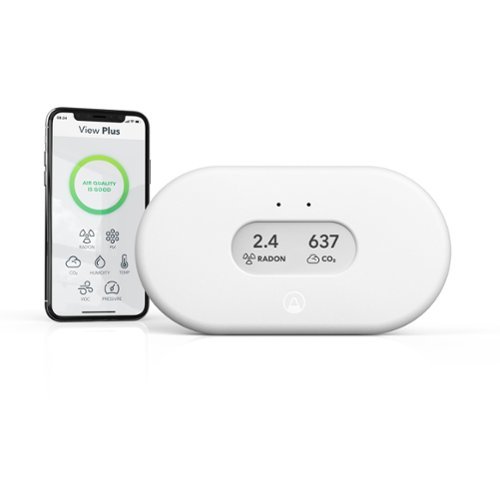
9 out of 10 people in the world breathe unsafe air according to WHO guidelines. With View Plus, you can keep your family safe from air pollutants: radon, particulate matter (PM), carbon dioxide (CO2), humidity, temperature, airborne chemicals (VOCs), and air pressure. When there is so much that is out of your control-pollution, asthma, allergies, wildfire, virus-you have more control than you think when it comes to indoor air quality with View Plus. View series products are: battery operated or use USB plug; wireless and WiFi-connected; work as a hub; include a customizable display; connected to an app (iOS/Android) and online dashboard with full data and reporting.
Customer Rating
4
Easy way to track indoor air quality
on November 3, 2022
Posted by: BobinVA
The Airthings View Plus is a home air quality monitor that gives you the ability to track multiple things at once: radon, carbon dioxide, particulate matter, temperature, humidity, pressure, and VOCs (gasses). The unit resembles a home thermostat and can be mounted on the wall using the included 3M Command Strips.
The unit comes with 6 AA batteries installed (Airthings says they’ll last for 2 years) and is ready to go. To set up and use the unit, you need to download the Airthings app for your phone and create an account. Once that’s done, you pair the app with your particular unit, and connect it to your wi-fi network. Wi-fi is necessary so that the unit can send you notifications via the app. This is very simple and worked for me on the first try. At this point, the unit is testing the air in your home. You place it near where you spend most of your time. After all, you want to know how good the air is that you’re breathing every day. The package comes with a small startup guide, but there’s very little information there beyond the steps I just described. The package also includes a USB cable that can be used to power the device, and doing that also allows you to use it as a hub for other Airthings devices. I only have the View Plus, so I did not try out that option.
Setup in the app includes giving it a room name (kitchen, bedroom, etc.), turning on notifications for the various things it’s measuring, and choosing which two items can be on the screen. The unit includes a non-backlit screen that can only display 2 items at a time. You choose which 2 you care most about seeing. Waving your hand in front of the unit will show readings for other measurements, as well as a red, yellow or green light signifying overall air quality. While you can turn on or off specific notifications, you can’t customize the thresholds for alerts, these are preset based on Airthings’ recommendations.
When first starting, the View Plus calibrates its sensors, with a notice in the app that the calibration step takes 7 days. With respect to things like radon, monitoring over time is valuable, and provides more confidence than the traditional 12-hour test. I received the View Plus in exchange for an honest review, so I waited the 7 days to give the unit time to settle in on the most accurate measurements possible.
The View Plus includes temperature and humidity readings, and these were very accurate. Where it gets a little more difficult is with the other measurements. I have no way of independently verifying these measurements, so I have to trust that the View Plus is accurate. My carbon dioxide ratings tended to stay higher than I expected. The threshold that the View Plus considers high is 1000, and my base reading started at around 700. That meant that almost any change, such as another person in the room, would cause that number to rise quickly. I began to wonder how accurate it was, so I decided to do an un-scientific test. I left the View Plus outside for a few hours, and the carbon dioxide level went down to about 450. What does that mean? Well, the carbon dioxide level outside near the ground is normally around 400, so this told me that the Co2 numbers were not inflated. I was glad for that result, but that took me back to being concerned about the level in my house.
My house has an open floor plan, which means the kitchen influences all the rooms on the main floor, where we spend most of our time, and where I positioned the View Plus. Cooking has a pretty drastic effect on the air quality readings. Things like particulate matter and gasses (VOCs) jumped up quickly when we did any kind of cooking, and typically came back down very slowly.
The bottom line for a device like the View Plus is what to do with the data. Airthings recommends opening windows to improve circulation for most of the issues tracked by the View Plus. Seeing the high Co2 readings did cause me to open my window slightly to let some air in. This did help the situation, but can I really leave my window open when it’s freezing outside or sweltering in the summer? Since we have to cook, I’m also not likely to do much for PM or VOCs spiking temporarily. And this leads back to why I have the View Plus in the first place. To be honest, my main concern was radon, so I was glad that this turned out not to be an issue in my house, and I’m glad to be able to track this over time. Beyond that, I struggle to know how to apply my newfound knowledge of my home’s air quality.
The iPhone app is useful, and can be set to provide notifications for the various things being measured. There is also a web-based dashboard that provides a wider view that is better able to provide historical trends. I really like this, it’s a great tool for longer-term monitoring. Supposedly, I should be able to integrate the View Plus with Alexa, but when I tried to do that, I got an error saying that functionality wasn’t supported. This was confusing, since Alexa went through the motions of linking my Airthings account with Alexa, but after several tries I gave up.
I need to add a caveat here, and it may be significant. During the time I was testing the View Plus, temperatures in our area were somewhat mild. As a result, our heat did not have to run very much, and thus there was not a lot of air moving throughout the house. I’m looking forward to seeing if there’s much difference when the HVAC is running most of the day.
If you’ve read this far, I assume you’re interested in buying an air quality monitor for your home. There are cheaper options available that seem to do just as good of a job. However, I didn’t find any that include radon monitoring. If that’s important to you, then I think this is the price level you have to consider.
In my opinion, the biggest impact that the View Plus has is to make you aware of the quality of the air you’re breathing. If it causes you to open more windows to bring in fresh air, isn’t that a good thing? And if it allows you to know about dangerous levels of radon before too much time has passed, then it could just save your life.
Although I liked the View Plus and its accompanying app, a few things caused it to drop in my overall rating:
• Pricey
• Screen only shows two measurements, and is not backlit
• Doesn’t allow you to change the thresholds at which alarm notifications are triggered
If I could, I think I would go with 3.5 stars, but I’m giving it 4 because it does what it says it does simply and cleanly, and it tracks radon, which its competitors do not do.
I would recommend this to a friend!
Share this review:
0points
0of 0voted this as helpful.
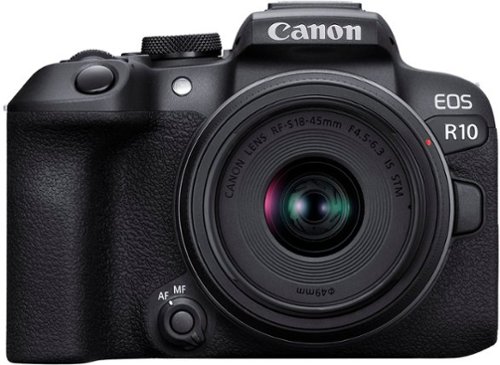
The EOS R10 is perfect for content creators looking to take their creativity to the next level. Featuring a high-speed shooting 15 FPS mechanical shutter^,~ a 24.2 Megapixel CMOS (APS-C) sensor, and lightning-fast auto-focus, all in a sleek, lightweight design.
Customer Rating
4
Great entry point to mirrorless DSLRs
on October 25, 2022
Posted by: BobinVA
I’ve recently revived my interest in photography. For many years, I’ve carried around my trusty Canon Rebel XT, but after 17 years it was time to upgrade. One of my biggest gripes with my previous setup was just the weight and heft of carrying around the camera and several lenses. So, I’ve been looking to reduce the amount I have to carry. My first purchase was the excellent Sony RX10 Mark IV, and while this is not a review of that camera, I will make a few comparisons to it.
While the Sony RX10 iv is truly a “do it all” camera, you definitely won’t mistake it for a small and light camera. That’s where the new Canon R10 shines. It’s Canon’s new entry into the mirrorless market, and it’s targeted at beginners or those who want a second Canon to go with their current setup. I’m not a beginner, but I am a casual photographer who appreciates good equipment.
The first thing you’ll notice when you open the box is just how small this camera is. I got the kit, which includes Canon’s 18-45mm IS USM lens, part of their new lineup of RF-mount lenses. This lens won’t do the trick if you really need to zoom in, but it’s incredibly small and light, and turned out to be plenty bright for my needs. Canon includes a battery, strap, and battery charger in the package. I was appreciative of the charger, since Sony does not include one with their camera. This is one of those small things that just ought to be there, so kudos to Canon for not choosing the cheap way out.
The R10 features a fully articulating screen, something that I haven’t seen in my last few cameras, and something even the Sony RX10 iv is missing. Why does this matter? It’s a convenience thing, allowing you to easily take photos from a variety of viewpoints, from well below your eyes to above them at the end of your outstretched arm, and even allows you to take a selfie. Yeah, I know, really important stuff. The screen is also touch-sensitive, which is great for those times when you need to make a quick change in setting or for responding to menu choices.
The R10 features a fully articulating screen, something that I haven’t seen in my last few cameras, and something even the Sony RX10 iv is missing. Why does this matter? It’s a convenience thing, allowing you to easily take photos from a variety of viewpoints, from well below your eyes to above them at the end of your outstretched arm, and even allows you to take a selfie. Yeah, I know, really important stuff. The screen is also touch-sensitive, which is great for those times when you need to make a quick change in setting or for responding to menu choices.
One thing that was immediately apparent was the Canon menu system. I haven’t used a newer Canon, so the updated menu system was a very pleasant surprise. Today’s crop of prosumer cameras have a bewildering array of options, and digging through the menus can be tedious. Canon’s menus may not be the best example of best practices in design, but I found them to be very intuitive. What I liked the most was the information given when using each of the different shooting modes, such as aperature priority or shutter priority. When using the scene (SCN) mode, explanatory text and sample pictures give you an idea of what using that mode will do. Compared to the Sony, this is a much simpler system to use.
The R10 doesn’t have any world-changing features, but it does have what you’d expect. It comes with one card slot, but it would have been nice to have a second for backup. Zooming the lens or deploying the flash are both done manually. I actually like this, as it gives the photographer more control and extends battery life a bit. It features a generous array of physical controls, and they’re fairly intuitive to figure out. Things like shooting mode (single/continuous), ISO and flash all have dedicated buttons, so you won’t have to hunt through menus to find those.
The R10 has the ability to shoot up to 15 fps with the mechanical shutter (which is a bit loud), or up to 23 fps with the electronic shutter. This is more than enough for most anything, and pretty impressive at this level. The only limit to continuous shooting is the camera’s buffer, so you will need to time your usage appropriately.
The wide range of features on the R10 makes it easy to get the shots you want in a variety of situations. Eye detection is included for both people and animals, and it works very well. There is also a panning feature that allows you to move the camera while tracking a moving vehicle, resulting in a photo with the car in focus and the background blurred. These are just two examples of the wide range of options available for shooting in various situations. I’m impressed with how many options exist to help you get just the shot you want. While a “real” photographer might not need things like creative effects settings, I found them to be very useful to get the shot. There are easy settings to blur the background, change the brightness, saturation, color tone or shoot in monochrome. There’s even a setting that allows you to make a scene appear as if it’s a miniature. It’s not something you’ll need every day, but it’s fun if you want it.
Canon also offers an app that allows you to control the camera remotely and preview the photos on the camera. Connecting the app with the camera was pretty straightforward and worked well. Sony’s app is barely functional, and apps for other camera peripherals were iffy at best, so it was nice that this one actually worked.
I’m much more interested in still photos than video, but the R10 handles video with ease. Videos are sharp and colorful, and the image stabilization makes for smooth panning. While it’s not something I’ll do a lot of, it’s good to know that the R10 is a capable video camera as well as a still camera.
The Canon R10 is a great way to get a lot of functionality and advanced features without breaking the bank. It’s also a great starting point, since the lenses are the same ones used across the Canon line. And this is actually something to think about. The RF-S lenses are pretty expensive. Canon only introduced 2 new lenses when the R10 (and its big brother the R7) came out. This means that if you want to add other lenses, you’ll have to go with one of the RF lenses from the full-frame lineup, and those aren’t cheap. So, it’s great to have the option, but you need to be aware of the cost. Hopefully Canon will introduce some more lenses targeted at their APS-C cameras that are a little more affordable. The R10 does not have stabilization built into the body, so you’ll have to buy lenses with IS built in.
The Canon R10 is a great way to get a lot of functionality and advanced features without breaking the bank. It’s also a great starting point, since the lenses are the same ones used across the Canon line. And this is actually something to think about. The RF-S lenses are pretty expensive. Canon only introduced 2 new lenses when the R10 (and its big brother the R7) came out. This means that if you want to add other lenses, you’ll have to go with one of the RF lenses from the full-frame lineup, and those aren’t cheap. So, it’s great to have the option, but you need to be aware of the cost. Hopefully Canon will introduce some more lenses targeted at their APS-C cameras that are a little more affordable. The R10 does not have stabilization built into the body, so you’ll have to buy lenses with IS built in.
The combination of a smaller, lighter camera with the feature set and performance offered by the R10 makes for a very compelling package. It’s aimed squarely at cameras in the “prosumer” market, but with better performance and the flexibility to add lenses as needed. If you’re considering this camera, you’re likely comparing it to other Canons, like those in the Rebel series. In my opinion, the R10 provides better performance, the same APS-C sensor, but in a smaller, lighter mirrorless body with access to the new RF-S lens lineup, as well as the legacy EF lenses with the use of an adapter. It also shoots higher-quality video and its 15 fps blows away the 7 fps offered by the T8i, at a comparable price point. Once Canon adds some more quality, affordable RF lenses to their lineup, this may be the perfect place to start in the realm of serious digital photography.
I would recommend this to a friend!
Share this review:
+1point
1of 1voted this as helpful.

Your blowout just got personal with the new T3 AireBrush Duo hot air brush. This Allure Best of Beauty winner takes your style from smooth and sleek to bouncy and wavy with the simple swap of a brush. Featuring a powerful built-in ion generator and a smart microchip, T3 IonFlow Technology delivers an ion-enriched airstream and precise, digitally controlled heat for polished, frizz-free results. The T3 AireBrush Duo features an interchangeable brush design with two brush attachments and 15 heat and speed combinations for personalized styling. Choose the round brush attachment for bold, voluminous looks or the paddle brush attachment to stretch and smooth coily hair types and straighten and polish straight, wavy and curly hair types. SmoothGrip Bristles deliver optimal tension and styling control for effortless styling, while a CeraGloss ceramic surface imparts shine. This powerful blow dry brush delivers shiny, beautiful results for every hair type. Swap, set, style!
Customer Rating
4
Professional results at home
on October 24, 2022
Posted by: BobinVA
My hair is thick, wavy, coarse, and a little frizzy. Recently my hairdresser has been blowing out my hair and straightening it. Most of the time she can get my hair beautifully smooth just by using a round brush and a hair dryer. When I try to replicate this at home, I just feel like I don't have enough hands to do it well.
I’ve been checking out hair dryers that have brush attachments as a potentially handier option than what I have. I had been looking at another dryer with only a round brush attachment, but after getting the T3 Airebrush, I'm very glad I chose this one with two brush attachments.
I found that I liked the flat brush better than the round brush, even though I was not expecting to use the flat brush attachment at all! Since air is only coming out of one side of the flat brush as opposed to all sides of the round brush, the air and heat is more concentrated causing the hair to dry faster. The flat brush smoothed and straightened my hair very nicely. I used the round brush by winding the hair section and holding it for about 8-10 seconds then ending with a shot of cool air before unwinding. This took more time than I usually spend on my hair, but it got me at least 3 complements at work after drying my hair with the round brush! The round brush dries the root area faster and creates more volume.
Positives:
*Two brush styles for flexibility.
*Beautiful product and packaging.
*The ability to turn ions off and on.
*Multiple heat settings, including cool.
*Two brush styles for flexibility.
*Beautiful product and packaging.
*The ability to turn ions off and on.
*Multiple heat settings, including cool.
Negatives:
*Works best after your hair has partially dried. Unless you air-dry your hair, you'll need a second blow dryer.
*Once the cool air button is depressed it takes 8-10 seconds for the air to come out cool.
*Cool button is oddly placed near the power button, so the power is easy to hit instead of the cool.
The T3 Airebrush is a great package if you’re in the market a specialty product like this. While it does a great job, it misses getting 5 stars because of the need for an additional blow dryer and its imperfect implementation of the cool air shot. The addition of a simple diffuser and a tip to allow the unit to be used as an ordinary blow dryer would have made it a more complete package. Still, the Airebrush is a great tool if you can get past the sticker shock.
I would recommend this to a friend!


Share this review:
+2points
2of 2voted this as helpful.

With the Ninja Foodi Power Mixer System, you can tackle all your essential food prep tasks in no time. Its 750-peak-watt power-dense motor lets you power through tough ingredients, evenly mix cookie dough, and blend drinks or soups. Simply connect the PowerBase with one of two attachments to transform it into whatever you need it to be. Mix, whisk, and blend~all in one.
Customer Rating
5
Versatile blender and mixer in a space-saving syst
on October 18, 2022
Posted by: BobinVA
After using a cheap immersion blender for years and always being dissatisfied with it, we decided it was time to upgrade. We’re fans of the Ninja line of kitchen products, and regularly use our Ninja 5-in-1 grill and Nutri Ninja blender, so we were excited to try out their immersion blender. I placed my order, but didn’t even notice until it arrived that it also included a hand mixer. Bonus!
The core of the system is the PowerBase, the handheld motor that powers the mixer and blender. I love this idea! Simply snap the PowerBase onto the mixer handle, add beaters, and you’ve got a mixer. Push the two buttons to remove it, and snap on the immersion blender attachment, and now you’ve got an immersion blender. Everything is very well-built and feels solid in the hand. I’m impressed by how everything feels.
As a hand mixer, the Ninja has 5 speed settings, plus a Turbo button. Every time you start the mixer it begins on the lowest speed setting, which is great, and prevents an unpleasant surprise when just starting out. The buttons are responsive and provide tactile feedback to let you know you’ve pressed them. The overall profile of the mixer with the PowerBase is actually smaller than most of the better-quality mixers, which I liked. What really impressed me was how well-balanced it feels in your hand. This shows that the designers had that in mind, because not every multi-attachment system is made that way. The package comes with a pair of regular beaters, as well as a whisk and a 4-cup blending pitcher with lid. Optional dough hooks are also available.
The performance of the hand mixer was just what you would want in a higher-end tool such as this. The motor operated the beaters smoothly, and there are enough speeds to prevent splattering. A mixer should do a good job of mixing up ingredients, and this one does just that. The motor shifts speeds smoothly, and the turbo button provides a burst of speed when you need it, without causing the mixer to lurch in your hand.
The performance of the hand mixer was just what you would want in a higher-end tool such as this. The motor operated the beaters smoothly, and there are enough speeds to prevent splattering. A mixer should do a good job of mixing up ingredients, and this one does just that. The motor shifts speeds smoothly, and the turbo button provides a burst of speed when you need it, without causing the mixer to lurch in your hand.
The immersion blender is what I really wanted, so let’s get into that. The blade is a generous size, which comes in handy for blasting through big pieces of food. Just like the mixer, the unit feels good and solid in your hand. The powerful engine really impressed me when making a smoothie with big chunks of frozen fruit. The manual advises the use of liquids, and that does make things easier. Once I started blending up the fruit, I could feel the downward pull of suction, demonstrating the power of the motor. It barely made any noise and I realized that I was done. The fruit was pulverized and the blender barely made any noise other than the whir of the motor! The same thing happened when making soups—this thing is a beast!
It didn’t take any time at all for me to decide that this would be our new go-to for mixing and blending. I immediately got rid of my cheapo immersion blender, but we’re also replacing our hand mixer as well. The Ninja is more compact and less bulky, and just feels better. Eventually, we plan to add the food chopper attachment as well, and that will likely replace another appliance in our kitchen.
In my opinion, the immersion blender is the star of the show, but the mixer is great as well. The powerful motor is what makes it all work so well. If you’re in the market for one of these, click that “place order” button right now—you’ll be glad you did.
I would recommend this to a friend!
Share this review:
0points
0of 0voted this as helpful.
BobinVA's Review Comments
BobinVA has not submitted comments on any reviews.
BobinVA's Questions
BobinVA has not submitted any questions.

Create, learn, work, and play like never before. Featuring an immersive 9.7-inch Multi-Touch Retina display,~ powerful A10 Fusion chip, and now supports Apple Pencil,~ there's nothing else quite like iPad.
Can I buy this without service to a wireless carrier for the same price?
The WiFi only model for $329 does not include cellular service with a wireless carrier, and is the cheapest price available (other than sales).
8 years ago
by
BobinVA
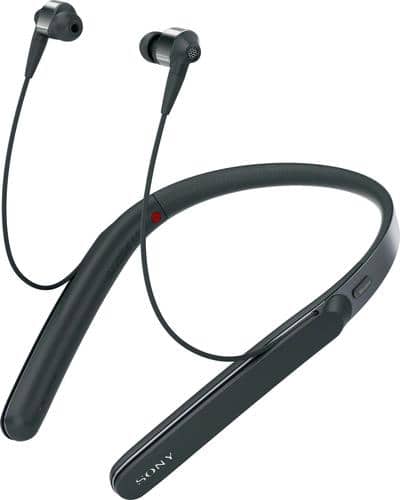
Enjoy up to 10 hours of wireless audio with these Sony noise-canceling headphones. They produce rich sound by playing at audio frequencies of 3-40,000Hz and have a closed-back design that blocks outside noise for a better listening experience. These Sony noise-canceling headphones sit comfortably behind the neck and work with or without the 1m wire.
Can you mute while on a call. I want to take some conference calls on my way to work and need to mute myself. Is there a way to mute while on the call from the headphone. I know i can always mute from the phone. Thanks.
Yes, you can mute by pushing the volume up and down buttons simultaneously, but that's a little tricky, so it might be easier to mute from the phone.
8 years, 4 months ago
by
BobinVA
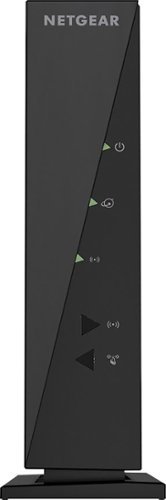
Keep your Wi-Fi connection strong anywhere in the house with this NETGEAR router. Monitor your network with the NETGEAR genie app, keep track of your kids with parental controls, and use multiple devices simultaneously for downloading, gaming and more
Is there a monthly charge for this netgear wireless router? Or does it just need an outlet and from there your off and running?
No monthly charge, you just need a modem to provide a signal, and you'll be good to go!
8 years, 8 months ago
by
BobinVA
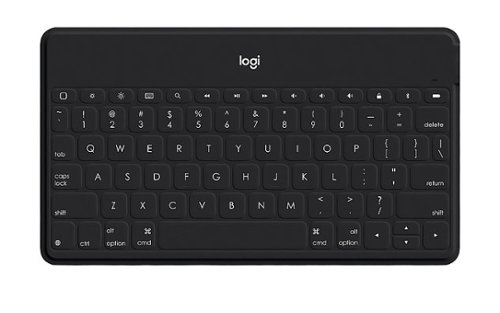
Type on your terms with Keys-To-Go, the super-slim, super-light Bluetooth keyboard for iPhone, iPad and Apple TV that fits anywhere and goes everywhere. The durable, spill-proof Keys-To-Go helps you escape the cramped on-screen keyboard and turn any space into a workspace whether you~re in the backyard, the kitchen, or the park. Keys-To-Go has comfortable, soft keys that type silently so you and people around you can focus without distractions. Plus, a full row of iOS shortcut keys provide one-tap access to your most-used functions including volume and media controls.
Is this compatible with an iPad pro
Yes, but don't expect it to take the place of the Apple Smart Keyboard. This is a great keyboard, but it will connect via blue tooth, not using the new smart connector.
8 years, 9 months ago
by
BobinVA
Type on your terms with Keys-To-Go, the super-slim, super-light Bluetooth keyboard for iPhone, iPad and Apple TV that fits anywhere and goes everywhere. The durable, spill-proof Keys-To-Go helps you escape the cramped on-screen keyboard and turn any space into a workspace whether you~re in the backyard, the kitchen, or the park. Keys-To-Go has comfortable, soft keys that type silently so you and people around you can focus without distractions. Plus, a full row of iOS shortcut keys provide one-tap access to your most-used functions including volume and media controls.
Will this work with the new IPad 5th generation (2017)?
It'll work with any blue tooth enabled computer.
8 years, 9 months ago
by
BobinVA
View files or videos in custom positions with this HP Envy x360 laptop. The hinge lets you lay the computer flat, fold it for use as a tablet or prop the screen at angles to enhance your viewing experience. When you aren't streaming videos on this HP Envy x360 laptop, convert it to a traditional position for standard keyboarding action.
How do you turn on the keyboard backlite ?
View files or videos in custom positions with this HP Envy x360 laptop. The hinge lets you lay the computer flat, fold it for use as a tablet or prop the screen at angles to enhance your viewing experience. When you aren't streaming videos on this HP Envy x360 laptop, convert it to a traditional position for standard keyboarding action.
does this computer come with windows 10 or.........
Yes, it's Windows 10, the November, 2015 build.
9 years, 10 months ago
by
BobinVA
View files or videos in custom positions with this HP Envy x360 laptop. The hinge lets you lay the computer flat, fold it for use as a tablet or prop the screen at angles to enhance your viewing experience. When you aren't streaming videos on this HP Envy x360 laptop, convert it to a traditional position for standard keyboarding action.
have msata ssd socket inside ?
I'm not sure about what's inside, as this laptop really isn't built to make it easy to open up. It's quite thin, so I doubt there's an extra slot in there. Sorry that I don't know for sure.
9 years, 10 months ago
by
BobinVA