BobinVA's stats
- Review count158
- Helpfulness votes452
- First reviewDecember 19, 2014
- Last reviewJune 10, 2026
- Featured reviews0
- Average rating4.1
Reviews comments
- Review comment count0
- Helpfulness votes0
- First review commentNone
- Last review commentNone
- Featured review comments0
Questions
- Question count0
- Helpfulness votes0
- First questionNone
- Last questionNone
- Featured questions0
- Answer count28
- Helpfulness votes23
- First answerAugust 12, 2016
- Last answerJanuary 22, 2022
- Featured answers0
- Best answers2
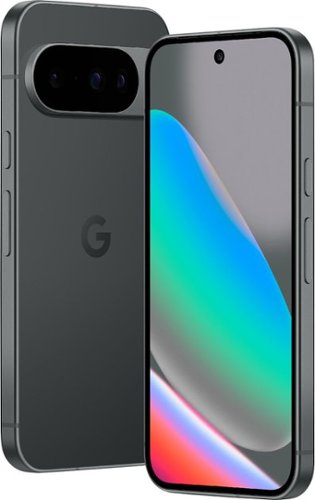
Escape the ordinary with Google Pixel 10. It has Pixel~s most powerful chip, an incredible camera, and Gemini built in to supercharge your productivity and creativity.~
Customer Rating

4
Another winner in the Pixel lineup
on September 4, 2025
Posted by: BobinVA
As a longtime Pixel fan, this is my third Google phone. My last phone, the Pixel 7, is still quite capable, but I wanted to find out what Google had in store for its latest model.
Executive summary: the build quality is excellent, the screen is gorgeous, but the real news here is the deep integration of AI capabilities in this phone. The new cameras are the best ever for the Pixel line, but you should plan to get on board the AI train.
Build: the Pixel 10 features a beautiful metal frame (I got the color called Obsidian, a grey/black) with glass front and back (the Pro model has matte finished glass, while the base model has smooth, shiny glass). The new cameras are bigger and more capable than ever, but Google’s design manages to make them look good on the back of the phone. This one is noticeably heavier than the Pixel 7, but it definitely feels solid in the hand.
Transferring from the Pixel 7 couldn’t have been easier. Even with the transition from a physical SIM card to the new eSIM, migrating was flawless. It took a while to update to the latest version of Android, as well as updating my apps, but when it was finished, I had a new phone inside and out.
A few things jumped out right away:
• The “always on” lock screen is great to be able to see things like the current time and temperature at a glance.
• Google added its new Pixel Snap functionality to finally allow Qi2 charging and the ability to use magnetic accessories. This was long overdue and very welcome!
• The camera is improved with higher resolution, greater zoom capabilities, and AI-assisted tools to make getting great shots even easier.
• The biggest change is the addition of AI capabilities built into a wide range of functions. This is truly a game-changer, but we’ll get into more details about that in a moment.
The Pixel 10 uses the same Tensor G5 chip that you’ll find in the Pro versions, which means you don’t have to sacrifice power just to save some money. There are some differences, such as fewer capabilities in the camera, less RAM, and some features available only on the Pro and Pro XL, but you really can’t go wrong with any of the new Pixel cameras. Google’s choices offer rewarding upgrades for those who want them, while providing good value and overall great performance for those who don’t need all the extras.
The camera is clearly a focus this time around. Featuring a 48MP camera with a 12MP ultrawide lens and macro focus, you won’t miss a shot. The zoom reach is better than ever, and with features like Camera Coach and Guided Frame, you’ll have fewer missed moments. An especially fun feature is “Add Me”. For those of you who may have experimented with multiple exposures in the same frame with a film camera, this feels a bit like that, only much easier, and with great results! You can use this feature to add a person who missed a group photo, or even multiple images of yourself. Google’s TV ads have been showing how easy it is to use AI assistance to clean up photos, and it’s just as easy as it looks. It’s never been easier to get great shots with minimal effort, and Google has bundled in a whole toolkit of tools to help.
There are numerous improvements to apps as well as new features that make using the phone a better experience. Daily Hub is a nice way to get an overview of your day. New writing tools help you express yourself better, and Gemini Deep Research is built right in.
Speaking of Gemini, AI is the real star of the show here, so if you’re on the fence about using AI, we’re beginning to see how useful it can be. Magic Cue is like having an assistant who’s right there in your conversations, offering useful information. Google’s ad for this feature says that when someone asks you for an address that’s in your phone, shouldn’t your phone be the first one to provide it? Sounds like a great idea, but it doesn’t seem to be fully baked yet. I tried to give it softball questions by getting my spouse to text questions like “what time is the game this weekend?”, knowing that the game is on my Google calendar and should have been easily accessible. Unfortunately, it didn’t offer any suggestions. The same thing happened when trying to get Magic Cue to work on a call. It has a lot of promise, but I’m not seeing it just yet.
Another great new feature is Voice Translate, which allows people on either end of the call to communicate in different languages with real-time translation. After getting the settings right and downloading the language we wanted (Spanish), we tried it. Unfortunately, this didn’t work either, and queries on the internet indicated that perhaps Google hasn’t yet rolled this out for everyone. That’s disappointing, but hopefully the wait won’t be too long.
The screen is gorgeous, and the 120 Hz refresh rate is a nice addition, although I don’t play many games on my phone at this time. Madden NFL Mobile looks great and performs smoothly, so I was very satisfied with its performance. The colors look great, and the Gorilla Glass is actually pretty great at resisting smudges.
It’s clear that Google is trying to create AI-enhanced features that are actually useful. They largely succeeded, although the features that don’t seem to be ready yet are a bit annoying. There are some things such as live wallpaper that are quirky and cute the first time you see them, but not really worth keeping. I’m actually a fan of using AI to make common tasks better, so I’m solidly behind the direction Google is taking. Once everything is working as it should be, the Pixel 10 will be the latest winner in a long line of winners. I’m taking off a star for the opening day missteps, but even without those things, this is a great phone.
I would recommend this to a friend!
Share this review:
0points
0of 0voted this as helpful.

TCL QM8K Series Smart TV is The New, Ultimate Choice TV for fast action movies, sports, and next level gaming TCL~s Halo Control System that includes the New Super High Energy LED Microchip, Condensed Micro Lens, Micro OD Reduced Optical Distance, CrystGlow WHVA Panel, Enhanced QLED, Zero Delay Transient Response, Bi-direction 23-bit Backlight Controller, and Dynamic Light Algorithm for Stunning ~Halo-Free~ Images. With up to LD3800 Precise Dimming Series and up to HDR5000 Brightness, you~ll experience pure black levels and a great picture in virtually any room lighting environment. TCL's AIPQ PRO Processor, an advanced processor optimizing each scene provides an unrivaled cinematic experience. 144Hz native panel refresh rate with Motion Rate 480 focuses on best-in-class motion clarity producing smooth video playback. With TCL's Game Accelerator 288 and Auto Game Mode gameplay is blistering fast keeping you ahead of the competition. TCL QM8K TVs feature Audio by Bang & Olfusen as well as Dolby Atmos and DTS Virtual:X for accurate, immersive sound.
Posted by: BobinVA
Executive summary: With the QM8K, TCL has provided a premium television with a mid-level price tag. Screen performance is excellent, with the mini-LED backlighting providing more than enough brightness and excellent blacks. A few quirks cost it a star in my opinion, but this is a very nice TV that deserves a look if you’re in the market.
TCL is known for providing good value in their TV offerings, but this is the first TCL TV I’ve had. Even though I have a 65” TV already, it’s several years old and technology has improved considerably. This TCL QM8K mini-led offers the right mix of innovation and performance. It’s not the cheapest 65” TV out there, but for the price it’s hard to find one with these features and quality.
Setup was pretty easy. I chose to utilize my phone for the setup, which required me to download and install the Google Home app. This is necessary if you want to take advantage of voice commands with Google Assistant, but you can choose to do a simplified setup without it. I didn’t want to miss out on any features, so I used this recommended path. The setup routine offers the option to set up individual apps using QR codes on my phone, which was nice. Overall, it made for an easier time getting everything ready to go. Apple Air Play is also supported, but it too requires their home app to be installed in order to set it up. Although my internet connection was fine for everything else, Air Play complained that it couldn’t find my connection and it timed out. Given that literally everything else uses that connection, it’s annoying that this happened. Is it due to the rivalry between Google and Apple? Who knows?
Setup was pretty easy. I chose to utilize my phone for the setup, which required me to download and install the Google Home app. This is necessary if you want to take advantage of voice commands with Google Assistant, but you can choose to do a simplified setup without it. I didn’t want to miss out on any features, so I used this recommended path. The setup routine offers the option to set up individual apps using QR codes on my phone, which was nice. Overall, it made for an easier time getting everything ready to go. Apple Air Play is also supported, but it too requires their home app to be installed in order to set it up. Although my internet connection was fine for everything else, Air Play complained that it couldn’t find my connection and it timed out. Given that literally everything else uses that connection, it’s annoying that this happened. Is it due to the rivalry between Google and Apple? Who knows?
This TV uses Google TV for its screen and app management, and I think it’s quite nice. I’ve used other content managers from Samsung, Sharp, and Roku, and Google TV compares favorably with those. I really like the presentation and the way that it integrates content from all your streaming apps, as well as free content and content available for purchase. The overall presentation of content and settings is well done and easy to navigate. The inclusion of a settings button on the remote is a very nice touch. Adding new apps is easier than I’ve found it to be on other manufacturers’ proprietary systems.
TCL includes speakers tuned by Bang & Olufsen, and they actually sound pretty good. Choosing custom sound enables Beosonic, which allows for simple adjustments to the sound quality to get it the way you like it. This TV features a very thin border around the screen which relegates the speakers to the back of the unit. Sound quality is good, but rear-firing speakers don’t sound quite as clear and require higher volume. A wall-mounted configuration helps by bouncing the sound off the wall. Because of that, I prefer to utilize either a soundbar or home theater audio. I connected my soundbar using the eArc feature, which I thought was supposed to provide plug and play sound setup. Unfortunately, I experienced a lot of issues with lip synching of the audio, and one time the sound bar cut out entirely when I chose a different screen brightness setting. Hooking up the TV to an older home theater receiver didn’t have these issues, but also doesn’t support the newer features supported by eArc. All in all, I found it a little frustrating to get the audio set up the way I wanted it, but perhaps the issue is my soundbar.
The included stand is nice and it’s easy to attach with just 4 screws. The inclusion of a wire-management system is a thoughtful touch and adds to the clean aesthetic of this TV. The back of the TV features a 200 x 200 VESA pattern for wall mounting, which was easy to pair up with my wall mount.
Coming from my old TV, the TCL has much truer blacks and the detail is excellent. This is thanks to their use of mini-led technology and accurate localized dimming. One of my pet peeves is the blooming that I sometimes see on darker scenes on other TVs. This TV has none of that kind of behavior, and that makes the experience much more enjoyable. This is one of the things that TCL highlights in their advertising, and they delivered on their promise.
The core functionality for any TV is the screen quality. TCL touts a number of innovative technologies that they used to make the screen on this one special. I must say that I give this screen high marks. Resolution is excellent, blacks are dark, and the brightness level surpasses most other TVs I’ve owned or used. There are lots of options for tweaking the screen to your liking, and that means that you can get the optimal settings for your environment. Nothing is more annoying than having a TV that can only really be used at night when it doesn’t have to compete with ambient light. This one is a champ! TCL touts the wide viewing angles, and they’re right—this thing looks great no matter where you are in the room. The native 144 Hz screen refresh rate ensures that motion sequences look good.
Like other TVs with an underlying Android operating system, this one needs a minute to “wake up” when you first turn it on. I often got a message saying “internet connection lost” that would resolve and go away, usually within a minute. This isn’t that big of a deal, but given that TVs are not completely off when you turn them off, it’s surprising that this happens. Instant-on is the expectation these days, so it’s a bit jarring to see that your apps aren’t connected.
The bottom line is that this is a very nice TV that delivers on its promises. The screen is gorgeous and fast, and it delivers blacks that rival OLED, without the issues that come with OLED. This TV can stand with the best, but at a better price point. It seems like TCL is moving toward more premium products, and this is a good example. If I can get years of good service out of it, I’ll be a TCL fan!
I would recommend this to a friend!
Share this review:
0points
0of 0voted this as helpful.
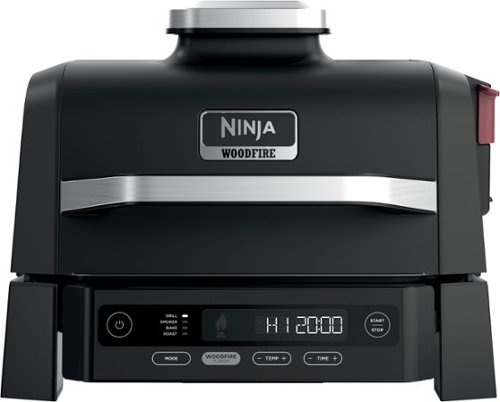
Meet the Ninja Woodfire Outdoor Grill & Smoker. Master Grill, Fool-proof BBQ Smoker, and Convection Baker and Roaster all in one with 100% authentic woodfire flavors. With Ninja Woodfire Technology, easily create rich, fully developed woodfire flavors with anything you make.
Customer Rating
4
A great new option for outdoor grilling
on July 17, 2025
Posted by: BobinVA
I’m a big fan of products by Shark Ninja. This is my third Ninja grill, but the first for outdoor use. Ninja makes excellent products that make cooking easier. I still love using my indoor grill, but I was interested in grilling with real woodfire flavor, and that’s where the Ninja Woodfire grill comes in.
I’ve used a propane grill for many years, but recently went back to charcoal using a kamado style grill. You just can’t beat the taste of wood smoke infused into a burger or steak, but the time it takes to get the coals burning and ready sometimes causes me to skip the grill entirely. The Ninja Woodfire grill bridges the gap, providing the ease of an electric grill with genuine wood smoke flavor. Does it deliver? Read on…
Executive summary:
• Easy to use – simply choose cooking mode, whether to add smoke, set time and temp, and you’re good to go!
• Real wood smoke from wood pellets
• Even heat distribution and convection cooking
• Easy clean up and easy to get great results
• Easy to use – simply choose cooking mode, whether to add smoke, set time and temp, and you’re good to go!
• Real wood smoke from wood pellets
• Even heat distribution and convection cooking
• Easy clean up and easy to get great results
In the box is the grill itself, including the nonstick grill grate, a removable smoke box for the wood pellets, a grease tray, instruction booklets, and a starter bag of all-purpose blend wood pellets. To get started, all you need to do is wash and dry the grill plate, install it back inside the grill and plug it in.
Similar to other Ninja grills, there are multiple modes: grill, smoker, air crisp, bake, roast and broil, although the unit I got does not include the air crisp and broil modes. Using the grill couldn’t be easier—just turn it on, select the mode, then choose time and temperature, and press start. If you’re choosing to use the wood fire feature, press that button after selecting the mode.
Preparing a charcoal fire can take up to 30 minutes to get to the right temperature, in addition to cleaning up the ashes and loading up the new charcoal. A propane grill takes a bit less time to preheat but lacks the ability to add wood smoke flavor. Preheating the Ninja grill to Hi only takes about 10 minutes, with an additional 5 minutes if you want wood smoke. In addition to it being faster, it’s just a lot easier to use, reducing the total time to be equivalent to using a propane grill, but without having to remember to fill the propane tank.
The Ninja Woodfire grill features an ingenious smoker box for producing wood smoke. Just fill the box using the supplied scoop, then press the woodfire button to ignite the pellets. This initiates the ignition sequence, and in a few minutes, you’ll see beautiful white smoke billowing out of the grill. The grill includes a convection fan inside the lid, and this serves to circulate air during cooking, but also pulls air through the wood pellets to encourage their burning and pushes the smoke out the vent in the back of the lid.
The grill plate and heating elements guarantee even heat, and the convection fan speeds things up. Of course, you can also cook with the hood open if you choose. Grilling is straightforward, and no different from how you’d do it on any other grill. Having an electric grill is just easier than propane and produces the same results. Using it as a smoker is just as easy, set it and go, and top up the smoker pellets as needed.
In my opinion, the Ninja Woodfire grill is just as easy as a propane grill, but even easier. The removable grill plate makes it easy to clean, and the nonstick surface makes cleanup a breeze. Real wood smoke is the reason to consider this grill, but it’s also a very capable grill even without that.
Is the flavor of food cooked on the Woodfire grill equal to a traditional charcoal grill? I’ll admit that I thought it was just slightly less flavorful than a full wood fire charcoal grill, but only slightly so. The convenience, speed and easy cleanup, however, make up for that and can provide great results when you don’t have the time or patience to start up the charcoal. For me, this is the fallback option for when it’s getting late, but I still want some wood smoke flavor in my food.
Ninja says the grill can fit up to 6 burgers, 30 hot dogs or 2 racks of ribs, so keep that in mind when determining if this grill can cook enough to feed your family. I think it’s fine for feeding 4-6 people, but your mileage may vary.
The Ninja Woodfire grill offers something not previously available: the convenience of propane with the flavor of wood smoke. For small, quick cooks, it can’t be beat. No, it won’t replace your other grills when you need to feed the whole neighborhood, but for a few people, it’ll let you get to actually eating the food quicker and let you spend less time setting up and getting ready. I’ve been considering getting one of these for a while, and I’m glad I finally did it.
I would recommend this to a friend!
Share this review:
0points
0of 0voted this as helpful.
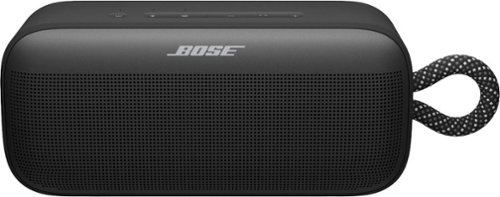
Play the moment with the SoundLink Plus Speaker. Big enough to bring the bass while still being portable, this new speaker features bold, resonant audio and a tough, ready-for-anything exterior. Experience up to 20 hours~ of energy-shifting playback.
Customer Rating

5
Enhanced bass and richer sound!
on June 30, 2025
Posted by: BobinVA
As a longtime user of Bluetooth speakers, I was ready for an upgrade when the Bose Soundlink Plus was released. Larger than the Soundlink, but smaller than the Soundlink Max, the Plus is aimed at those who still value portability, but who won’t compromise on sound quality or battery life. The Soundlink Plus delivers both!
Unboxing is a straightforward affair, with only the speaker and a charging cable included. The Bose site indicates that a charging block may be included in the US, but that wasn’t the case for me. A quick-start guide is printed on the inside box flap, but that’s it for instructions. For everything else, you’ll need to use the app and/or the user guide on the Bose web site.
The Soundlink Plus is built like a tank, with a powder-coated front grill of steel, a back made of plastic, and rubber wrapping around the middle, giving it good resistance to drops and shocks. It features an IP67 waterproof rating, meaning it can survive short periods of complete immersion, and IP64, meaning it can survive being splashed, with some water getting inside. It is not designed to be used in a pool, unlike some speakers which will float while in use. It is also dust resistant, so this speaker is definitely ready for use wherever you may be. It does weigh more than smaller speakers at 3.4 pounds, but this is to be expected and goes with the longer battery life.
Pairing is easy, and the Plus can be connected to two devices simultaneously, but one at a time can provide the source audio. Once connected, it will show up in the Bose app, where you can adjust things like EQ, the function of the shortcut key, and change the source device. The app is also where firmware updates originate. The shortcut key can be used to connect two Bose Bluetooth speakers, allowing you to play them in stereo, or with the same audio in “party” mode. The shortcut key may also be used for Spotify Tap, which will start playing your music on Spotify from where you left off. There are also buttons for volume up/down and play/pause.
The most important thing for any Bluetooth speaker is sound quality. My main speaker for the last several years has been the Bose Revolve+ II, and it’s still a great portable speaker. The larger enclosure of the Plus produces a richer, fuller sound, and bass is greatly enhanced. The sound quality is just better across the spectrum, with highs being crisp and sharp, mids are clear and strong, and the bass is rich and full, not “muddy”. The full sound that it produces is just a joy to listen to. There’s also plenty of volume to fill a room with sound.
Battery life is rated at 20 hours, and while I didn’t keep track of how long I’d been playing mine between charges, I never had to worry about not having enough battery for my event. You can also plug your phone into the USB-C port and charge it, which is nice in a pinch. Unlike my other Bose speaker, this one does not have a microphone that would allow you to use it as a speakerphone. I think this is unfortunate, and is a feature I’ve come to expect on my Bluetooth speakers. It’s included on the Flex and Micro models in the Soundlink line, but not in the larger Plus and Max models. Perhaps Bose intends the larger models to be for bigger groups and thus speakerphone functionality isn’t needed?
The Bose Soundlink Plus is a fantastic-sounding speaker that is rugged and has long battery life. For taking your tunes with you wherever you go, this is a great option. If you’re just not satisfied with the sound you get from a smaller speaker, but don’t want something a lot bigger, this might be what you’ve been looking for.
I would recommend this to a friend!
Share this review:
0points
0of 0voted this as helpful.
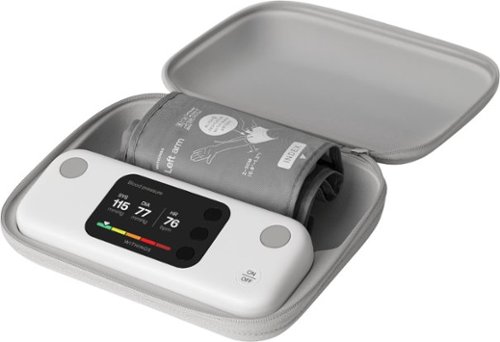
Withings BPM Vision is an FDA-cleared digital blood pressure monitor for home use that delivers precise systolic & diastolic measurements, heart rate tracking, and instant color-coded feedback~all displayed on a 2.8~ high-resolution LCD screen. Your results are immediately visible, making health tracking effortless.
Customer Rating
4
High quality device for tracking blood pressure
on June 17, 2025
Posted by: BobinVA
The Withings BPM Vision blood pressure monitor is the latest option from Withings, and comes in its own zippered case, which nicely packs the unit and soft arm cuff. Included in the box are printed instructions and a USB-A to USB-C charging cable.
When you first open the box, you’re greeted with quick setup instructions printed on the inside of the box. This is a slick way to do it, avoiding the easy-to-lose paper insert, and getting your attention literally right out of the box. Setup is very easy, but the process is designed to push you to download the app for your phone and sign up for an account. While I don’t mind that, and I understand that this is necessary for long-term tracking, I would have liked for this step to be easy to skip and come back to later. For something as one-dimensional as a blood pressure monitor, the first thing I want to do is check my blood pressure, not sign up for another account on an app.
Once I had my account set up, it was easy to pair the device with my phone. Be aware that both Bluetooth and wi-fi are required for setup. Wi-fi is necessary for firmware updates, but I would have preferred updates to be done via the app and transferred via Bluetooth. Having to give my blood pressure monitor access to both my phone via BT and my home network via wi-fi feels like a bit much just to be able to take my blood pressure.
Once I had my account set up, it was easy to pair the device with my phone. Be aware that both Bluetooth and wi-fi are required for setup. Wi-fi is necessary for firmware updates, but I would have preferred updates to be done via the app and transferred via Bluetooth. Having to give my blood pressure monitor access to both my phone via BT and my home network via wi-fi feels like a bit much just to be able to take my blood pressure.
Once all of that was done, I was ready to find out how bad my blood pressure was. The unit walks you through the steps for your first time, even encouraging you to rest for 5 minutes before you begin. The arm cuff is well-marked to help you put it on your left arm correctly. About a minute later, the crisp LED display shows your systolic and diastolic results, as well as your heart rate. A nice touch here is a color-coded strip along the bottom of the screen showing you where your reading ranks: normal, elevated, stage 1 and stage 2 high blood pressure. At a glance, you know how to interpret your reading.
The app is excellent. It’s easy to pair with the unit and get set up, and it’s nicely arranged to give you all the important information in a well-designed layout. It integrates nicely with Apple Health, bringing in all your other health information so that you can see it altogether in one place. Seeing your bp readings over time gives you the full picture. The app will even allow you to privately send a report to your doctor, helping you to avoid elevated readings due to “white coat syndrome”. This is a thoughtful touch that allows you to get real benefit from the data you’re collecting.
The Withings BPM Vision makes it easy to take your blood pressure and track it over time. I also have an older monitor from one of the prominent vendors of bpm machines, and the reading from the BPM Vision matched that from my older unit. That brings up my one major objection to the BPM Vision: price. At $180, it’s not cheap. My older unit was less than $50, but it doesn’t include an app or any of the bells and whistles that come with the BPM Vision. The core functionality—taking your blood pressure—is present in all monitors, so it’s everything else that you need to consider. The app and all its functionality is really great, but do you want to pay much more to get it? The build quality, from the unit to the cuff to the case, is top-notch, but is it worth the extra $130? A long-lasting rechargeable battery is also nice, but you have to decide how much it’s worth to you.
For a high quality, easy-to-use unit, the Vision is a great choice. As soon as you open the box, the quality of the unit is obvious. It excels at taking blood pressure readings, and the app integration is very well-done. If you’re looking for a top of the line blood pressure monitor, this is it. As much as I like it, I’m taking off a star for the high price tag. Other than that, it’s an excellent option.
I would recommend this to a friend!
Share this review:
0points
0of 0voted this as helpful.
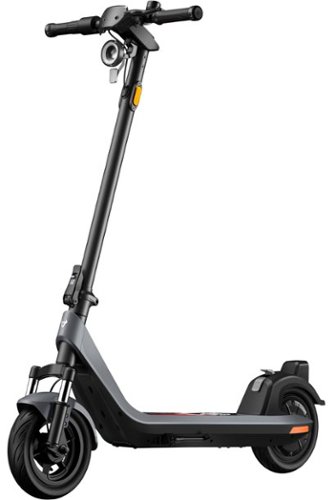
NIU - KQi 200P Foldable Electric Kick Scooter w/ 34 mi Max Operating Range & 20 mph Max Speed - Gray
Designed for reliable daily rides with practical power, comfort, and protection. Front suspension smooths city streets and reduces rider fatigue. A smart battery system delivers consistent performance, with 20mph top speeds and up to 34mi of range. Backed by NIU's industry-leading 2-year warranty, you can ride with confidence from day one.
Posted by: BobinVA
This is my second electric scooter, and the first by NIU. I’ve had so much fun zipping around the neighborhood that I thought it would be good to have another for family members to join me.
Assembly is a simple matter, involving unfolding the front tube, inserting the wiring into the tube and fastening a few screws with the included tool. The scooter comes pre-charged with enough juice to try it out, which you’ll want to do right away. A full charge takes 4 or 5 hours. For your first ride, you won’t be able to go faster than 9 mph for the first 200m, which is a safety feature to give you a bit of time to get used to it.
Assembly is a simple matter, involving unfolding the front tube, inserting the wiring into the tube and fastening a few screws with the included tool. The scooter comes pre-charged with enough juice to try it out, which you’ll want to do right away. A full charge takes 4 or 5 hours. For your first ride, you won’t be able to go faster than 9 mph for the first 200m, which is a safety feature to give you a bit of time to get used to it.
The display is very simple and only shows a few bits of information, such as remaining charge (shown as bars), current speed, mode and Bluetooth connection. No distance is shown on the display, it is only shown in the app, which is a must. I wish that more information were shown on the display, and that more settings could be done right from the scooter. As it is, you can switch between e-save mode (limits speed to 9 mph max) and sport, with a top speed of 18.5 mph. Other speed-limiting modes can be selected in the app. A double-press on the main button toggles the light, and five presses puts the scooter in pedestrian mode, useful if you need to walk along beside it.
The pneumatic tires and dual shock absorbers do a good job making the ride smoother. Compared to my other 2 year-old scooter, the 200P definitely feels nicer going over rough spots in the road. Deck space is adequate, and is pretty standard for the category. The deck is covered in a nice grip tape that is replaceable, which is a nice touch. New on this model are integrated turn signals in the handles. I’m torn as to what I think about these. They beep and put out a nice bright light, but they’re likely to be hidden by your hands or body, limiting their usefulness. In the dark they’re very bright and easy to see, so perhaps that’s their main use case. The button to turn them on is big, but it’s easy to hit the wrong one. Nonetheless, this is a good addition that only adds to the safety features of the scooter. The headlight is nice and bright and puts out a square-shaped beam that covers the road in front of you very well. There’s also a daytime running halo that is available if you desire. I really like the lighting options included here.
The pneumatic tires and dual shock absorbers do a good job making the ride smoother. Compared to my other 2 year-old scooter, the 200P definitely feels nicer going over rough spots in the road. Deck space is adequate, and is pretty standard for the category. The deck is covered in a nice grip tape that is replaceable, which is a nice touch. New on this model are integrated turn signals in the handles. I’m torn as to what I think about these. They beep and put out a nice bright light, but they’re likely to be hidden by your hands or body, limiting their usefulness. In the dark they’re very bright and easy to see, so perhaps that’s their main use case. The button to turn them on is big, but it’s easy to hit the wrong one. Nonetheless, this is a good addition that only adds to the safety features of the scooter. The headlight is nice and bright and puts out a square-shaped beam that covers the road in front of you very well. There’s also a daytime running halo that is available if you desire. I really like the lighting options included here.
Braking is extremely important, so let’s talk about it separately. The brakes are smooth and work well. There’s only one brake caliper, for the front drum brake. There’s also an e-brake in back, but it works automatically. There’s also another feature that I’m really liking—regenerative e-braking. With this turned on, the e-brake engages as soon as you let off the throttle. A small amount of power goes back in the battery as you slow down. This is a nice feature that should save on wear and tear on the drum brake. Settings allow you to choose the level of regenerative braking you desire, from none to strong.
The handlebars fold down to allow you to pick up and carry the scooter if you need to do that. It weighs about 53.6 pounds, so it’s not light, but neither is it too heavy to load it into your car to take it with you. On the left handlebar you’ll find a bell to allow you to let others know you’re behind them.
The app is very nice-looking and well designed. It’s easy to find the settings you want, but I find it curious that it only tracks your distance if you think to turn on the tracking at the beginning of each ride. If you forget to do that, nothing is tracked. Remaining charge is prominently shown, as is the button to lock the scooter. Once locked, attempts to move it more than a foot will lock the wheels and sound the alarm and blink the lights. While this won’t stop someone from just picking it up, it will make it harder to actually use it.
The app is very nice-looking and well designed. It’s easy to find the settings you want, but I find it curious that it only tracks your distance if you think to turn on the tracking at the beginning of each ride. If you forget to do that, nothing is tracked. Remaining charge is prominently shown, as is the button to lock the scooter. Once locked, attempts to move it more than a foot will lock the wheels and sound the alarm and blink the lights. While this won’t stop someone from just picking it up, it will make it harder to actually use it.
The NIU Kqi 200P electric scooter is a very nice addition to the crowded market of electric scooters. It’s well built with a nice set of features at a reasonable price. It provides a smooth ride with nice acceleration, and enough range to make it useful. I don’t know the history of the NIU company or how good their customer service is, but I’m pleased with this product so far, and I’m happy to add this one to my stable. I think you will be as well.
I would recommend this to a friend!
Share this review:
0points
0of 0voted this as helpful.

Introducing OpenDots ONE, the new open-ear clip-on earbuds from Shokz. With a fresh take on audio, OpenDots ONE is designed to keep you connected without the isolation. Simply clip them on and immerse yourself in your favorite sounds, wherever life takes you.
Customer Rating
5
Best overall air conduction buds
on April 22, 2025
Posted by: BobinVA
As a runner, I’ve been a fan of open-ear headphones for a while, and while I love bone conduction models, the sound quality is good, but nowhere near great. Shokz has been hard at work to improve this in their open-ear offerings, first with the Open Run Pro 1&2 models, then with OpenFit, and now with the new Opendots One. The Opendots are different than anything else Shokz offers, and are the latest entry into the world of clip-on earbuds.
Pros:
• Super lightweight and comfortable for extended wearing
• Excellent sound quality, rivaling some in-ear buds
• Great battery life
• Very secure fit, good for active lifestyles
• Wireless charging
• Super lightweight and comfortable for extended wearing
• Excellent sound quality, rivaling some in-ear buds
• Great battery life
• Very secure fit, good for active lifestyles
• Wireless charging
Cons:
• Expensive
• Good water and dust resistance, but not water or dust proof
• Expensive
• Good water and dust resistance, but not water or dust proof
Let’s deal with the top areas that I think make the difference for ear buds, then I’ll address the usage profiles where the Opendots would be a good pick.
Comfort – this is a big one for me, because if they’re not comfortable, then I won’t be wearing them. I am a big fan of the neckband style of bone conduction headphones, but I’ll admit they’re a little annoying when used with glasses. The ear cuff style employed by the Opendots is great for use with glasses, as they’re completely out of the way of glasses, similar to in-ear buds. The main concern with the clip-on style is ear soreness, or fatigue at the points where the cuff touches the ear. As with their other models, Shokz uses titanium and soft silicone to make these very comfortable. Unlike other clip-ons that use hard plastic, the Opendots are flexible and comfortable. As with anything that touches the ear for any length of time, I had to shift them from time to time, but I had no problem wearing them for hours at a time. They are also totally secure, and did not budge at all during my run.
Sound quality – this is where the Opendots really shine! These are quite possibly the best sounding earbuds that Shokz has yet produced, and they’re actually better than some in-ear buds as well. As I’ve found with the other “air conduction” models from Shokz, these have have a wider sound stage and a very enjoyable overall sound signature. There are several preset EQ options such as standard, vocal, bass boost and treble boost, as well as a 5-band custom EQ. These are good enough that I found myself putting them in just to listen to my music, something I never did with bone conduction, which I have for use while running. Call quality is excellent, on par with any of the top-shelf alternatives.
Features – the Opendots feature touch controls, and these may be done in two ways. First, you can tap the band that connects the battery to the bud, just like you would with any other touch-sensitive earbud, or you can tap the battery compartment that sits behind your ear. You can also squeeze or double-squeeze the battery compartment. I found these squeezes to be more dependable than tapping the band, which were sometimes ignored. Taps can be used to play/pause, accept or reject/end calls, and raise/lower volume (long press). Unfortunately, there isn’t any way to customize what taps do, and I would have liked to be able to skip forward or back in my playlist. The app does have a place to customize the taps, but currently all you can do is turn them on or off. Hopefully that will be rectified in a future update.
Something unique to the Opendots is that it doesn’t matter which earbud goes in which ear. They sense when they’re properly positioned, as well as which ear they’re in, so you don’t have to worry about keeping them in the right ear or placed in the right spot in the charging case. Speaking of the case, it is small and fits easily in a pocket, and it supports wireless charging, in addition to USB-C. Battery life is great. I didn’t use them long enough continuously to drain the battery, but I never had to worry about running out of power.
So, who are these for? As a runner, I don’t think you can do better than pure bone conduction (without an “air conduction” speaker). I say that because I sweat a lot and bone conduction models are often waterproof, or nearly so. Since the Opendots use tiny speaker drivers, they are by design more open to their surroundings. Shokz rates these at IP54, which means they’re water and dust resistant, but not water and dust proof. If you don’t sweat a lot or run in dusty environments, that would be plenty for you, and it’s enough for me too during the colder months of the year, but I probably won’t use them for running during the summer. That said, they are extremely secure, and I had no worries that they would fall out. In fact, they don’t move at all, so if you have difficulty with traditional earbuds when they get sweaty, that’s not an issue with the Opendots.
I would position the Opendots as all-around earbuds than can also be used for exercise as long as they won’t get too wet. That means wearing them around the house and using them for calls, meetings, and music, while preserving the ability to hear what’s going on around you when you need to do that, then going to the gym or for a walk/run. They’re comfortable enough to be your everyday buds, and sound good enough to use them for whatever you need. As with any open-ear style bud, too much exterior noise can drown out what you’re listening to, so if you need full-blown active noise cancellation and isolation, these aren’t the buds for you.
The market for ear cuff-style buds is growing rapidly. There are much cheaper options available, as well as those that cost a lot more. Build quality and performance put these in the premium category, in my opinion, but you’ll have to decide if that’s worth the price difference over cheaper competitors.
It's crucial to understand how you want to use these before you get them, or you may not be happy. Sound quality is really, really good, but if you don’t care about situational awareness, you’re probably better off with high-quality in-ear monitors. If, like me, you prefer not to have your ear canal filled up, then give these a try. You won’t be disappointed.
I would recommend this to a friend!
Share this review:
0points
0of 0voted this as helpful.
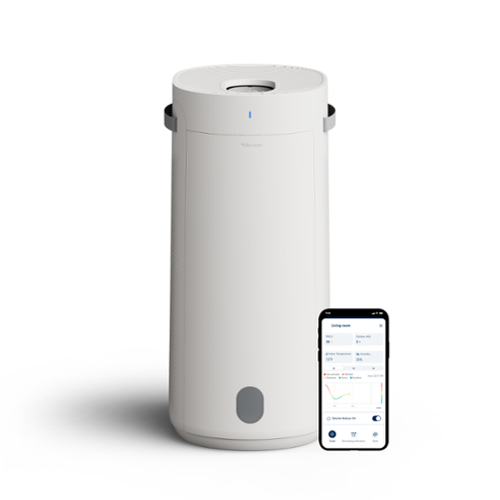
Blueair - 2-in-1 Purify + Humidify Air Purifier with HEPASilent and InvisibleMist Technology - White
Blueair's 2-in-1 Purify + Humidify is a powerful multi-functional air purifier + humidifier that provides both clean and humidified air all in one smart and beautiful device. Blueair's HEPASilent Technology purifies dirty air, while 360~ InvisibleMist Technology humidifies dry air, delivering ultimate air care with clean, fresh air and balanced humidity~ dual-action technology for ultimate air wellness. Independently evaluated for safety standards and third-party tested for performance as part of the AHAM Verifide Program for air cleaners, the fast purification takes only 12.5 minutes to clear the air, removing 99.97%** of all airborne pollutants down to 0.1 microns. Innovative refill through our premium LED display that doubles as a water refill without hassle, Auto Smart control with AutoHydrate feature; app connection, Night and Auto mode available, Designed to be easily cleaned and handled. **Tested on PM2.5 up to 90 minutes
Customer Rating
4
High quality device to improve air quality
on February 13, 2025
Posted by: BobinVA
We decided to buy this new Blueair purifier/humidifier after looking at some options online and placing our order. When the box arrived, we thought we may have gotten the wrong item delivered. We thought we were getting a tabletop unit that was fairly small and could be placed on top of a dresser. Instead, the Blueair 2-in-1 was much larger, and resembled a small water heater! After adjusting to the difference from our expectations, we were ready to get started.
The first thing you have to do is to open up the unit, take out the multiple filters, and remove the plastic from the filters. As I did that, I was struck by how well constructed this thing is. If you’ve ever had a humidifier, you’ll be familiar with the paper wicking filters used to draw water out of a tank. This has one of those, but it’s taller than most, and there’s a plastic frame to hold it in place. Below the filter is the water tank, with clear plastic window for seeing the water level. You can fill the tank by putting it under a faucet, or the recommended method for filling, which I’ll get to later. I filled the tank for the initial time and put the filters back in place. In addition to the water filter, there are 3 other filters for purifying the air, and these are rated to last for up to 9 months.
With the unit put back together, I used the attached handles to carry it to its designated place. The handles feel solid, and were easily able to support the weight of the unit plus water. Even full of water, the unit wasn’t overly heavy.
The control panel features 7 touch-sensitive buttons for operating the unit. After briefly familiarizing myself with the control icons, it was easy to use them to operate the unit, but the smartphone app provides an easier and more customizable way to operate the unit. Pairing the unit with the app was easy, and it even shows you the outdoor air quality as well, which is a nice touch. There are lots of features available, and when using the automatic mode, you can choose the humidity level you want to target. The unit is rated for a space of up to 300 square feet, so it’s not going to handle a large open floor plan space, and that led us to choose our bedroom for its main placement. After all, we spend a lot of time in there, and good air quality while sleeping is important.
The top of the unit features a grid for allowing the air to get out, with a center interface panel. This panel shows things like humidity level and fan speed, as well as indicators for auto mode, night mode, humidification mode, and filter expiry indicators. The brightness of the panel is completely customizable, making it comfortably bright in any ambient light. The panel has a neat trick, however: it is waterproof and doubles as an alternate way to refill the humidifier water level! The first time I did this, I had to overcome my reluctance to pour water onto an electronic display, but it is actually more convenient than taking it all apart to take out the tank for filling.
The fan is super quiet at lower levels, and I barely knew it was on when in use. In our bedroom, it was able to reach our desired humidity level quickly. Just to test it out, I also ran it in a room that was technically too big for it, but it did a good job of humidifying and cleaning the air even in the larger space, it just took a while. When the tank runs out of water, or if humidification is turned off, the unit goes into auto-dry. Auto-dry quickly dries out the wicking water filter when it’s not in use. This is a great feature which should prevent the growth of mold and mildew on a filter that is constantly damp. With older humidifiers, we had to add small amounts of chemicals to achieve the same result. I’ll be keeping an ey on this to see how well it works over time.
So, does it work? This is a very well-built unit with thoughtful features and the quality is evident throughout. But what really matters is how it improves the air quality in my home. Here’s where it gets difficult to determine. In our home, the air quality indicator always says that we have excellent air quality. Cooking is the main time when the quality dips, but the unit handles that pretty quickly. I’m not sure we can rely on the indicator light to determine our overall air quality. That’s not necessarily a bad thing, as air purifiers are meant to quietly do their job night and day, running constantly, so I may end up using the Blueair in that way.
We’ve used it every day for the last week and a half, and while I’m very happy overall with the build, ease of use, and integration with the app, it’ll take time to really tell how well it impacts our air quality. We need to use it over multiple seasons to really put it through its paces, but I have confidence that it will perform well. From what I can tell on the Blueair website, a 3-pack of air filters costs $50 and the water filter costs $25. This is what you can expect to spend every 9 months, and there are discounts available for subscriptions.
Based on our experience so far, we’re pleased with the Blueair 2-in-1 air purifier/humidifier and look forward to many years of improved air quality in our home.
I would recommend this to a friend!

Share this review:
0points
0of 0voted this as helpful.

Experience the next generation of power! The Greenworks Pro 80V 17 Inch Cordless String Trimmer features advanced brushless motor technology, delivering major torque, power and life - with virtually no maintenance required. The incredible power & performance is equivalent to a 30cc gas string trimmer, without the added weight, pesky pull start and noxious fumes of gas and oil. When it comes to outdoor power equipment, you put the emphasis on ~power.~ And why not? For homeowners like you who take on jobs big or small, you need heavy grade construction and long-lasting peak performance. The Greenworks Pro 80V family of tools meet the challenge with a universal battery system that works across multiple products, high-efficiency motors, and innovative smart technology.
Customer Rating
5
Powerful and solid trimmer
on December 23, 2024
Posted by: BobinVA
After years of using a corded electric string trimmer, I made the leap to the Greenworks cordless string trimmer. This year’s model features a more powerful 80V battery for longer run times, although the rated coverage of .5 to .75 acre is plenty for me.
Setup is easy and really doesn’t even require a glance at the user guide. The straight shaft just needs to be “unfolded” and tightened, attach the handle and head guard, and you’re good to go. The trimmer head is pre-loaded and ready out of the box.
The battery comes with a hefty charger that can provide a full charge in 40 minutes. The side effect of a fast charge is that a lot of heat is generated, so the charger has its own fan. I don’t think I’ve ever had a charger with a fan, so it was a little surprising to hear it spin up. You may want to charge it in another room if you’re trying to watch TV.
Once charged up, I headed out to the yard to try it out. Although it’s December, I waited on my last cut/trim of the year because I knew this trimmer was coming. The power this thing has is amazing! I was blasting through all my trimming needs in no time at all. The angle of the shaft allowed me use it to mow small patches instead of having to get in there with a mower, making short work of that part.
One thing that was immediately apparent was smooth sound and operation of the motor. There are two power settings (high and low), although I’m not sure why I would ever use the low power setting. The variable-speed trigger is a really nice touch, allowing precise control in every situation. The “tap to feed” feature works amazingly well—just a tap of the head on the ground advances the string so you barely need to pause to extend the string.
One thing that was immediately apparent was smooth sound and operation of the motor. There are two power settings (high and low), although I’m not sure why I would ever use the low power setting. The variable-speed trigger is a really nice touch, allowing precise control in every situation. The “tap to feed” feature works amazingly well—just a tap of the head on the ground advances the string so you barely need to pause to extend the string.
Construction of the trimmer is solid, with metal motor housing, shaft and clamp. It is very sturdy and feels like it’s built for heavy duty work. I didn’t use it enough to need to reload the spool, but the claim is that it’s easy and quick, so we’ll see.
I like that the battery is also able to be used in other Greenworks tools, so that’ll make it easier for me to expand by tool set.
Hopefully this trimmer will provide years of service. If so, I can’t see ever going back to gas-powered tools. Now that I no longer need to get out the spools of extension cord for my previous trimmer, I’m much more likely to just grab this one and get it done.
If you’re considering a battery-powered trimmer, you can’t go wrong with this one. I’m very happy I got it!
I would recommend this to a friend!
Share this review:
0points
0of 0voted this as helpful.
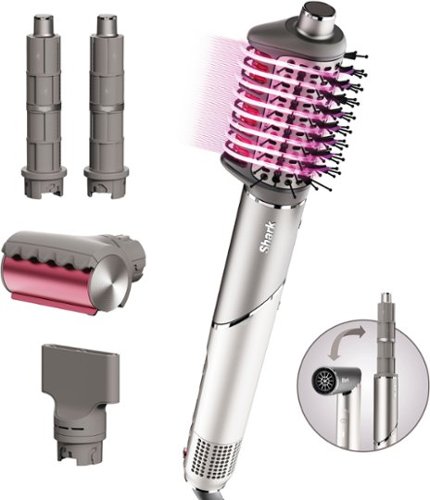
With Shark FlexFusion dry, curl, volumize, and smooth all with one tool. Equipped with Fusion Styling Technology for no heat damage styling & hot tool results. Rotate the hair dryer into a versatile multi-styler that~s now smaller, lighter, and more powerful than the original FlexStyle. Complete with Scalp Shield mode to deliver comfortable air temperatures for your scalp.
Customer Rating
4
An efficient multi-tool hair stylist
on November 18, 2024
Posted by: BobinVA
My hair is thick, wavy, coarse, and a little frizzy. Recently, I decided to get the Shark FlexFusion Air as a potential replacement for my current styling tool. What I find appealing about the Shark FlexFusion is that it addresses the main drawback of my previous tool: the inability to use the dryer as a standalone hair dryer. Like many similar tools, the FlexFusion styling attachments perform much better when your hair is partially dry, the Shark instructions call this “rough dry”. With the push of a button, the FlexFusion barrel rotates, creating a classic gun-shaped blow dryer, allowing me to easily rough dry my hair and get it ready for the styling tools to do their magic!
After my hair is partially dry, I can choose from a nice assortment of tools to finish my style. The Wet-or-Dry Fusion Brush does an excellent job of quickly drying and smoothing my thick, wavy, shoulder-length hair. While the unit includes a cool shot feature, I didn't use it when finishing my style with the brush. There is a handy QR Code printed inside the box lid that took me to an online quiz about my hair type, list the accessories I have, and get video instructions of how to use each tool. The video that gives instructions about how to use the Wet-or-Dry Brush describes the finish this brush gives to wavy hair as a “bouncy blowout”. That is a great description of my hair after using this brush. Drying is fast and effective. I can go from wet to a bouncy style in about 10 minutes. (See picture)
The FlexFusion also comes with two auto-wrap curlers for creating soft curls. I had to switch out these barrels when moving from one side of my head to the other. Because my hair is very thick, it took me longer to curl my hair than if I had used a curling wand. I found that I could only take small sections of hair at a time for curling. Following the instructions, I held each section for about 10 seconds and finished with a cool shot. The curls turned out great and lasted for two days without needing to be touched up. The curls were tighter on the first day, but the soft waves on the second day were still impressive.
Additionally, the Wet-or-Dry Fusion Brush has a heated section that can refresh your hair on its second day without washing it or smooth out a ponytail dent, which worked well for me. The package also comes with a Styling Concentrator, which can be used to target air onto a flat brush or round brush for a smooth finish. Unlike other air concentrators that I have used, this one rotates independently from its connection to the unit. This made rotation for precise air control much easier than some of my past hair dryers. The set also includes a Frizz-fighter Finishing Tool. The tool was easy to use and with a few swipes down the top of my hair, I was convinced that my hair was indeed smoother and had less flyaways. I cannot figure out what is so “magic” about this device…so maybe I am just imagining less frizz.
However, there are a few negatives:
- The instructions are printed on the box, so you can no longer access them once you throw away the box.
- The air intake covers a large band at the bottom of the device, where you are supposed to grip the FlexFusion. I hope to adjust my expectations over time, but for now, I find the grip position on the barrel to be cumbersome.
- The power cord is quite thick, likely due to the power of the FlexFusion. It reminds me of a clothes dryer or large appliance cord, making it unwieldy to wrap up and store in my drawer or cabinet.
Overall, I am enjoying the Shark FlexFusion Styling and Drying system. There are additional accessories that can be purchased for use with the base product, and I will most likely be adding the diffuser to my collection. The FlexFusion improves upon my current tool and adds capabilities I didn’t have before, in a compact and well-built package. If you’re looking for a do-it-all tool that can dry and style your hair, give the FlexFusion a look.
I would recommend this to a friend!

Share this review:
0points
0of 0voted this as helpful.
BobinVA's Review Comments
BobinVA has not submitted comments on any reviews.
BobinVA's Questions
BobinVA has not submitted any questions.

Logitech Wireless Mouse M185. A simple, reliable mouse with plug-and-play wireless. You get the reliability of a cord with wireless convenience and freedom~fast data transmission and virtually no delays or dropouts. You~ll enjoy the high quality and reliability that have made Logitech the global leader for mice~plus a three-year limited hardware warranty. The tiny nano receiver works right away without software and is small enough to leave in your USB port so you won~t lose it. And on top of that, this comfy, contoured mouse treats your hand right.
Will this mouse work with a Lenovo Think Pad?
It should work, either using the Logi Bolt receiver that is included, or via Bluetooth.
4 years, 4 months ago
by
BobinVA
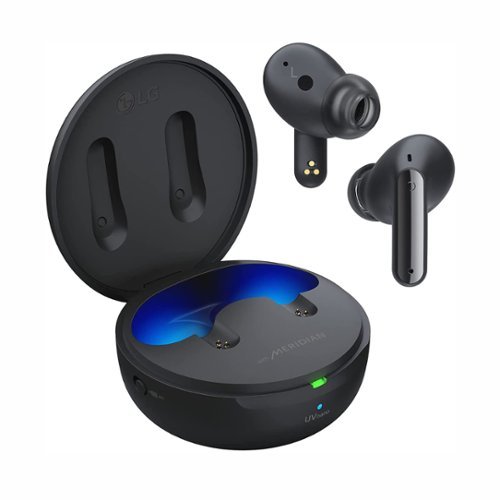
Free your travel with the LG TONE Free FP9. Connect to in-flight entertainment systems even without Bluetooth capabilities. Get peace of mind with a UVnano charging case that kills 99% of bacteria on the speaker mesh~ and medical grade ear gels.~ Plus, get better clarity for calls on the go.
How do I connect using the wire? I tried it on my computer using the manufacturer provided connection and it did not work. What do I do?
Make sure you move the switch on the charging case that enables wired mode to work. You may not have noticed that switch. Good luck!
4 years, 5 months ago
by
BobinVA
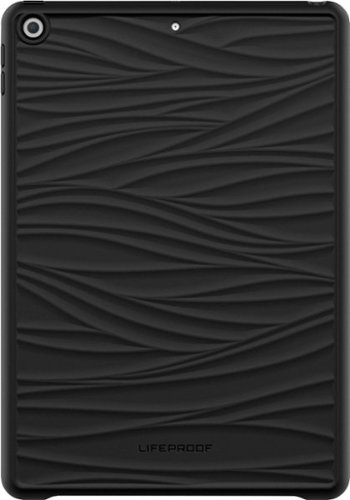
Serious protection. Subtle styling. Built sustainably. W~KE for Apple iPad (7th generation, 8th generation, and 9th generation) is a sea-change in case construction, using mostly ocean-based recycled plastic without sacrificing performance. Molded with a mellow wave pattern, the look is contemporary to the core. And after purchase, you get to donate a dollar to one of LifeProof~s water-conscious nonprofit partners ~ for free.
Does the screen protector come with the case?
![Adobe - Photoshop Elements 2022 - Windows [Digital]](https://pisces.bbystatic.com/prescaled/500/500/image2/BestBuy_US/images/products/6475/6475048_sd.jpg)
Bring out your creativity to share your life stories. Adobe Sensei AI technology* and automated options do the heavy lifting so you can instantly turn photos into art, warp photos to fit any shape, and more. Add moving overlays or 3D camera motion to take your photos to a whole new level, and save them as MP4s for easy sharing on social. Grow your skills with 60 Guided Edits that step you through how to create perfect pet pics; extend, remove, or replace photo backgrounds; and more. Effortlessly organize your photos, and craft personalized creations like dynamic photo and video slideshows with all-new styles and inspirational quote graphics. Transform your favorite photos into gallery-quality wall art, beautiful prints, and unique keepsakes with the built-in prints and gifts service. ~And enjoy an updated look that makes the software even easier to use and navigate. *Adobe Sensei is the technology that powers intelligent features across all Adobe products to dramatically improve the design and delivery of digital experiences, using artificial intelligence and machine learning in a common framework.~FUJIFILM Prints & Gifts service is available in the U.S. only.
Gee - I don't want to pay monthly. So is it a lifetime license where you never have to pay again?
Yes, this is a perpetual license. Unless you can get enough value out of a subscription, it's not worth it. Since I don't edit photos enough to pay for a subscription, this is perfect for me.
4 years, 7 months ago
by
BobinVA
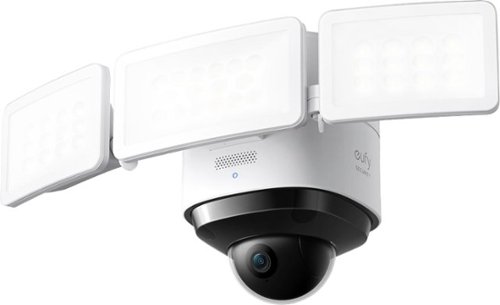
eufy Security Floodlight Cam 2 Pro provides 360~ pan and tilt camera coverage in 2K HD resolution. It boasts smart lighting, real time communication via 2-way audio, all with zero monthly fees. You don't even need a eufy Security HomeBase. This eufy Security Floodlight Cam 2 Pro is compatible with most smart devices and can be easily controlled through the eufy Security App. The floodlight can be installed either on the wall or on the ceiling. (Existing outdoor wiring and weatherproof junction box required.)
Can you turn on the light with an external switch?
No, the light switch needs to stay on at all times so that the unit has power, but you can manually control the light through the app.
4 years, 10 months ago
by
BobinVA
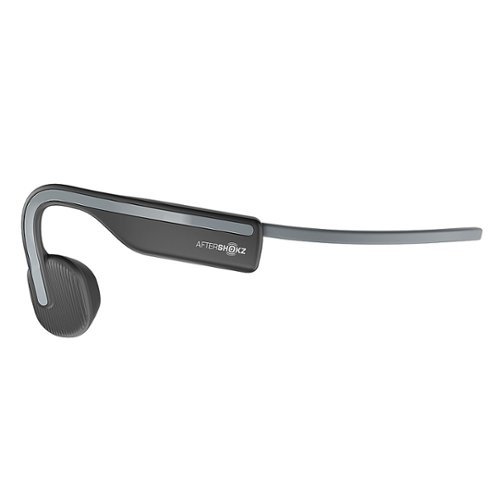
Inspired by athletes, designed for everyone. The AfterShokz OpenMove Open-Ear Lifestyle Headphones in Slate grey were created with versatility in mind. OpenMove by AfterShokz brings you bone conduction technology with a lightweight, titanium fit taht ensures all-day wear.
I’m cyclist and occasionally get caught in rain, can it survive?
Yes they can survive a downpour, just don't submerge them.
5 years, 5 months ago
by
BobinVA
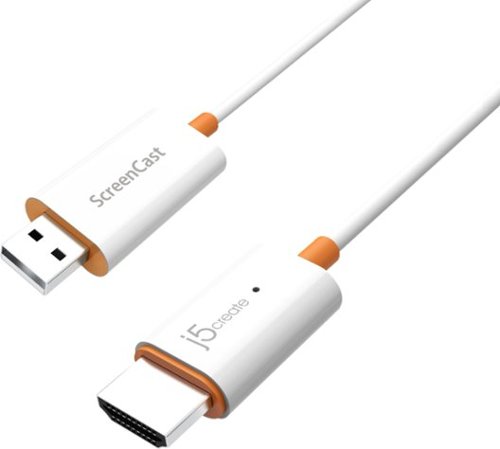
The JVAW53PRO Wireless Display HDMI~ Extender Pro includes a transmitter and receiver kit. It can send a high definition video and audio signal to an HDMI~ enabled TV set, projector or LCD PC monitor display device with receiver distance up to 100 meters and nearly zero latency. Users can extend other HDMI~ sources, including DVD players, Blu-ray~ players, PCs, notebooks and gaming machines (ex. Sony~ PS5~, Nintendo Switch 2~). The JVAW53PRO is fully HDCP compliant via HDMI~, supporting resolutions up to 1080p and stereo digital audio. The extender also supports the transfer of IR remote control signals to the receiver side.
Can this be used to stream Netflix/Amazon from MacBook Pro to Samsun smart tv?
Yes, it should work with any device that can join the wifi network created by the device. Keep in mind that not all video content is supported for screen casting.
5 years, 8 months ago
by
BobinVA
Meet the Logitech Pebble i345. It takes your iPad to higher places with a level of precision and control you can~t get with a tablet alone. Use it to click, scroll, and control your workflow like never before. It~s small, portable, and comfortable~so you can keep exploring, wherever you go.
I would just like to ask if I can use this mouse for an ipad air with an ios of 12.4?
It's just a bluetooth mouse, so I believe it will work on any device that supports bluetooth connectivity.
6 years, 1 month ago
by
BobinVA

GE Appliances is dedicated to providing the right solutions for rooms of any size. Our window air conditioners are designed to offer exceptional comfort while remaining quiet, and our latest connected technology makes these products versatile and easy to use.This 8,000 BTU smart window air conditioner cools medium rooms up to 350 square feet. Energy efficient cooling with 3 cooling and 3 fan speeds provide flexible and optimal home comfort. Integration with the SmartHQ app allows you to monitor, schedule, and control your connected air conditioner from anywhere, or use the electronic controls with included remote to easily to adjust and manage your settings. This AC installs easily in a double hung window with included EZ Mount window kit and fixed chassis. Additional features like eco mode, power interruption restart, 24-hour on/off timer, and removable filter offer ease of use and maintenance.
Does this ait conditioner work with alexa?
Obtain high-quality color prints with this Canon PIXMA wireless inkjet all-in-one printer. The 4.3-inch LCD touch-screen panel simplifies operation, while dual-band Wi-Fi connectivity and voice-activated printing provide enhanced efficiency and support a smooth workflow. This Canon PIXMA wireless inkjet all-in-one printer utilizes a six-ink system with a photo blue ink tank for brilliant results.Prints up to 15 ISO ipm* in black, up to 10 ipm* in color