BobinVA's stats
- Review count153
- Helpfulness votes450
- First reviewDecember 19, 2014
- Last reviewDecember 17, 2025
- Featured reviews0
- Average rating4.1
Reviews comments
- Review comment count0
- Helpfulness votes0
- First review commentNone
- Last review commentNone
- Featured review comments0
Questions
- Question count0
- Helpfulness votes0
- First questionNone
- Last questionNone
- Featured questions0
- Answer count28
- Helpfulness votes23
- First answerAugust 12, 2016
- Last answerJanuary 22, 2022
- Featured answers0
- Best answers2
Nothing about your personal style is standard. So why should your appliances be? Created for those who want to reflect their true style in every room of their home, Caf~ is distinct by design. Backed by showstopping features, every Caf~ appliance gives you the form and the function you've been craving. Now you can bring that exceptional style to your countertops thanks to elegant and innovative Specialty Grind and Brew Coffeemakers with Thermal Carafe from Caf~, which are as intelligent as they are beautiful. All Caf~ coffee makers are WiFi enabled and feature voice-controlled capabilities, connected through the SmartHQ app and compatible with Alexa and Google Home. Flexible temperature controls and a variety of brew settings allow even the most discriminating coffee connoisseur to enjoy the ideal amount of coffee at the ideal brew, without ever sacrificing flavor or performance. The modern, clean look pairs perfectly with the signature Caf~ copper accents that truly mark these as the world's most stylish appliances.
Customer Rating

5
Fresh ground coffee at home!
on October 27, 2023
Posted by: BobinVA
Coffee making in our house has been almost exclusively handled by one of those pod coffee makers, except when we have guests and need a pot of coffee, when we have to get our traditional machine out of the closet. The new Café Grind and Brew coffee maker brings those two together, allowing you to make either a single cup or a pot of coffee with the same machine. Yes, there are other machines that do this, but the Grind and Brew adds the ability to freshly grind your coffee beans just seconds before brewing, giving you the freshest coffee possible.
I received the stainless-steel model. All of the available options include copper accents, and it’s a good-looking machine, very well built. A clear plastic water reservoir sits next to the grinding/brewing station. It’s fairly large, but looks good sitting on a countertop. Beans are placed in the top of the machine, and ground coffee ends up in the included filter(s) in the basket area just under the grinder. Included are filters for single-cup and coffee pot mode. Both of these are made of plastic with metal mesh, so they should last a long time, but are not dishwasher safe. Paper filters may also be used as an alternative that doesn’t require cleanup.
You’ll notice immediately that the design of this one is different. GE moved away from the traditional single-tower design, and I’m glad they did. Traditional coffee makers often have an internal reservoir for the water, with a flip-up lid where you pour the water in. With many designs, this is annoying and sometimes makes it hard to pour the water in without making a mess on your countertop. The Café Grind and Brew features a completely separate water reservoir with a built-in replaceable charcoal water filter. The reservoir can be lifted off and taken to the sink to fill, eliminating spills. It is also clearly marked for different capacities, so you’re sure you have enough water for the size you want. For me, I just make sure it’s full all the time, so I don’t have to worry about that.
Setup is fairly intuitive, although I recommend reading the included manual. Getting ready to brew is as simple as filling the hopper with your beans, putting the appropriate filter in the basket (single-cup or pot), setting the switch for cup or carafe, filling the water reservoir, and placing the cup or carafe under the basket. From there, you use the touch controls to select your settings, and touch the brew button to begin. A countdown timer shows how long before your brew is ready to drink. Interestingly, it also keeps track of how much time has elapsed after your brew is finished, and reminds you to empty the grounds from the basket. This felt like the machine was nagging me, but at least you can’t blame GE if you come back and find mold growing in your basket!
Let’s talk about the settings for a moment. The Café Grind and Brew puts you in complete control of the brewing process, allowing you to select the brew size, temperature, strength and bloom time. I haven’t seen the bloom setting on many other coffee makers, and I think it may be called other things, but the idea is that by exposing the fresh grounds to hot water, it allows the carbon dioxide to escape and the remaining water to fully absorb the flavor in the beans. This helps to counteract the slightly sour taste that can result from the carbon dioxide. It’s a nice touch.
As you might expect, being able to brew coffee immediately after grinding results in the freshest coffee. This machine features a removeable burr grinder, and you can turn off the grinder if you happen to have some coffee that’s already ground. When we first loaded up the bean hopper, we realized that our beans were pretty old, and therefore not very tasty. Unfortunately, there’s no easy way to get the beans out if you want to switch to another flavor. We vacuumed out as many as we could and then made some throwaway coffee to grind up the rest. It would have been nice to have a way to completely empty the hopper, but that’s probably not something you’d need very often. You can choose how coarse you want your grind, and it’s impressive that the machine grinds just enough for whatever size cup you’ve chosen, but it does not sense when the beans are gone, in which case it’ll grind up some air for you. The included carafe is insulated, and kept coffee as hot as when it was brewed for almost 2 hours.
The Café Grind and Brew works with GE’s Smart Home app, and it works well. The app quickly recognized the coffee maker and immediately paired. The app allows you to control the coffee maker remotely, choosing all the same settings you can choose on the machine itself. If you get in the habit of filling the machine with beans, water, and a ready cup or carafe, you can use the app to start the brew from your phone before you get out of bed. You can also program it to start at a particular time, but that kind of thing has been available for years, so the app is more fun. We had the machine ready to go when guests arrived. We met them outside and offered to brew a cup of coffee for them, which we then started from the app. By the time we went inside, the coffee was almost ready.
Overall, this is a great machine, and we’re looking forward to trying different kinds of beans to really see what works best. It produces coffee that tastes fresher than what we’ve been accustomed to with pods or grounds, and it gives you the ability to tweak the brew settings as much as you like. There are many competitors on the market, at a variety of price points, so if you’re in the market, compare the flexibility, design and build quality of the Café Grind and Brew with those others, and I think you’ll find this to be a worthy competitor.
I would recommend this to a friend!
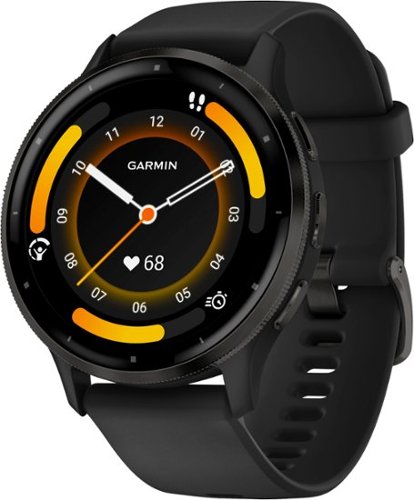
Know the real you with the Venu 3 smartwatch, the ultimate on-wrist coach designed to support your goals ~ whatever they may be. Featuring a bright, colorful display and up to 14 days of battery life, this GPS smartwatch is purpose-built with advanced health and fitness features to help you better understand your body. Body~Battery energy monitoring helps you keep your energy levels in check with personalized insights based on sleep, naps, stress, workouts and more. Improve the quality of your sleep with personalized sleep coaching and nap detection plus even more details such as HRV status (data presented is intended to be a close estimation of metrics tracked). During the day, switch up your activities with animated workouts and more than 30 built-in sports apps ~ including for active wheelchair users ~ plus advanced training features to keep you going strong. With its built-in speaker and microphone, the Venu 3 smartwatch makes it easy to make and take calls right from your wrist when paired to your smartphone ~ and even reply to texts by using your phone~s voice assistant. Plus, enjoy connectivity features such as music storage, Garmin~Pay contactless payments (with a supported country and payment network) and more.
Customer Rating

4
Enough features for smartwatch and sports nuts
on September 25, 2023
Posted by: BobinVA
My first Garmin was the clunky Forerunner 305, which I still have and it still works! Since then, I’ve had other brands of GPS sports watches, as well as the Apple Watch. The new Garmin Venu 3 caught my eye, so I decided to upgrade my sports/smart watch. As a runner, I appreciate having physical buttons because they work better when wet, and the Venu offers the best of both worlds with physical buttons as well as a vibrant touch screen.
Inside the box, you get the watch, a proprietary charging cable, and some instructions. The watch is very lightweight, and the soft rubber band is comfortable and secure. Setup is pretty easy, and the accompanying Garmin Connect app guides you through the setup process. If you want to add additional apps to the watch, you must also get the Garmin Connect IQ app, which Garmin’s app store for their watches. Downloading apps (such as additional watch faces) is very easy, but that’s where the setup process seemed to grind to a halt. After trying to figure out why the apps were not installing to the watch, I figured out that I had joined the Venu to my guest wifi network, but my phone was on the main network. Setup didn’t warn me about this, and while I should’ve noticed this, it would have been nice if the setup process could have at least shown a message to remind me. Once I noticed that, it went a lot more smoothly, and I was able to finish the process.
The Venu 3 has a beautiful AMOLED touchscreen and 3 physical buttons. I have the 45mm size, and I love the big screen which is very easy to see. The buttons are sufficient for tracking activities, but for non-sports activities, you’ll use the touch screen. The button functions are well laid-out, but it does take some exploration to figure out how everything works. Even though I’ve had the watch for a week and have been using it every day, I still haven’t discovered where everything is located within the menu structure. I do wish the buttons provided a little more tactile feedback than they do. Of the 3 buttons, the top and bottom buttons are pretty good, but the middle button has a smaller profile than the other two, and as a result it seems a little harder to reliably press it. Perhaps this is by design, but I’m not sure. Holding that button down invokes the voice assistant, so maybe this behavior is designed to prevent accidental presses. Hopefully this isn’t a harbinger of the future reliability of the buttons.
The Venu 3 has a beautiful AMOLED touchscreen and 3 physical buttons. I have the 45mm size, and I love the big screen which is very easy to see. The buttons are sufficient for tracking activities, but for non-sports activities, you’ll use the touch screen. The button functions are well laid-out, but it does take some exploration to figure out how everything works. Even though I’ve had the watch for a week and have been using it every day, I still haven’t discovered where everything is located within the menu structure. I do wish the buttons provided a little more tactile feedback than they do. Of the 3 buttons, the top and bottom buttons are pretty good, but the middle button has a smaller profile than the other two, and as a result it seems a little harder to reliably press it. Perhaps this is by design, but I’m not sure. Holding that button down invokes the voice assistant, so maybe this behavior is designed to prevent accidental presses. Hopefully this isn’t a harbinger of the future reliability of the buttons.
Using the watch for sports activities really couldn’t be easier. A press of the top button brings up the activity menu. Select your chosen sport, press the button again, then one more time to start tracking. GPS activation on this watch is quicker than on any other watch I’ve owned, which is fantastic. I’m able to pick up a signal in about 5 seconds, which means my running group no longer has to wait for me to get a signal before we can start the run. Choosing which stats to show on the face is easy, and I love that I’m able to do that from the watch itself, instead of having to go to the app for things like that. By default, the Venu 3 announces your lap time after each mile, but this is adjustable. I mostly only use the watch for running, walking, biking and indoor biking, but I’m glad to know it can handle other activities as well.
The Venu does a great job of making information easily available. Swiping up from the bottom brings up the “glances” screen, with a big list of things like steps, heart rate, intensity minutes, sleep coaching, etc. Pressing on any of these brings up a full screen with more details, or you can go to the app on the phone for even more. This is a great feature and makes it easy to find what you want. Garmin offers a lot of widgets that you can download, so that’s an area for me to explore later.
Garmin advertises battery life of 14 days when the screen is only on when you raise your wrist, or 5 days if you put it into “always on” mode. I’m not sure if that’s accurate, since I didn’t experience this myself, but I wonder if I used up more battery because of initial setup and downloading of music (more on that later). After getting everything set up and using the watch every day for a 40-minute run, I got about 6-7 days of battery life. Even that is better than anything I’ve used before, and allows me, for the first time, to be able to wear the watch at night for sleep tracking. Garmin includes a morning report to get your stats from the night before, and a sleep coach tracks your sleep, including naps. This is a pretty nice feature, and provides insight into your overall sleep patterns and their impact on your health. It’ll also suggest how much sleep you need, adding more after an especially strenuous day or reducing it after a restful day. Garmin also has something it calls a “body battery”, where it calculates an overall rating that is the net of things that recharge your body (like sleep) and those that deplete your body (like vigorous exercise). You can find out each data point that went into this calculation to get an idea of your overall energy status.
Garmin watches always excel at sports tracking, and the Venu 3 is no exception. But, can it take the place of your smart watch? The Venu has a legit speaker and microphone, allowing to place and receive calls using just your watch (assuming your phone is nearby). While you won’t want to take a long call this way, it’s just fine for a quick call when your phone is too far away to reach it, and callers said I sounded just fine.
Garmin watches always excel at sports tracking, and the Venu 3 is no exception. But, can it take the place of your smart watch? The Venu has a legit speaker and microphone, allowing to place and receive calls using just your watch (assuming your phone is nearby). While you won’t want to take a long call this way, it’s just fine for a quick call when your phone is too far away to reach it, and callers said I sounded just fine.
The Venu also supports onboard music, meaning you can leave your phone behind and still have some tunes with you. Old school MP3s may be loaded, or you can use a supported music service such as Amazon Prime Music or Spotify. For Spotify, a subscription is required before you can load music, so I didn’t try that one. Instead, I tried out Prime Music. As a Basic subscriber, I was only offered a preselected set of all-access playlists, which is very easy, but what if I’m not in the mood for their options? Downloading the music was easy enough, but does take some time. Also, I could see the battery strength declining as the songs were copied over, so I guess that’s a power-hungry operation. It’s a really nice option to have, but it’s probably easier just to take your phone with you. You can also control playback of the music on your phone, but you have to bring up the playback interface manually after the music starts playing on the phone.
The Venu 3 supports the ability to read text messages as they come in, but there’s no way to reply to them in iOS, due to some Apple restriction. I was used to doing that on my Apple Watch, so it’s a bummer to not be able to do that. The Venu also supports the ability to get notifications from all the apps, and you can select which ones to turn off. One of my most-used features on previous watches is the ability to instantly check the temperature outside, and I can do that on the Venu as well, and also get a full-blown forecast for the week ahead.
I think I’m going to be learning things about this watch for some time to come, but I really like it, and it’s a very capable watch, whether you’re exercising or not. The only thing I miss from my Apple Watch is the ability respond to text messages on the watch, but it’s offset by the great battery life and physical buttons for use during sports. The overall health reporting is top notch, with plenty of details for the statistics lovers. I’ve been using it as my main watch since I got it, and I really don’t miss my regular smart watch—I don’t think you will either.
I would recommend this to a friend!
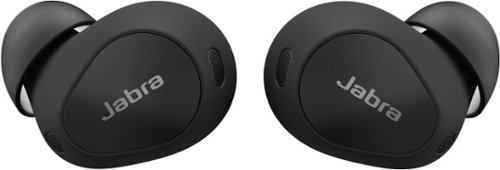
Jabra~s Elite 10 true wireless advanced earbuds for work and life. For the first time, revolutionary Jabra ComfortFit technology has been combined with Spatial Sound and Dolby Head Tracking, for a more immersive Dolby Atmos experience to create the clear-sounding earbuds that you can comfortably wear all day. Complete with 10mm speakers, you can immerse yourself in rich, life-like sound that puts you right inside your favorite tracks. We scanned over 62k ears to create our unique oval EarGels that sculpt to every ear shape, and a semi-open design that relieves any pressure. Unwanted background noise will be blocked by our Active Noise Cancellation even in challenging environments, and you can connect the earbuds to two devices at once for super simple switching between phone and PC. Time to comfortably sink into mind-blowing sound. Don~t get caught without charge again with up to 36 hours (ANC off) of battery life that lasts throughout the day. When your buds run out of juice, simply pop them into the wireless charging case for a fast charge of 1 hour worth of battery in 5 mins. Ready to support Low Energy Audio. Stream pristine audio to multiple pairs of earbuds for easy sharing or tune into public broadcasts.
Customer Rating

5
Even better sound than the 85t!
on September 19, 2023
Posted by: BobinVA
Since getting Jabra’s 85t earbuds in 2020, they’ve remained at the top of my list for in-ear wireless earbuds. While I’ve tried a number of competitors, I keep coming back to Jabra for 3 core reasons: comfort, sound quality, and functionality. A key reason they are so comfortable is the use of oval ear gels, which prevent them from completely sealing off the ear canal and creating a feeling that is caused by occlusion, which is the blockage of the ear canal. Most earbuds rely on a good seal to produce deep bass, but Jabra went a different route for the 85t, and I love it, but while I loved it, I was concerned that this would be a “one and done”. Not to worry, the new Elite 10 brings back all that was good about the 85t, and then makes them better.
Initial pairing is super easy, although my left earbud was completely discharged when it arrived, requiring me to charge the buds before I could get started. Even as simple as Jabra makes pairing, it took a few tries before it actually worked. Initially, only one or the other of the buds would pair, but after a few tries I got both paired up and they’ve been good to go ever since. Oddly enough (I’m not making this up), the earbuds disconnected and reconnected while typing this!
As an 85t fan, I’ve loved the sound quality of those earbuds, especially using AAC on an iPhone. Jabra’s marketing touted improved sound, so I was excited to find out if that would be true. Sound quality is a very subjective thing, but to my ear, the Elite 10 earbuds really do sound much better. The soundstage seems wider, and the overall tone is crisper, with sharper highs and more defined mids. The bass is as good as ever—solid, but not muddy, and not the pounding bass that you find on some of the more bass-heavy earbuds. The Elite 10 has a balanced sound with just enough focus on the highs to make the overall experience much better than before.
One of the big new features this time around is Spatial Sound with Dolby Head Tracking, courtesy of Dolby Atmos. I’ve seen several professional reviewers raving about this, so I was really looking forward to experiencing it for myself. I even found songs that were remastered in spatial audio to test out this new feature. The idea is that you’re supposed to feel like you’re in the middle of the sound, with notes coming at you from all directions. With spatial sound turned on, it did feel a little like the sound was in front and to the sides of me, but not decidedly so. It made sounds seem more distant, not as loud, and maybe even with a little less definition. With head tracking on, turning my head to the right made most of the sound shift to my left year, and the reverse was also true. I’m not sure why that’s a good thing. Why do I want to pretend like the sound source is directly in front of me? This only made me want to keep my head still. Ultimately, I didn’t like the compromises required of these features, so I’ve turned them both off for now.
If you’re going to take advantage of spatial sound, make sure you’re using the latest version of the app on your phone. Since I already own 2 other pairs of Jabra earbuds, I have the Sound+ app. I assumed that this would seamlessly welcome the addition of the Elite 10s, but that was not the case. The ability to turn on/off spatial sound did not show up until I uninstalled and reinstalled the app. Keep that in mind before you lose time like I did trying to find the right setting in the app.
Do the Elite 10s have 2 times better ANC? Well, it might be 2 times better than Jabra standard ANC, but it’s not 2 times better than that found on the 85t. In fact, I could not find any difference from the ANC on the 85t.
Do the Elite 10s have 2 times better ANC? Well, it might be 2 times better than Jabra standard ANC, but it’s not 2 times better than that found on the 85t. In fact, I could not find any difference from the ANC on the 85t.
Jabra touts “comfortably better sound”, and this is probably my favorite feature of these earbuds. I’m a big fan of the oval ear gels, as I said above, and these are truly the most comfortable earbuds I’ve ever worn. Jabra continues to utilize physical buttons as opposed to touch-sensitive, and I’m glad. Physical buttons can be used with gloves, and accidental presses are almost nonexistent. I was pleased to find that the latest versions of the buttons are a bit more sensitive (in a good way), but still not overly sensitive.
Call quality is on par with previous versions, although some reviewers have complained about the ANC not being very effective during calls. I found the ANC to be more than adequate for my needs, and my callers told me I sounded just fine. If you’re going to be making calls in noisy situations regularly, you may want to investigate this in further depth.
If you’re currently using the Elite 85t, should you upgrade? I’m pretty happy with the improvements in sound quality, and the new smaller size and coating make them feel premium. But ANC is virtually indistinguishable from the 85t, and the older model is very comfortable in its own right, and sounds very good as well. So, you’ll need to decide if those incremental improvements are worth $250. If you’re in the market for new earbuds, you can’t do much better than these, and I highly recommend them. In the end, we buy earbuds to listen to music, right? Listening to music on the Elite 10s is wonderful!
I would recommend this to a friend!
The Tablo 2-tuner, whole-home DVR ablo lets you watch, pause, and record TV for free~. Tablo connects to your TV antenna and your Wi-Fi to send live broadcast programming from ABC, NBC, FOX, CBS~, and more as well as a selection of 100+ free streaming channels~ to compatible smart devices - including smartphones, tablets, as well as smart TVs & streaming players from Roku, Amazon Fire TV, Apple TV, Android TV, Chromecast w/ Google TV, Samsung TV, LG TV, anywhere in your home.
Customer Rating

4
Finally, a DVR for OTA at a reasonable price
on September 7, 2023
Posted by: BobinVA
I’ve been a “cord cutter” for many years, and while I subscribe to several streaming services, I’ve always had to get my local channels over the air. I’ve tried devices that claim to let me utilize my antenna’s signal on all my devices and recorded OTA broadcasts, but these have always been big disappointments, and I’ve never kept any of them. Tablo has a new offering with an affordable price, so I decided to try again to see if the technology is good enough yet.
Setup should have been easy, and I thought it was going to be, but it definitely was not. The first step is to download the Tablo app for your phone. The latest Tablo hardware does not work with their legacy apps, so you’ll need to make sure you download the latest version. The Tablo quick start guide includes a QR code to take you right to it, and I suggest you use it. Next, the Tablo sets up its own local Wi-Fi network, just to allow you to connect to the device, since it doesn’t have a screen. Once connected, it will guide you through connecting the device to your home Wi-Fi network.
My first attempt at connecting to Wi-Fi seemed to work right away, but then suddenly it said it could not find the Wi-Fi network. No problem, I’ll just try again. Unfortunately, the device seemed to think it was connected to Wi-Fi (according to its lights), but it wasn’t, so it put me into a loop to try to manually connect. At this point, it was trying to get me to manually connect my phone to the internal Wi-Fi network of the device (back to step 1), but that Wi-Fi network was not actually running and couldn’t be found by the phone, so I was dead in the water. Multiple resets made no difference.
I talked to a very nice guy at tech support, but he wasn’t sure what to do either. He instructed me to try to connect and set up using an Ethernet connection and then switch to wifi. So, I tried that. Using a wired connection did allow me to set things up, but I still had the wifi problem. At that point, I got an idea: what if I held down the reset button for a longer time? I did that, and it triggered a hard reset, which is what I wanted all along! Turns out that a quick press of the reset button is a restart, not a reset. Now that I could redo the wifi setup again, it correctly connected and allowed me to set it up via wifi. Finally, I was in business!
Once the setup was complete, the next step is to connect an antenna and scan for channels. The positioning of the antenna matters here. One nice thing about using a device like the Tablo is that you aren’t constrained to keep it near the TV, since you’re using your home’s wifi signal and not the physical wire from the antenna. Mine picked up about 34 channels in the attic, but unfortunately the attic is too hot to leave it there, and here’s where I ran into a limitation that I’ve experienced with other devices like this: the device’s tuner is not as good as the tuner in the TV. In my normal spot, using my normal antenna (which gets all 34 channels), I could only get 6 channels. Obviously the old maxim is true here as well: location, location, location! After finding a suitable location in the house, I’m able to view my live channels on any device that can support the app. That means that instead of only being able to view my local channels on the TV where the reception is best, I can now view programming on my phone, tablet and any TV that has its own Roku, Fire Stick or Apple TV.
The heart of the Tablo system is the Tablo app, which uses a third-party channel guide to make it all work. One thing about this new 4th gen Tablo is that it includes the channel guide at no additional cost! I don’t have an older Tablo, but my understanding is that you have to have a subscription to get more than a day of guide information, but on this new one, it includes a week of guide info at no cost. It takes a few minutes for all of the guide data to load, but once it does, you can select a show and then choose to watch it live or record it. The guide is nicely laid out, and it was very intuitive to use. It includes a Home Screen which highlights some of the top upcoming shows, and this is very nice, as it brings a modern touch to your OTA channels.
I did experience a small glitch with the guide. All the channels except one loaded up without issue, but no guide information was included for my local CBS affiliate. Without the guide information, you really don’t have that channel, as you cannot select any programs for viewing or recording. The app on my phone did allow me to watch that channel live, but not the Roku app. I worked with tech support via email, and I must say that they were very responsive and great to work with. It took a few days, but they finally got the situation resolved, and now my Tablo is fully working.
What about recording? The Tablo comes with 128 GB of storage built in, which the company says will provide up to 50 hours of recording. With the guide, it’s easy to select a show for recording and not have to put in start/stop times like an old-fashioned VCR. The user interface is nice, and fast-forwarding is easy and better than any of the DVRs that I have on my streaming services. Recording and watching recorded content was easy and flawless, and I’m really enjoying finally being able to record network TV broadcasts.
Tablo also includes a good selection of free TV channels, and this is a nice touch. These channels are often included in smart TV packages, but it’s nice to have them here, and with the ability to record. While it’s not perfect, I really like the Tablo app. It does have some quirks, especially the Roku version, but hopefully these will smooth out over time with future updates. One thing to be aware of is that this version does not support viewing your content outside of your home. I think older versions support that, but it doesn’t work for this one. That’s probably a decision that was made to differentiate the different models. I’m not bothered by that, but it’s good to know about this up front.
I’m very pleased with my new Tablo, and looking forward especially to being able to record live sporting events, which I haven’t been able to do for years. It’s a nice solution, and best of all, it works! I’m deducting a star for the setup experience, which definitely could have been better. I’m a “techie” person, so I’m willing to put up with troubleshooting problems, but I can see how many people would just box it up and return it. A more in-depth installation guide might have helped here, especially explaining the difference between a single press and a long press of the reset button.
At $99, this is a great way to enhance and extend your local stations. It doesn’t have all the bells and whistles of the higher-priced legacy models, but if you don’t need those things, this will work just fine.
I would recommend this to a friend!
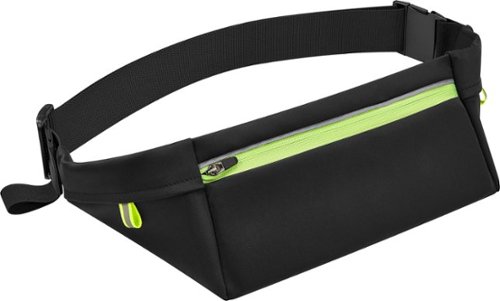
Don~t sacrifice contact with your family or friends when you~re walking or jogging ~ try the Insignia NS-RNGBLT Running Belt for Phone Screens up to 7". This belt keeps your phone and other items within reach, freeing up your hands. The belt has a zippered main pocket and two side pockets to provide plenty of storage options. It keeps your keys securely in place with an interior hook, and reflective trim helps you to stay visible even in the dark. A fully adjustable strap offers a comfortable fit. Don~t leave the house without your phone and this Insignia running belt.
Customer Rating

4
Well-built protection for running with your phone
on July 25, 2023
Posted by: BobinVA
During my years of running, I’ve come to appreciate a running belt for taking my phone with me, as opposed to arm bands or other solutions. That’s because a running belt holds the phone securely without constantly reminding you that it’s there. I’ve used a number of cheaper belts like this, but I decided it was time to try out a nicer one, which is where this Insignia belt comes in.
The belt is black with neon green and yellow accents, and a few stripes of reflective tape. It’s made of a slightly stretchy nylon material on the outside, and the inside is lined with a slick coating that would seem to provide some water resistance. Although Best Buy says it’s not water resistant, I found that the interior coating protected my phone from getting wet from my sweat while I ran. Looking at its construction, I’m not sure how well it would do in a rainstorm, but I think it would provide at least enough protection to get out of the rain.
The belt has a large main pocket to accommodate phones up to 7 inches. It was plenty big enough for my iPhone 12 in a case. What’s nice about this belt is that it also has separate compartments to allow you to carry other things. On each side of the phone pocket are compartments for things like keys other little items you may want to have with you. One of these pockets also features an integrated clip to hold your key in place, and this is a nice touch. There are also 2 slim pockets behind the phone compartment that could be used to keep folded money if you like.
The Insignia Running Belt is well-made and held my phone in place without bouncing while I ran—this is what’s most important to me. Adjusting the belt’s sizing is easy to do, with an integrated finger loop included. The only area that concerned me was the belt’s clip. It feels pretty solid, but the plastic is thin, causing me to wonder about its long-term strength. Time will tell, and perhaps the thinner plastic will prove to be more comfortable than something thicker. Overall, this is a nicer belt than others I’ve used. If you’re looking for something to hold your phone without bouncing around to annoy you during your run, this is a good choice. If you need something fully waterproof, you’ll need to look elsewhere.
I would recommend this to a friend!
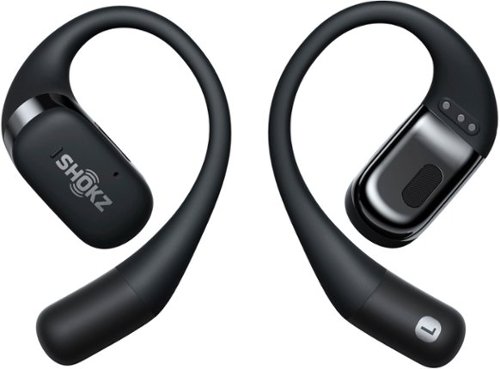
OpenFit continues the Shokz open-ear concept to let users enjoy all-day comfort and hear their own soundtrack while staying open to the world around them. OpenFit offers an ultra-lightweight, open-ear construction to hear both your own audio and every sound around you with crystal clarity. DirectPitch technology produces a full audio experience to immerse yourself in your favorite songs, podcasts, and audiobooks. A flexible ear hook design combines stability and comfort. Moments are precious, and OpenFit gives you the freedom to hear every one of them.
Customer Rating

4
The evolution of open-ear listening
on July 4, 2023
Posted by: BobinVA
I’m a big fan of Shokz headphones—this is my fifth pair, so I’m definitely on board. If you know Shockz (formerly Aftershokz), then you know that they made a name for themselves producing high-quality bone-conduction headphones. These allow you to keep your ear canals free so that you don’t lose touch with your surroundings—as a runner and biker, this is especially important to me for safety reasons. It’s always been a given that I would have to give up sound quality for special awareness, and I didn’t mind that, but always wished the sound quality could be better. Don’t get me wrong, Shokz has improved the sound quality of their bone-conduction headphones with each release, enough that I’ve traded up several times, but they were never the headphones I’d choose if I just wanted to shut out the world and enjoy my music. The Openfit earbuds are their attempt to bridge the gap and bring serious sound quality to open ear headphones.
Normally, my top two criteria for evaluating earbuds/headphones are comfort and sound quality. All the features in the world don’t matter if they sound bad or if you won’t wear them because they’re uncomfortable. One of the best things about bone-conduction headphones is their comfort. You can literally wear them for hours and not even know they’re there. I have a lot of earbuds, some of which are pretty comfortable, but even the best of them are fatiguing after a while, plus I just don’t like having something in my ears that long. Even with recent technology additions like “hear through”, it’s just not practical to have buds in my ears all day. As I’ve already said, bone-conduction headphones don’t win in the sound quality category, but the ability to maintain situational awareness has always trumped that for me, so I’ve stayed with them.
The latest offering from Shokz is the Openfit. These are their first true wireless earbuds. They’re not bone-conduction, but they are still open ear earbuds, meaning that they don’t sit in the ear canal like regular earbuds. Instead, they utilize hooks that go around your ear (called Dolphin Arc hooks), with tiny speakers sitting right inside your ears, directing sound into the ear canals. The hooks are amazingly secure, and I did not manage to dislodge them shaking my head, running, or bending all the way over. In addition, they’re super comfortable, covered in a substance Shokz calls “liquid silicone”. It is very soft and adapts to the size of your ear, making them comfortable enough to wear for hours on end without fatigue. They even work well with glasses, which is something I was worried about. Out of the box, I wore them for 3 hours straight with only a little “tiredness” on the backs of my ears, but that may have actually been due to the combination of the earbuds and my glasses. These may be the first earbuds I really could wear all day, but I haven’t gone that far yet.
Pairing them with your phone the first time is very easy, as they go into pairing mode when you take them out of their compact charging case, which features USB-C charging, but not wireless charging. Strangely, Openfit does not support multipoint pairing like their other headphones do, so you’ll have to delete the pairing with your phone and then pair them with another device if you want to use them with something else. This is a minorly annoying oversight, given that Shokz knows how to do this.
So, the Openfit check the comfort box, but how good do they sound? I paired them right out of the box and started listening. I used my normal music app, which features customizable EQ. They sounded good, but didn’t wow me. I decided to try the app to see if it had any additional magic to add. When the app started up, my music was still playing, but it asked if I wanted to update the firmware, which I did. When the update finished, I picked some EQ settings in the app, and wow! What a difference! I’m not sure whether the app or the update (or both) did the trick, but it really made the Openfit sound great! They aren’t going to cause you to stop using your studio-quality IEMs, but these have sound that bone-conduction can only dream of! Highs are crisp, mids are clean, and bass is good but not great (need to leave some room for improvement). Other reviewers have mentioned how some bass sounds, particularly kick drums, don’t sound quite right, and I agree. I liken the sound to what I would get when my speakers got too old and the foam would dry rot, leaving the cones to vibrate without any dampening. It’s like that, although not exactly and not all the time. I’m hoping that Shokz will be able to fix this with a firmware update in the future. Overall, though, these sound really great, and I’m willing to trade a little sound quality for the ability to comfortably wear them as long as I want and still maintain situational awareness.
Call quality is great, and my wife, who usually complains about earbud call quality, said I sounded great. She couldn’t tell I was talking to her via earbuds. Speaking of calls, it would be nice if there were a way to mute myself during calls, but this is not available.
The touch controls are very good, once you get used to the angle of the earbuds in your ears. Unfortunately, your choices on how to use them are somewhat limited. By default, you can double-tap to play/pause your music or podcast. Long pressing on the right bud will skip to the next track, while the left will go to the previous track. There are a few other configuration choices in the app, but you can’t have the ability to control the volume, track skipping and voice assistant together at the same time, nor can you choose which side you want for things like voice assistant. Hopefully, Shokz will add more options in the future.
I really do think Shokz has hit their goal with the Openfit. They’ve got an IP54 rating for water and dust resistance, which should mean they’re fine for running and workouts, but I wouldn’t submerge them. Speaking of workouts, one of the annoying things about bone-conduction headphones is that the headband on the back of your head would push the buds out of place if you laid your head on a bench. Not so with the Openfit, since there is no headband to contend with.
If you’ve already got a pair of bone-conduction headphones, especially the OpenRun or OpenRun Pro, you may not need these unless the sound quality or other features are calling to you. I’m deducting a star for the issue with bass sounds and lack of multipoint pairing, but I hope that both of these will be corrected in the future. The Openfit are perhaps the best all-around earbuds on the market today, and for most things, they’ll be my new go-to earbuds. They’re a bit pricey right now, but hopefully that will come down over time as well. If you’re trying to decide if you should get these, it comes down to your specific use cases. If you value situational awareness and are willing to trade some sound quality to get it, these are the best combination of those two things. If your main use case is sitting down to lose yourself in the music, but you want to run while listening to podcasts now and then, you might be happier with traditional earbuds. There are so many different choices these days, but I think Shokz has a winner on their hands with the Openfit. I’ll be using these alternately with my OpenRun headphones to see which I prefer over the long haul, and which version I’ll keep buying when the time comes.
I would recommend this to a friend!
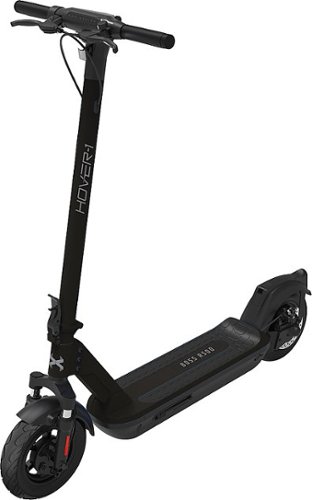
With its advanced dual front and rear suspension and 10~ honeycomb tires, the Hover-1 Boss electric scooter delivers a remarkably smooth ride to maximize your comfort. Boss~s 500W brushless motor propels it to 20 mph and the rechargeable lithium-ion battery gets up to 24 miles of range on a single charge. The premium LED display is easy to read and shows the Boss~s current speed, speed mode, battery level, odometer, and more. Keep your Boss safe from theft with the remote lock security feature via the Hover-1 E-Mobility app. Simply press the ~Lock~ key in the app, and the throttle will not engage until you unlock it. If your Boss is locked but you want to grant access to a friend or family member remotely, you can do that too! Take control of your commute or your weekend getaway with the Hover-1 Boss.
Customer Rating

4
Great looking scooter with a premium build
on June 21, 2023
Posted by: BobinVA
Electric scooters have suddenly become a big thing. In our town, electric scooters by Bird are scattered all over the place, and I’m often passed by them as I run on our “rails to trails” bike path. Recently, I saw some guys zipping down one of the roads downtown, and I thought it looked like fun, so I took the leap and got the Hover-1 Pro Boss R500. I didn’t do a lot of research into the many models of electric scooters available today, but when this one became available to me as a member of the Best Buy Technical Insiders program, I jumped at the chance to pick one up.
The R500 arrived in a very nice-looking box and was well protected inside. The scooter is almost fully assembled, with the exception of putting the handlebar assembly into the steering column. This is done by pushing the wiring into the column and inserting the handlebar assembly, then fastening it with the included screws. Hover-1 does include a pair of hex keys for this purpose, but I found it much easier to use my own hex tool so that I could get more torque. After tightening the 4 screws (extras included), I was ready to go.
The R500 is a very nice-looking scooter, with a matte black finish and silver/white lettering on the model I got. It has a maximum weight capacity of 264 lbs, which thankfully leaves me with plenty of room to spare. The 10-inch wheels are very solid and feature a disc brake in the rear, and I think maybe a drum brake in the front. There’s an LED front headlight and a red taillight in back. At the head of the steering column is the LED display, which includes the odometer, speedometer, mode, and battery meter. All of this is controlled by the single power button, by which multiple presses allow you to control things like lights, cruise control, etc.
The steering column folds down and locks in place with a hook so you can pick it up and carry it. Carrying is certainly possible, but you won’t want to do that for long, as the R500 weighs in at 47 pounds. I suppose that’s partly due to the size of the battery, since the R500 has a stated range of up to 24 miles and a top speed of 20 mph. There are 4 modes, selectable by toggling the power button:
• Pedestrian mode (0-3 mph)
• Eco mode (0-9 mph)
• Drive mode (0-15 mph)
• Sport mode (0-20 mph)
• Pedestrian mode (0-3 mph)
• Eco mode (0-9 mph)
• Drive mode (0-15 mph)
• Sport mode (0-20 mph)
Out of the box, you are not able to start the scooter by simply pressing the throttle. That’s because the R500 is designed to accelerate only after you’ve kick-started it moving like you would on a non-motorized scooter. This is for safety reasons, but you can turn this off in the app (more on the app in a moment). The R500 features a powerful 500W motor, and you can really feel it. I had plenty of power to go right up the small hill near my house, and it was easy to reach 20 mph on a flat road. You can still feel the bumps, but it’s a pretty smooth ride, and it’s easy to forget that you’re actually going 20 miles per hour. If you want to lock in your speed, you can turn on cruise control and save your thumb from having to hold the throttle down constantly. For riding at night, the light provides plenty of illumination, but I would have liked for Hover-1 to include a better LED headlight. Nonetheless, it gets the job done, and oncoming traffic can easily see you coming. The brakes are responsive without being twitchy, and I never felt like I was going to be thrown off the scooter in a sudden stop.
Hover-1 also provides a smart phone app. The app allows you to control all of the functions that you can control on the LED display, and even a little more, such as turning on the front and rear lights independently or enabling “throttle to start”. The most important function of the app, in my opinion, is the ability to lock the scooter. This would prevent someone from just jumping on it and taking off, but of course you’ll need a lock to prevent someone from picking it up. A nice feature is that the app alerts you if the scooter is moved while still locked, which would presumably indicate someone is attempting to steal it. I was amused when the app told me that my car was moving. Depending on how you’re using the scooter, I guess it could be your car!
Whie I’ve only had the R500 for several days, I’m very pleased with it so far. It’s easy to just hop on the scooter and take off, and it’s a very pleasant way to navigate a town. It’s deceptively fast, and has plenty of power for going up a small grade. It has shock absorbers for both front and rear, making for a smooth ride, although I don’t think I’d recommend any off-roading on this one. For urban commuting or joy-riding, I think the R500 is more than up to the challenge. The key with things like this is longevity, so if the R500 can stand the test of time, I’ve got a winner!
I would recommend this to a friend!
Officially licensed for the PlayStation5 console, the WD_BLACK SN850P NVMe SSD for PS5 consoles allows you to store more titles with worry free installation. Instantly add up to 4TB of storage to hold more of your favorite games. With an optimized heatsink built specifically for the PS5 M.2 slot, you won~t need to worry about compatibility. Experience uninterrupted gameplay as your WD_BLACK drive runs cool with quality you can trust. The WD_BLACK SN850P NVMe SSD for PS5 consoles is certified and tested for PlayStation 5 consoles so you can store more, play more, fast.
Customer Rating

5
Fast storage with a built-in heatsink
on June 17, 2023
Posted by: BobinVA
In case you haven’t noticed, games have gotten enormous! With digital distribution of games, publishers are no longer limited to the space on a DVD or Blu Ray, so it’s not uncommon to find games that require upwards of 100 GB! Because of this trend, the internal storage on my PS5 was almost full and I had to do something about it.
The WD_Black 1TB SSD offers a cost-effective way to expand the storage of a PS5. For only $20 more than the previous version of this drive, you get double the storage. There’s also a 2 TB version, but I got the 1 TB version. Having used M2.SSDs with my laptop in an external enclosure, I know how hot they can get, which is why I was happy to learn that this one from Western Digital includes a built-in heat sink that is small enough to fit into the space available in the PS5. Installing it was simple: slide off the side of the PS5, plug in the SSD, then use the screw and spacer already inside the PS5 and you’re good to go!
Upon starting up the PS5 after installing my new storage, the PS5 lets you know that you need to format the drive. This took only a few seconds, after which time the storage was available. I’m happy to report that the full 1 TB of space was available, and there were no “free trials” or other sort of bloatware on the drive (probably a “feature” of having to format the drive before use).
While I don’t have the ability to measure performance, I could not notice any difference in speed compared to the internal console storage. I moved several games to the new storage to free up space on the console. Note that even when you move a large game to the SSD, some game data (such as saved games, etc.) must stay in console storage. Moving gigabytes of game assets took just a few seconds. I also compared the performance of downloading new games to both internal storage and the SN850P, and I could see no difference in the time it took to download massive game files. Sony gives you the option to download all future games to the SSD, which is a convenient option. It’s great that the PS5 handles the additional storage so nimbly and easily.
I’m super happy with the expanded storage, and it couldn’t have been easier to add it and start using it. If you’re running short on space, the SN850P is a great option, providing tons of additional storage at a reasonable price. The built-in heatsink means you can capitalize on all that extra space without having to worry about it running too hot and jeopardizing your game files. Plus, it has the official Sony PlayStation branding, which tells you that Western Digital worked closely with Sony to make sure it’ll work seamlessly with your PS5. Now to get some of those games I’ve been hearing about…
I would recommend this to a friend!
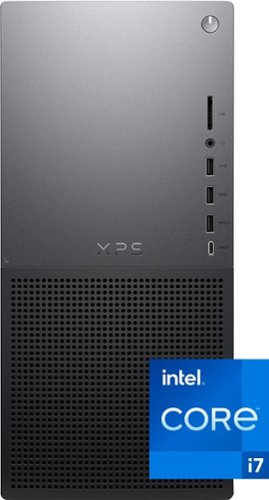
Achieve outstanding performance and expandability with the new Dell XPS 8960 Desktop. Built with powerful processors, memory and graphics, this desktop acheives maximum performance to support your tasks.
Customer Rating

4
Gaming-capable machine in a business suit
on June 6, 2023
Posted by: BobinVA
My trusty old Dell desktop computer was retired many years ago and we haven’t had a stationary desktop computer since then. Both my work and personal computers have been laptops for years, so why would I now get a desktop? I’ll mention my reasons (in case you’re searching for your own), and then I’ll share my experiences with this new entry from Dell.
Desktop computers have a few advantages that no laptop will ever match:
• Easier upgradeability
• Better thermal management
• Cheaper for the same performance
• Loads of ports
• Easier upgradeability
• Better thermal management
• Cheaper for the same performance
• Loads of ports
The tradeoff for all of this is that you go where the computer is, not the other way around. Is it worth it? That’s what I’m here to find out.
The Dell XPS 8960 is the latest upgrade to the previous XPS 8950. The version I’m reviewing features a 13th generation i7, 16GB of memory, and a discrete NVIDIA GeForce RTX 3050 video card. As someone who enjoys gaming but could not call myself a gamer, the Dell XPS 8960 gives me the opportunity to play all of the many games I’ve collected over the years but couldn’t always play, depending on my laptop hardware configurations. Games like NBA 2K21 ran flawlessly, and Civilization VI ran more smoothly than on any of my other machines. While I wouldn’t have expected any chess game to give a computer problems, Chess Ultra is a game that has proven very finicky on my laptops, but the 8960 ran it without a hitch. The 8960 is ostensibly a gaming machine, but it has understated “business” looks that appeal to gamers of all ages. For me, that allows it to fit into my home décor much more easily than it would if it featured clear side panels and colored LED fan lights. If you’re looking for that king of gaming machine, you won’t find it here.
Setup is pretty standard for a Windows machine. Bringing over my One Drive files was a breeze, as was getting setup in Edge and Office 365. Dell took an interesting approach to storage on this machine. It includes a 512 GB SSD, as well as a 2 TB hard drive spinning at 7200 rpm. This is a great solution that provides a super-fast SSD for boot-up and storage of processor-intensive programs while also giving you plenty of slightly slower storage with a 2 TB hard drive. I actually like having a real hard drive, since it’s still possible to recover from a catastrophic failure with a physical disk, which is not possible on a fully digital solution such as an SSD. The downside of Dell’s approach is that the SSD is relatively small if you want to take advantage of the faster performance by installing your games to the SSD. It’s been a while since I’ve actually had to think about more than one hard drive in a computer, so I was just installing games left and right without much thought. It wasn’t long before I was running out of space on the SSD and had to move some of the games to the hard drive. This gave me the opportunity to test the games on both the SSD and hard drive, and I’m happy to report that, while the hard drive was a bit slower, if you’re careful not to put your most intensive programs there, you’ll be fine. You’ll just have to do a little planning to decide what goes where. The nice thing is that there’s an empty slot you can use to add another SSD or even another hard drive if you want, so storage definitely won’t be a problem on this machine. The inside of the machine is pretty roomy, but its compact size makes it less spacious than a typical tower configuration. I like the size of the XPS 8960, as it makes it easier to incorporate into most rooms.
I mentioned the RTX graphics card earlier. This card features 4 Display Ports and 1 HDMI port. I know that DP may be the more popular option in the gaming world, but I would have preferred at least one more HDMI port. I also found that the USB-C port did not support display output natively, and this seems like an oversight to me. I could use an HDMI to USB-C adapter in that slot to add another monitor, but why doesn’t that port handle video on its own?
I mentioned the RTX graphics card earlier. This card features 4 Display Ports and 1 HDMI port. I know that DP may be the more popular option in the gaming world, but I would have preferred at least one more HDMI port. I also found that the USB-C port did not support display output natively, and this seems like an oversight to me. I could use an HDMI to USB-C adapter in that slot to add another monitor, but why doesn’t that port handle video on its own?
This is a pretty quiet computer, but when the fans kick in, they are pretty loud. They usually spin up when I’m putting a big load on the processors, and then spin down after a short time. It’s not so loud that it’s unbearable, but it’s definitely noticeable.
The system comes with a wired keyboard and mouse, which you’ll need to complete the initial setup. After that, I paired my Bluetooth keyboard and mouse, and put the wired versions away. The ones in the box are clearly not meant to be high-end peripherals, but they get the job done.
It’s not really a fair comparison, but I wanted to compare Geekbench results on this machine, to those I previously got on my Surface Book 3 a few years ago. The SB also has a discrete video card, but it’s not even in the conversation with the XPS 8960, as you would expect. The SB single-core score was 944 versus 2576 for the XPS. The multi-core score of 3255 for the Surface Book 3 was matched with a multi-core score of 15, 287 on the XPS. Without the thermal constraints of a laptop, Dell was able to give it a lot more power. Another piece of anecdotal evidence is the time it takes to create a passage guide using the Logos Bible software. A passage guide is basically pulling excerpts from your library on a particular topic or passage. The Surface Book 3 did this in 14 seconds, which is great, but the XPS 8960 handled it in 5.69 seconds! Running an Excel test consisting of 100,000 VLOOKUP formulas took an average of .05 seconds, compared with an average of 2.5 seconds on the Surface Book—50 times faster! Everything I did, from working with Office files, to compiling code in Visual Studio, to using Adobe Photoshop Elements, to playing games, worked flawlessly, smoothly and quickly.
The Dell XPX 8960 is causing me to shift my mindset back to my older way of thinking. I like the idea of having a desktop as a “home base”—a place where files can be stored to be shared, and which won’t carry the risk of being left behind in a hotel or taxi on my laptop. Plenty of storage means I can store more photos without having to worry about running out as soon, and there’s no program that I have to run with reduced settings due to performance issues. I’ve been working at home since the pandemic, and that means I have an office space set up all the time. Given that, it’s now much more practical to have a desktop computer in that space, running 24/7 and ready to go (although it did crash and reboot hours after I wrote this). If you’re going to do that, I highly recommend the XPS 8960 for that setup. It’s a great gaming machine for all but the most demanding gamers, but it’s also a more than capable business machine that can handle anything you can throw at it.
I would recommend this to a friend!
From simple tweaks to advanced artistic options and adjustments, it~s never been easier to create photos you~ll love to share. Bring motion to your photos with Adobe Sensei AI*, add peek-through overlays, and showcase your photos with new collage and slideshow templates. Plus, go beyond your desktop with new web and mobile companion apps (English-only beta), and enjoy faster installation and performance plus Apple M1 chip support. You~ll find all your photo essentials in this easy picture editor.
Customer Rating

4
Solid update, but you may not need it
on November 15, 2022
Posted by: BobinVA
Adobe has updated its Photoshop Elements software for 2023, and I decided to get this version. Like the yearly updates on other software packages, there aren’t always a lot of new additions each year, and thus I usually skip some of the upgrades, and maybe get the new version every other year. I think I must not have been thinking about that when I picked up the new 2023 version, as I’m currently using the 2022 version. So, this review will focus mainly on the differences between those versions. For those of you thinking about upgrading from the 2022 version, I hope this will be helpful. For those purchasing for the first time, your decision will be harder, since you have to compare Adobe’s offering to those from other companies, such as Luminar or Zoner Photo Studio or Paintshop Pro.
Photoshop Elements is aimed at photo hobbyists, those of us who need to make a few changes to our photos to make them look better, while Adobe targets more advanced photographers with their full Photoshop package or the online tools in their Creative Commons subscription suite. I’m not a fan of the subscription model, so I’m very happy that Adobe still offers Elements for a one-time reasonable purchase price. Photoshop Elements includes much of what you’ll find in the full Photoshop package, but at a much better price point and without a subscription. Whether you need the higher-end features is what you must determine.
Photoshop Elements 2023 retains the same look and feel as its predecessor. The main things added for this year’s version are:
• Add motion to pictures – this allows you to make part of your photo, such as ocean waves or a waterfall, look like it’s moving. The effect is pretty good, and this is a fun effect. This one is fun to put in an electronic photo frame that can handle video.
• Peek through overlay – adds a somewhat realistic foreground object, creating the illusion of depth. This is a pretty impressive and easy tool, but don’t expect particularly realistic results. If you’re shooting for something that could have actually been in the shot, you’ll find that the options are limited. Instead, I think this is more useful as a way to put a “frame” around your photo.
• Guided edit search – this is a deceptively useful tool. Suppose you’re not sure what guided edit you want, but you know you don’t want to do it manually. The new search tool allows you to use key words to find the one you want out of the 61 guided edits that are available. In my usage of this new tool, it often brought up several possible options, which caused me to try things out I might not have otherwise tried. This is a great way to learn more about the power of Elements. In my opinion, this may be the best new feature this year, as it helps you discover ways to apply an edit that you may not have thought of on your own.
I’m moving to shooting most of my shots in RAW, and this part of the program appears to be unchanged. The Camera Raw plugin lets you make some preliminary edits, but the heavy lifting is done in the Photoshope Elements editor. Elements has come a long way in allowing amateurs like me to make pretty sophisticated edits without a lot of work. That’s one of the things that I really like about Photoshop Elements: you can use powerful tools to make quick and easy (and impressive) changes, but you still have a full suite of very powerful, professional level editing tools at your disposal. This allows you to be in charge of how deep you want to go. I love that this is left up to the user, and not decided for you by software developers. Of course, you can’t do everything that the full Photoshop can do, but there is an awful lot that is available.
The new features are nice, but not compelling for those who are using the 2022 version. Unless you specifically need one of the new features, I think you can safely wait to see what the next version brings. For those who are diving into photo editing for the first time, you really can’t go wrong with Photoshop Elements, but it’s worth taking a look at the competition. My experience with other tools is that they offer similar feature sets, but usually try to rope you into a subscription if you want to do anything of a more advanced nature. Other tools may offer easier ways to do the most common edits, but there is a wealth of helpful information available for Photoshop, since it’s been around so long and has become the de facto standard.
In conclusion, I’m glad I picked up this version, and I’m enjoying the new features, but I don’t think I would have been too much worse off to have waited until next year. If you’re new to photo editing and willing to put in some effort, you’ll be happy with Photoshop Elements and the results you can get. If you have a recent version of Elements, you’ll need to weigh the value of the new features. Happy shooting!
I would recommend this to a friend!
BobinVA's Review Comments
BobinVA has not submitted comments on any reviews.
BobinVA's Questions
BobinVA has not submitted any questions.
Logitech Wireless Mouse M185. A simple, reliable mouse with plug-and-play wireless. You get the reliability of a cord with wireless convenience and freedom~fast data transmission and virtually no delays or dropouts. You~ll enjoy the high quality and reliability that have made Logitech the global leader for mice~plus a three-year limited hardware warranty. The tiny nano receiver works right away without software and is small enough to leave in your USB port so you won~t lose it. And on top of that, this comfy, contoured mouse treats your hand right.
Will this mouse work with a Lenovo Think Pad?
It should work, either using the Logi Bolt receiver that is included, or via Bluetooth.
3 years, 11 months ago
by
BobinVA
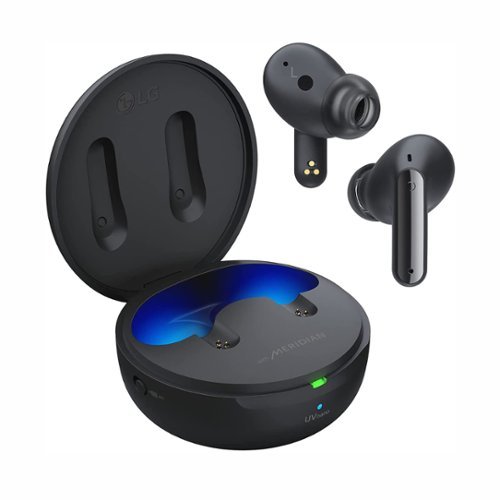
Free your travel with the LG TONE Free FP9. Connect to in-flight entertainment systems even without Bluetooth capabilities. Get peace of mind with a UVnano charging case that kills 99% of bacteria on the speaker mesh~ and medical grade ear gels.~ Plus, get better clarity for calls on the go.
How do I connect using the wire? I tried it on my computer using the manufacturer provided connection and it did not work. What do I do?
Make sure you move the switch on the charging case that enables wired mode to work. You may not have noticed that switch. Good luck!
4 years ago
by
BobinVA
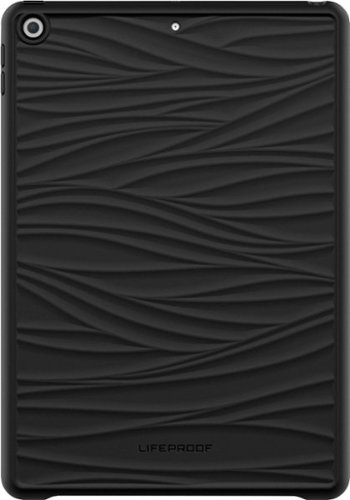
Serious protection. Subtle styling. Built sustainably. W~KE for Apple iPad (7th generation, 8th generation, and 9th generation) is a sea-change in case construction, using mostly ocean-based recycled plastic without sacrificing performance. Molded with a mellow wave pattern, the look is contemporary to the core. And after purchase, you get to donate a dollar to one of LifeProof~s water-conscious nonprofit partners ~ for free.
Does the screen protector come with the case?
Bring out your creativity to share your life stories. Adobe Sensei AI technology* and automated options do the heavy lifting so you can instantly turn photos into art, warp photos to fit any shape, and more. Add moving overlays or 3D camera motion to take your photos to a whole new level, and save them as MP4s for easy sharing on social. Grow your skills with 60 Guided Edits that step you through how to create perfect pet pics; extend, remove, or replace photo backgrounds; and more. Effortlessly organize your photos, and craft personalized creations like dynamic photo and video slideshows with all-new styles and inspirational quote graphics. Transform your favorite photos into gallery-quality wall art, beautiful prints, and unique keepsakes with the built-in prints and gifts service. ~And enjoy an updated look that makes the software even easier to use and navigate. *Adobe Sensei is the technology that powers intelligent features across all Adobe products to dramatically improve the design and delivery of digital experiences, using artificial intelligence and machine learning in a common framework.~FUJIFILM Prints & Gifts service is available in the U.S. only.
Gee - I don't want to pay monthly. So is it a lifetime license where you never have to pay again?
Yes, this is a perpetual license. Unless you can get enough value out of a subscription, it's not worth it. Since I don't edit photos enough to pay for a subscription, this is perfect for me.
4 years, 2 months ago
by
BobinVA
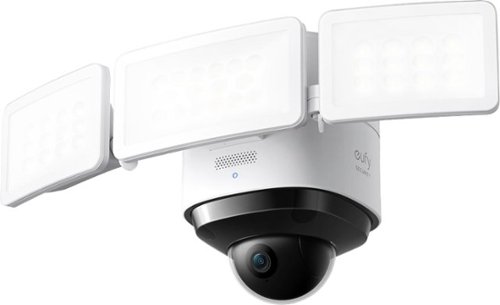
eufy Security Floodlight Cam 2 Pro provides 360~ pan and tilt camera coverage in 2K HD resolution. It boasts smart lighting, real time communication via 2-way audio, all with zero monthly fees. You don't even need a eufy Security HomeBase. This eufy Security Floodlight Cam 2 Pro is compatible with most smart devices and can be easily controlled through the eufy Security App. The floodlight can be installed either on the wall or on the ceiling. (Existing outdoor wiring and weatherproof junction box required.)
Can you turn on the light with an external switch?
No, the light switch needs to stay on at all times so that the unit has power, but you can manually control the light through the app.
4 years, 5 months ago
by
BobinVA
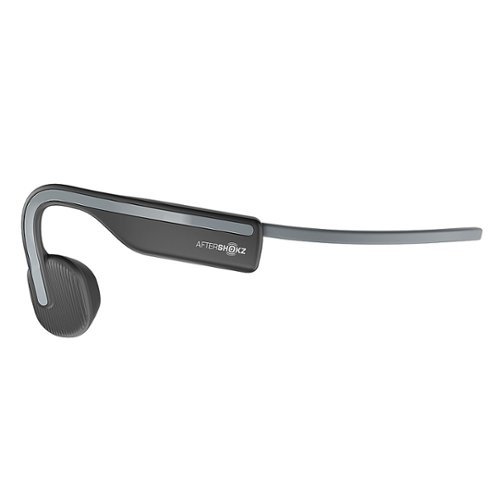
Inspired by athletes, designed for everyone. The AfterShokz OpenMove Open-Ear Lifestyle Headphones in Slate grey were created with versatility in mind. OpenMove by AfterShokz brings you bone conduction technology with a lightweight, titanium fit taht ensures all-day wear.
I’m cyclist and occasionally get caught in rain, can it survive?
Yes they can survive a downpour, just don't submerge them.
5 years ago
by
BobinVA
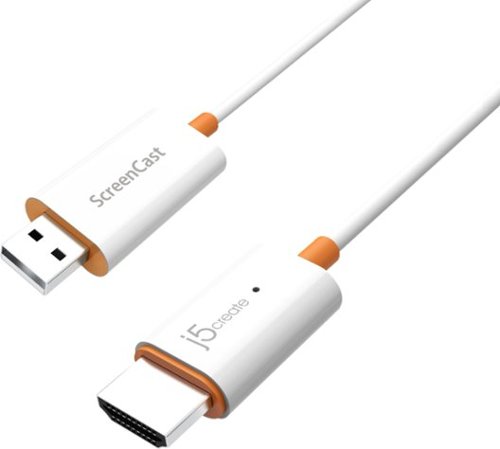
Wirelessly display content from a phone, tablet, or laptop onto a bigger screen with the ScreenCast Wireless Display Adapter. With its support of multiple wireless display standards (Miracast, AirPlay, and Chromecast), this wireless display adapter is compatible with devices and TVs you already own, including Windows, macOS, iOS, iPadOS, and Android operating systems. Perfect for home, travel, office, and more. The ScreenCast works with a wide variety of apps. Just connect and share!
Can this be used to stream Netflix/Amazon from MacBook Pro to Samsun smart tv?
Yes, it should work with any device that can join the wifi network created by the device. Keep in mind that not all video content is supported for screen casting.
5 years, 3 months ago
by
BobinVA
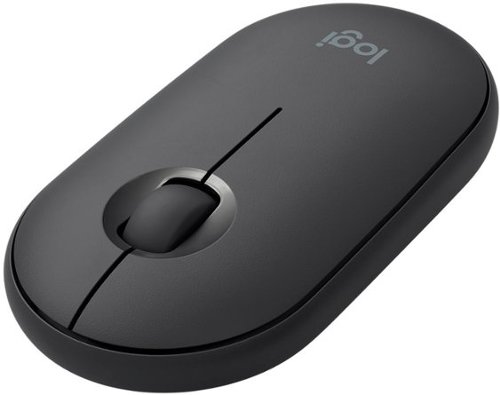
Meet the Logitech Pebble i345. It takes your iPad to higher places with a level of precision and control you can~t get with a tablet alone. Use it to click, scroll, and control your workflow like never before. It~s small, portable, and comfortable~so you can keep exploring, wherever you go.
I would just like to ask if I can use this mouse for an ipad air with an ios of 12.4?
It's just a bluetooth mouse, so I believe it will work on any device that supports bluetooth connectivity.
5 years, 8 months ago
by
BobinVA
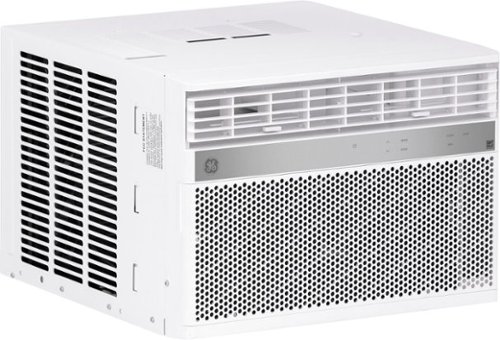
GE Appliances is dedicated to providing the right solutions for rooms of any size. Our window air conditioners are designed to offer exceptional comfort while remaining quiet, and our latest connected technology makes these products versatile and easy to use.This 8,000 BTU smart window air conditioner cools medium rooms up to 350 square feet. Energy efficient cooling with 3 cooling and 3 fan speeds provide flexible and optimal home comfort. Integration with the SmartHQ app allows you to monitor, schedule, and control your connected air conditioner from anywhere, or use the electronic controls with included remote to easily to adjust and manage your settings. This AC installs easily in a double hung window with included EZ Mount window kit and fixed chassis. Additional features like eco mode, power interruption restart, 24-hour on/off timer, and removable filter offer ease of use and maintenance.
Does this ait conditioner work with alexa?
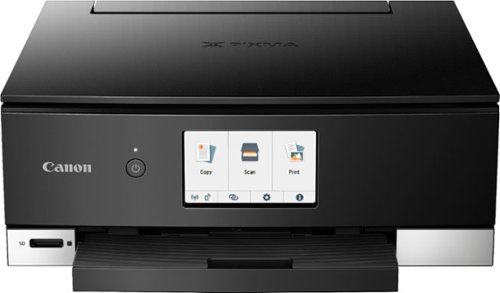
Obtain high-quality color prints with this Canon PIXMA wireless inkjet all-in-one printer. The 4.3-inch LCD touch-screen panel simplifies operation, while dual-band Wi-Fi connectivity and voice-activated printing provide enhanced efficiency and support a smooth workflow. This Canon PIXMA wireless inkjet all-in-one printer utilizes a six-ink system with a photo blue ink tank for brilliant results.Prints up to 15 ISO ipm* in black, up to 10 ipm* in color






![Adobe - Photoshop Elements 2022 - Windows [Digital]](https://pisces.bbystatic.com/prescaled/500/500/image2/BestBuy_US/images/products/6475/6475048_sd.jpg)
