ITJim
Top 100 Contributor
ITJim's Stats
- Review Count153
- Helpfulness Votes1,560
- First ReviewNovember 23, 2013
- Last ReviewMay 10, 2026
- Featured Reviews0
- Average Rating4.3
Reviews Comments
- Review Comment Count0
- Helpfulness Votes0
- First Review CommentNone
- Last Review CommentNone
- Featured Review Comments0
Questions
- Question Count0
- Helpfulness Votes0
- First QuestionNone
- Last QuestionNone
- Featured Questions0
- Answer Count17
- Helpfulness Votes31
- First AnswerNovember 23, 2013
- Last AnswerMay 22, 2021
- Featured Answers0
- Best Answers3
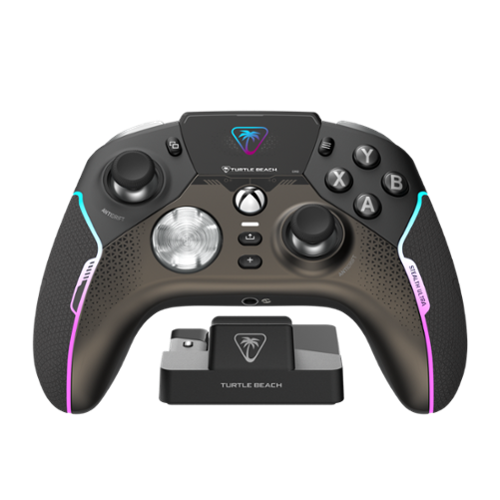
The New King of Control. The Turtle Beach Stealth Ultra high-performance wireless smart game controller with charge dock is built for gamers who demand the best. Lag-free wireless quickly connects to Xbox consoles, and Windows PCs, plus Bluetooth for Android devices & supported Smart TVs. Tactile microswitches throughout provide fast, reliable response and last up to 5X longer than standard buttons, while AntiDrift thumbsticks eliminate drift for precise, customizable control and adjustable triggers suit your game on the fly. The Connected Command Display lets you customize the RGB lighting, audio, thumbsticks, mappable buttons and more, plus patented technology receives social notifications from your phone. Best of all, adjustable power modes provide up to 30 hours of battery life on a single charge.
Flexible Premium Xbox Series X Controller.
Customer Rating

4.0
I was going to write a typical, “let’s point out all the features” type review but I really want to point out a few items that differentiate the Turtle Beach Stealth controller from your typical Xbox or Xbox Elite controller.
First, and most important to me, is the Anti-Drift technology. My favorite Xbox game of all time is Titan Fall 2. Yes, it is an old game, but it is, in my opinion, one of the best FPS games ever made. And I still play it on Xbox when the servers are up. The biggest issue I have with regular Xbox controllers is drift. For example, when my character response he will immediately begin drifting to the right. I can put my regular Xbox or Xbox Elite controller on the ground, walk to the other room to get a drink, and when I get back, I will have found him still walking to the right. Adjust stick dead zones, stick sensitivity, and switching controllers and quality of controllers provide some relief but never fully solved the issue. The Turtle Beach Stealth Ultra fixed the issue right out of the box! I spent the night parkouring every wall and ledge I could find; feasting on the fast frag fest which is Titan Fall 2. Never once did I experience any stick drift. Honestly, if the Stealth Ultra failed my Titan Fall 2 antidraft test then I would have packed it up and sent it back to Turtle Beach.
Antidrift is just one of the useful features I found with the Stealth Ultra. The onboard configuration allowed me to set up customer dead zones for each stick. I disabled the dead zone options in my game and used the Stealth Ultra’s onboard controls to custom the dead zone for each stick. The modifications paid off with better precisions with movement and aiming. It was not magic. I did not suddenly become the untouchable pro player with a bullet proof slide hop magical movement pattern. But I did feel more in control of my avatar. I will note that my Titan piloting did not improve any. Then again, the movement system is tweaked to feel like a giant robot as opposed to a super nimble, jet pack totting super soldier.
The controller itself is slightly larger than a typical Xbox controller. As such, the bumper buttons took a little getting used to. The buttons themselves are comfortable, easy to depress, and super sensitive. The issue I have is that my grip style favors my forefinger to control both the trigger and bumper buttons. Gripping the controller with just my thumb and forefinger forces me to reach with my forefinger. Which is a little awkward for me. The controller really favors a grip with a finger on the trigger, a finger on the bumper, and thumb on the thumb stick. In this configuration, all the buttons except the P2 and P3 buttons on the bottom are easily accessible. If you plan on programming the P1 – P4 buttons, then this may be an issue for you. If you plan on just using two buttons, then the P1 and P4 buttons will be easy to access on demand.
The sides of the Stealth Ultra have a shallow texture that act like a grip but really are not. The controller did slip around in my hand when holding it with thumbs on the sticks, forefingers on the bumper and triggers, and the other three fingers gripping the controller handles. I also kept pressing the P1 – P4 buttons whenever I tightened up my grip on the controller.
Finally, setup with Xbox is a little awkward. The Stealth Ultra will not connect directly to the Xbox wirelessly without the included cable, charging cradle, and the USB wireless adapter plugged into the charging cradle. I found this disappointing since, at the very least, I was hoping the Xbox could operate directly inserted into a free USB port on my Xbox Series X. Why? Because latency goes up if the signal needs to travel down a 15-foot cable before reaching my Xbox. It does not add much latency but there were times where I felt like my avatar was reacting just a fraction of second after I pressed a button or moved the control stick. Of course, this can be completely resolved by connecting the controller directly to the Xbox using the included cable.
The other odd thing I found with the Stealth Ultra is that pressing the Xbox button on the controller does not auto-start my Xbox. I need to also press the Wireless sync button on the USB wireless adapter. This can be a pain because sometimes the Stealth Ultra and the USB adapter fall out of sync and can be a real pain to resync. I also found syncing to a be a real pain when trying to connect with the Control Center 2 app on my phone. Sometimes the Stealth Ultra was available and sometimes it was not. Hence, the reason why this review does not include any information about Control Center 2.
Overall, I think the Turtle Beach Stealth Ultra is a fine controller. It has infinitely more flexibility than a stand Xbox or an Xbox Elite controller. The built in control panel allows for custom audio, stick dead zones, social, button, calibration, lighting controls, and more. It will probably take an afternoon or two to get used to the controller’s lite weight and larger size. But nothing is insurmountable for your average gamer.
I would recommend this to a friend!
+2points
3out of 4found this review helpful.
Share this review:
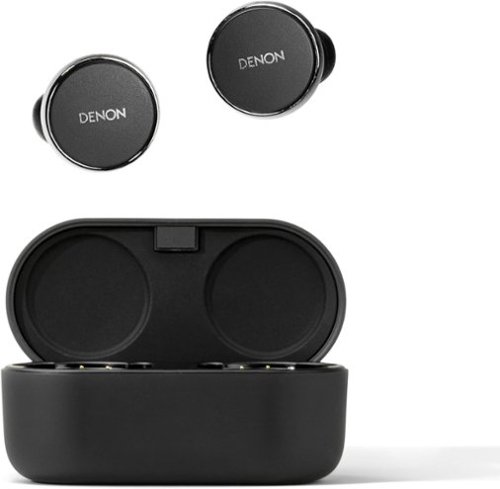
Denon - PerL Pro True Wireless Adaptive Active Noise Cancelling In-Ear Earbuds - Black
Denon Perl Pro True Wireless Earbuds let you create a personalized sound profile via Masimo AAT for audio that is perfectly tuned to you. Add in CD-quality sound from Qualcomm aptX lossless technology and spatial audio from Dirac Virtuo for an unrivaled wireless audio experience. Confidently take calls with best-in-class voice audio. Use the Denon Perl Pro app to create your profile and fully customize your listening experience. And with eight hours of earbud battery life-plus 32 additional hours from the case and wireless case charging-you can keep the music going all day.
Adaptive Acoustic Technology is Legit! Love it!
Customer Rating

5.0
Initial Impressions:
The Denon PerL Pro, combined with Masimo Acoustic Technology (AAT) and Dirac Virtuo spatial audio, makes the PerL Pro a next level earbud experience. Out of the box, the PerL Pro’s are clear, precise, and pleasant to listen to. Nothing all that special that I cannot already get from my Jabra, JBL, or B&W earbuds. However, the PerL Pro’s offers per ear auto calibration through Masimo’s AAT technology. Essentially, the PerL Pro’s will run a series of test tones, listen to the reflections off your inner ear, and then build a sound profile based on how respond to each frequency. At first, I thought this was more “better sound through marketing” wizardry. Man was I wrong. I think the marketing is rather muted compared to what AAT brings to the table. This is a game changer.
Post calibration, music is clearer, fuller, and offers a more natural sound experience. How do I know? The Denon app has a switch that allows me to switch between AAT calibration, called Personalized in the app, and Default. Default is zero calibration or EQ applied. I played Lindsey Stirling’s Snow Waltz album for testing. “God Rest Ye Merry Gentlemen” is a combination of violine and heavy bass. On Default, the sound is good but sounds a bit boxed and bass lite. Personalized opened up the music, restored the bass, and brought the piece to life. Think black and white photo vs the same photo with color. The difference is that stark.
If AAT is taking my bowl of Mac-n-Cheese and adding heavy cream, bacon, garlic, and breadcrumbs then Dirac Virtuo spatial sound was like paring my delicious, gourmet bowl of Bacon Mac-n-Cheese with a perfectly paired glass of wine. Dirac did not add anything to the main dish. But it completed the meal. And what a great meal these PerL Pros are.
Bass output:
The PerL Pro’s have some serious bass output. However, there is a catch. Default sound profile kind of has bass and kind of doesn’t. It is hit or miss. In my experience, AAT calibration is required to get proper bass response from the PerL Pro’s. And the bass is really good post calibration. A great example for bass is Riff Kitten’s, “Nothing to You”. This song opens with a deep bass riff that will shake your ear drums. PSY’s, “DADDY” has a bass heavy beat that will also shake your ears. Bottom line, the PerL Pro’s is fantastic with bass. There is a Bass EQ in the app which Denon calls “Immersion Mode.” I got ok results from this. It really depends on the music and how well the earbuds are seated in your ears.
EQ:
The Denon app offers a five band EQ along with bass boost. Bass boost is labeled, “Immersion Mode” for some reason. Personally, AAT did such a fantastic job of per ear auto EQ that I did not feel the need to mess with the manual EQ settings. I am glad that the option is available. Most ear buds I have used have a two band EQ. So, props to Denon for the extra effort.
Fit and comfort:
The PerL Pro’s come with five different tips: four silicon and one foam. It also comes with two different sized ear anchors. This makes the PerL Pro’s flexible for many different ear types. I eventually settled on the medium sized tips. The foam tips were simply too big and did not make a good seal for my ears. I calibrated the earbuds once I found the correct tip.
Now, proper fitting makes a huge difference in sound and ANC response. Any gaps between your ear opening and the ear tip will weaken the sound. For example, the ear buds will loosen as I move my jaw with activities such as eating or speaking. The ear buds will not fall out of my ears, but they will break the seal with my ears. The results are weaker bass, lesser spatial audio, and an overall degradation in sound quality. Sound quality is still good. And I normally do not realize that I have lost quality until I adjust the PerL Pro’s to sit tighter in my ears.
Which brings me to my first Con. The PerL Pro’s do a really good job of staying in my ears, but tips do a terrible job or maintaining a seal with my ear canal. I would have preferred tips that were longer than their current rounded shape. In my opinion, the shallow rounded shape requires me to regularly adjust the ear buds to get the best sound possible. I have the same issue with the foam tips. Their round shape does not allow enough material in my ear canal to maintain a good seal. And they are also more prone to break the seal than the silicon tips.
Are they comfortable? Yes, but only for about two hours for my ears. Most ear buds I have owned put pressure on the cartilage on the front of my ear. I must take a break after an hour of use. The PerL Pro’s weight rests on the cartilage on the rear bottom of my ear. That part of my ear becomes tender after about an hour. It becomes uncomfortable after about two hours. Then I must take a break for about 30- to 60-minutes before putting them back in. Now, my wife and daughter can wear earbuds all day without fatigue. So, take from this what you will.
ANC:
ANC is good but not great. It really depends on the environment and the noise. To test, I wore these on the highway and during a shopping trip through my local supermarket. In my car, the road noise from the tires and wind were always present. The ANC reduced the noise but never eliminated it. The same with the supermarket. The hum of the refrigeration units in the deli and later in the frozen section were always present. The sound was reduced but never eliminated. Playing music helped drown out the remaining noise. The outside world reasserted itself during quite moments in my music or between songs. But, not all is list. I was forced to either take one ear bud or switch to “social mode” hear anyone speaking to me. So, ANC may not have been as all-inclusive as I would like, but it still did a good job.
Multi-point and controls:
Multi-point is great to have but not perfect. This is especially true if you have more than two devices. My first device is my iPhone. My second device is a combination of laptops. The problem is that I cannot permanently set my iPhone as “connection 1”. The PerL Pro’s may remember the last device it was connected to. But, in my experience, I am telling Windows or my iPhone to connect to my PerL Pro’s every time I turn them off. Which leads me to my second issue.
Touch controls can be set in the app. The app provides 14 predefined actions. Each ear bud can perform a total of four functions for a total of eight independent functions. If I connect to Windows computer, without a secondary device, then app controls such as pause and skip work without any issues. Once I connect my iPhone as a second connection then I lose these controls. A few times I even lost the ability to change my volume level using the touch controls. I have had zero issues if when connected to my iPhone. There are also times where the wireless connection drops without error or explanation. This seems to happen with Windows but not with my iPhone.
Phone calls:
Phone calls are fantastic! No issues reported from anyone I have spoken with. They all think I am speaking directly into my phone’s microphone.
Social Mode:
Social Mode is known as pass through or hear through on other earbuds and headsets. This can be setup in the app to either pause the music and enable social mode or reduce the music’s volume and then engage in social mode. I have used both. Social mode does a pretty good job. Enable/disable pause works best with my iPhone. It will also work in Windows for things like YouTube and iTunes player. But, if I have multi-point connection active to my iPhone then the best I can hope for is Enable/Disable while the content continues to play in the background.
I will engage social mode when talking on the phone. This way I am not trying to shout above the ANC for that all important vocal feedback needed to self-regulate my speaking volume.
Denon App:
The Denon app is very useful. I do not think it is organized well. But, once you learn where everything is, it is very useful.
Conclusion:
I love the sound of the Denon PerL Pro’s with AAT and Dirac Virtuo. Are the PerL Pro’s Audiophile quality? I’m going to say yes because they sound great to me. The app is pretty good. The number of tips and ear anchors make the PerL Pro’s flexible for many ear types. ANC is good enough for most instances where I’ll be using it. Bass response can be visceral with the right content. I can only wear these for about two hours before needing a break. But those two hours are a great listening experience.
I would recommend this to a friend!
+1point
1out of 1found this review helpful.
Share this review:
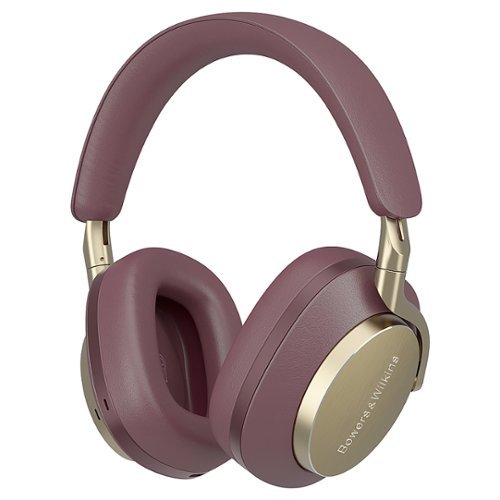
Bowers & Wilkins - Px8 Over-Ear Wireless Noise Cancelling Headphones - Royal Burgundy
The Bowers & Wilkins Px8 Wireless Headphones, featuring a completely redesigned and optimized acoustic system, an angled ultra-high-resolution carbon drive unit, deliver detailed, rich audio performance with incredible clarity. With its proprietary active noise cancellation, the headphones are designed to block out unwanted external noise, ensuring clear, crisp playback of your favorite tracks. With the redesigned microphone arrangement with 2 external adjustable mics, the wireless headphones ensure exceptional call quality. Easy set up offered through the iOS/Android compatible Bowers & Wilkins Music App that allows you to control he sound and noise cancellation, enable voice control right from your phone. Offers 30 hours battery life from a 2-hour charge, plus quick charge support delivering 7 hours playback from a 15-minute charge. Comes with all round improvements to headband that ensure comfort across differing head-shapes, coupled with lightweight aluminum and fine leathers for a superior fit and finish.
Amazing sound!
Customer Rating
5.0
Images for this Review
(click to see full-size image)


If I were forced into a single word review, then my word would be “luxurious”. Visually, materially, physically, and sonically the Px8 is luxurious. My Royal Burgandy and Nickel Px8 is a rich, decadent wrapper implying the musical finery waiting inside each ear cup. The leather wrapped ear cushions are soft and blush. The Px8’s are constructed of metal and soft, plush leather. The ear cup outer shells are a combination Metal, leather, and brushed nickel. The connecting armatures are brushed aluminum metal and extend well into the headband. The head band is wrapped in a matching royal burgundy leather, plush foam padding, and is very flexible. The ear cups have a 180 Degree rotation that allows them to rest cups facing in or cups facing out when wearing the Px8 around your neck. It is nice that B&W gave me the option that I find most comfortable.
Sonically, these are like having two high fi speakers strapped to my ears. I would describe the sound as clear, precise, rich, detailed, intimate, and full bodied. In some instances, acoustic guitars and classical piano are sonically voluptuous. There is just the little extra something that I find lacking from less expensive headphones. For example, Chopin’s Nocturne No. 2 in E-Flat. Op. 9 No 2 and the Plonaise No. 6 in A-Flat, Op. 53 – “Heroic” are like being teleported into the best seat in a professional concert hall. I can hear everything from the most powerful notes reverberating through both ear cups to the gentle decay of the most delicate keystrokes as they forever vanish into silence. The world simply evaporated away and reconstituted as Chopin.
The Px8’s did not shy away from anything I threw at them. As a matter of fact, they played everything I threw at them magnificently. Meghan Trainor, Indego Girls, Air Supply, Metallica, Old 97’s (thank you James Gunn), Anime Anthems, Bach, Beethoven, Mozart, Albinoni, Litz, John Williams, Boston, Christmas and Holiday Music, and so much more. Christmas/Sarajevo 12/24 by the Trans-Siberian Orchestra is simply explosive. The electric guitars are alive and screaming in my ears with such richness that I wish the piece could go on forever. In my home, I can only outperform the Px8’s with a fully dedicated component stereo system. But now we are comparing apples to rocket ships.
Bottom line, the Px8’s sound amazing with all music in every genre I sampled. At low volumes they sound good. Medium volume is where the Px8’s truly come alive. Hands down, this is the best headset, wired or wireless, that I have ever used. And just in case you believe my experience is limited to midrange only. Wrong. The Px8 put out a surprising amount of bass without any adjustments. And bass can be boosted in the B&W App. The same with the treble. They are there, they are clean, and they are wonderful and airy. The 40mm Carbon cones of the Px8’s delivers the goods and then some.
ANC:
Active Noise Cancelation is good but not excellent. Sorry B&W. However, B&W states that their ANC does not impact the quality of their sound. I mostly agree with that assertion. ANC has a slight impact on sound but nothing that you will notice until you turn off ANC in the middle of a listening experience. And even then, the difference is very minor. Much better than other ANC enabled headphones and earbuds I have used. The other thing to keep in mind is that strong ANC can, and does, increase the pressure in the earcup and will eventually lead to ear fatigue. I have not experienced either with the Px8’s. So, the tradeoff is superior sound quality/low fatigue vs inferior sound quality/high fatigue. That’s a no brainer. I am picking the Px8’s all day long unless I absolutely need the very best ANC that money can buy.
Passthrough:
The Px8’s have six external mics. This is for ANC, phone, and Passthrough. What is the purpose of passthrough. I am sure there are times where you wish you could casually listen to music, a podcast, the news, but also want to remain sonically aware of your surroundings. Maybe you are in an office building, keeping one ear open for your mischievous children, or your wife is…uh…just turn on the ANC and up the volume. You’ll be fine.
The six mics pick up the sounds around me and reproduce the environmental sounds in the ear cups. Unfortunately, the passthrough is boosted which gives it a slightly unnatural sound. Conversations, road noise, wind, and other environmental sounds are clear but not 100% natural. For instance, computer fans, ceiling fans, air purifiers, drier sounds, and anything that I would qualify as “white noise” is boosted and will take away from musical enjoyment.
Phone calls:
The Px8’s are not the best for phone calls. The six external mics do not do a good job of picking up my voice. For example, my voice has been described as distant and with the quality if speaking through a hallow tube. My voice was very clear. However, my partners needed to turn the volume to maximum to enjoy a full conversation with me. There is no gain adjustment in the B&W app. So, it is what it is. Moving on.
Bowers and Wilkins Sound App:
My only musical subscription is Apple Music. Thus, I can only comment on the Px8 controls portion of the app and not on the music service integration portion of the app.
The Bower and Wilkin’s headphone control app is spartan at best. It does not have the same flagship feel or experience as the Px8’s. And there is no reason why not. It’s software. You can make it look like and do anything you want. The options are as follows:
- ANC is On, Off, or Passthrough. There is no manual adjustment to customize the ANC to my tastes.
- EQ: limited to Bass and Treble.
- Quick Action button: Environment Control or Voice Assistant.
- Auto Standby 15 Minutes or Off
- Wear Sensor: On or Off. There is an added configuration for movement sensitivity.
- Device Rename
- Factory Reset
- EQ: limited to Bass and Treble.
- Quick Action button: Environment Control or Voice Assistant.
- Auto Standby 15 Minutes or Off
- Wear Sensor: On or Off. There is an added configuration for movement sensitivity.
- Device Rename
- Factory Reset
I was hoping for a multi-band EQ, Passthrough volume controls, in ear notification volume and sound/voice selection, additional sleep timer settings, and maybe an ANC intensity adjustment.
It is functional and useful for what it does. It could be much better for a premium product such as the Px8’s.
It is functional and useful for what it does. It could be much better for a premium product such as the Px8’s.
Conclusion:
The Px8 is the best sounding wireless over ear headset I have ever heard. Period. Waitress, may I have the check! Do I think they could be better? Yes. If the Px8’s had Muli-EQ support and more control over the ANC, microphone gain for phone calls, and volume adjustments for native functions then these would be next level wireless headphones. But none of the cons I rattled off above are deal breakers. As is, these will need to be pulled from dead, rotting hands before I’ll give them up. The Px8’s radiate luxury; both physically and sonically. Pure and simple, this is an outward expression of decadence. Sonically luxurious.
I would recommend these all day long for anyone looking to take a dip into the high-end wireless headphone pool.
I would recommend this to a friend!
+1point
1out of 1found this review helpful.
Share this review:
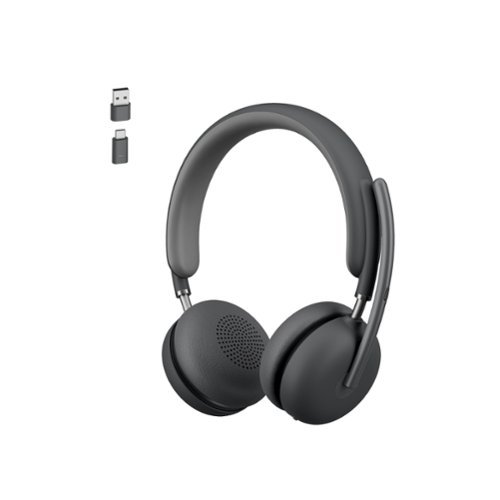
Logitech - Zone 950 Wireless Active Noise-Cancelling On-Ear Headset - Graphite
Enjoy exceptionally clear sound with the Logitech Zone 950 Premium Noise Canceling Headset, our best wireless headset. Work from anywhere and ensure you can hear and be heard in busy environments ~ like open offices and cafes. The Zone 950 noise canceling headphones feature Advanced Call Clarity technology, which uses AI to make it easier to hear the person you~re talking to by suppressing ambient noise. Hybrid active noise cancellation (ANC) blocks distracting background sound. Noise canceling mics elevate your voice while suppressing other sounds. 40 mm speakers deliver premium audio for meetings and music. The free Logi Tune app offers a dynamic and personalized equalizer (EQ) that automatically adjusts the audio to your own hearing range or lets you customize the sound to your preferences. Designed for comfort and a longer life with replaceable earpads and battery.
Fantastic Office Headset
Customer Rating
5.0
Images for this Review
(click to see full-size image)


I work from home full time. As such, my only interaction with my co-workers is MS Teams, Zoom, or phone. Most of my co-workers have adopted a headset-less approach to remote interactions. I think this is a mistake. Granted, they look much better on video than I do. However, the quality of the conversation can unnecessarily suffer. For example, I have had to contend with barking dogs, random noises from inside and outside the home, the laptop microphone echoing my voice back to me, the voice bottoming out because the speaker turns away from the laptop screen while speaking, and other annoying aspects of going native with their work computers built in microphones and speakers. If the worker is in the office, then I am often competing with the background noises of other meetings, the boisterous laughter of someone who thinks everyone is part of “their” conversation, or that one office baritone whose volume knob broke somewhere around 11 and blames their rude demeanor on poor hearing. You know who those people are. Finally, I expect my private conversations to remain private. A headset can guarantee that at least half the conversation remains private.
My typical go to for headsets has always been Plantronics. However, my last headset was worn down and needed replacing. This was about the time I was offered the opportunity to try out the Logitech Zone 950. I knew that Logitech made very inexpensive conferencing headsets and a full range of gaming headsets. But I had no idea they made high-end office headsets with advanced features like adjustable ANC, noise canceling microphone, multi-device connectivity, touch controls, and audio personalization.
Setup with my work computer was easy. The Zone 950 ships with a USB C wireless fob that plugs directly into any USB C port on my computer or laptop. Logitech includes a USB C to USB A adapter to guarantee compatibility with any computer. If you do not have any USB ports, or no available USB ports, then the Zone 950 will also sync with your computer via Bluetooth. For me, I used the USB C port on my work computer. Windows 10 automagically recognized the adapter, loaded the correct driver, and then synced with my Zone 950. The Zone 950 verbally reported successful connectivity with the computer. Having the adapter liked to the headset makes the Zone 950 plug-and-play from computer to computer. To demonstrate the point, I have used this headset on my work laptop, my personal laptop, and even played a few games with my gaming computer using the wireless dongle. Setup in all three cases was as simple as plugging in the dongle.
Sound quality with sending and receiving is excellent! Calls are crystal clear. Logitech states that the Zone 950 will filter out background sounds on both ends of a call. I have no idea how they manage that and I have no idea how to measure this claim. What I can tell you is that I have not heard lawn mowing, road noise, chirping birds, or barking dogs since owning these. I have heard classical music playing from an Amazon Alexa during one of my meetings. So, maybe the Zone 950 filters out low volume background and allows more complex sounds closer to the foreground to be broadcast over the call. On my end, the mic does an excellent job of filtering out ambient background noise. I typically have an air purifier running all day that generates about a 45db hum. Plus, I have family members doing housework and chattering in the background throughout the day. I can hear them. But at no point does anyone on my calls notice any of these noises. My transmission is so clear that one person told me that I sounded like a pod caster hosting a talk show. Translation. I sound good.
I did take a few minutes to listen to music and play a few YouTube videos. Music sounded good. I was surprised that the Zone 950 has bass. Not as good as a dedicated pair of music listening headphones. They are good enough to help me through my workday. Just for fun, I decided to give these a spin during a night of online gaming. The ANC kept any background noise in my room away from my ears, the mic proved to be a top-notch performer, and the overall experience was enjoyable. The folks I was gaming with had no idea that I was using an office headset for our session. One person commented that I sound really good. Now, the Zone 950 will not be replacing my regular gaming headset anytime soon. I do want to feel like I am away from work when enjoying my leisure time.
ANC is fantastic. I was a bit worried about ANC performance when I discovered that the ear cups are on ear and not over ear. Usually, in ear or over ear allow for the best ANC performance. Logitech found a solid middle ground. The ear pads are large enough and plushy enough that they create a soft seal around the ear. It is not perfect. But it does allow for an ANC experience close to what I have experienced with dedicated musical headsets of about the same price. It is very good at filtering out ambient room noise and background noises such as conversations, fans, and vacuum cleaners. I have no experience yet with foreground noises like obnoxiously loud car exhaust driving by my open window so I cannot report if this type of situation would overwhelm both the ear cup and microphone ANC. You will need to judge that for yourself.
The headset is comfortable. Though, it is a little heavier than what I am used to. The weight can be felt on the ears. Adjusting the headband offered some relief. After all, my last headset was much lighter than the Zone 950. I got used to it after a few days.
In the hand, the headset feels solid. Logitech made sure that every surface of the Zone 950 had a luxurious texture to it. Visually, the headset if sleek and modern looking. There are no hard angles anywhere in the design. It looks like a solid, quality, luxurious headset.
Logitech’s “Tune” app is very useful and well organized. Kudos to Logitech for getting the app right. The app displays charge level, ANC controls, Personalized EQ (hearing test and calibration), preset and custom EQ presets, Sidetone adjustments (how much of my own voice can I hear during a conversation), Advanced Clarity options, sleep timer, touch pad options, and a few other useful settings. Logitech packed a lot of flexibility into the Zone 950.
The Zone 950 comes with a USB C cable for charging. You can use the included USB C to USB A adapter if required. The Zone 950 does not ship with a wall adapter. My work laptop’s power supply uses USB C to charge the laptop. I use that to charge the Zone 950. However, any USB wall adapter or computer will work. I noticed that the Zone 950 has two metal pins on one of the ear cups for a matching charging dock. I do not have this dock so cannot comment. However, I am glad to see that Logitech included this feature since many of us keyboard warriors like someplace to hang our headsets when we are done wearing it. Why not charge it while it hangs?
Touch controls are good. So far, I have only used volume up, volume down, and pause/play gestures. The touch controls are smooth and accurate. The push button controls are also easily accessible. Mute can be controlled via either the button on the mic boom or by flipping the mic up. The mic boom also swings 270 Degrees making the headset ambidextrous. There is an ANC button that will cycle the headset through the active ANC features. ANC functions can be enabled/disabled via the Tune app. The power button also acts as the Bluetooth sync switch. And finally, there is a phone answer/hang up button.
Overall, I am very pleased with the Logitech Zone 950. It is comfortable, flexible, way more stylish than any other office headset I have ever seen, and the ANC is outstanding for an office headset. I see myself using these for a good long time.
I would recommend this to a friend!
0points
0out of 0found this review helpful.
Share this review:

Adobe - Photoshop Elements 2024 & Premiere Elements 2024 - Mac OS, Windows
From quick tweaks and trims to total transformations, Adobe Sensei AI* and automated options make editing easy, and you can learn tricks and techniques as you go with 88 step-by-step Guided Edits. Present your best pics and videos in beautiful templates for Photo Reels, video Highlight Reels, collages, slideshows, motion graphics, Quote Graphics, and animated social posts. Effortlessly organize everything. And do more on the go using web and mobile companion apps (English-only beta).
Elements is pretty amazing
Customer Rating
5.0
Images for this Review
(click to see full-size image)


Photoshop Elements:
Adobe Photoshop Elements hits the right balance between professional photo editing and all the fun stuff that us non-graphics artists always wish we could do. For me, I want a photo editing application that allows me to create compositions with my fine scale models, make some funny photos, and create some touch up, or renovate, my family photos. Creating compositions is easy. I can import any photo, use magic wands to isolate my human or non-human subjects, and then combine those elements with backgrounds, special effects, words, and many other actions. I provided a photo edit that combines a war gaming figure that I cut from a photo, combined it with a random landscape photo I found on the internet, and then added fancy words. The whole edit took me about 10 minutes.
Fun and corrective photos are super simple if you stick with the Wizards. For example, we have all seen the commercials where some random parent wishes they could capture the perfect, smiling family photo. Mom starts with Tom Foolery photo and ends with her imaginary perfect family photo. Elements does this by providing face swapping Photo Merging wizards that will allow single-subject and multi-subject photos: single or multiple head swaps. I did a test photo swap with some old photos of my daughter. In one photo she had her eyes closed, a goofy grin, and her head leaned to one side. The head I wanted was the same photo taken a few seconds later where she had her eyes open and a nice smile. But the image was not as cute because her head was not leaning to the side. The Photomerge Faces Wizard took the head I wanted and perfectly aligned it with my target photo. What I got was the photo I always wish I could have taken. It took about five minutes to figure it out and execute. I later imported the new photo in the Advanced editor, cut her out of the photo using the magic wand tool, and combined it with an Alice in Wonderland promo image from Disney using the background image as both the foreground and the background. This allowed me to create an illusion that she was interacting with the environment. Very cool. I did not upload a copy of this photo with this review. I posted an image of the Guided page which shows the Photomerge Wizards.
All in all, I really like the wizards because they take the guesswork out of many of the advanced imaging techniques that we all see on TV and magazines but don’t have the time or means to learn how the pros do it. There is still a learning curve. And your efforts will be rewarded. Each wizard has instructions on what to do at each step. But the instructions lack context for the nuance of how each option within a step should be used for maximum effect. For example, the text I added to the Photomerge screenshot looks cool. Text follows a wavy line I drew on the screen. The instructions literally tell me to make a line, cover the line with the mouse arrow until it turns into the “text” icon, and then start typing. What it does not tell you is that placement of the Text Icon creates imaginary boundaries along that line that cannot be altered without undoing the line, redrawing it, and trying the Text Icon somewhere else. And Elements has little quarks like this littered all over the place. For example, if you screw up a wizard, there is no back button. Sometimes the delete button does not work. You must start from the beginning. I was fine once I figured out the nuance of the wizard I was using. Just know that there is a learning curve even with the wizards.
Finally, Advanced editing looks like every other PC photo editing software I have ever used. All the basics are covered. Select, Move, Wand, Red Eye Removal, Text, Crop, Heal, etc… Each tool can have multiple features and sub-features. Pay attention to the bottom of the screen where those feature sets pop-up. Finally, the menu bar at the top of the screen is flush with features, affects, correction tools, and filters.
Overall, I think this is a fantastic package. The more I use it the more I discover. It is what I’ve been looking for.
Premiere Elements.
This is my first-time using video editing software. I typically record, upload to my NAS or OneDrive, and then fast forward to the parts I want to watch. Video editing opens a whole new world for me. Premiere Elements is organized into three editing modes just like Photoshop Elements: Quick, Guided, and Advanced.
Quick mode allows me to open a series of videos that I want to string together into a single video. It will then arrange them on a timeline with transition elements between them. I can then move different videos to different spots on the timeline, choose what kinds of transitions I want between each video, add text to each video, and add music. For a quick one and done solution this is pretty robust and powerful. This is truly click and drag object-oriented editing at its finest. I am not saying this is the best on the market because I really don’t know. I am just impressed with how simply Quick Mode is. The only caveat is that rendering the final video can take hours for very large video files. For me, I strung together four 15-minute quarters of a sporting event I recorded. At 4K, this was 14GB of video. The rendering took about 2 hours on a 24 core Ryzen processor with all cores running at or close to 100%. I included a screenshot of Task Manager during the rendering event for your reference. You will also notice that my nVidia 4700 is running at 56%. This activity is Premiere. Finally, I was surprised that Premiere, as well as Photoshop Elements, did not eat more of my 32GB of ram.
Guided is a series of Wizards that will allow certain types of fun video editing such as adding video to words, animating the sky with your own videos, add music or narration, and add animations. Truthfully, I have not used these wizards yet because I am just getting into this. But I am planning on having a good time with these features.
Advanced editing is the raw editor. This is where I jumped in. Don’t be me. Be smart and start with the Quick mode.
My game footage has a lot of yelling, clapping, swearing, and other not so nice sounds that you’ll find familiar as part of most sporting events. I wanted to remove the audio track from all four videos, add fades between quarters, along with a title screen before each quarter showing the score. My advice, if you have never done video editing before, then don’t start here. It is not hard. Adobe makes it quite easy. But, without clear instructions, there was a lot of trial and failure involved until I figured out the boundaries of the timelines and of each tool. Within a few hours, I had a larger unified video of the game complete with title screen, fades, game score screens, and no audio.
I do not have a video to upload simply because they are too big.
Final thoughts:
Both Photoshop Elements and Photoshop Elements Premiere are keepers. I know that there are similar products on the market. I own a few of them. Adobe does it better, provides some very helpful wizards that will satisfy most lay persons needs to be Hollywood producers, and, best yet, I don’t have to jump between 30 different applications to interact with all the wizards or the editors. The tools are well organized. I did run into some spots in Elements that could use an optimization or usability pass. But those were few and easy to overcome. What I like best about these products is that they put professional power in the hands of a father who wants to create the memorial moments that stand out years after experiencing them.
I would recommend this to a friend!
0points
0out of 0found this review helpful.
Share this review:
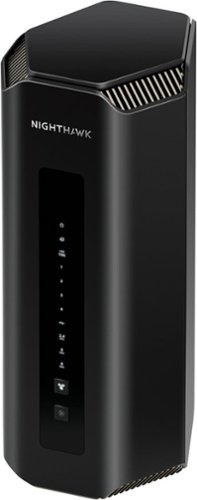
Spearheading the Wi-Fi 7 revolution with cutting-edge technology and unimaginable power, the NETGEAR Nighthawk RS700 harnesses the power of Wi-Fi 7 to unleash speeds up to 19 Gbps. Leveraging NETGEAR's over 25 years of Wi-Fi expertise, the RS700 features a sleek body with high-performance antennas and a significantly smaller footprint. A 10 Gigabit Ethernet port unlocks fast speeds of today and tomorrow. Experience the next-generation gaming, AR/VR, and 8K video - all streaming flawlessly in your home.
Solid hardware. Poor user experience
Customer Rating

3.0
Initial Impressions:
The Netgear Nighthawk RS700S breaks from the antenna farm trend. Instead, Netgear engineered a tower design equal to the height and volume of a two-liter bottle of soda. It weighs about the same. There are eight 3-D printed antennas inside this slim box. Additionally, there are vents made of aluminum at the top and bottom of the box. I assume this is a passive cooling system. I have not heard any fan noise. The router has three bands, 2.4 GHz, 5 GHz, and 6 GHz which support legacy Wi-Fi, Wi-Fi 5/6/6e, and Wi-Fi 7. There are no Wi-Fi 7 devices available to me at time of this writing. The setup wizards for the Nighthawk are awful. I was forced to setup the router using the manual path. Which I found very disappointing. The user interface is pedestrian, very slow, and lacking some basic features that I would expect with a flagship product. Bitdefender integration is a highlight since it offers both integration with the Nighthawk and edge protection with an included 1yr, 10-user license for edge protection such as workstations and laptops. Finally, I found the 6 GHz band to be extremely unstable.
Setup:
I have set up a lot of wireless routers for different living environments over the last 20 years. Some are easier to set up than others. The Nighthawk is easy to set up if you do not use the setup wizards. Let us talk about the wizards for a second. The Nighthawk can be set up using a mobile app downloaded from Google or Apple app stores. The Nighthawk starts on its own private network, makes a connection with the app, and then leads the user through the setup and configuration process. I ran into a few issues here.
First, the router must be connected to the internet router. The wizard will not compromise on this step. If you live alone then this is not a big deal. This is a big problem if you live in a household where the internet is life. In my household, someone is always working from home, streaming a movie, doing homework, engaged with social media, streaming high resolution music, and all combinations of the aforementioned from 7am to 11pm. Set up for me started at 11pm. The next issue I ran into was setting up the Wi-Fi networks. At first, I chose to set up three separate networks, one for each band. Unfortunately, the router refused to rename the networks to anything other than Netgear88. Reboots, name changes, harsh language. It all repeatedly failed. Worse, Netgear88 was inaccessible because the password for the network is associated with the network name I set and not with Netgear88 network. The default wireless password for your router is conveniently printed on the bottom of the router.
I reset the router using the reset button located at the back of the router. Next, I chose to connect directly to the router via network cable and the default gateway address. I was greeted by another wizard. In this case, the setup process failed at naming the router and setting up a new Admin password. Again, best practice. Sad face... I had to reset the router to factory defaults because I could not log into the router using the new default password.
Finally, I chose the manual setup route by connecting directly to the router using a network cable. The wizard has a choice for manual configuration. This time I configured the router offline before deploying it to my network. From here I was able to set up my wireless networks, set up passwords, change the default admin password, configure the network, and set my allowable IP address ranges.
Nighthawk Interface:
The web interface for the Nighthawk is slow. Moving between pages can take 2 to 10 seconds. Sometimes longer. There is no discernible reason for this. Even the mobile app suffers from this slow response. Applying changes can take 10 seconds to 2 minutes each. A two-minute or longer wait is guaranteed if the router needs to reboot to implement the changes. The mobile app is not immune to this. I find this frustrating because the next closest competitor to this Nighthawk, which I currently own, already does a better job serving up pages, implementing changes, and goes as far as to offer a more robust user interface than the Nighthawk. I honestly expect better from a flagship product.
Network Speed:
Network speed is top notch. I have approximately 40 devices on my network consisting of several workstations, several gaming and work laptops, tablets, phones, TVs, other smart device, network home theater receivers, switches, network streamers, and other smart devices that all connect to their respective cloud services. TVs, Receivers, and gaming consoles, and workstations are all hard wired into the network. Everything else is wireless. File transfers are fast. I have had two TVs streaming videos, work from home laptop going, music streaming to my office receiver, and the kids doing social media simultaneously using a combination of wired and wireless connections with no issues. The Nighthawk hardware is a solid performer with a single exception.
Wi-Fi:
The 6 GHz band is unstable like nobody’s business. I have several Wi-Fi 6e certified devices that cannot maintain a stable connection with the Nighthawk. For proof, I ran a continuous ping for about an hour and could see the disruptions in real time. How does this impact performance? Long load times for web pages, dropped connections, broken file transfers, disruption in meetings, you get the point. It is not good. Maybe the 6 GHz band is for Wi-Fi 7 devices only? If there were the case then my Wi-Fi 6 devices would not keep preferring the 6 GHz band as the default, best network. This is true if I am rocking three individual networks and allowing Windows to decide or if the Nighthawk is configured for Smart Connect. SmartConnect combines all three bands into a single SIDD. Then Windows can pick the best connection for the connected device.
Unfortunately, Wi-Fi 6 devices like to grab the 6 GHz band by default. Windows will not auto switch to the super stable 5 GHz band unless the 6 GHz band is completely unreachable. Unstable is not unreachable. My only remedy is three separate Wi-Fi networks, one for each band. I hide the SIDD for the 6 GHz band and force Windows to connect to the 5GHz band. A downside is that I lose the super high performing Wi-Fi performance that the 6 GHz band. The other downside is that I cannot turn off the 6 GHz antennas. This is one of those basic features that I would expect from a flagship product that I mentioned earlier. It is a waste of electricity to run a set of antennas that I cannot use. To be fair, my Wi-Fi 6 Router also has a 6 GHz band that is difficult to maintain connection to. So, this may be an environmental issue that has nothing to do with the router. The difference is that my devices will auto connect to the ultra-stable 5 GHz band automagicaly on my previous router.
Security:
The Nighthawk integrates with Bitdefender. A 1yr, 10-user Bitdefender license is included. Armor must be activated via the mobile app. Armor cannot be interfaced with from the router. Why? I have no idea. The only indication that Armor is running is a chicklet on the Home page that states Security, with a Sheild and “A” symbol, is enabled or disabled. At least one computer on the network must be running Bitdefender to establish end-to-end security. According to Bitdefender, the security environment strengthens as more Bitdefender clients are added to the network. I really like the idea of an integrated end-to-end solution. I also like what I am seeing thus far with Bitdefender. So much so that I am considering dropping my current security software and migrating my systems to Bitdefender. This is not a Bitdefender review. However, I will say that it is nice to have a holistic security solution that is not constantly nagging me for more money.
Final item. The Nighthawk app does interface with Armour. Except, the Nighthawk app forever prompts to activate the trial period. And then it will simply “fail to subscribe.” Whatever.
Final thoughts:
The Netgear Nighthawk RS700S is a solid performer once it is properly setup and configured. The user experience desperately requires a useability, performance, optimization, bug, and beauty pass before I can recommend this router. The Nighthawk does keep up with all my internet and data needs. I really like the Bitdefender end to end integration and will consider migrating my clients to the solution. I do not like having to pay an annual subscription to Bitdefender if I choose to only leverage the router security feature. I also do not like zero access to the Armor router security features unless I am running the client somewhere on my network. Even then, I do not really have access to router security. However, this is an enterprise like solution for a consumer/small business device. I do not know of anyone else offering this type of solution.
Netgear packed a lot of innovation into the Nighthawk. However, for a premium flagship product, the user experience is terrible. This needs a lot of work before I feel comfortable recommending this product.
No, I would not recommend this to a friend.
-1point
1out of 3found this review helpful.
Share this review:
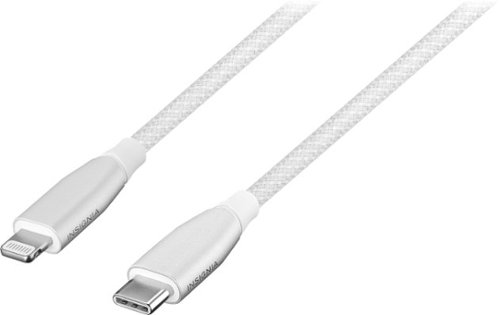
Insignia - 7' USB-C to Lightning Charge-and-Sync Cable with Braided Jacket - White
Whether you~re calling loved ones, texting friends or ordering takeout food online, your phone is vital to your lifestyle. It~s important to keep it charged and ready to go at a moment~s notice. The Insignia NS-MC5CL7W24 7' USB-C to Lightning Charge-and-Sync Cable with Braided Jacket is more than up to the task. It~ll not only help charge your Lightning-enabled iPhone, iPad or iPod, but also let you transfer files and sync your device with a quick data transfer speed of up to 480 Mbps. Its 7 ft. length gives you flexible placement options so you can place your phone wherever you need it. A white color keeps the cable looking stylish while a braided jacket adds protection and durability. Trust this USB-C to Lightning cable to help keep you ready for the challenges of everyday life.
Solid, reliable, and solved a huge problem for me
Customer Rating
5.0
I am pleasantly surprised by how good this Insignia Braided USB-C to Lightening Cable is.
First, both the USB-C and Lightening connectors are very well made. The connector housings are made of out of aluminum and have a rubberized connector between the connector and the rest of the cable. This will protect the cable from wearing out prematurely at the adapter end. I have owned many “Premium” cables from Apple which always seem to fail at the point where the cable meets the housing.
Second, the cable has a nice, stiff jacket to protect it. It is not fancy, fluffy, or died to match my personality or hair color. It is also not very thick. This may not be the best cable for high situations where the cable may frequently rub up against furniture, a desk, or a counter. But it will last longer than a non-protected cable. And it most definitely will survive living in a school or work backpack or regular home/office use.
Third, this is a rather long cable. I did not think 7 feet would be long enough for my uses, but it is more than long enough. It is so long that I often need to use the included rubberized cable tie that is molded onto the cable. The cable tie does slide along the length of the cable so I can tie the cable towards either end or the middle. I find this a convenient addition since I am often adding Velcro straps to my cables for the very same purpose.
Fourth, the cable is stiffer than most braided cables I have used. This is most likely because the braiding is tighter and thinner than other braided cables I have used. This is not necessarily a bad thing. The cable is still flexible, easy to loop, and does not have any issues going around corners or furniture.
Fifth, this is the only cable that I have ever used with any iPhone that allowed a stable enough connection to any computer to download all my photos and videos. Maybe Apple finally fixed their OS to allow stable file transfers to a Windows PC. This has been an issue for years across multiple iPhones and Widows PCs running everything from Windows 8 to Windows 11. I doubt Apple fixed this issue just in time for my review. The Insignia USB-C cable is the only cable that I have used to allow me to transfer all 14 GB of data from my iPhone. This one point alone is enough for me to make this my go to cable for my iPhone.
Overall, I think this is a very nice cable. It is not fancy, offers a good level of protection, the connections are tight, it just gets the job done. I cannot ask for anything more.
I would recommend this to a friend!
0points
0out of 0found this review helpful.
Share this review:

Shark CarpetXpert with Stainstriker, 2-in-1 deep carpet cleaner and handheld spot & stain eliminator, combines Shark's powerful suction & PowerSpray high pressure spray to deliver the best tough stain elimination**and unbeatable deep carpet cleaning~. Two unique chemicals mix and activate on contact in the built-in tool to deliver 20X more stain-striking power*. ~Shark CarpetXpert models vs. consumer carpet cleaners based on ASTM F2828 using included cleaning solution as of May 15, 2024. **Based on TM110, vs. extractor market, using included stain cleaner and best-performing accessory. *vs. Shark Deep Clean Pro Formula.
A real asset to keeping my carpets clean
Customer Rating
5.0
Images for this Review
(click to see full-size image)


The Shark CarpetXpert Upright carpet cleaner did a fantastic of cleaning my carpets. My home has several carpets. I have two pets and a family. Weekly vacuuming is the minimum required to keep the surface dirt under control in my home. However, stains from spilled drinks, animal matter, and dirty wet feet build up over time. There are some things we just do not have control over. Or so I thought until I gave the Shark CarpetXpert a try.
My cat left me a lovely pile of vomit on one of my carpets that very day I unpacked the CarpetXpert. How nice of her. I cleaned up the surface dirt with paper towels and a quick vacuum. I noticed that the entire carpet had stains from spilled liquids, foot traffic, and soda can rings. The CarpetXpert made quick work of all the stains and even stored some of the original brightness to the carpet. I have included before and after photos of the carpet in question. I also included a photo of the water tank wastewater and the mess left inside the nozzle so you all get a sense of what the CarpetXpert extracted from the carpet. Warning. It is gross. The carpet measures 8 feet by 10 feet. It took me about 30 minutes to clean and about 3 to 4 hours to fully dry.
Setup:
Read all the directions before setup and first use. The instructions are printed on a single, double sided sheet of glossy paper. That’s it. Read them twice and then twice again before operating the unit. The Shark CarpetXpert Upright is more sophisticated than a regular Shark vacuum. Like Shark vacuums, the CarpetXpert shares the same quick connect and quick release technology for all the parts. The big difference is the addition of detergent tanks, a water tank, a wastewater tank, floats, and the different uses for the hose and adapter heads. There are also online videos for additional help and instruction.
The Shark ships with two bottles of cleaner: 12 oz. Deep Clean Pro and 16 oz. OXY Multiplier. There is just enough in the 12 oz. bottle to fill the Stain Striker tank. There will be some left over in the bottle. Also, this bottle has a weird aluminum seal with a fabric center. I have no idea why. There is no obvious reason for the sophisticated seal. Nor any obvious use with the CarpetXpert. The Deep Clean Pro goes undiluted into the StainStriker Tank. The OXY Multiplier is diluted with water in the CarpetXpert Tank. Both cleaners are used together to deeply clean a carpet. There is no hard rule stating a carpet must be deep cleaned. However, I chose the deep cleaning route for my carpets.
Use:
The CarpetXpert gets very heavy when cleaner and water are added. There is a handle/shelf hidden under the hose that should be used to move it around. Pushing the CarpetXpert back and forth does require some force. Unlike a vacuum, moving the unit forward dispenses cleaner and water onto the rug. Pulling the unit back extracts the water, cleaner, and loosened dirt. The added resistance inherent with the CarpetXpert forced me to slow down my cleaning and focus on smaller sections.
The dirty water tank filled quicker than I expected. There is a float in the tank that will rise as dirty water fills the tank. The float closes a door at the top of the tank which cuts off the flow of air to the rest of the unit. Be sure to have a drain filter in your sink before emptying the dirty water tank. Otherwise, you will be pouring bits of hair, rug fibers, dirt, grass, pet matter, and other large debris down your drain. This could lead to future plumbing issues.
Cleaning was easy and hard at the same time. The brush and brush cover are filthy after use. The brush cover and the roller are removable. The nozzle housing also requires cleaning. Guess what does not come off for cleaning. The nozzle housing. I have not found a safe way to fully clean out the nozzle housing. I stuck it under the faucet in my bathtub. Regardless, follow the cleaning instructions after each use. Otherwise, bacteria and mold could build up in the system and generate odors.
Finally, the carpet will be wet and there will most likely be water on the floor around the perimeter of the carpet. I used the Quick Dry mode on the unit to reduce drying time. I do not know the impact of allowing the rug to simply air dry. What I saw was more dirty water being pulled into the dirty water tank. I think I made the right call.
Results:
The results are first class. My basement has a specific sour smell that I simply could not find the source of. It turns out that part of my problem was the carpets. Dirty feet, dirty shoes, cat yack, food, drink, and other contaminants have all contributed to my carpet biome. Cleaning the carpets have vastly reduced the sour smell and most likely impacted my unwanted carpet’s biome.
What not to do:
If you have a “Dry Clean Only” carpet or a wool carpet then do not use the CarpetXpert. I had a cat accident on my wool carpet that I chose to use the Pet Tool to clean. This attaches directly to the hose and has its own small wastewater tank. The cat accident was cleaned but I also pulled out a lot of rug fibers that proved difficult to clean out of the Pet Tool. In the end, it was not worth the effort. It also convinced me not to use the CarpetXpert on the whole carpet like I originally planned. Lesson here. When in doubt, use the hand tool on a very small are of your rug before attacking the entire rug.
Final thoughts:
Vacuuming alone is not enough to keep a carpet clean. The surface dirt can be kept under control. I had no idea how much dirt was ground into the carpet until I did a deep cleaning with the CarpetXpert. Now that I know, I will make deep cleaning with the CarpetXpert a regular part of a cleaning regimen. I am thinking once a quarter will. Maybe more frequent in high traffic areas. I was a little disappointed in how much the wastewater tank held before the float closes the air intake in the tank. However, dirty water can get very heavy, so I get it. I would have also liked to have seen a thicker user’s manual. Otherwise, I think this was a very good investment for me that will lead to healthier rug biomes and an overall healthier environment.
I would recommend this to a friend!
+6points
7out of 8found this review helpful.
Share this review:
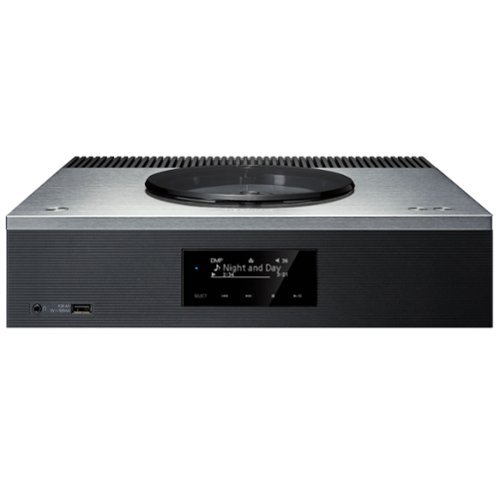
Technics - SA-C600 Premium Class Network CD Receiver - Silver
The SA-C600 Network CD Receiver showcases Technics~ legacy of renowned digital audio technology and flawless construction, eliminating noise and rendering a colorful, vibrant expression of sound space. This versatile receiver unit has a twin power supply circuit system for incredibly clear performance, Spacetune technology to automatically optimize the sound field, and incredible connectivity across wireless, digital, and analog channels.
Good choice for a low power, small room system
Customer Rating
4.0
Images for this Review
(click to see full-size image)


Initial Impressions:
The Technics SA-C600 is a nice little streaming stereo amplifier with CD player. The CD player is what ultimately convinced me to get the SA-C600. The unit itself is very handsome with its black body, brushed aluminum top, and smoked plastic CD door. The LCD screen is mostly black and white with a few colored icons here and there. The back of the unit has every input I could possibly want. The front panel has a single USB and stereo mini jack. Overall, the unit aesthetics are simple enough that it will fit into any modern-day décor. Sonically, the SA-C600 needed a good day to break in before it found its stride. Power wise, the SA-C600 is best suited for bookshelf speakers with an integrated subwoofer. Tower speakers are simply too much for the SA-C600 to drive reliably. Overall, I like the flexibility, the inclusion of a CD Player, the streaming options, and the integrated FM Tuner. This is a solid addition to my home office.
Setup:
The SA-C600 took about 5 minutes to setup from box to CD/FM Radio. Configuration and app setup took a bit longer. For some reason, Wi-Fi setup requires Google Home or Apple Home apps to configure. Once Wi-Fi is setup Google Home or Apple Home is no longer needed. Technics’ Audio Center is the app you want to load on your smartphone to take full control of the SA-C600. Everything can also be configured and controlled from the included remote. The top of the unit has three buttons for power and volume. There are dedicated CD player controls that illuminate on the front of the SA-C600 when the CD player is active. The illuminated touch controls are integrated into the mostly monochrome front facing LED screen.
For my setup, I have a pair of B&W 705 Signature bookshelf speakers and a MartinLogan 600X 10” subwoofer in a desktop stereo configuration on my office desk. I used a Panamax MR5100 for power protection. For inputs I used a toslink optical digital cable to connect to my gaming computer. I also connected an RCA to a mini stereo cable to the Line Input on the back of the SA-C600 as a hardwired connection to my iPhone. I also connected my iPhone via Airplay but wanted to hear the difference between the two inputs.
Next, I accessed the Setup menu via the included remote control and updated the SA-C600 firmware. This took about 20 minutes to complete. What did it fix? According to Technics, and I quote, “Improvement of Stability.” So, yeah.
The manual that ships with the SA-C600 is a bit pedestrian. It does illustrate how to access certain functions. It lacks explanations for the SA-C600’s configuration items and options. It also does not explain any of the individual input setup items or options. Neither the Technics’ Audio App nor Technics’ website provide any additional information. Technics’ website does not provide a longer, more detailed manual.
Sound:
SA-C600 is hot on the highs. It was vocals forward with a few tracks that was best illustrated by “Love Shack” by the B-52’s. Luckily, the SA-C600 has proper tone controls. Bass and Treble have a range from -10 to +10 and set to 0 for both out of the box. The tone controls are only accessible via the Setup menu or via the Technics’ app. For my B&W bookshelf speakers, -1 to -2 treble and +1 base works well for most music that I listen too. For FM radio, I set the tone controls to -10 bass and -1 treble. Keep in mind that the tone settings are persistent from input to input. If the SA-C600 loses power, then the tone controls need to be reset. The clock also resets. But the FM presents do not…
Space Tune is sound calibration presets. For example, your speakers will gain some boost on the low end if they are corner loaded. Which could make them sound boomy. The Space Tune has a corner preset calibration setting that will tone down the lows and boost the higher frequencies. There are four presets and five modes: Free, Corner, Shelf, Cabinet, and Custom. Customer allows one of the four presents assigned independently to each speaker. I found that Free sounded best on my setup.
The SA-C600 needs a good 12- to 24-hour break in period. I own eight different pairs of speakers. They sounded awful prior to this break-in period. I just left the SA-C600 playing unattended in a room. The goal was to break in the amplifier and not my ears. Once broken it, the unit sounded really good at low to moderate listening levels in my small office. I listen mostly to classical, jazz, vocalist, and talk radio during my workday. In addition to my office bookshelf system, I auditioned a pair of B&W 606 Anniversary bookshelves which also sounded good. Not as good as the 705 Signatures but good enough at the 606 price points.
Conversely, the SA-C600 sounds like trash on hungry tower speakers. I auditioned a pair of SVS Ultra Towers, SVS Prime Pinnacles, and a pair of B&W 702 s2 Towers. The SA-C600 simply does not have the power to drive these. These are highly capable speakers when integrated with the right gear. The SA-C600 is simply a poor match in this situation.
I included photos of two of my audition spaces. I did not include a photo of my permanent listening space for personal reasons.
Power handling:
Full power: 60 W + 60 W (1kHz, T.H.D. 1.0 %, 4Ω, 20kHz LPF) or FTC Output Power: 40W + 40W (1kHz, T.H.D. 1.0 %, 4Ω, 20kHz LPF). Source, technical specs from manufacture’s website. Measurements like these are useful but for all the wrong reasons. Are manufacturers still playing this game? Moving on…
Digital vs Line Input vs Line Input:
Digital content, such as Apple Music over Airplay, sounds great. I do not have subscriptions to Tidal, Amazon Music, Deezer. I did try Spotify. It sounded ok but Apple Music sounded better. I also test Apple Music over RCA connections on the Line Input.
The Line Input gain is very low compared with all the other inputs. If volume is set to 30 for streaming, then the Line Input must be set to 60 for the same audible output. Beware! The SA-C600 does not remember the last volume setting for any previous input. This means the volume must be decreased before swapping back to streaming, CD, radio, or another source. Otherwise, you will experience that super loud, thin, low fidelity noise I discussed earlier on. Hopefully Technics will address this in a future firmware update.
The SA-C600 will not make bad CD sound better. If anything, the SA-C600 will reveal their poor quality. Newer CDs, such as Lorenna McKennet’s, “The wind that shakes the barely”, sound fantastic. The vocals were full, and the music textured. Depending on the content, the sound reproduction could come off as crisp and sometimes overly clinical. I picked up on this quickly because I am used to a warmer sounding system. Not bad. Just different from what I am used to. Dialing in my tone controls and integrating my sub-woofer played a big role in balancing out the SA-C600 presentation.
Finally, fiber optic input from PC. I have nothing to complain about. I watched a movie, listened to Apple Music, watched some Youtube videos, and played a few games. The SA-C600 did not miss a beat, and everything sounded dialed in. I was perfectly happy with the results. If you also chose to connect a PC via Toslink to the SA-C600 then be sure to set the output resolution from Windows so you get the highest quality signal. The SA-C600 will display on the LCD screen what the input source is. By default, my Windows 11 machine’s output was 16-bit 48kz. I changed the highest available. You can find these settings under Windows Settings here: “System/Sound/All Sound Devices/Speakers.”
CD Player:
The CD player door swivels left or right. For best results, you will want to use a finger and thumb to slide the door open and closed. Do not press down on the recessed nob or force the door in any way. The door floats above the SA-C600 connecting to the chassis by a single left/right swinging hinge. The player is quiet. The disk can be heard spinning but only within six inches or less. Even then it is very quiet. I did not notice or hear any vibrations with the chassis or the CD door. The CD disk centered nicely and did not show any signs of wobbling during playback. There is an LED light that washes over the top of the disk while playing. The affect can be toggled through the SA-C600’s Setup menus.
Final thoughts:
The SA-C600 is a solid two or 2.1 channel Compact Network CD Receiver. My recommendation is to pair the SA-C600 with a solid pair of bookshelf speakers and a subwoofer. The SA-C600 lacks the chops for power hungry towers. The flexibility of the SA-C600 is great. It meets all my needs and then some. The reason I went with the SA-C600 was for the integrated CD player. It saves valuable office space and reconnects me with my CD collection. The chassis is handsome, has good cooling, and the controls are easy to use. The sound quality at low to medium volume in a small room is fantastic after a 12- to 24-hour break in period. There are some issues that Technics need to address through firmware. Overall, I am happy with the SA-C600 and look forward to years of enjoyment.
I would recommend this to a friend!
+1point
1out of 1found this review helpful.
Share this review:
Elevate your video editing experience with the Crucial X10 Pro SSD: the portable drive that packs a palm-sized punch. With sequential read and write speeds up to 2,100/2,000MB/s and 2TB of space, your X10 Pro can connect directly to your laptop or workstation via a convenient USB-C cable. Blaze through your multi-cam timeline and even edit, trim, and render directly from the drive. The Crucial X10 Pro works with Windows, Mac, Android devices, and more. Featuring Micron TLC NAND plus water and dust resistance (IP55), the Crucial X10 Pro is the perfect partner in the studio or in the field, giving you the raw performance, lasting durability, and generous capacity you need.
Tough, Fast, Small
Customer Rating
5.0
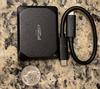
Images for this Review
(click to see full-size image)
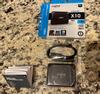


The Crucial X10 Pro by Micron is durable, fast, and takes up less room in my pocket than my car keys. The X10 Pro is IP55 Certified meaning that pocket lint, dirty bags, and rain showers should not pose a threat to the normal operations of the drive. Which is good. I carried mine around all day in a linty pocket and even banged it against a table a few times to see what would happen. The drive worked perfectly every time. Transfer speeds are fast but dependent on what I was working on, the speed of my USB port, or the method by which I was transferring data. I was able to run 15-to-20-minute videos from the drive, including randomly moving the player slider bar around, without any hiccups or buffering. Overall, this is a fast, durable, and dependable drive.
Speed:
Let’s get straight to speed. I benchmarked the drive using Crystal Disk Mark. I used the Anime edition simply because it looks better. I used a 2023 Alienware laptop that, as stated by Dell, has three USB 3.2 Gen 1 drives. The transfer speed should top out at 625MB/s. The benchmark achieved 2140MB/s sequential read and 1790MB/s sequential writes. Random reads and writes were significantly lower than this. I included screenshots of the benchmark run as well as a benchmark of my internal NVMe drive for reference.
Next, I copied a 100GB folder with 22 video files from the local drive to the X10 Pro. From my C: drive to the X10 Pro I hit an average of 397 MB/s. From the X10 Pro to my C: drive I saw 348MB/s. I ran the transfer a few times, both ways, and got the same or similar numbers. See included screenshot. Enabling encryption slowed things down to 350 MB/s download from the X10 Pro and 280MB/s on the upload to the X10 Pro. This is a little disappointing but not unexpected. Encryption tends to add overhead to drive operations.
Performance:
As mentioned before, playing and navigating running videos was seamless and without any kind of lag, artifacts, or buffering issues. I loaded up Corel Paintshop Pro and went to work editing photos directly on the drive. Loading, editing, saving, and manipulation of the files was fast and did not interrupt my workflow. I switched the drive to my MS Surface tablet where I could use my touch screen and stylus as an art tablet. Connecting to the Surface was simple and seamless. And just like with my gaming laptop, my experience on the Surface was lag free, no buffering issues, and bouncing between projects was seamless. The only oddity was I had the little X10 Pro dangling from the side of my surface by its 9-inch USB cable when working with the Surface on my lap or when I kicked out the foot for desktop mode.
Heat. The drive remains cool under most operations. Under heavy load, such as encrypting the whole drive, the X10 Pro did get warm but never hot. The drive quickly cooled down once the operation was complete.
Flexibility:
The durability of the unit makes this an ideal choice for travel. The outer shell is metal, inflexible, and will survive a fall if you should drop it. The IP55 Certification guarantees that a certain amount of dust, dirt, and water will not penetrate the X10 Pro’s shell up to a certain threshold as defined by the IP55 standard. IP55 certification also signifies the drive will survive bumps, bruises, scratches, and some impacts. The drive is solid state which means impacts will not damage your data. So, if you want to dangle this from your key chain using the conveniently included eye hole, your data will most likely be fine. Finally, the bottom of the drive is rubberized to reduce the possibility of the drive slipping off the table or a slightly inclined surface.
The drive ships with a 1.8 TB exFAT partition. The drive sports 256 AES HW + PP hardware-based encryption. The drive supports BitLocker and Apple’s MacOS Firevault. Unfortunately, BitLocker is only available on Windows 10/11 Pro. I was able to enable BitLocker, setup a password, backup the security key to my Windows account, and encrypt the drive without any issues. Crucial will be releasing a password utility in September 2023 that will allow password setting without the need for BitLocker. However, I do not know how this impacts data encryption on the drive. I guess we will have to wait and see.
Finally, the drive can be re-partitioned and reformatted using NTFS or whatever Apple uses. NFTS will give you greater control of file security and management over exFAT.
The X10 Pro ships with a 9-inch USB C cable. This will limit placement when using the drive. This will not be an issue with a laptop since the USB ports can be measured in half inches from the table or desk surface. A desktop tower case will present special challenges due to where the USB ports are usually located. For my tower, I had enough cable to easily reach the USB C port while the X10 Pro rested on the top of the tower case.
Management Software:
Crucial makes an application named Crucial Storage Executive available on their website. As of this writing, version 9.04 does not recognize the X10 Pro. No idea why. I tried on three different computers and none of them would recognize the X10 Pro. This is disappointing because this is the only way, that I could find, to enable special drive features or perform firmware updates. Storage Executive will also monitor drive temperature.
Crucial does provide Arconis True Image available from their support page. This will allow you to format the drive, change partitions sizes, and clone the drive from an existing drive. If you are replacing a drive then Arconis is a great way to quickly clone the drive.
Final thoughts:
The X10 Pro is tough, fast, and flexible. It will survive my backpack and a rainstorm. Password protection and Encryption support are welcome features in an age where data protection is a necessity. The drive is fast enough to stream videos and support photo editing. The only downsides are Crucial’s own software compatibility and the lack of a USB C to A converter in the shipping box. Crucial will sell you the adapter if you really need it. Overall, this is a fantastic little drive.
I would recommend this to a friend!
+2points
2out of 2found this review helpful.
Share this review:
ITJim's Questions
ITJim has not submitted any questions.

JBL - FREE True Wireless In-Ear Headphones Gen 2 - Black
Perceive every detail of your music with this pair of JBL wireless headphones. The 10Hz to 22kHz frequency response lets you enjoy the full range of sound, while the in-line microphone provides an effortless switch to hands-free calls. Featuring 5.6mm dynamic drivers, these JBL wireless headphones supply rich, resonant bass for your enjoyment.
Are these noise cancelling for gyms that play really loud music?
No, they are not noise cancelling. They do come with three silicon ear canal adapters: small, medium, and Large. You can block out some sound if you use a connector that fits snuggly in the ear canal. This will muffle and not canceling outside noise.
7 years, 4 months ago
by
Posted by:
ITJim
Acer - Nitro 5 15.6" Gaming Laptop - AMD Ryzen 5 - 8GB Memory - AMD Radeon RX 560X - 1TB Hard Drive
Enjoy engaging simulations and immersive visuals with this Acer Nitro 5 gaming laptop. The Radeon graphics card offers 4GB of dedicated video memory for efficient rendering performance, and the 2.GHz AMD Ryzen processor and 8GB of RAM provide ample computing power. This Acer Nitro 5 gaming laptop has a 1TB hard drive for your collection.
Not computer savvy. Love playing games but also surfing the web and photos. Just looking for a "standalone" that I can take anywhere...outside or in my room with no wires and connections. Is this good for that? And can I connect to a printer? Thanks!
If I understand you correctly, you want to know if you can surf the web, view photos, and connect to a wireless printer. Correct?
You can use this computer to surf the web, view photos, and connect to a wireless printer. You will need to a wireless network, of some kind, in order to surf the web without a wired connection. The printer could be connected to your wireless network or you could connect over bluetooth. It depends on your printer. My Acer Nitro 5 is connected wirelessly to my network, the internet, and my printer. If you are unsure of how to setup a wireless network, connect your laptop, or connect wirelessly to your printer, then I you will want to speak with your local Best Buy Geek Squad representative. They should be able to get you going. Hope this helps!
You can use this computer to surf the web, view photos, and connect to a wireless printer. You will need to a wireless network, of some kind, in order to surf the web without a wired connection. The printer could be connected to your wireless network or you could connect over bluetooth. It depends on your printer. My Acer Nitro 5 is connected wirelessly to my network, the internet, and my printer. If you are unsure of how to setup a wireless network, connect your laptop, or connect wirelessly to your printer, then I you will want to speak with your local Best Buy Geek Squad representative. They should be able to get you going. Hope this helps!
7 years, 6 months ago
by
Posted by:
ITJim
Envy x360 2-in-1 15.6" Touch-Screen Laptop - AMD Ryzen 5 - 8GB Memory - 1TB Hard Drive - HP Finish In Dark Ash Silver
Optimize your productivity and entertainment experience with this 15.6-inch HP Envy convertible laptop. Its AMD Ryzen 5 processor and 8GB of RAM provide smooth performance, and its AMD Radeon graphics loads stunning gaming visuals. This HP Envy convertible laptop has 1TB of storage, and its Windows Ink feature lets you work with a digital pen. Learn more.
What is the full name of the cpu?
The CPU is a Ryzen 5 2500u. It is a four core, eight thread CPU with integrated Vega Graphics in a 15W TDP. You can find more information from AMD's website here: https://www.amd.com/en/products/apu/amd-ryzen-5-2500u
8 years, 5 months ago
by
Posted by:
ITJim
Envy x360 2-in-1 15.6" Touch-Screen Laptop - AMD Ryzen 5 - 8GB Memory - 1TB Hard Drive - HP Finish In Dark Ash Silver
Optimize your productivity and entertainment experience with this 15.6-inch HP Envy convertible laptop. Its AMD Ryzen 5 processor and 8GB of RAM provide smooth performance, and its AMD Radeon graphics loads stunning gaming visuals. This HP Envy convertible laptop has 1TB of storage, and its Windows Ink feature lets you work with a digital pen. Learn more.
Does this laptop have a display port?
No. It has an HDMI output and a USB C connector that can do video with the right connector. Do a search on BB's site for: USB C to display port. There are several options listed.
8 years, 5 months ago
by
Posted by:
ITJim
Microsoft - Surface - 32GB - Black
Microsoft Surface Tablet: Do more on the go with the productivity of a laptop in the compact size of a tablet. Create documents with Microsoft Office RT, sync files between Windows devices and video chat with friends and family. The built-in kickstand props up your tablet at just the right angle for easy viewing.
do i have to get a network package to buy the surface?
ive been told i need to buy a network plan with a monthly charge. Or can i just use wifi?
No Surface product has native support for a Cell carrier such as ATT, Sprint, etc.... All you have is WiFi. If you have internet in your home with a WiFi router or some other device to server your WiFi enabled devices, then you have everything you need. Just make sure your connection is password protected and encrypted. You can also turn off the WiFi on the tablet, Airplane mode, and use it offline. I hope that answers your question.
12 years, 5 months ago
by
Posted by:
ITJim
from
Maine
Microsoft - Surface - 32GB - Black
Microsoft Surface Tablet: Do more on the go with the productivity of a laptop in the compact size of a tablet. Create documents with Microsoft Office RT, sync files between Windows devices and video chat with friends and family. The built-in kickstand props up your tablet at just the right angle for easy viewing.
Can I download PFD files from Internet Explorer to the Microsoft Surface RT?
Can I download PFD files from Internet Explorer to the Microsoft Surface RT, then view them without internet connection?
Yes you can. First go to the Microsoft Store and pick up the Free Adobe Acrobat Reader application. Then you can open PDFs from your flash drive, desktop, network locations, or even the web. Do keep in mind that your ability to open some PDFs from the web is also dependent upon the source of your PDFs. Finally, the surface, as I have experienced with most tablets, do have a difficult time with very large PDF files sizes and very complex PDFs. This is typically an issue with the small amount of RAM you have on a tablet as compared to a modern PC. (2GB on Surface RT and up to 64 GB on a PC). The amount of RAM does make a difference.
12 years, 5 months ago
by
Posted by:
ITJim
from
Maine
Samsung - Galaxy Note 2014 Edition - 10.1" - 16GB - Black
Samsung Galaxy Note 2014 Edition - 10.1" - 16GB: This sleek, stylish tablet comes with a 10.1" Full HD touch screen to display movies, Web sites and more with impressive visual fidelity. The included S Pen is pressure sensitive and allows you to draw, write, edit and more as easily as if you were using a real pen.
Syncing with a Windows 7 Laptop.
Will this version of Samsung Galaxy Note 10.1 2014 Edition be able to sync with my laptop and thus allow me to control it from the laptop, like the Samsung Tab 2 allows? This also mean I would be able to view content like pics and music from my laptop to my tablet and vice or verser.
I've found that the Galaxy 2014 edition doesn't sync well with anything. Or I haven't found the app or the feature or the best kept secret desktop app that will allow it. I'm thinking of something like iTunes that will sync everything for me and backup my device.
I have found a few work arounds the may interest you.
1) You can upload all of your photos and files to an SD card. You can then move the SD card between the computer and the tablet. Kind of 10 years go I know but there you go.
2) You can plug your tablet directly into the laptop with the USB cable that is connected to your power cord. Then you can easily move items between the tablet and your Laptop using the very useful Windows Explorer App. Thank you Microsoft.
3) If you want to take control of your laptop from your tablet then you can download another nifty Microsoft tool called Microsoft Remote Desktop. You will also have to allow remote connections in Windows on our laptop to make this work. I've already taken over my desktop to edit photos from my tablet. It works very well. However, there is no pinch and zoom. So if you can't read a word when you pull it up on the screen then there isn't anything you are going to do about it. There are other remote desktop apps that may give you additional features. X2 is one I used for my Ipad and is also available on Google Play.
4)Laptop taking control of the Tablet? I haven't heard anything about this. I do know, however, that Samsung saved all the best software for this own devices. Sync easily between your Samsung laptop and your device. However, this is only software and Samsung could be a hero and release it to the rest of their paying customers. I've seen the Samsung Laptops. I won't be buying one anytime soon.
12 years, 5 months ago
by
Posted by:
ITJim
from
Maine