ITJim
Top 100 Contributor
ITJim's Stats
- Review Count153
- Helpfulness Votes1,560
- First ReviewNovember 23, 2013
- Last ReviewMay 10, 2026
- Featured Reviews0
- Average Rating4.3
Reviews Comments
- Review Comment Count0
- Helpfulness Votes0
- First Review CommentNone
- Last Review CommentNone
- Featured Review Comments0
Questions
- Question Count0
- Helpfulness Votes0
- First QuestionNone
- Last QuestionNone
- Featured Questions0
- Answer Count17
- Helpfulness Votes31
- First AnswerNovember 23, 2013
- Last AnswerMay 22, 2021
- Featured Answers0
- Best Answers3

The king returns to raise the game. Enter the Razer Basilisk V3 Pro~the most advanced gaming mouse. Armed to the teeth with industry-leading technology, unlock your maximum potential with a weapon that pushes the known limits of performance, customization, connectivity, and control.
Great Gaming Experience!
Customer Rating

5.0
Images for this Review
(click to see full-size image)


What do I like:
Solid build quality. The Razer Basilisk v3 Pro does not feel like cheap plastic. The Basilisk is light as far as gaming mice go and still manages to feel solid in my hand. The sides of the Basilisk are covered with a rubberized grip that is substantial enough to give me full control over the mouse but subtle enough to vanish into the background during gaming sessions. The left and right mouse buttons are bare plastic with a texture that reminds me of fine grain sandpaper. I am not sure if I am a fan of this texture. However, just like the side grips, the texture on the buttons vanishes into the background rather quickly when gaming or performing other general mousing tasks.
The pads on the bottom of the mouse are extremely low resistance. The mouse simply slides across my Corsair MM700 mouse pad better than any other gaming mouse I own. The buttons also feel very substantial. They have a slightly longer travel than what I am used to. However, the force to depress each button is less than other non-Razer gaming mice I have used. The travel may be longer, but the responsiveness is very fast.
The scroll wheel feels excellent! I really like the wheel texture. There is zero chance of my finger sliding off the wheel regardless of how sweaty my hands get. Scrolling in clicky-mode is smooth, offers little resistance, and is tactile enough to keep me locked in on my current setting. If that makes any sense. The Basilisk v3 Pro wheel’s free-spinning mode is super smooth and amazingly low resistance. The thing will spin forever if you let it. The only thing I do not like about the mouse wheel is with the button that switches between clicky and free-spin modes. The button is located directly in front of the DPI switch and is about a millimeter or two taller than the DPI button. I regularly switch DPI modes on the fly and have hit the scroll wheel button a lot more than I am comfortable with. Before I lambaste Razer for this feature, I do need to point that other manufacturers do the same thing. For some reason this has proven to be an issue for me with this particular mouse. Not only has this cost me precious time in game when a quick DPI change was warranted but it also forced me to change the scroll wheel back to clicky-mode from smooth mode. I suspect my issue may have more to do with the spacing of the buttons and the size of my hands more than anything Razer did wrong. It is annoying for now but I will eventually compensate for it.
The bottom of the mouse has a three-way switch which controls power and how the Basilisk v3 Pro connects to your system. There are three ways to connect: Bluetooth, Hyperspeed wireless via an included 2.4 Ghz dongle, or via USB cable. Razer includes the dongle, a USB A to USB C, and a mini-dongle dock that can be used with both the included cable and the Hyberspeed dongle. This gives you the flexibility to place the dongle wherever you get the best wireless reception. Finally, there is a profile button on the bottom of the mouse. I like this idea and wish other manufacturers would do this. First, you can create different mouse profiles through Razer’s Synapse software, easily port these over to the mouse’s memory, and then use the mouse’s profile button to easily switch between profiles. Windows will even display, on screen, what profile you switched to. Just note that these pop-ups are suppressed during gaming.
My gaming sessions were good. I paired the Basilisk v3 Pro with my Alienware M15 R4 gaming laptop. This laptop is no slouch by any measure and rips through any game I have thrown at it. The Basilisk v3 Pro did not show any signs of hesitation or latency in any game I threw at it. I was able to get the fine detail movements required for my strategy games. Fast paced movements for my FPS games were smooth, accurate, and low latency; even when making a lot of fast paced twitch movements. And everything in between was perfect. The Basilisk v3 Pro delivered the goods every time.
Finally, the Basilisk v3 Pro has multiple charging options. The Basilisk v3 Pro can be charged directly via USB cable, included. The Basilisk is also compatible with Razer’s charging puck and mouse dock, sold separately. There is a round cover on the bottom of the Basilisk v3 Pro to store the 2.4 Ghz wireless dongle. There are six copper pins under the door. The optional charging puck replaces the cover and makes contact with the charging pins. The puck then allows wireless charging with either a optional charging base or with any Qi-charging compatible devices. Personally, I would have preferred an option that included the entire wireless solution but that’s just me.
Luckily the Basilisk v3 Pro has a long battery life. I have been running the Basilisk v3 Pro with RGB lighting turned on for four days as of this writing for both gaming and work. The battery is currently at 45%. That’s impressive. By this measure I should be able to go a whole week on a single charge!
What don’t I like:
First, the Sensitivity Clutch button is too far forward for me. I have small hands thus I tend to use smaller mice. The Basilisk v3 Pro is a longer mouse than what I am used to. Essentially, I tend to use a claw grip and depress the mouse buttons just shy of the tips of my fingers. The Basilisk v3 Pro forces my hand into a shallower grip than I am not used to. Thus, I now have to press the buttons with the pads of my fingertips. This is not much of an issue. Just something I will either get used to or not. However, the Basilisk v3 Pro forces me to depress the Sensitivity Clutch button using the very tip of my thumb where my thumb is already pressed up against the side of them mouse. It just does not work for me.
Second, the mouse did not ship with a charging dock or puck. More of a personal gripe than an actual con though. The absence of the dock does not impact the quality, functions, or experience of the Basilisk v3 Pro.
The Razer software, like everyone’s software, has a bit of a learning curve. And it has a lot of features and confusing interconnects between a suite of companion programs that make me wonder when Razer will redesign their systems to be a unified application. At the end of the day, I was able to program my mouse for several games and easily ported the whole profile, as a single action, from the configuration screen to mouse memory. My only advice is to download Razer Synapse directly from Razer and do not allow Windows 11 to auto install it for you. The version that Windows deploys does not detect this mouse. This may change with a future update to Windows. But for now, do yourself a favor and go get it yourself.
Final thoughts: If you have not looked at Razer for a while then you may want to check out the Basilisk v3 Pro. I own several wired and wireless gaming mice that fit in a similar price range as the Basilisk v3 Pro but I had completely dismissed Razer as an option. The build of the Basilisk v3 Pro is simple, has a quality feel to it, and is very responsive in all gaming situations. The RGB lighting is subtle and does offer more than other similar mice. The Basilisk v3 Pro has 13 lighting zones; 11 of which are on the bottom of the mouse! Most gaming mice have two. The mouse is lightweight when compared with other gaming mice I own. The Basilisk does not ship with weights or a mechanism to add weight. And the form factor is a little large for my smallish hand but still very usable.
I am pleasantly surprised by the Basilisk v3 Pro.
I would recommend this to a friend!
0points
0out of 0found this review helpful.
Share this review:

Jabra - Connect 5t True Wireless In-Ear Headphones Optimized for Calls, Music and Online Meetings - Titanium Black
Jabra Connect 5t true wireless earbuds are optimized for use in any environment - working from home, at office, or on the go. These earbuds have 6-mic call technology for clear virtual meetings or mobile phone calls, Hybrid ANC for better focus, and are comfortable for all day use. Bluetooth Multipoint lets you stay connected to two devices, like a laptop and a smartphone, at the same time. And if you~re an Android or Windows user, Google Fast Pair and Microsoft Swift Pair will have you connected in seconds, so you can breeze through your work day. Use your voice to talk to your preferred voice assistant and get all the help you need while you work. Call colleagues, schedule reminders, or get directions, without taking your hands off the keyboard. It~s a bit like having your own PA, except you don~t have to pay them and they can~t bring you a coffee. Well, not yet anyway. We~ve also gone all out to bring you a truly back-to-back-call-worthy battery, with up to 7 hours in the buds, and up to a total of 28 hours with the Qi-certified wireless charging case (included in packaging). Our fast charge feature gives you an hour of power in ten minutes, and you can stretch your battery out even further by using one bud while the other charges. The Bluetooth wireless headphones are also IP55 rated and come with a 2 year warranty against water and dust. Register for warranty and customize Connect 5t via the Jabra Sound+ app.
Solid all around earbuds for business use
Customer Rating

4.0
Images for this Review
(click to see full-size image)


Jabra Connect 5t Earbuds are small, fit easily in my ear, come with a very small charging case, and includes a wireless charging pad for the case. I work from home full time. The majority of my day is either on MS Teams or my cell phone. I normally use a 5yr old Plantronics headset for all of my MS Teams meetings and then switch over to another headset for my phone calls. Since the Jabra Connect 5t can connect to both I decided to see if they would be a worthy replacement for a full blown headset.
Connecting the Jabra Connect 5t Earbuds to my computer and phone was easy. Press and hold each earbud’s button for three seconds and then select Jabra Connect 5t Earbuds from the Bluetooth connect menu from the windows 10 wireless device management screen or the iPhone Bluetooth screen. The earbuds do have a nag function that will inform you every three seconds or so that they are ready to be paired with something. When I connected my iPhone the headset informed me that the second device was paired. This multipoint pairing is an either/or function. Meaning, I cannot listen to both devices at once. The earbuds do play nice with both devices. If I hit play on a video on my laptop then the Jabra Connect 5t Earbuds will play the audio from the Windows 10 PC. If I take call on my iPhone then the audio automagically switches to my iPhone. And then back again.
The Jabra Connect 5t Earbuds ships with three silicon tips: small, medium, large. The default installed tips are medium. I found that the earbuds held well in my ear with both the small and medium tips. The ear buds are shaped in such a way that the tip goes deeper into the ear canal than other brand earbuds. The body of the earbud is design to fit snuggly in ear cavity just above the ear lobe. The first day I was able to wear these for six hours out of my eight hour workday. Ironically, I also got the low battery nag from the earbuds around the six hour mark. The next day, I tried to use the earbuds and found that the cartilage just above my ear canal was tender enough that the earbuds proved uncomfortable to wear for longer then 30 minutes. I did wear them sporadically throughout the day. But my ears were so sensitive that I was not able to repeat the marathon session from the day before. These are still fairly comfortable compared with other earbuds I have owned. However, they still cause discomfort after pronged use.
Sound quality for phone calls is excellent. MS Teams was loud and clear. My voice was also reported to be very clear and immediate. I turned on the HearThrough feature and listened to the news on the radio. I wanted to see how well the HearThrough feature worked. Duh! It worked very well. You could tell the sound was a little muffled. But only just. I could easily carry on a conversation. And, in some instances, like music, I think the HearThrough worked better at sound reproduction than it did when processing a signal from iTunes. The one downside to the HearThrough is the Jabra Connect 5t Earbuds did not pick up my own voice while in this mode exclusively, without music or phone call. Unfortunately, this gave my own voice an underwater like quality. This did cause me to speak a little louder than I normally would when I can easily hear the volume of my own voice. I still find it odd that this not an issue when speaking on the phone or on an MS Teams call.
Music is ok. My primary use of the Jabra Connect 5t Earbuds is for office and business. Not music. So, I did not spend a lot of time on critical music listening. I did listen to some classical, heavy metal, electro swing, dance, and classic rock. It sounds like a lot but in reality I was just throwing stuff at them to get a sense of musical performance. Overall, I though the highs were clear, the mids seemed a bit flat in some instances, and bass response was heavily dependent on volume level. The Sound+ app allows for EQ presets and custom EQ presets. For example, I was able to turn up the bass response with classic rock while listening at low to moderately volume levels. Relatively solid bass only comes when riding the volume button to higher levels.
Sound+ is a solid experience. Hunting for what you want is kept to a minimum. What I like about Sound+ is that the first time I connect a new device the app presents the key features for setup of that device. For example, instead of hunting for ANC setup I was present with an option to calibrate ANC for my environment up front. Since I was in a quiet room that did not require ANC I passed on the configuration step. But, later in the day, I was at a sporting event and decided the event, with the crowed around me, would be a good place to try out ANC. I loaded up the app, turned on the calibration, and within seconds I had ANC calibrated to tune out most of the white noise from the crowd. Overall, ANC is really good. Much better than other earbuds I have owned in the same class as the Connect 5ts. From the app, I can further adjust ANC, HearThrough levels, and turn off both. I do have control over on off of each of these features from the earbuds themselves. The app simply gives me more flexibility.
The Sound+ app provides a lot of flexibility with the earbuds. The buttons on each side of the earbud can support up to three contextual actions each. If you are playing music then you can configure the button to handle things like volume, pause, track skipping, etc. When using for phone or conference calls then those same buttons can be used for three additional functions. The system is quite flexible. The Connect 5ts also support voice assistants, personalization, Find my Device, Spotify Tap, and more.
Final thoughts. Overall, I do like the Connect 5t even after some of the criticism I provided here. Most earbuds I can only wear for 45 minutes before they become uncomfortable enough to remove. The Connect 5ts unique shape extends that period by hours. They will not, however, be replacing a my dedicated headset simply because I cannot wear the Connect 5ts for extended periods of time.
Phone calls and MS Team’s calls are crystal clear for both me and my team. The ANC is powerful enough to block out background noises in my home and at a high school sporting event. Music is good enough as an ultraportable solution. And the battery life is solid for an earbud this size. I also like the multi-point connect. I find multi-point to be an important feature because most professionals similar to myself rely on both our laptops and cell phones for voice communications. My only real gripe is that I wish Jabra had designed the earbuds with capacitive touch surfaces instead of push buttons. The cartilage in my ears does become sensitive after a few hours of use. The last thing I want to do is press a button the also presses the Connect 5ts into a spot that is already sensitive. Finally, HearThrough is excellent less the issues with my voice sounding muted.
If you are a professional who is looking for a mobile communications solution then I encourage you to give the Jabra 5t a try.
I would recommend this to a friend!
+3points
5out of 7found this review helpful.
Share this review:
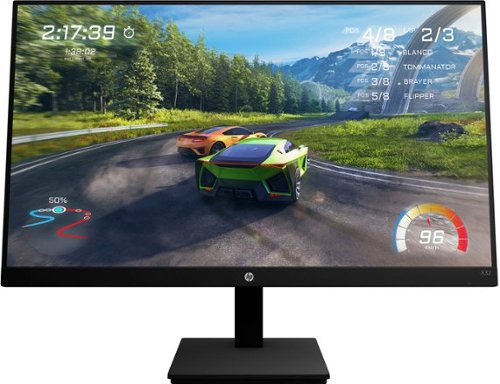
HP - 31.5" IPS QHD AMD FreeSync Gaming Monitor - Black
Take on the competition and explore open worlds in comfort with the HP X32 31.5" 16:9 FreeSync 165 Hz QHD IPS Gaming Monitor. This 2560 x 1440 QHD monitor supports a 165 Hz overclocked refresh rate, which works with the 1 ms response time to reduce motion blur and to deliver liquid-smooth gaming experiences. At the same time, AMD FreeSync Premium technology helps to reduce stuttering and screen tearing when connected to a compatible graphics card.
Fantastic monitor, no frills, Gets the job done!
Customer Rating
5.0
First off, no Hype. I originally had reservations about this monitor because I have become somewhat of a snob when it comes to performance and bling with my monitors. I have used a lot of monitors over my lifetime including office, laptop screens, gaming laptop screens, and gaming monitors. To date, the best monitors I have used all come from HP. And yes, I have owned some of the more expensive and gaming blingy brands on the market. I define myself as a casual gamer who is more interested in image quality over raw performance. The X32 gives me excellent clarity, beautiful color saturation, responsiveness, a solid monitor menu experience, blacks that do not look washed out, sharp text, and an even backlight. The left, right, and top bezels are so thin that the monitor is borderless. Motion blur, ghosting, and tearing are all absent with the right gaming hardware and configuration.
Setup:
First, 99% of the packing material is cardboard. Way to go HP! My recycling center thanks you.
Unpacking and setup took all of 10 minutes at most. In the box you have a power cord, display Port cable, the stand, the x32 panel, a quick start guide, and a warranty card. The stand snaps into the back of the monitor with little effort. The monitor has an HDMI port, Display Port, mini-stereo jack for headphones, power, and a cable lock hole to secure the monitor to a desk. The monitor is also VESA compatible for those how want to provide their own stand or wall mount.
Gaming:
I tested the HP X32 on three systems: custom built gaming desktop, a high-end gaming laptop, and my work laptop. More on my work laptop later.
My custom Desktop currently sports an Nvidia 1660 Ti (don’t ask), Ryzen 5900x, and 32GB of memory. I knew from the start that the HP X32 resolution would be a challenge for the Nvidia 1660 Ti. Many of my games barely broke the 60fps mark at 1440p. Part of the issue was getting FreeSync to function correctly FreeSync under the Nvidia driver. This was mostly because my old monitor was G-Sync compatible. This meant that the Nvidia Control panel was pre-configured for G-Sync. The HP X32 is recognized by the Nivida Control Panel as G-Sync compatible. This caused an issue with the monitor since it really wants FreeSync. I noticed this the most in Mechwarrior Online where the indicator icons above the Units blurred, elongated, and shock as my moved my field of vision from left to right. There was a crazy amount of motion blur. And the FPS counter was all over the place and, in many instance, elevated to levels I could never achieve at 1080p. Turning off G-Sync globally in the driver, setting Adaptive Sync globally, and then re-enforcing Adaptive Sync at the game level in the Nvidia Control Panel solved almost all of these issues. I also set the “Response Time” to Level 3 in the monitor menu. Unfortunately, the FPS was still too low to resolve all of the motion blur. But, all of the annoying icon issues and ghosting were resolved.
My go to games were Mechwarrior Online, Mechwarrior 5, Halo, Battlestar Galactica Deadlock, and Forza 4. All games were played over a Display Port cable. Still images in game were beautiful with the monitor set to “Game” with brightness and contrast set to 100%. The very first thing I noticed was how my Catapult battlemech’s camo pattern popped on screen. Colors were rich and vibrant. Panel lines and edges were very sharp. My last monitor was a 25-inch, 1080p, 240hz gaming monitor from a popular manufacturer other than HP. The issue I had with that monitor was that there was no good balance between brightness and contrast. I had to manually turn up the brightness from the monitor’s built in menu to allow me to make out detail in dark scenes. I would also be forced to wash out the colors to do so. In bright scenes, such a snow-covered landscapes, I was forced to do the opposite and manually turn down the brightness because the screen would completely wash out otherwise. Lens flar on any of these maps usually resulted in a quick loose for me because the older monitor simply could not handle big differences between light and dark in the same scene. I don’t have these issues with the HP X32. I set the x32 to 100% brightness and 100% without any issues with wash outs or with scenes being too dark.
Forza 4 allowed me to achieve 60 FPS. The game detected my hardware settings, auto set the game’s graphical settings, and then gave me a first-class gaming experience. My car was rendered beautifully. I noticed some motion blur outside to the side of the car, but it was hard to detect since most of my focus was on what is in front of the car. The colors were bright and vivid. The screen brightness and contrast was excellent. There was no ghosting or screen tearing. Overall, it was a very good experience.
Upping my game to my gaming laptop resulted in an even better experience. My gaming laptop has an Intel 10th Gen CPU, Mobile Nvidia 3080, and 32 GB of memory. This puppy is a beast. All my games received double the performance of my gaming desktop. I still had to reset the graphics settings in the Nvidia control panel to turn off G-Sync and activate Adaptive Sync. Forza 4 was even better looking because the graphics engine was able to turn on more features. My Mechwarrior looking great. And I was even able to almost max out the monitor’s FPS in Battlestar Galactica: Deadlock with a max FPS of 164. The only problem I had was the laptop screen overlapped the monitor screen by about half an inch. But, in all honesty, if this really bothered the fix would have been to place a book under the monitor to elevate it a few inchs.
Work:
And now let’s talk about work. The gaming habit must be fed somehow. I do a lot of work from home. I spend a lot of time in MS Word, Excel, and Powerpoint. I connect my work laptop to the monitor via use of the HDMI port. I normally have two cables connected to my monitor exactly for the purpose of maintain a connection to my gaming computer and having a universal connection to another device such as my work computer. This is where the other presets really came in handy. On the gaming preset, text is ok in MS Office applications, but I would not want to spend the day with it. Text sharpening on a white background was terrible. Night mode really cleaned up the text. Night mode also reduced blue light considerably and reduced the brightness. There are other modes that also sharpen text. You will need to experiment. Each monitor mode is fully configurable so you can adjust it to your taste. My preference for work or web browsing is to set Night mode and then reduce brightness to zero. I can work all day for hours without any eye fatigue using this configuration. Again, I have tried something similar on other monitors, including my laptops, but no one quite gets it as right as HP does. Overall, the HP X32 is equally affective with gaming and day to day computer use.
Cons:
My first con is the use of four push buttons for menu navigation and one button for power. The menus are easy to navigate. But one false push and you could find yourself switching inputs by mistake. The HP Omen Gaming Hub does work with this monitor. I wish HP leverage the joystick from the HP Omen monitors. Then again, this monitor is about the panel and not the bells and whistles. It would have been nice if HP included access to all of the monitor’s controls through the Omen Gaming Hub. The monitor OS here is the same as Omen monitors so it is not like HP would be doing something special just for the X32. Maybe HP will revisit this in some future up for the Gaming Hub. At least I hope so.
Second con is the fixed height. It is not a big con. If the monitor is too low then stick a book under it or mount the monitor to an aftermarket wall mount or desk mount. The X32 is mounted high enough that my work Laptop does not interfere with the screen. But my gaming laptop does cover up part of the monitor. The X34 stand does allow some flexibility in this area. So, it would have been nice if that was extended to the X32.
Third, sometimes the monitor resets the presets to their default values.
Third, sometimes the monitor resets the presets to their default values.
Finally, the monitor could use some non-slip feet. Mine did not come with any. I do stand at my desk during long meetings. This is typically when I tile the monitor up so I can comfortably see the screen without slouching. However, the monitor also shifts position when I adjust the tilt. My desk is a little uneven due to some bowing over the years. I have a shim under one corner of the monitor to make everything level. The monitor goes out of level when I adjust the tilt because the base slips. I can add my own silicon or rubber feet. So, again, not a big con.
Final thoughts:
This is a budget gaming monitor that gives you a lot. Coming from a 25-inch, 240hz gaming monitor I thought I was giving up a lot. The only thing I really gave up was an awful contrast and brightness implementation and RBG lighting. The top and side bezels are thin enough that they may as well not be there. The brightness, contrast, and vividness of the screen is excellent for an IPS panel. The 165hz refresh is more than enough for anyone who is a casual gaming like me. And the HP presets, and preset flexibility, is excellent. Cons, for me, are nit picking. If you are looking for an upgrade, or even an entry level gaming monitor that provides a lot of real estate, then give the HP X32 a try. I think you will like it.
I would recommend this to a friend!
+3points
3out of 3found this review helpful.
Share this review:

Logitech - G735 Aurora Collection Wireless Over-the-Ear Gaming Headset for Windows, Mobile - White Mist
Play your way with G735 Wireless Gaming Headset from The Aurora Collection from Logitech G. Logitech Gaming Headset intentionally designed to maximize comfort for all players inclusive of smaller headsizes. Play, stream, or listen comfortably all-day, this computer headset features an adjustable headband, breathable materials, and cushy, rotatable cups. This headset is even designed with glasses and small earrings in mind, so no more pinched ears. Long-lasting, this gaming wireless headset allows you to take your gaming to go (and bring the fun with you) with up to 16+ hrs of wireless playtime (at 50% volume with lighting on, 56 hrs at 50% volume with lighting off) and multi-platform connectivity.
A well put together package
Customer Rating
4.0
Images for this Review
(click to see full-size image)


The Logitech G735 headset has the look and feel of a glam gaming accessory. This is obvious from the supple white exterior, soft RGB lighting, and the optional pastel pink and green ear cup/microphone accessories (not included). The ear pads have a plushy marshmallow feel to them and are very comfortable to wear. The G735 styling is not aggressive looking by any stretch. These are not giant ear cans with an over exaggerated head band or other styling. The G735 is petite, fits closely to the head, and has a minimalist profile. The ear cup’s split level RGB lighting is equally supple using pastel color palette. The styling may lead you to believe that the G735 is wimpy. The connectivity options and the flexibility afforded by the Logitech G Hub software really makes the G735 stand out of the crowd.
Setup:
The G735 setup can be very simple or very complex depending on what it is you are trying to accomplish. If your goal is to get into gaming as quickly as possible then setup is as simple as plugging int the dongle, activating Bluetooth sync, or plugging the USB cable into your computer, turning on the headset, and choosing G735 from the Windows Audio menu. Done.
If you want to leverage all the features and flexibility of the G735 then you have a lot of fun head of you. For example, the G735 can be configured for simultaneous playback of two separate devices. Want to play our favorite game but don’t like the soundtrack? No problem. Turn off the in-game music, connect the headset to your iPhone or other device, and stream your favorite music. You will have both the game sounds and your music playing through the cans simultaneously and without distortion.
The Logitech G Hub software has a very rich set of features to customize the G735 to do anything you want. Want to sound like a robot while rocking pink LED lighting on the cans? Go for it. Want DTS surround with any audio source. It’s in there. Want to leverage nVidia Broadcast instead of using Blue VO!CE? This is in Beta but it is in there. Honestly, there are more features for the headset than I can comfortably cover. In summary, Logitech took great care to maximize the sonic customization of the G735. This is fantastic for anyone who is streaming their game play on Twitch. There are ambiance sounds that can be tied to macro keys to play whenever you want. I am not a streamer so am unsure how useful this feature is. But I will add that G Hub allows you to add your own effects and ambiance sound samples.
Sound:
The one feature I really like is simultaneous playback from two devices. I don’t always like the soundtracks of my favorite games. It gets tiring listing to the same music loop for hours. However, I don’t want to bog down my system by playing iTunes or another music service in the background. The G735 is capable of handling Lightspeed and either a Bluetooth or USB sources simultaneously. I tested this with Mechwarrior 5. I turned off the in-game music and launched some dance beats on my iPhone. Once the connections were established the system just worked.
Simultaneous play does take some volume balancing. The G735 has an independent volume knob. Windows 11 and my iPhone also have independent volumes. For me, I set Windows 11 volume to 100%. Then I adjusted the nob on the side of the G735 left ear cup until I had the volume I wanted. I then started my music on my iPhone and adjusted the iPhone volume, from the phone, until I had the volume level that works for me. Now, this works great until I change content. Each piece of content has its own preset volume. I did not find this very difficult between games. I did find this cumbersome with streams services where a default volume level is a fantasy at best. Just be prepared to ride the volume knob when changing content.
The G735 sound is clear with both stereo and surround sound modes. However, you will want to play with the presets and the equalizers built into the G Hub software until you find the sonic behavior that works best for you. I found the G735 adequate for gaming, music, and movies regardless of the mode. However, the G735 are not very big on bass. Turning the bass all the way up in the equalizer adds more but still is not enough to my liking when listening to content with heavy bass. Explosions, footsteps, and dance beats are anemic. Turning on surround sound will further wash out the bass. In this case, I think it is more of a compromise for adding DTS Surround than an actual con.
There is no noise canceling. Logitech does not advertise that there is any. However, most over the ear headsets I have owned offer some level of sound isolation. Even if the sound isolation is minimal. The G735 offers zero sound isolation in the ear cup. I can hear just as clearly with them on as off. I am unsure if this was intentional or not. I find it a plus because I can hear my own voice when speaking. Essentially, it prevents me from yelling into the microphone because I cannot hear how loud I am. It is a con because I can hear all the background noise including my gaming laptop’s cooling fan, air purifier fan, and my keyboard clicks when using the G735. Again, Logitech does not make any claims to noise isolation or ANC. So, not a con. Just something to be aware of.
Recording:
I recorded a few lines of text to help calibrate the input volume. The microphone boom is flexible but does not hold it shape well. Essentially, it sticks straight out with no possibility of getting the microphone to rest beneath my chin. There is also no windshield, fuzzy thing, on the microphone. It does not seem to need one. While recording, the microphone picked up my voice perfectly. It did not record any breathing or any fan noise in my room. And the playback of my recordings was crystal clear. I did have a few phone conversations with this headset. There were no issues.
The Logitech G Hug allowed me to use a recording of my voice to playback using all the different playback pre-sets and special effects voices. I tried out the different broadcast voices and the special affects voices. If you want to sound like an over synthesized robot while broadcasting, then you are in luck. It’s in there. Overall, I think voice capture and reproduction are fantastic.
Final thoughts:
The G735 headset is as much a visual accessory for streamers and influencers as it is a solid gaming headset. The color, styling, and accessories are focused on enhancing a certain visual style that focuses on the feminine. And that is ok. The market is flush with giant, over the top, visually loud looking headsets. In this sense, I think Logitech hit their mark. The headset is small, lite, close to the head, and RGB color presentation screams fashion accessory. The audio performance is good. Recordings are fantastic. And the flexibility offered via Logitech G hub is excellent. Bass and sound isolation are weak. Then again, the G735 allows for both surround sound and multi-source simultaneous playback. Compromise had to come from somewhere. The G735 is a very well put together package.
I would recommend this to a friend!
+1point
1out of 1found this review helpful.
Share this review:

HP - LaserJet Tank 2604sdw Wireless Black-and-White All-In-One Laser Printer preloaded with up to 2 years of toner - White
Business capabilities with up to 5,000 monochrome pages of prefilled toner and an ultra-low cost per page. All in one Printer. Pre-filled with up to 2 years of Original HP Toner. The HP Toner Tank System makes it easy to refill delivering the lowest cost per page in black and white.
Great Laserjet MFP with some software hang-ups
Customer Rating
4.0
Setup:
Setting up the physical printer is super easy. The LaserJet Tank 2604sdw ships with a full toner tank. That leaves unpacking, removal of shipping material, load the paper tray, and finding a wall outlet to complete physical setup. HP Smart setup is a little more difficult. In my case, HP Smart got as far as configuring the printer for the network but failed the actual setup and integrate the printer into my network. Instead, I installed the printer driver manually and printed a test page. I then logged into my network’s wireless router and reserved the IP Address for the printer as a static address. HP Smart then recognized the printer and added it the HP Smart application after the manual setup.
Printing:
Printing with the LaserJet Tank 2604sdw is fast and easy. A 20-page duplex text document took less than 30 seconds to produce from the time I clicked print to the time the final page was printed. This was true regardless if I used the printer five minutes between prints or five hours between prints. The LaserJet Tank 2604sdw does have a slight time delay to first page printed after sitting for hours. It is still a shorter startup than most other laser printers I have used. Printing from the ADF and the flatbed is also very quick and easy. The printer will spit pages out as quickly as the ADF and flatbed can scan them. The control panel on the paper tray controls number of copies, darkness, and cancel functions. There is also a feature that allows for the two-sided scan and subsequent print of an ID card such as a driver’s license.
The ADF is not capable of two-sided simultaneous scanning. Producing copies of a two-sided document will require manual collation once all pages have been reproduced as single sided copies.
Finally, the HP Smart software acts like a print, scanner, and faxing service for the printer. I have both a LaserJet Tank 2604sdw and an HP Smart Tank 7001 MFP AIO. Both printers are setup in the HP Smart application. This allows me to see the status of both printers, manage the features and connectivity of both printers, and setup any special features unique for each printer. For example, I can setup HP Print Anywhere and Secure Print from the LaserJet Tank 2604sdw but not from the HP Smart Tank 7001.
Scanning:
The LaserJet Tank 2604sdw has two scanning options: Automatic Document Feeder (ADF) and Flatbed Scanner. The ADF supports up to 40 pages at a time. The ADF is fast. It blows through forty pages in about a minute. The processing and delivery of the scanned pages to the computer takes a bit longer. A single page can take about 10 to 15 seconds after scanning to appear in the HP Scanning application. I have not waited more than 30 seconds for any job to appear in the HP Scanning software once the LaserJet Tank 2604sdw is done scanning. By contrast, the LaserJet Tank 2604sdw will print a one-to-one copy of a document scanned by the ADF as quickly it the ADF can scan it.
The ADF max resolution is 300 dpi. 300 dpi does not produce the best scans but it is adequate for most uses. Two issues I did find with the ADF were misaligned pages and compressed or elongated text at the top or bottom edges of the scanned pages. When this does happen, the text is still perfectly legible and can still be accurately identified by OCR. For near-perfect scans/copies then you will want to use the flatbed scanner. Max resolution of the flatbed is 600 dpi.
The ADF does not scan simultaneously scan both sides of a page. Obviously, you can manually scan both sides of the document using either the ADF or the flatbed scanner. The HP Smart scanner application allows as many additional scans as you want for a single job. You can also re-order the pages before saving the scanned document. Essentially, you can scan all the odd pages using the ADF, flip the pages and scan all the even pages, and then re-order. Or you can scan each page front to back, one at a time, using the Flatbed scanner. Either way, the HP scanner application interface is rudimentary and leaves plenty of room for further development.
OCR is excellent! I OCRed several documents and did not run into any issues. A straight OCR will remove all formatting and just leave the text. However, you can save the scanned document in multiple formats including MS Word. My MS Word scanned document preserved the formatting and the relative font size. There were some strange artifacts here and there but nothing a quick proof reading didn’t resolve. The OCR to Word function also groups text into text box objects on the page. It is not setup to be a single contiguous body of text. The text boxes will expand and contract independent of the other text boxes. If your use case is to scan, OCR, and edit these documents then know that you will have extra steps to take before you can call your document finished.
HP also offers additional features to remove blemishes, punch holes, bent page corrections, and corrections for scanning book pages. These advanced features are made available automatically through the HP Scanner application.
HP Smart:
There is good and “room for improvement” with HP Smart. First the good.
The HP Smart software has a lot of features that help level the playing field between a small office/small business and larger companies who have deeper pockets. First, HP Smart allows for the setup and management of multiple HP Printers. I mentioned earlier that I have multiple HP multi-function printers on my network. Both are present in the HP Smart application. From HP Smart, I can initiate scans, print documents, print photos, sign up and use Mobile Fax, and access Printer Settings without ever leaving my chair. Better yet, if I download the HP Smart app to my cell phone then I can leverage secure print and release functions from Print Anywhere on the HP LaserJet Tank 2604sdw. Essentially, the printer can be setup to not release documents until the printer makes a Bluetooth connection to your phone thus identifying you as the appropriate owner of the document. This is big IT level functionality without the expensive IT department to maintain it. HP Smart will also allow for printing from literally anywhere in the word to your printer. Combine this with secure printing features and you have a very powerful toolset at your disposal.
Room for improvement:
HP Smart is useful and frustrating all at the same time. For example, I have two HP Printers on my network. If one of the printers goes into sleep mode, then HP Smart cannot communicate with it. Sometimes I must restart the printer, press the printer ready button, or press the wireless network button to get HP Smart to see and interact with the printer. I also have had issues jumping between systems to use the scanner. My HP 7001 has a higher resolution flatbed than the LaserJet Tank 2604sdw. Once I make the switch, HP Smart will indicate that the scanner for the LaserJet Tank 2604sdw is offline. Even though it is not offline. The only solution I have found is to close out of HP Smart application and restart it.
My second point of frustration is administering the printers through their advanced menus. I need two things: the PIN number as printed on a label on the printer and a Username/Password combo. The PIN is provided on a sticker under the Output Tray. The Username/Password is more of a mystery because there is almost zero information about where this is coming from. I could not find any information regarding a default credentials or how to reset them. The good news is that you can access the printers webservices by entering it’s IP address into a web browser. You still have the same security challenges for sensitive settings. But, you can check basic information about the printer if you do not wish to use the HP Smart application.
Finally, the primary HP Smart page for the LaserJet Tank 2604sdw does not display paper tray levels, toner levels, or imaging drum health. Maybe this will be resolved in an upcoming update to HP Smart. If you can get into some of the advanced printer screens then you can find this information. But, like mentioned above, once you mess up the log-on then even this unprivileged information is blocked from view.
Final thoughts:
Overall, there is a lot to like about this printer. I feel that HP Smart software needs some more work before I am comfortable calling it a fully integrated solution for managing all the HP printers on your small business or home office network. The LaserJet Tank 2604sdw is small for an All-in-One LaserJet. The removal of the expensive toner cartridge is a huge plus. I am very glad to see that HP is taking their LaserJet models in the same direction as their Ink Jet Printers. This reduces waste and expenses. Print quality is top notch and fast. Scanning quality ranges from great to acceptable depending on the scanning source and resolution. If you need higher resolution scans, then you will want to either invest in a separate scanner or investigate an HP printer with a higher resolution flat bed scanner. The resolution of the LaserJet Tank 2604sdw is perfectly acceptable as a home office or small business all-in-one solution. It is not good enough for scanning high resolution images for marketing campaigns that require the best resolutions possible. Finally, the best part is that this printer does not ship with a wimpy beginner toner cartridge and imaging drum. It ships with a full toner tank and 50K imaging drum. The fact that there is no toner cartridge drives down to the total cost of ownership for this printer while also reducing the amount of wasted plastic used to produce those toner cartridges.
I would recommend this to a friend!
+4points
4out of 4found this review helpful.
Share this review:
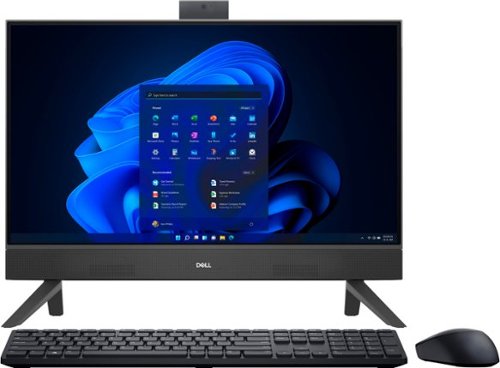
Dell - Inspiron 24" Touch screen All-In-One - AMD Ryzen 5 - 8GB Memory - 512GB SSD - Black
Introducing the latest Inspiron 24 All-in-One Desktop with a TV-inspired design and a display which features ComfortView Plus to help reduce harmful blue light and a flicker free panel optimizing eye comfort. Redesigning the front screen experience with a narrow 4-sided border with touch option for a clean look and feel. Stay up to date with the latest AMD 15W processors.
Great value, fits my wife's use case perfectly
Customer Rating
5.0
The Dell Inspiron 24” AIO fills the space between a laptop and a desktop computer. The footprint and capabilities are equivalent to a work laptop but with a screen size typically reserved for a desktop. The Inspiron AIO has a Ryzen 5 5625U 15-Watt laptop class CPU. The CPU leverages an integrated Radeon GPU which saves space in the case and removes the need for expensive, exotic cooling solutions to keep the CPU/GPU cool. I have been using the Inspiron AIO for several days for general office work, Netflix, YouTube, and consuming web content. Sometimes all of this at the same time with the aid of an external monitor. Not once have I heard a fan.
The footprint is limited to a narrow triangle stand, a narrow bare-bones wireless keyboard, and a basic wireless mouse. The power supply is about the size of a typical Dell Latitude laptop power supply. And that is it. The power supply is the only cable coming off this system. And that is easily hidden behind the Inspiron AIO. There are tree USB-A style connections (one taken up by the keyboard and mouse wireless receiver) and a single USB-C style connector. There is an HDMI input and HDMI output port. A single RJ-45 gigabyte network port. An SD Card port for additional storage or transfer of files and photos from other devices. And an audio out port.
The Inspiron AIO has Bluetooth connectivity. I was able to setup my wireless headphones through Windows 11 Bluetooth & Devices screen under Settings. I was also able to connect to my home network with no issues. I was able to see my other Windows 10/11 devices, storage devices, TVs, Receivers, Printers, and other devices on my network. Printing to my local HP Printer was as simple as picking it from my print screen drop down list and pressing the print button. Windows has come a long way.
Loading applications is generally quick. This is thanks to the 8GB of memory that ships with the Inspiron AIO. I currently own two computers with 4GB of memory: one with Windows 10 and one with Windows 11. 4GB of memory is enough to run Windows 10/11 but nothing runs well. 8GB is the magic minimum amount of memory required to deliver both a clean application experience and allow for some level of multi-tasking. In my case, I wrote a Best Buy review on a Dell Inspiron AIO in MS Word, had a large Excel Spreadsheet in the background, several MS Edge tabs open, watched a YouTube video, and ran an external 24” monitor as an extended desktop. I pushed 7GB of total memory usage but did not stress the system enough to cause any lag between task switching nor did I experience any issues working with any one of these applications. The Ryzen 5 5625U has 6 Cores and 12 total threads for multi-tasking. The CPU had zero issues managing all of my open applications.
The keyboard is very narrow. It is a full keyboard complete with number pad and F keys. The keys are chicklet style without backlighting. The underlying keyboard technology is membrane and not mechanical. The keys are very stiff. Much stiffer than your average work laptop. A half hour of typing is enough to fatigue my fingers. I typically type all day and do not run into fatigue. Maybe the keys will soften up after a break in period but I have no guarantee of that. Most likely I will replace the keyboard with something higher end. The mouse is a basic three button mouse. There is the standard right button, left button, scroll wheel, and the scroll wheel doubles as a third button. The included Dell software does allow for the adjustment of the DPI settings. From a practical perspective the DPI setting will control how fast the mouse pointer moves across the screen. The included Dell software does allow for the F1 to F12 keys to be reprogrammed to functions other than the default printed on each key. The scroll wheel button can also be assigned a function.
The 24” touch screen is of good quality. But, for some reason, the default refresh is set to 59.94 Hz. My eyes are very sensitive to strobing. Just below 60 Hz was enough to bother me. Luckly, I was able to reset the monitor refresh to 60 Hz. Windows will allow me to set the screen to 75 Hz, which would be even better for my eyes, but the screen apparently cannot handle the higher refresh. Second, at 1080p, this monitor is not as sharp as I would expect. It feels more like a 27” 1080p monitor that has a lower DPI than I would expect from a standard 24” monitor with a denser DPI. To compensate, I set Windows Scale to 125% in the Settings/System/Display screen. This only bothers me when working with text at 100% scale. Again, I can compensate. The secondary monitor I used is a 24” gaming monitor that can reach 240 Hz. I was able to run the Inspiron AIO 24” monitor at 60 Hz and the 24” external gaming monitor at 240 Hz at the same time without any issues. If I wanted to, I could have disabled the Inspiron AIO monitor so that the integrated GPU could focus all its resources on the gaming monitor. But that would defeat the purpose of owning a computer like this.
There are only two buttons on the Inspiron AIO: power and video select. Changing brightness, for example, must be done through Windows 100. By default, the screen is set to 100%. This was way too bright for me and for the room I generally work from. The slider allows me to turn down the backlighting to almost nothing. Which I really love. I have laptops that cannot reach low dimming levels and can, and do, hurt my eyes in very low lighting situations. I am happy with how dim the Inspiron AIO can get.
What do I not like about the Inspiron AIO. First, gaming stinks. And so it should. This is not a gaming computer nor is it billed as a gaming computer. But, I had to try anyway. First up was Fortnite. This game will play on anything including this Inspiron AIO. The graphics are good enough. I was able to maintain 60 FPS throughout gameplay. But the input lag was terrible. I still managed to hold my own in a few engagements using just the included wireless mouse and keyboard. Realistically, this game is not enjoyable on this system. Next, I tried Civilization V. Load times and times between turns were exceptionally slow. The game, and system, simply stopped responding around turn 20. I had to force reboot the system because all applications on the system became unresponsive. I am sure this will run some simple games like what you will find in the Microsoft Store. But the Inspiron AIO is not a platform for modern AAA titles.
Touch controls are excellent. I did not have any issues using the touch screen capabilities of the system.
The Inspiron AIO has a built-in pop-up camera. The image quality is equivalent to a Dell Latitude laptop. It gets the job done but not much more. The optics are not good enough for Windows Hello image recognition sign-in. The camera is also not good enough to capture fine details. For example, I took a photo of the instructions that shipped with the Inspiron AIO. I could not read the text in the photograph. It is good for video conferencing when bandwidth is a major concern. Which makes it ideal for MS Teams and Zoom meetings. Which, in all honesty, is what the camera was designed for. I do like the fact that the camera can be hidden inside the body of the Inspiron AIO. This prevents bad actors from taking over my camera and spying on me.
Overall, I am pleased with this system. In my opinion, this computer will make a good student computer, work computer, general home use computer, and is good for anyone who is looking for a general computing experience with a larger screen than a laptop. The Inspiron AIO setup is as simple as setting up a laptop. In my case, this computer is going to be setup on a desk in my basement and used for general computing, some light office work, and drive my wife’s Cricut machine and accompanying design software. She currently uses a laptop with a 15” screen and often complains that she wished she could have a larger screen without taking up additional space on the work bench. The Inspiron AIO fits her use case perfectly. We will get many years of use from this system.
I would recommend this to a friend!
+3points
3out of 3found this review helpful.
Share this review:
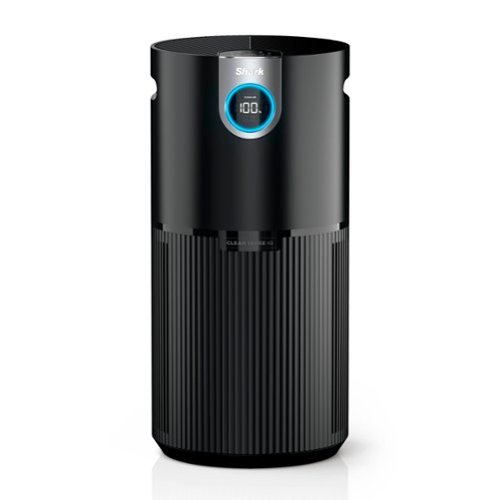
The Shark Air Purifier MAX uses Pure Air MicroForce to deliver fast, powerful, and quiet purification in a compact size. Clean Sense IQ automatically improves your air quality and reports results in real time. A HEPA filter captures 99.98%* of airborne particles like allergens,** dust, and dander. Cleans up to 1200 square feet. *Based on IEST-RP-CC007, 0.1-0.2 microns. **Allergens refers to non-living matter.
Pretty good
Customer Rating
4.0
Images for this Review
(click to see full-size image)


Initial impressions:
The Shark Air Purifieer Max (P200 model) is a handsome cylinder that stands about 22 inches tall and just shy of 11 inches in diameter. It is just the right size for the floor without being obtuse. But to large to be placed on a desk or dresser. I was surprised by the volume of filter exposed to the outside. Two thirds of the bottom half of the cylinder exposes the filter to the outside. The area of exposure is equivalent to that of a traditional box air filter while only taking up half the floor space.
I like the large LCD display. The numbers are large and easy to read. The illuminated ring may be off putting to some people. This is especially true if you plan on running this in a bedroom. The good news is that there are three lighting levels: high, low, and off. The touch panel is also lit. All the touch settings have backlighting. The lighting levels impact all of the lighting equally with the exception of the power button and the backlight button. To either side of the LCD screen is information about how to read the LCD and the same 3D barcode found on the instruction sheet. I plan on leaving the marketing stickers on the unit. It is useful information. And the presentation of the stickers does not scream “cheap marketing material.”
The unit does a good job of detecting impurities in the air and cycling through the room’s air quickly. For example, this time of year the pollen is so thick that it turns everything yellow. I set the P200 to auto. It detected the levels of pollen in the air and set an appropriate level to reduce that number to zero. In a sealed room, this process was relatively quick. With the window open the P200 would cycle through low and low medium speeds to keep the pollen count within an acceptable range. Obviously with the windows open the count will never be zero.
The unit does a good job of detecting impurities in the air and cycling through the room’s air quickly. For example, this time of year the pollen is so thick that it turns everything yellow. I set the P200 to auto. It detected the levels of pollen in the air and set an appropriate level to reduce that number to zero. In a sealed room, this process was relatively quick. With the window open the P200 would cycle through low and low medium speeds to keep the pollen count within an acceptable range. Obviously with the windows open the count will never be zero.
Setup:
Setup of the P200 was easy. The unit ships with a simple five step instruction sheet. Each instruction is accompanied by an image. There is also a 3D barcode that will take you to the online instruction manual. Setup took about five minutes. I set the unit about three feet from a wall, plugged it in, set the unit to Auto, and waited a minute for the unit to evaluate the air quality.
Operation:
On low, this unit is very quiet. There is a very distinct rattle when the fan ramps up from low to low medium. I checked the unit and cannot find anything loose or broken so I figure this is normal operation. The fan does even out when it gets up to speed. The unit will sound like a fan when the fan is set to medium and high. That’s kind of expected given the amount of air the P200 pushes at those speeds. The fan does rattle a bit when ramping up and down between speeds. As before, the rattling ceases once the fan reaches its designated speed.
The unit has two operating modes: Auto and Manual. Pressing the Auto button, or either of the arrows on either side of Auto button, will switch the unit from Auto to Manual. Pressing Auto again will put the unit back into full Auto. Auto mode is tied directly to the air quality sensor. If the air quality is poor then the fan will automatically increase in speed until the sensor detects air quality returning to normal.
For example, the other night my neighbor decided to smoke his tires. It’s late spring so my windows are open. Before I know it the whole house is full of burnt rubber and smoke. Airing out the house is almost never an option because the stink outside the house can linger for hours. I closed the windows, turned the P200 to full auto, and let it do its thing. The P200 detected the fumes, the LED light ring turned Orange, and the % clean air reading dropped below 80%. The fan automatically spun up and worked to cycle the air in the room as quickly as it could. Within a few minutes, air quality levels were detected to be about 90% and continued to increase over the next five minutes. I did have to move the P200 around my home to hit every room. This is mostly due to the layout of my house and not any limitation on of the P200. Overall, the P200 worked performed beyond my expectations.
Smell:
Yes, this is an important one. I have owned several HEPA rated air purifiers over the years and almost all of them come with a chemical smell that must gas out over time or develop a stink within a few weeks of operation. I have been running the P200 for about a week and so far there is no unnatural smells.
Filter:
The filter is a HEPA filter so it will clean anything out of the air that is 0.3 microns or larger. That’s the standard. It is not a HEPA filter unless it meets this standard.
Final Thoughts:
Overall, I am pleased with the Shark Air Purifier MAX (P200). There is the annoying fan rattle when switching between fan speeds. Otherwise, the performance has been great. The filter does not stink. The LCD is big enough to read but not so big as to be obnoxious. The color-coded LCD ring is also a great high-level indicator of air quality for those times when you are not close enough to read the numbers on the screen. The control panel is easy to use. Switching out filters are very quick. The P200 has a handle on each side for easy movement between rooms. I also like that I can turn off the LED and control panel backlighting when they are not needed.
I would recommend the Shark Air Purifier MAX with True HEPA & Microban Antimicrobial Protection to a friend.
I would recommend this to a friend!
+4points
4out of 4found this review helpful.
Share this review:

The WH-1000XM5 headphones rewrite the rules for distraction-free listening. Two processors control 8 microphones for unprecedented noise Cancelling and exceptional call quality.
Great headphones with industry leading flexibility
Customer Rating
5.0
Disclaimer:
I am a member of Best Buy’s Technical Insider Network, TIN for short. Reviewers in this invitation-only program are provided products for the purpose of writing honest, unbiased reviews.
Initial impressions:
I currently have a pair of the Sony WH-1000XM2’s from several years ago. They are very comfortable headphones with good musicality and very good noise canceling. The WH-1000XM5’s carry on this tradition in a new package with upgraded features. The noise canceling is still top tier. Musicality is still very good. And four of the eight external mics do a fantastic job of delivering crystal clear voice when speaking on the phone, working in MS Teams, or when playing video games. The touch controls from past XM series headphones are still present here. I do miss the lady telling me when I have turned a feature on or off. I hope Sony adds her voice back full-time for all features because the audio queues that replace her are too abstract for my taste. As good and as robust as the WH-1000XM5 are there are some quirkiness. I'll highlight what I experienced throughout this review. Let’s get to it!
Setup:
The very first thing I did after unboxing was to use the 2-inch USB cable to fully charge the WH-1000XM5. The cable has a USB type-C connector the goes into the left ear cup and a USB type-A connector to plug into a wall adapter or other power source. Charging to 100% took about an hour or so. Sony says that you can get up to 3 hours of usage from a quick charge but only if use a USB-PD compatible AC adapter. This adapter does not ship with the WH-1000XM5.
There are two buttons on the left ear cup. Power/Bluetooth sync and NC/AMB (Adaptive Noise Canceling and Ambient Sound). The NC/AMB button can be configured for up to two quick actions with certain compatible music applications. This is configurable in the Sony Headphones app. Syncing to a new device is super simple. Turn off the headset, press and hold the power button until you hear the sync sound, and then check your device for WH-1000XM5. Swapping between my devices was super easy once the sync relationship was established. With the headphones turn on go into the Bluetooth devices screen on your device and chose to connect. I had zero issues bouncing between my Windows 11 laptop and my iPhone.
The WH-1000XM5 also gave me the ability to connect to two devices simultaneously. With this feature I can actively listen to music on my laptop and then automagically switch over to answer a phone call. It’s a neat feature. But there is a catch. Any LDAC support devices will be automagically downgraded to Bluetooth transmission quality. For me, I also lost the ability to connect to the Sony Headphones app. I am hoping that the latter is a bug that Sony will soon fix. For this reason, I chose to turn this feature off. And there is even a downside to this decision. There are no on-the-fly adjustments to the WH-1000XM5 when connected to any device not running the app. I instantly loose connection with my Windows 11 laptop when I chose to connect from the app.
The right ear cup is a touch sensitive surface that allows you to change volume, pause, resume, answer and end calls, instantly go into Ambient Noise Mode, and enable/disable Voice to Chat. There may be other features but, due to another bug in the app, I can only open the WH-1000XM5 tutorial and user’s guide once. It was like, this message will self-destruct in 30 seconds.
Sound quality
First, music is fantastic and exactly what I have come to expect from the WH-1000XM headphones line. I loved using my WH-1000XM2s and feel the same way about the XM5s. Music is about the same with the Active Noise Canceling (ANC) on or off. The difference is the amount of environmental noise that invades my listening experience. The highest sound quality I can expect is from Sony’s LDAC codec and accompanying LDAC enabled devices. Unfortunately, neither Windows or Apple support LDAC without additional hardware or software. My testing was limited to Bluetooth and with the included three-way headphone cable. The music sounded better wired. But that is because I can drive higher quality audio through the wired connection than I can over Bluetooth. It was a good experience regardless of how I connected the WH-1000XM5’s to my source material.
ANC
ANC is excellent with the WH-1000XM5. The WH-1000XM2’s were fantastic for flights or to silence noisy office spaces. The WH-1000XM5s are much more robust than the WH-1000XM2s. To start, you will need to get intimately familiar with the Sony Headphones app and the features that control Noise Canceling and Ambient Noise. By default, ANC is turned on 100% and Ambient Noise is set to 100% sensitivity. I can sit all day next to my air purifier blowing at medium speeds with just a slight trace of fan noise in the ear cup. You can explicitly set the amount of environmental sound into the earcup via use of the Headphones app. This is done with a sliding scale from zero noise to all noise. There is also a check box to instruct the headphones to focus mostly on voice and block out the environment. Sony also integrates ANC and ambient noise capabilities into location services and activities. The flexibility here is robust. The quirk here is that the flexibility means that you must use the WH-1000XM5 with a device that is also running the Headphones app. Otherwise, the WH-1000XM5 has no idea where you are, what you are doing, and if you require ambient sound or full ANC. The good news is that you can still set the WH-1000XM5 to full ANC and quickly switch to full Ambient just by pressing your palm against the right ear cup.
Ambient Sound:
Sony rocks the ambient sound. The WH-1000XM5 ambient sound is much more natural than my older WH-1000XM2. This is mostly because the WH-1000XM5 has better sound processing and a total of eight mics on each ear cup. The older model only had two mics. There are still some sounds that are a bit exaggerated or sound processed. Scratching my neck or the sound of a popping limb after sitting for a long time is definitely amplified. But fans, cars, birds, general environmental noise is natural if not a little amplified in volume. The intensity of the ambient noise can be adjusted in the headphones app. The adjustment is hiding behind Adaptive Sound Control on the home page instead of being available on the Sound page as one would expect.
Voice:
Phone calls are crystal clear both receiving and transmitting. No one knew that I was speaking through a headset without a mic. And no one asked me if they were on speaker phone. The sound quality also carried over to my Windows 10 work computer. I spent a day using the WH-1000XM5 in place of my work headset. I typically use a headset which has an external mic that rests in front of my mouth. Sending and receiving audio through MS Teams was on par or better than my dedicated headset. In my experience, headphone mics tend to have a speakerphone sound to them. Not these. I do work from home so the noise level tends to be rather low. I did spend a night playing video games using the WH-1000XM5 as a Bluetooth headset. It did a fantastic job of filtering out my gaming laptops leaf blower cooling fans. The sound and voice transmission quality was also excellent. I did not test these in a noisy office environment. But, my wife does run the TV all day in the adjoining room to my office. The ANC did a great job for what its worth.
Speak to Chat:
Be careful with this feature. It works awesome. Speaking causes the music to pause and the ambient sound to turn on. 15 seconds of silence and the WH-1000XM5 return to their pre-speaking configuration. You can also set the silence wait time to 5 seconds or 20. But, if you speak to yourself, mutter, sing along with your music, swear under your breath, or yell at the cat to stop scratching the couch then you will want to turn this feature off. It will activate every single time and drive you nuts. I had to turn it off. One last word about speech. The WH-1000XM5 will work with a digital assistant. Just set it up in the Sony Headphones app.
Final Thoughts:
The WH-1000XM5 continues Sony’s tradition of offering the most robust experience in the industry. The headphones are rock solid. ANC, Ambient Noise processing, and Adaptive noise processing are the best I have experienced. Sony’s Headphones app, though a bit quirky at times, is still the most robust and well executed of any headphone or earbud app I have owned over the last five years. Most manufacturers offer an app because it is expected. Sony ownership in this space really gives them the ability to supercharge their products with features and flexibility not available anywhere else. If you are looking for a solid wireless headphone with tons of flexibility, quality musicality, clear voice, and solid build quality then the WH-1000XM5 should be at the top of your list.
I would recommend this to a friend!
0points
0out of 0found this review helpful.
Share this review:

Kyvol - HD3 1.2 Gal. UltrasonicHumidifier - Dark Gray
Maintain a comfortable home environment with this Kyvol HD3 humidifier, which humidifies your home and soothes dry skin and reduces coughing, congestion and other symptoms by keeping proper air humidity at around 45% to 60%. The ultra-quiet ultrasonic feature ensures better sleep quality and 75 hours super long-lasting runtime to help indoor plants grow healthier, especially during dry winter season.
Quite, efficient, and will fit almost any decor
Customer Rating
4.0
Images for this Review
(click to see full-size image)


Disclaimer:
I am a member of Best Buy’s Technical Insider Network, TIN for short. Reviewers in this invitation-only program are provided products for the purpose of writing honest, unbiased reviews.
-------
Initial Impressions:
Initial Impressions:
The HD3 is quiet. I have run the HD3 both in my home office and my bedroom. The unit’s ultrasonic membrane is audible but not overwhelmingly slow in a quiet space. This is especially important to me when sleeping. Prior to the HD3, we were using a ultrasonic humidifier that is commonly got from the local pharmacy. This common humidifier makes a lot of noise, doubles as a night light, and gurgles every few minutes as air enters the reservoir. The HD3, in contrast, has a low intensity indicator light, hums quietly, and dampens the gurgling sound of air entering the reservoir. It is quiet enough not to disturb my sleep. The design is compact, has an adult style that should fit into any environment, and has a good size reservoir. The HD3 also does an excellent job pumping out the moisture. Where I’m from, the environment quickly dries up to 20% or less humidity in the winter which leads to dry skin, dehydration, congestion, and a feeling of chill in the air. A humidifier adds back into the air what the air is trying to extract from me in the dry, winter air.
Setup and handling:
Setup was a little more complicated than I first expected. First, I am not used to having filters on my humidifiers. There is an air filter at the bottom of the unit. This is a rough, black, spongy material that captures large particles such as pet hair. The second filter is part of the access cap. There is a large, bulbous chamber full of small round pebbles. This second filter is to help control odors. My water does not have an odor so I cannot attest to how effective it is at eliminating odors. This may change if I do not clean and care for the unit properly.
Next, the reservoir lifts easily from the body. And this is where you can tell the engineers were forced to make some compromises. First, you should remove the nozzle. There is a depression one side of the reservoir that allows you to get a finger under the nozzle to lift if out. Unfortunately, the physics do not quite for out. To properly remove the nozzle, you will need to put one finger in the lip and another in the mouth of nozzle. Then lift to remove. You could also just put your finger in the lip of the nozzle and lift. There is a handle hidden under the nozzle for easy lifting from the base and transport. The is not cheap plastic but it does not feel like it is sturdy enough support the weight of a full reservoir. I recommend holding the handle with one hand and holding the bottom of the reservoir with your other hand as you transport. Empty, the handle is fine. I would not risk it when the reservoir is full. I could be wrong but why chance it.
The cap to the reservoir is on the bottom of the reservoir. This is where the handle at the top gets in the way. Gravity wants to pull the free moving handle straight down when you flip over the unit. Be aware that you will need to purposely move the handle to a neutral position when placing it on a surface. It is not hard. Just something to be aware of. It becomes a pain if you have to manipulate the reservoir while filling, loosening a stubborn cap, or moving a full reservoir to a position where you can tighten the cap.
Finally, filling the reservoir can be a bit of a challenge. There is a small handle at the bottom of the reservoir allowing you a place to hold the reservoir while filling it. This is a “U” shaped bracket that is glued, off center, to the bottom of the reservoir. I also do not trust that this handle will work over the long run to support the weight of a full reservoir.
My recommendation here is to also use two hands. The handle is useful for fine movement while the other hand supports the actual weight of the reservoir. If, you have big hands then you may find the small handle useless. It is packed around the engineering needed to operate the reservoir. The handle cannot be larger due the constraints implied by the HD3 body. These are some of the engineering compromises I hinted at earlier.
These are not bad things and do not impede the use or operation of the unit. I only point these out because these design decisions do make the reservoir slightly more difficult to manipulate than a other reservoir designs I have used.
User’s Manual:
Everything you need to operate the unit is in the user’s manual. There is no reason, in my opinion and experience, for you to go online to learn more about this product. The manual does a good job of showing, pictorially and with minimal text, what you should and should not do to operate the HD3 properly. Overall, I think the User’s manual is very accessible for English readers. The pictures are good enough for non-English readers to get the idea of how to use the unit. I think Kyvol should include Spanish instructions at the very least.
Operation:
Operation is a super easy. You have two controls: power cord and control knob. Plug it in and turn the nob to your desired misting intensity. The unit easily ran for 24 hours at 50%. I did not feel I needed more than this. I also felt that the HD3 at 50% was equal to any other humidifier I have owned running at 100%. At 100% the HD3 vapor exhaust is substantial. The idea is to control the room’s humidity and not drown the room. I found that 50% was enough to make the room comfortable. The heat in the room felt more comfortable and even. My congestion significantly eased up. And I felt less parched. Now, any humidifier will accomplish this goal so there is nothing magical on these points. What sets this part from my other humidifiers is the volume of moisture this can put into the air compared with my other humidifiers. No method of measure is not scientific. I judged by the density and volume of mist I could see from the top of my units.
What it does not have or do:
What it does not have or do:
The HD3 is not Wi-Fi enabled, Bluetooth, Smart home capable without assistance, have a phone app, capable of talking to you, on/off timers, play music, track air quality metrics, or any of the other Internet-of-Things capabilities that seem to be making their way into everything today. The HD3 turns water into vapor and delivers that vapor to your oppressive working or living space during the dry months of winter. And that is perfectly fine by me. If you are someone who needs a perfectly calibrated environment, then the HD3 is not for you.
Final thoughts:
Overall, I like the HD3 and I am glad I was given the opportunity to review this. The HD3 solved one major issue for me, sleep. It is quiet enough for me to allow to run all night without interruption. The gurgling sound of water entering the reservoir is not as loud or as other hydroponic humidifiers I have owned. Granted, the sound does increase in volume as the tank empties just like other ultrasonic humidifiers. This until also does not act like a night light for my room. This is a big plus for me. I want my room dark. Finally, the unit does not look like something that should be in a nursery or hospital room. That means I can easily work this into the décor of a professional space or common room.
The HD3 may not be perfect. But it does a fine job for what it was designed for.
I would recommend this to a friend!
+2points
2out of 2found this review helpful.
Share this review:
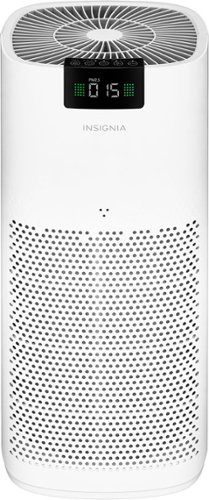
Insignia - 375 Sq. Ft. HEPA Air Purifier - White
The Insignia 375 Sq. Ft. HEPA Air Purifier removes allergens, large irritants, mold, dust, pet dander, smoke and pollen with the included HEPA filter. The active carbon filter also removes odors, keeping your house smelling clean and fresh. An LED display makes it easy to check the air quality of your home and change the settings of the air purifier, such as the speed, timer or child lock. It~s ideal for a medium-sized room up to 375 sq. ft.
Simple, effective, no gimmicks
Customer Rating
5.0
Images for this Review
(click to see full-size image)


Disclaimer:
I am a member of Best Buy’s Technical Insider Network, TIN for short. Reviewers in this invitation-only program are provided products for the purpose of writing honest, unbiased reviews.
Initial impressions:
The Insignia Air Purifier NS-APMWH2 for Medium rooms is about the size of a small stool. It has dual air intakes, an easy to service filter, multiple fan speeds, timers, button locks, air quality sensors not hidden behind an app or pay wall, and multiple fan speeds. The unit even comes with an auto and night mode. The Insignia Air Purifier is unassuming, sits on the floor, does not overpromise, and does a fairly good job of cleaning particulates and odors from the air.
Setup:
The NS-APMWH2 takes less time to setup than it does to remove it from its box. Setup includes removing packing tape, removing the filter from its bag and re-inserting it into the air purifier, removing the cellophane stickers from the readout panels, and plugging it into the wall. That’s it.
Using:
The NS-APMWH2 comes with a HEPA filter. The HEPA filter is wrapped in a pre-filter and a charcoal filter. The pre-filter stops larger airborne pollutants such as pet hair and the charcoal filter removes odors from the air. The NS-APMWH2 allows for four fan speeds: moon, low, medium, high. Low and “moon” mode seem to be the same speed. I’m guessing moon mode is “quiet, I’m sleeping in the same room,” mode. Both are ultra-quiet. Auto mode leverages the built-in air quality sensors to determine the correct fan speed. If the air quality is Great, then auto mode will maintain a low fan speed. If the air quality is poor, then the auto mode will ramp up the fan speed. For my home, auto mode never increased fan speed above low. Though, there are instances where I manually set the fan speed to medium. See Performance section below.
Now, how do I know that the air quality in my room was low enough to justify the low fan speed? The NS-APMWH2 has an easy-to-read LCD display on the front of the unit that tells you the air quality. Amazingly, this is the only air filter I own that measures and reports the air quality. The number on the front of the unit displays the number of particles less than or equal to 2.5 micrometers. When I first started the unit, the number hovered around 030. Within an hour the number alternated between 001 and 006. Events like, say, burning dinner, added pollutants to the air and thus increased this number.
To the left and right of this number are 4 x 5 light banks that color code my air quality: Great is green, Okay is yellow, Bad is orange, and Hazardous is red. Thankfully, my room’s air quality is soundly in the green.
What I like about this system is that I “do not” need a fancy app to give me relatively simple information. At the end of the day, my goal is clean air and not a fancy new app for my cell phone. The air purifier does exactly what it says it does and nothing more. That I can appreciate.
Changing the air filter is super simple. Remove the door, pop out the old filter, pop in a new filter, and close the door. Setting the timer, child safety lock, auto mode, and sleep modes are accessible from the top panel and very easy to setup. You have to get out of your chair to adjust the NS-APMWH2 settings. Then again, with other air purifiers, I have spent upwards of an hour trying to figure out how to remotely change fan speeds or find the page that tells me the air quality. I’ll take the exercise over the frustration every day of the week.
Performance:
Performance is pretty good. I have not once had to run the NS-APMWH2 at a fan speed higher than medium. Setting fan speeds, auto modes, sleep, and timers are also super easy. The user’s manual tells you everything you need to know.
To try out the unit, I lit several wooden matches next to the air intake. I noticed two things. First, the smoke did not 100% enter the air intake. This made the room smell like burning wood and sulfur for a few minutes. Second, the burning wood and sulfur smell did not last long with the NS-APMWH2 running at medium fan speed. My expectations here may have been a little overly ambitious. I did not consider that the updraft from the fan would impact the environment around the updraft as much as it did. Opps. This is probably why every air purifier I have owned has failed to capture all the smoke. The good news is that the NS-APMWH2 did a quick job of filtering out the odors.
Next, I put the unit in my kitchen where I cooked fried eggs and salami for lunch. To be fair to the NS-APMWH2, I cleaned up all the dirty dishes, pans, and stove top. This eliminated the source of the odors. All the windows in the room were closed. Normally, when I do this, the odor from this food can last hours when the room is sealed, and the source of the odors is eliminated. It took the NS-APMWH2 about five minutes to remove the lunch odors from the room. That is pretty good in my book. I then moved the air filter into my finished basement. Odors get trapped in this room all the time. The finished side of my basement is much larger than my kitchen and fits closer to this air purifier's 380 sq. ft. recommended room size than my kitchen does. It took about an hour to clean the same lunch smell from the air. I could detect an improvement within the first 10 minutes. Again, pretty good when compared with other air purifiers I have owned.
Finally, I baked dinner in my dirty oven. I did not know at the time that the floor of the oven was covered with butter from a previous meal. This caused the oven to produce some smoke and a terrible odor. The NS-APMWH2 cleaned out the smoke and odor within 10 minutes on medium fan speed.
Where does the NS-APMWH2 not do so well?
The NS-APMWH2 has the same challenge I have with any other air purifier I have owned. It does not clean dust from the air all that well. My office gets direct sunlight first thing in the morning. That is the time of day I can see the dust floating in the air. And it floats, and floats, and floats. The air intakes are too low to the ground to pull dust particles to the filter. I am sure some dust is being captured. But this is an area where the NS-APMWH2 does not beat the effects of time and gravity. Now, how does the room look over time? I am noticing overall less dust in the air since I started using the NS-APMWH2. So, it seems to be having some positive impact on the room’s dust density.
Portability. The NS-APMWH2 is not heavy. But I feel it could use a handle either molded into the side or as an attachment. I am still young and mobile. Bending fully over to pick the unit up from the bottom is not an issue for me. People who have mobility issues may find it cumbersome to move this unit from room to room because they may not be able to bend down or squat low enough to get their hands under the unit. I would like to see handles in the next revision of the NS-APMWH2.
Final thoughts:
Overall, I am completely satisfied with this Insignia air purifier. There are no frills or gimmicks. I cleans odors from the air. Is quiet. And is easy to operate. I would like handles to make the unit easier to move around the house. But that is a minor inconvenience for me. The air filter is simple and inexpensive when compared with other air purification solutions on the market. I like the control panel. The LCD screen is easy to read and understand. What more can you ask for?
I would recommend this to a friend!
Mobile Submission: False
+7points
11out of 15found this review helpful.
Share this review:
ITJim's Questions
ITJim has not submitted any questions.

Bowers & Wilkins - B&W PI5 True Wireless Headphones with Adaptive Noise Cancellation, Bluetooth 5.0 with Qualcomm aptX - Charcoal
B&W PI5 true wire-free headphones are attractive, well-built, and they deliver a refined sound quality. Featuring Bluetooth 5.0 with Qualcomm aptX technology these earphones ensure reliable connectivity whether you are streaming from your smartphone, tablet or PC. Allows connection of up to two devices at the same time, however, only one device can be used to play or make a call at a time. Download the Bowers & Wilkins free headphone app, available for Apple and Android for further control of the sound and noise cancellation, right on your phone. The PI5 headphones feature the latest innovations in adaptive noise cancellation along with 4 built-in microphones that pick up ambient noise and cancel it with an equal, but opposite, audio signal and enhance the call quality. There are three levels of Adaptive Noise Cancellation ~ High, Low and Auto, that can be controlled either by the multi-functional button on the left earbud or via the app. Similarly, the touch-sensitive button on the right earbud allows you to enable voice assistance. The buttons also allows you to control playback and phone call functions with single (play/pause, answer call), double (skip forward, end call), or triple presses (skip backward). Another stand-out feature of these headphones is the intuitive detection sensors that put the earphones on standby or reconnect them depending upon whether they are removed or put back on. The PI5s come with a sturdy and attractive charging case for charging the earbuds when not in use. The case is equipped with two 350mAh rechargeable batteries. Each earbud has a rechargeable battery which provides up to 4 hours of wireless playback. Including the charging case, the PI5 can provide up to 12 hours of continuous playback.
Is there an App to set the equalizer?
App version 3.1.3 does not have EQ functions.
4 years, 11 months ago
by
Posted by:
ITJim

Alienware - m15 R4 15.6" FHD Gaming Laptop - Intel Core i7 - 16GB Memory - NVIDIA GeForce RTX 3070 - 512GB Solid State Drive - Dark Side of the Moon
With the 10th Gen Intel~ Core~ i7 processors enabling up to 8-cores and 16-threads of multi-threaded performance, the latest generation of Alienware m17 goes beyond its predecessor. Featuring the new NVIDIA GeForce RTX 3070 with Ultimate performance for gamers and creators. Realistic ray-traced graphics and AI-accelerated DLSS. Our latest thermal technology, Advanced Alienware Cryo-Tech, is an engineering approach where an Alienware system~s gaming performance is never compromised by means of electrical and mechanical methods while maintaining system stability during the highest performance states.
Is this a per-key RGB keyboard or a 4 zone?
Alienware - m15 R4 15.6" FHD Gaming Laptop - Intel Core i7 - 16GB Memory - NVIDIA GeForce RTX 3070 - 512GB Solid State Drive - Dark Side of the Moon
With the 10th Gen Intel~ Core~ i7 processors enabling up to 8-cores and 16-threads of multi-threaded performance, the latest generation of Alienware m17 goes beyond its predecessor. Featuring the new NVIDIA GeForce RTX 3070 with Ultimate performance for gamers and creators. Realistic ray-traced graphics and AI-accelerated DLSS. Our latest thermal technology, Advanced Alienware Cryo-Tech, is an engineering approach where an Alienware system~s gaming performance is never compromised by means of electrical and mechanical methods while maintaining system stability during the highest performance states.
Is the display having G-Sync?
For the 300Hz screen:
From Alienware's site:
"15.6" FHD (1920 x 1080) 300Hz 3ms 300-nits 100% sRGB color gamut"
https://www.dell.com/en-us/shop/cty/pdp/spd/alienware-m15-r4-laptop?~ck=mn
I do not see any indication of G-Sync on/off in the nVidia driver settings.
From Alienware's site:
"15.6" FHD (1920 x 1080) 300Hz 3ms 300-nits 100% sRGB color gamut"
https://www.dell.com/en-us/shop/cty/pdp/spd/alienware-m15-r4-laptop?~ck=mn
I do not see any indication of G-Sync on/off in the nVidia driver settings.
5 years, 1 month ago
by
Posted by:
ITJim
Alienware - m15 R4 15.6" FHD Gaming Laptop - Intel Core i7 - 16GB Memory - NVIDIA GeForce RTX 3070 - 512GB Solid State Drive - Dark Side of the Moon
With the 10th Gen Intel~ Core~ i7 processors enabling up to 8-cores and 16-threads of multi-threaded performance, the latest generation of Alienware m17 goes beyond its predecessor. Featuring the new NVIDIA GeForce RTX 3070 with Ultimate performance for gamers and creators. Realistic ray-traced graphics and AI-accelerated DLSS. Our latest thermal technology, Advanced Alienware Cryo-Tech, is an engineering approach where an Alienware system~s gaming performance is never compromised by means of electrical and mechanical methods while maintaining system stability during the highest performance states.
Is the ram upgradable?
From Alienware's user's guide:
Onboard system memory
NOTE: The memory is integrated to the system board and
cannot be upgraded after purchase.
You can find the user's guide on Alienware's support site.
Onboard system memory
NOTE: The memory is integrated to the system board and
cannot be upgraded after purchase.
You can find the user's guide on Alienware's support site.
5 years, 1 month ago
by
Posted by:
ITJim
HP OMEN - 15.6" Gaming Laptop - AMD Ryzen 7 - 16GB Memory - NVIDIA GeForce GTX 1660 Ti - 1TB SSD - Mica Silver
HP OMEN Gaming Laptop: A thin and light premium gaming experience in an elevated design so you can play everyday. With an AMD Ryzen 7 processor, NVIDIA GeForce GTX 1660 Ti graphics and cooled by OmenTempest Cooling, it makes you think how it all fits into such a tiny little package."
Can this output 144Hz over hdmi?
Yes it can. I am using the HP Omen X 25f over HDMI as an external monitor.
Just be sure to use a HDMI 2.0 or newer cable.
Just be sure to use a HDMI 2.0 or newer cable.
Images for this Answer
(click to see full-size image)

5 years, 10 months ago
by
Posted by:
ITJim
HP OMEN - 15.6" Gaming Laptop - AMD Ryzen 7 - 16GB Memory - NVIDIA GeForce GTX 1660 Ti - 1TB SSD - Mica Silver
HP OMEN Gaming Laptop: A thin and light premium gaming experience in an elevated design so you can play everyday. With an AMD Ryzen 7 processor, NVIDIA GeForce GTX 1660 Ti graphics and cooled by OmenTempest Cooling, it makes you think how it all fits into such a tiny little package."
Does it have Gsync?
This is not a Gsync monitor. At least I cannot find any information online or in the system drivers that tell me otherwise.
You can connect the laptop to a Gsync monitor and take advantage of all the features of Gsync with that monitor.
You can connect the laptop to a Gsync monitor and take advantage of all the features of Gsync with that monitor.
5 years, 10 months ago
by
Posted by:
ITJim
HP OMEN - Gaming Desktop - Intel Core i7-9700 - 16GB Memory - NVIDIA GeForce GTX 1660 Ti - 1TB Hard Drive + 256GB SSD - Shadow Black
HP OMEN Obelisk by HP Desktop: Play graphically intense games with this HP OMEN Obelisk desktop computer. You can easily store large amounts of media and other data on the 1TB hard drive and install games and programs on the 256GB SSD for fast access. This HP OMEN Obelisk desktop computer has 16GB of memory for multitasking effectively, and the Intel Core i7-9700 processor handles resource-intense programs efficiently.
How many cores are there in this pc
8 physical cores. This processor does not support 16-way multitasking.
6 years, 10 months ago
by
Posted by:
ITJim
HP OMEN - Gaming Desktop - Intel Core i7-9700 - 16GB Memory - NVIDIA GeForce GTX 1660 Ti - 1TB Hard Drive + 256GB SSD - Shadow Black
HP OMEN Obelisk by HP Desktop: Play graphically intense games with this HP OMEN Obelisk desktop computer. You can easily store large amounts of media and other data on the 1TB hard drive and install games and programs on the 256GB SSD for fast access. This HP OMEN Obelisk desktop computer has 16GB of memory for multitasking effectively, and the Intel Core i7-9700 processor handles resource-intense programs efficiently.
Is there a gtx 1660ti installed or not? What size pwr supply?
It says in the name that it is a GTX 1660ti. I can confirm that the video card is exactly as described. It is the 6gb version of the card. The Power Supply is 500Watts.
6 years, 10 months ago
by
Posted by:
ITJim
HP OMEN - Gaming Desktop - Intel Core i7-9700 - 16GB Memory - NVIDIA GeForce GTX 1660 Ti - 1TB Hard Drive + 256GB SSD - Shadow Black
HP OMEN Obelisk by HP Desktop: Play graphically intense games with this HP OMEN Obelisk desktop computer. You can easily store large amounts of media and other data on the 1TB hard drive and install games and programs on the 256GB SSD for fast access. This HP OMEN Obelisk desktop computer has 16GB of memory for multitasking effectively, and the Intel Core i7-9700 processor handles resource-intense programs efficiently.
Does this computer have a memory card reader built in?
HP OMEN - Gaming Desktop - Intel Core i7-9700 - 16GB Memory - NVIDIA GeForce GTX 1660 Ti - 1TB Hard Drive + 256GB SSD - Shadow Black
HP OMEN Obelisk by HP Desktop: Play graphically intense games with this HP OMEN Obelisk desktop computer. You can easily store large amounts of media and other data on the 1TB hard drive and install games and programs on the 256GB SSD for fast access. This HP OMEN Obelisk desktop computer has 16GB of memory for multitasking effectively, and the Intel Core i7-9700 processor handles resource-intense programs efficiently.
What is the operating system for the pc, and does it come with a virus protection app
Windows 10 standard. It ships with 30 days of McAfee.
6 years, 10 months ago
by
Posted by:
ITJim