ITJim
Top 100 Contributor
ITJim's Stats
- Review Count153
- Helpfulness Votes1,560
- First ReviewNovember 23, 2013
- Last ReviewMay 10, 2026
- Featured Reviews0
- Average Rating4.3
Reviews Comments
- Review Comment Count0
- Helpfulness Votes0
- First Review CommentNone
- Last Review CommentNone
- Featured Review Comments0
Questions
- Question Count0
- Helpfulness Votes0
- First QuestionNone
- Last QuestionNone
- Featured Questions0
- Answer Count17
- Helpfulness Votes31
- First AnswerNovember 23, 2013
- Last AnswerMay 22, 2021
- Featured Answers0
- Best Answers3
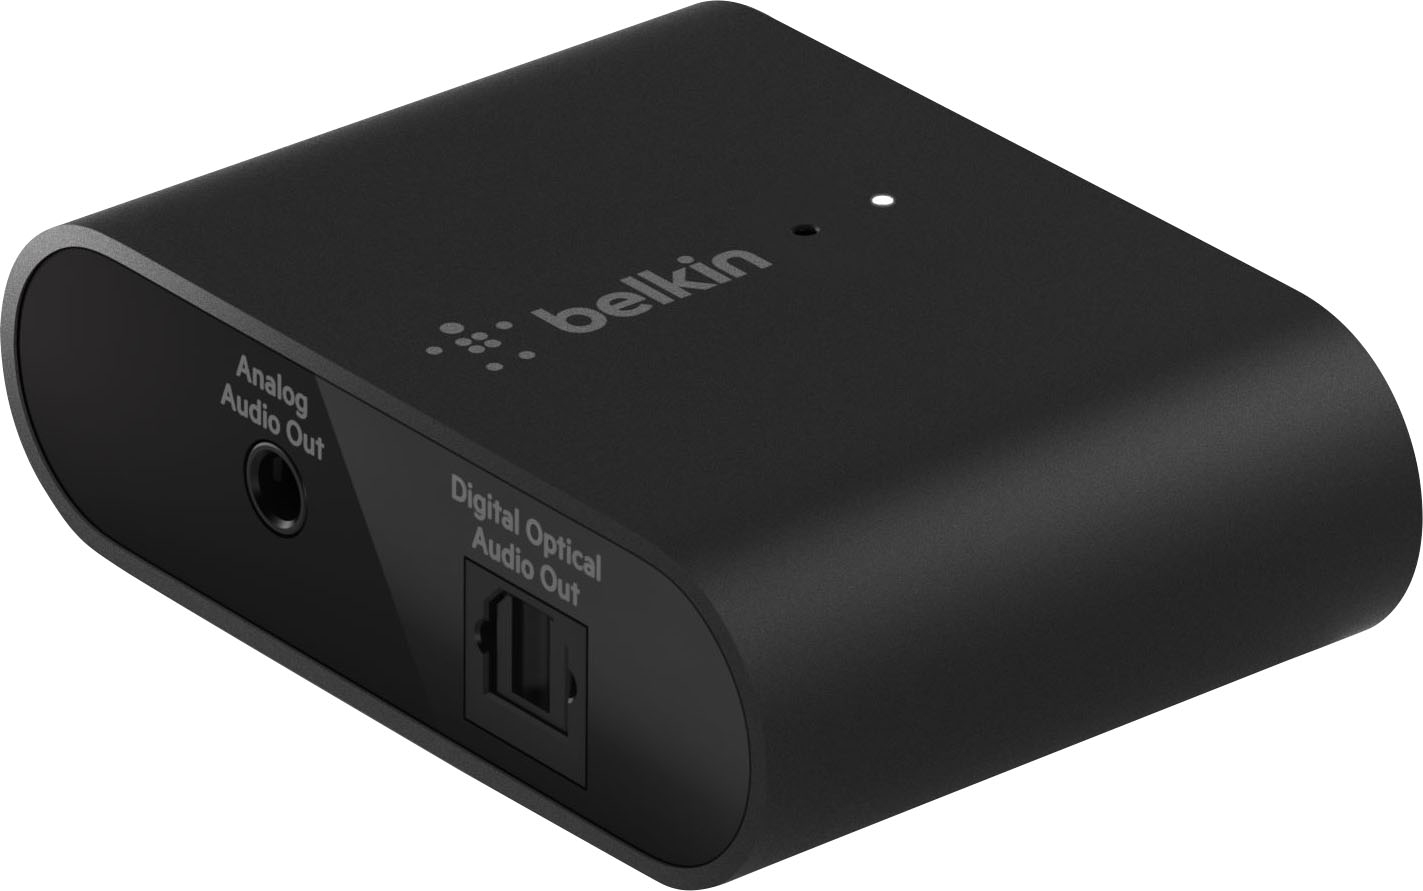
Belkin - SoundForm Connect Audio Adapter with Airplay 2 - Black
Keep enjoying your favorite sound equipment without an expensive component update. SOUNDFORM~CONNECT Audio Adapter with~AirPlay~ 2~ turns your stereo into an AirPlay 2-enabled speaker to stream the~music that you love from iOS and Mac devices. Our adapter is equipped with optical and 3.5mm output that brings signal from~your devices to any speaker~or receiver~with an audio~input.
Works, and works well!
Customer Rating

5.0
Disclaimer:
I am a member of Best Buy’s Technical Insider Network, TIN for short. Reviewers in this invitation-only program are provided products for the purpose of writing honest, unbiased reviews.
Initial impressions:
The Belkin Soundform Connect Audio Adapter with Airplay2 works wonderfully. Setup was straightforward and easy. I have not experienced any signal disconnects after 10 hours of continuous use. The Soundform Connect can also be transported from sound system to sound system without losing the Airplay relationship with my iPhone. The only caveat is that you will need to supply your own cables.
Setup:
There are two ways to setup the Soundform Connect with your iPhone. The Soundform Connect has an NFC chip that a modern iPhone can use to establish the AirPlay connect. But what if your iPhone is an older model that lacks the ability read NFC chips? Belkin includes instructions on how to manually setup AirPlay. In my case I have an iPhone 6s. The bottom of the Soundform Connect has a unique code molded into the plastic. Unfortunately, the numbers are small and molded into the plastic and not painted. I needed a bright light and a magnifying glass to read the numbers.
Next, I connected the Soundform Connect to my SVS Prime Wireless SoundBase. The SVS SoundBase is a mini desktop amplifier that sports Bluetooth, RCA, and fiberoptic inputs. It is perfect for testing the 3.5mm stereo and fiberoptic outputs on the Soundform Connect.
Setup took me about 15 minutes.
Sound:
The Soundform Connect sounds much better than anything I can stream over Bluetooth. Airplay uses the 802.11n network standard for transmission instead of Bluetooth. 802.11 standards are the same used in for wireless network communications. What does this mean for AirPlay? Audio transmission quality is equivalent to CD quality. This is much nicer than the rubbish that is transmitted over Bluetooth.
As mentioned earlier, my first round of testing was with the SVS SoundBase. Connected to the SoundBase are two SVS Prime Bookshelf speakers and a Martin Logan Dynamo 600X 10” down-firing subwoofer. CD quality over wireless is no joke. The Soundform Connect rocked this system.
I held three audio sessions: two with the SVS SoundBase and one with my Pioneer Elite receiver. More on the Pioneer below. The first session I used a 3.5mm stereo to RCA cable. This tested the stereo output of the Soundform Connect. The audio was clear and did not have that “something is missing” sound that you normally get with Bluetooth on quality equipment. I listened for about an hour and then switched over to the fiberoptic.
The fiberoptic session was noticeably better than the stereo cable. I am thinking this is because the cable is essentially taken out of the signal path. I listened to the same music as I did with the stereo cable. I got the same CD quality listening experience as I did with the stereo cable. Just better. I spent about an hour listening with the stereo cable and five with the fiberoptic. I just could not be brought back to using the stereo cable.
Finally, I connected the Soundform Connect to my Pioneer Elite receiver. This will be the permanent home for the Soundform Connect. The reason is that the Pioneer Elite’s wireless capabilities are terrible. The sonic experience is okay when I can make a connection. And I am constantly fighting connection dropouts when my iPhone does connect. I connected the Soundform Connect to the receiver via fiberoptic, plugged the box into my power center, and instantly connected with my iPhone. There was not fuss and no additional setup for the iPhone. The Pioneer Elite drives a home theater that is setup to split the stereo signal to all theater speakers. The performance from the Soundform Connect was more than I could hope for.
Final Thoughts:
Why did I get this? I own a 5yr old Pioneer Elite receiver that struggles with Bluetooth connectivity. It is very frustrating. The Soundform Connect solved this issue for me. It not only solved the issue but AirPlay, in general, transmits CD quality sound. Much higher quality experience then Bluetooth by every measure.
Does the Sound form support audio processing? No, it is not a DAC. Do not expect the Soundform Connect to improve a compressed, low quality, or poorly recorded audio file. It will also not enhance a strong audio source.
The purpose of the Soundform Connect is to bring AirPlay capabilities to audio devices that do not have AirPlay capabilities. The Belkin Soundform Connect Audio Adapter with AirPlay2 does this job very well. And I would recommend this device to anyone looking to add AirPlay or AirPlay2 capabilities to an audio system or speaker that does not currently have this capability. Setup is easy. The only thing you need to worry about is picking up the right cable to connect the Soundform Connect to your audio device or speaker.
I would recommend this to a friend!
Mobile Submission: False
0points
0out of 0found this review helpful.
Share this review:
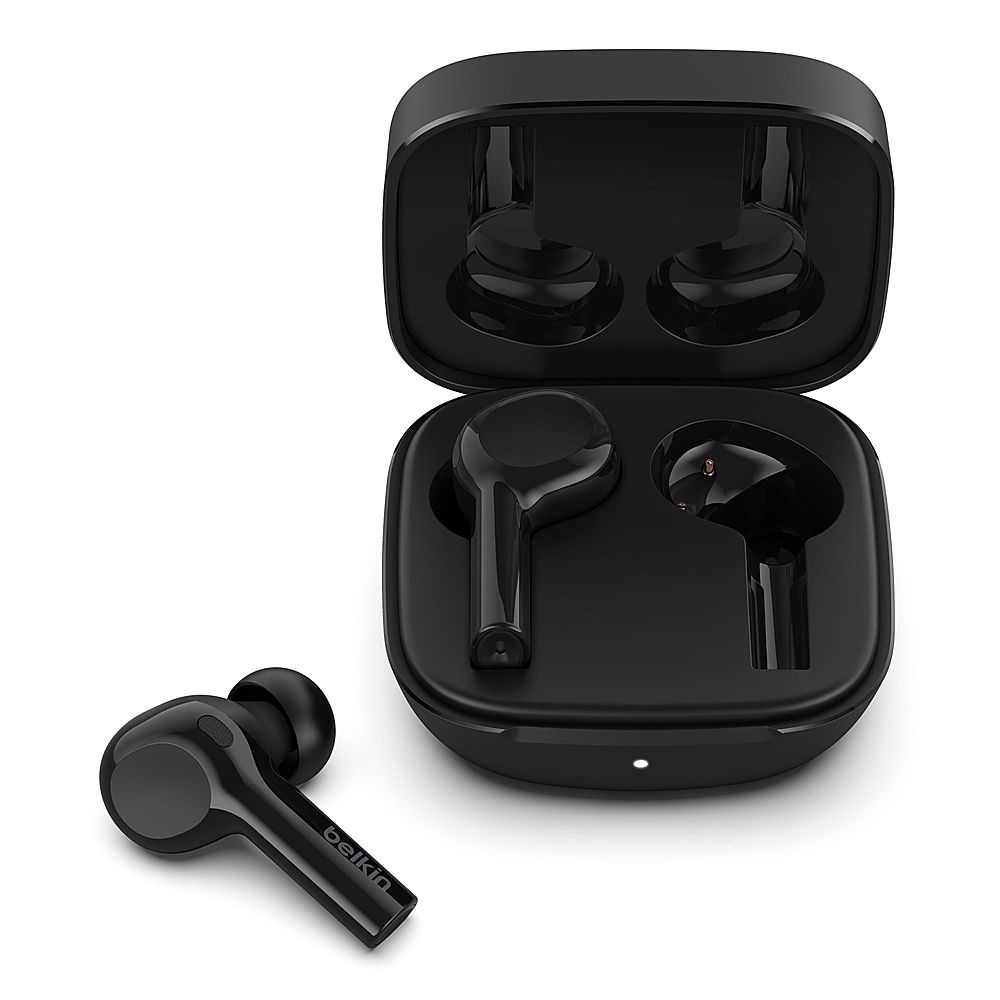
Belkin - SOUNDFORM Freedom True Wireless Earbuds Environmental Noise Cancelling (ENC) Works with Apple Find My - Black
Rich, radiant sound meets exceptional battery life in the SOUNDFORM Freedom True Wireless Earbuds. Custom drivers activate deep bass while maintaining clear mids and highs. Our advanced clear-call technology and dual microphones ensure remarkable call quality. There~s up to 8 hours of non-stop playtime, plus another 28 in the charging case. As one of the first third-party accessories to work with the Apple Find My network you can track and locate the charging case using the Apple Find My app.
Solid budget earbuds with lots of features
Customer Rating

4.0
Images for this Review
(click to see full-size image)

I am a member of Best Buy’s Technical Insider Network, TIN for short. Reviewers in this invitation-only program are provided products for the purpose of writing honest, unbiased reviews.
Initial impressions:
The Belkin Soundform Freedom True Wireless earbuds pack a lot of technology into a budget package. The central body fits into the ear with a short microphone boom extending away from the earbud’s body down below the ear. The body is a combination of smooth and slightly textured plastics. Each Soundform Freedom earbud has two touch sensors: one facing away from the ear and one facing the ear. The charging pins are recessed into the earbuds so there is no worry of them causing any chaffing while wearing them. The earbuds ship with three sizes of soft silicon ear adapters so there should not be any issue fitting any ear canal size.
The included charging box is a clamshell design. The case is small enough fit into your pocket, purse, or backpack. It also doubles as a portable charging station for the Earbuds. According to Belkin, the earbud batteries are capable of supply up to 8 hours of continuous use. The case auto charges the earbuds when they are placed inside. The case’s battery can provide up to an additional 28 hours charge time. Essentially you can use these all over the course of several days if you keep them in their charging case between uses.
Music:
Expect budget sound with the Soundform Freedoms. Music is crystal clear but lacks dynamic range and detail at low volumes. I tested the Soundform Freedoms with a wide musical selection including classical, techno, pop, Brazilian pop, electro swing, 80’s and 90’s rock, and vocals. In all instances the music was clear and precise but lacked definition. Base is weak but can be remedied using the pre-defined Base Boost EQ setting in the iOS sound settings app. Unfortunately, Apple did not bundle EQ settings with their iOS music app so you will need to adjust your EQ through the Music option in your phone’s settings.
Phone calls:
The Soundform Freedoms excels with phone calls. Reception and transmission are crystal clear. There were no dropouts between the earbuds and phone. There were also no dropouts between the two earbuds. There was no static or smearing of the speaker’s voice. The people I spoke with reported that reception on their end was so clear that they did not realize I was talking to them on earbuds and not directly into my phone’s microphone.
The pick-up and hang-up functions of the earbuds also worked without any issues. Double tap either earbud to answer and end a call worked wonderfully.
Comfort:
I find the Soundform Freedom earbuds uncomfortable to wear. I had to remove them after an hour of use. This is typical for me with most large earbuds due to how small my ears are. The Soundform Freedom’s ship with small, medium, and large silicon tips to fit any ear canal. In my case, the discomfort is caused by the pressure the earbuds place on the cartilage just outside my ear canal; the part of my ear that holds the earbud in my ear. Unfortunately, this means activity such as talking and or chewing exasperate the issues for me. For a test, I asked a family member with larger ears wear these for about an hour. He reported that the earbuds were comfortable and that he could see himself using these for work. Overall, comfort seems relative to the size of the ear.
“Find My” Feature in iOS:
Setting up the Find My feature with the Soundform Freedom was simple. The included instructions were easy to follow. If you require more detailed instructions, then you get these from Belkin’s website. Just scan the QR code in the provided instructions to navigate to Belkin’s simple step by step instructions for many of the Soundform Freedom’s features. This feature took a few minutes to setup.
Controls:
The touch controls work well. Play, pause, track forward, track back, volume, and phone are all controlled by tapping the touch sensors on the outside of the earbuds. Both earbuds have touch sensors. In some instance they can be used interchangeable for multiple functions. Belkin’s instruction many organized this information into a very easy to read table.
Volume control is the only one touch function for either earbud. The left earbud controls volume down and the right controls volume up. Expectations need to be adjusted here. The volume works like this: touch, count “one Mississippi”, touch, count “two Mississippi, touch, and so on until you get to your desired sound level. I think Belkin should have used a continuous touch function for volume, but they didn’t. My recommendation is to use the volume controls directly on the phone.
There is a second touch control surface on the inside of each earbud. This touch surface detects when the earbud is in the ear. Remove the earbud and the device pauses all audio output. Put the earbud back in your ear and audio output resumes. During my test, removing the right earbud paused audio for both. Removing the left earbud paused audio for the left earbud. I’m guessing that the true wireless transmitter is in the right earbud.
Syncing:
Syncing with any Bluetooth device such as a phone or laptop is easy. Open the clamshell, place the earbuds inside the clamshell, and have the device search for the Soundform Freedoms. There is one caveat. The Soundform Freedoms will not remember more than a single Bluetooth partner. If you want to migrate from your phone to your laptop you will need to reset the charging case and resync according to Belkin’s instructions.
Final thoughts:
Belkin really packed in a lot of technology for budget earbuds. Sound is crystal clear which is great for phone calls. Musically they do not compete with other similarly priced earbuds I have owned. The difference, those earbuds were awful for phone calls. True Wireless guarantees that the connection between the earbuds will be clear and free from static. The touch controls are simple to learn and use. Battery life is outstanding. And they ship with a charging case that can provide up to an additional 28 hours of use. Perfect for those long trips where wall outlets may be few and far between. As mentioned earlier, these do not work for my ears due my small ear size. This is beyond Belkin’s control.
Overall, the Soundform Freedoms just work. There are no frills or special marketing magic here. These are the functional essentials of what people expect from their earbuds these days. If you are in the market for budget earbuds that are easy to use and get the job done, then gives these a try.
I would recommend this to a friend!
Mobile Submission: False
+6points
6out of 6found this review helpful.
Share this review:
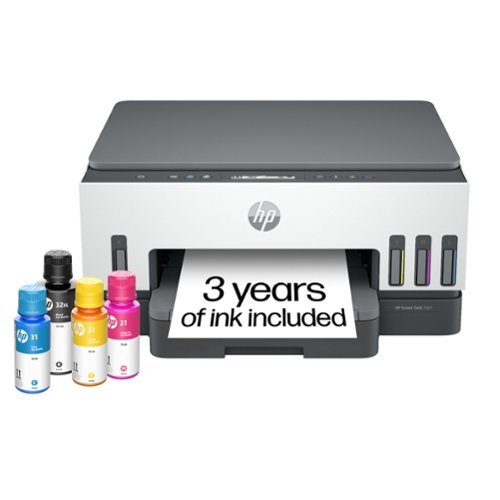
From America's most trusted printer brand~, the HP Smart Tank 7001 is a smart, connected and refillable tank printer that makes printing seamless for the whole family with its high capacity and wireless connectivity. Create everyday color documents at a low cost with 3 years of Original HP Ink included in the box~. It's AI-enabled~ to intuitively adapt to your workflow, with wireless and security features that keep your multifunction printer up to date and secure.
Plain looking w/a great back end experience
Customer Rating
5.0
Images for this Review
(click to see full-size image)


Initial impressions:
Visually, the HP Smart Tank 7001 All-in-One printer is one of the most plain and unassuming printers I have ever owned. Different shades of crème and grey an HP logo an interesting appliance does not make. The LCD is small without touch capability. There is a power button, two-sided ID card scanner button, color copier button, monochrome copy button, Wi-Fi toggle button, printer information button, down arrow resume button, and an X button that cancels whatever function the printer is executing. The paper tray accommodates 100 sheets of paper. The paper tray will also accommodate everything from 4x6 to 8.5x14. Finally, the high-capacity ink tanks have slightly transparent windows that allow you to check the ink levels.
The 7001 was designed to be a fast, high volume office printer. Who cares what it looks like just as long as it does the job it was intended to do? And it does its job well.
Setup:
The reference guide will walk you through the initial printer setup.
Setup took me about 30 minutes from start to finish minus the time it took me to unpack. Setup includes filling each ink tank using the included bottles of HP branded ink, priming the system, installing the black and color print heads, aligning the printer, loading HP Smart, and setting up Wi-Fi. There is no RJ-45 jack to hardwire the 7001 to your network. There is a USB A port on the back so you can directly connect the printer to your workstation.
Setup took me about 30 minutes from start to finish minus the time it took me to unpack. Setup includes filling each ink tank using the included bottles of HP branded ink, priming the system, installing the black and color print heads, aligning the printer, loading HP Smart, and setting up Wi-Fi. There is no RJ-45 jack to hardwire the 7001 to your network. There is a USB A port on the back so you can directly connect the printer to your workstation.
Printer calibration is the easiest calibration of any printer ever! I would kiss the engineering who put this together if I could. Typical calibration is printing out pages of color boxes, lines, and text that you is visually inspected and then reported back to a software driven calibration wizard. Some calibration prints are so small that the only way you can work with them is using a high-powered magnifying glass. HP, in its wisdom, chose to let the high-resolution build in scanner do that work for you. The printer printed a calibration page, I placed it on the scanner, pressed a button, and presto-chango the printer is magically calibrated! Thank the heavens and thank you HP. I cannot express enough gratitude for this feature.
Part of setup is installing HP Smart. HP Smart includes your printer drivers, cloud services, and supply store.
The 7001 is feature packed, integrates with a home or office network with little effort, and is integrated to HP Cloud platform through your HP Smart or HP Passport account. There is a lot going on here for such a simple and plain looking printer.
Printing:
Print quality is dependent on your content. Text prints, color or black and white, are crisp and easy to read. I did not notice any artifacts around the letters. Time to first print was just a few seconds. Not the fastest I have seen but still fast enough. Copies of text documents, bills, invoices, and marketing material with about 25% ink coverage are also very crisp and clean. Though, the color of the copy may not 100% match the original. Business documents with embedded graphics such as images, graphs, and charts were also reproduced with no issues. Excel spreadsheets also looked great. Essentially, if this printer is purely for school, general office work, or high-capacity printing then the 7001 should be on your short list.
I ran into some issues copying high gloss images with high color saturation. In my case, I copied the cover of Eaglemoss’ Battlestar Galactica Shipyards book. For some reason, this gives all printers a hard time. I copied the book cover in both color and monochrome. I got a lot of vertical and horizontal scan lines. The color saturation was good, but color reproduction was inaccurate. Crimson turn to orange and blacks turned to shades of grey.
As a second and third test I scanned the book covers for Battletech Total Warfare and a glossy from inside the book. Again, color saturation was good. But, unlike my last test, there were no printer lines or distortions in the copy. In the end, you may need to experiment with what works and what does not.
Scanning:
Scanning is clean and accurate. I had no issues capturing a perfect reproduction of my subject. The scan cover only opens and closes. The hinges will not expand to accommodate something tall like a book. The cover needs to remain in the vertical open position when scanning large objects. The scanner light also blinks every few seconds when the scanner cover is open. I do not know why.
If you frequently scan multi-page documents, then you may want to upgrade to the 7301 that comes with the automatic document scanner. If your scanning needs are modest and typically limited to a single document, ID card, or other single use scenarios then you will find this scanner to be sharp, accurate, and adequate. There is also a feature in HP Smart that purports to remove scratches and other imperfections in your scanned document. I have not had the opportunity to try this feature yet so I cannot report on its quality.
Finally, I cannot scan an image directly to a computer from the HP Smart Tank 7001 interface. I find this disappointing but it is not a deal breaker for my uses.
Copy:
Coping single pages is easy. Place the page on the scanner, press either the color or monochrome button, and then the 7001 will print out a copy. Press either button multiple times and the printer will copy the image as many times as you pressed the button. If you need to cancel the job then press the X button and the printer will spit out the unfinished page and cancel the job.
Color accuracy is not 100%. This is most noticeable with deep reds such as crimson or deep blues like ultramarine blue. For example, crimson red is more orange than red when copying my test book cover. This could be an issue for those of you who require color accuracy. For example, your business is selling deep red roses and you need to print marketing materials that reflect photographs of those roses. This is not the printer that will give that level of accuracy. But, if you need to print a report with a pie chart that includes a red wedge then this printer is accurate enough to get the job done.
HP Smart:
HP Smart is what connects your mobile life to your HP Smart Tank 7001. I downloaded HP Smart to my Windows 11 laptop from the Microsoft Store. I also downloaded the app to my iPhone from the Apple App Store. The app gives me full control over the printer, the printer properties, the printer network configuration, the ability to scan a document directly to my phone, mobile faxing capabilities, direct printing capabilities from anywhere in the world using any device I have HP Smart installed on, secure printing, and a bunch of other stuff I have not yet dug into. This is a digital cloud solution for your mobile printing needs. This takes an otherwise unremarkable printer and super charges it with a backend software package with features normally reserved for an enterprise network.
You can do remote printing, mobile faxing, mobile scanning, adjust print settings, add additional HP printers to your network, create shortcut and storage locations for files, images, and faxes, and invite other people to your HP Smart cloud. One very useful feature is Secure Print. HP Smart will hold your mobile print jobs until HP Smart confirms that you are next to one of the printers that are part of your HP Smart network before releasing the job for print. HP Smart accomplishes this by using the location services of your phone and the built-in location services of your printer to confirm you are near an HP Smart printer that is part of your HP Smart network of printers. Yes, I said network of printers. This means you can setup multiple HP Smart printers in multiple geographical locations and print to any one of them.
HP Smart app also gives you direct access to printer settings such as Wi-Fi, Bluetooth, DNS, IPv4 and IPv6 settings, passwords, and other features including Quite Mode.
Everything else:
Filling the ink tank is billed as clean and spill proof. Except, you have to remove the cap of the HP ink bottles, remove the foil seal which exposes the entire bottle to your room, and then put the cap back on. If you accidently mishandle the bottle when removing the foil seal, or accidently bump it, then you have ink all over your room. In all honesty, the foil seal is unnecessary. HP should simply remove it all together. The bottle is already sealed and airtight. Just get rid of the part and the step in the filling process. Maybe HP will improve this in future bottle releases.
Filling the tanks using the flip-top bottle top is easy, clean, and fast. The bottle opening has a rubber seal that does not open until you insert the spout from the tank into the bottle. Wait a minute and the tank is filled.
The print heads are user installable and user replaceable. It is far cheaper to replace a print head than it is to replace a whole printer. This saves me money. This is a no brainer.
HP needs to address the battery killing features of HP Smart mobile. The app will want to continue to update and perform services in the background when not in use. You can turn background service off which will save your battery. But, you will also miss out on the services this provides.
Final Thoughts:
This is a solid home office/small business printer. It is plain looking. The combination of the 7001 capabilities and the cloud power of HP Smart creates a compelling case to invest in this flexible, mobile All-in-One solution. The 7001 does not have all the convenience of other All-in-One solutions at this price point like automatic document scanning, smart card readers, or LCD touch screen controls. But it ticks enough boxes to put this on my short list of solutions.
I would recommend this to a friend!
Mobile Submission: False
+22points
22out of 22found this review helpful.
Share this review:
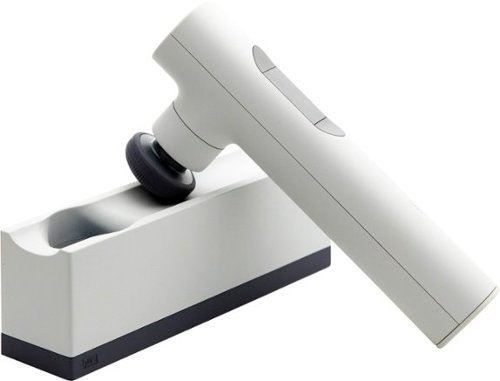
Lyric - Therapeutic Massager - Stone
The Lyric therapeutic massager is a revolutionary intelligent self-care companion that takes the guesswork out of wellness. Fitting seamlessly and stylishly into any home or lifestyle, the Lyric offers breakthrough Rhythm Therapy~ to relax and relieve pain for everybody and every body.
Powerful Massager
Customer Rating
5.0
Images for this Review
(click to see full-size image)


I am a member of Best Buy’s Technical Insider Network, TIN for short. Reviewers in this invitation-only program are provided products for the purpose of writing honest, unbiased reviews.
Lyric’s phone app and full user’s manual was not available at time of this review.
Initial Impressions:
This is a powerful massager. I have owned multiple massagers over the years that were one trick ponies. In short, they were all vibrating objects of various shapes and sizes whose goal was to magically relax sore muscles. At most, they made my voice all cool sounding when applied to my chest. Otherwise, they were all worthless. The Lyric is something different. The head oscillates like in a steady back and forth pattern instead of the random omni-directional vibrating heads of other motorized massagers. The oscillating head is very powerful. It comes with tips that will allow you to customize how best to target your sore spots and muscle groups. There is a handle that attaches to and extends the reach of the Lyric. The LCD touch screen is large, easy to read, and is easy to navigate. There are not lot of screens so it should not take long to try out all the features.
My first use of the Lyric was a bit of an adventure. Eh, it did not work out so well. I was not expecting the oscillations to be so powerful. In the end failed to respect how powerful of the massager this is and ended up bruising my shoulder. It took a few attempts to figure out how best to hold it, where to place the massager tip, which tick to use, and how much pressure to apply to my body part so the massager would massage and not punch me at high speed. My recommendation is that you practice this on the setting “Level” at level 1 speed using the soft tip until you have a good idea how to handle your Lyric. My outcomes became much better after a little experience with how to hold the unit, placement, and working with the pre-programmed therapies.
Setup:
Setup is straight forward. Turn on your phone, turn on the Lyric, follow the Lyric’s onscreen instructions. If you reset the Lyric, then you will be walked through the Wi-Fi setup again and again and again. Why is it so easy to reset the Lyric. The UI developers at Lyric decided to include the Rest button as one of the four guided massage options. In my opinion, the rest button should have been one of the last screens you can swipe to on the top-level menu screens.
The Lyric has two charging options. You can plug the USB cable directly into the handle or you can charge the Lyric via the included charging base. Both methods use the same USB A/B to USB C cable. The base also houses three of the of four massager heads. The default Dome head is designed to be stored attached to the Lyric. In my opinion, this is a compact and efficient design.
The extension handle has a smooth rubberized like coating. The extension handle slides into bottom of the Lyric and is held in place by a rubberized compression seal. The connection has a slight wobble which may lead you to believe the Lyric will just fall off the extension handle. It won’t. The fit is very tight. I had the lyric upside down massaging my back while I held the extension handle over my shoulder. It also took a good tug using both hands to separate the handle from the massager.
Power:
As mentioned earlier, this is a powerful massager. You will hurt yourself if you do not treat the Lyric, or your body, with respect. There are three guided massage settings: Pain Relief, Calm, and Energy. These are pre-programmed therapies that target specific pressure points on your body. The massage head vibrates for about 20 seconds at each pressure point. The power to the massage head may start slow, ramp up to fast, and then slow again but with more powerful hits than when the session began. For example, one of the pressure points is the back of my hand just under my thumb. It took a few practices tries to find the correct position for my hand so that the Lyric would not simply punch me in the back of the hand. Placing my hand on a table caused the Lyric to punch the palm of hand on the table. For me, the best position was to hold my hand in the air and apply pressure to the massager heard with the back of my hand.
Attachments:
From Lyric’s website. The four attachments are as follows:
Cone: Intended for more sensitive areas and for acupressure treatments.
Dome: Recommended for larger areas of the body.
Thumb: Can be applied to trigger points or used for deeper tissue penetration.
Double: This two-pronged design enables a “double tap” to target both muscle and tissue.
Dome: Recommended for larger areas of the body.
Thumb: Can be applied to trigger points or used for deeper tissue penetration.
Double: This two-pronged design enables a “double tap” to target both muscle and tissue.
I need specific directions on how and when to use the Double.
The Cone and Dome are the two I use the most. The Cone comes to a point but is softer than the other attachments. I use this mostly for targeting specific sore spots or areas where I feel the other attachments are too hard.
The Dome is broad and covers a wide area. This is the default attachment. This is good when moving the Lyric over a large muscle or area of your body. However, you still need to be careful because if you use this incorrectly it turns into a giant battering ram for a muscle or joint.
I used the Thumb a few times. Mostly on some stubborn knots in the arch of my foot. As much as I wanted to punish the nasty little knot, I found that the Cone was a better fit. Otherwise, I did not find a good use for the Thumb.
Guided therapy:
There are three guided therapies: Pain Relief, Calm, and Energy. Maybe there will be more when Lyric launches its app. There is little introduction or instruction for these therapies. The touch screen LCD will walk you through the placements of the massager head for each one of these therapies. I recommend that you start with the default Dome massager head until you get more comfortable with each therapy. If you find the Dome still too hard then go with the Cone. The Cone is the most forgiving of the four heads.
For example, the Pain Relief Therapy is a three-minute therapy consisting of eight twenty second sessions: massage of right/left inside thumb, right/left inside pinky, traps (top of shoulder), and right/left inside ankle. The LCD will give you an image of your right hand, palm side down, with a dot where the massage head should rest. The guide will show a graphic of the next massage point when it finishes with the previous one. Text on the screen will also state what the point is. You have three seconds to place the massage head between massage points. This will take some practice to get right. It took me a few tries to figure out exactly how to massage the inside of my thumbs before I got it right. First time the Lyric punched my hand. The second time I had better results. The third time I rested my hand palm down on a table. That was a very bad idea because the Lyric simply punched the palm of my hand into the table. This is an area where better instruction would be very helpful. As mentioned earlier, the best position for me was holding my hand in the air.
The LCD is very sensitive. If you touch the LCD screen with any part of your hand while transitioning to another part of your body the massager pauses. This is not a big deal with the guided therapy. It could be a very big deal when engaging in a mode called Level. This is essentially free hand mode. Using the trigger button, you can set the intensity level from 1 to 4. Four being the most powerful, fastest oscillation. This is not an issue if I am using the extension to reach hard to reach places. However, if I am targeting an easy to reach muscle group, such as my hip, then it is very likely I will brush the LCD screen and pause my massage session. In these instances, I had to put fabric between the LCD touch screen and my hand to prevent any interruption in the massage session. I am not sure if there is a software solution here. At least I can solve the problem using other methods.
Final thoughts:
If you are ready to give up on the vibrating massagers and ready for something a little more targeted, then you might like the Lyric. It has a very powerful motor, multiple tips, and an extension arm that allows you to massage those hard-to-reach places. The batter lasts a good long time. Charging is easy. And the multiple tips cover a variety of applications. I cannot stress enough how much this can hurt you if you do not respect it. Be smart and you will get a lot of great use out of the Lyric.
I would recommend this to a friend!
Mobile Submission: False
+14points
14out of 14found this review helpful.
Share this review:

BullGuard - Premium Protection 2021 Edition (10 Devices) (1-Year Subscription)
BullGuard Premium Protection provides the ultimate in online protection for the modern family. Besides offering protection on up to 10 devices, Premium Protection also safeguards your connected home by continuously scanning its Wi-Fi network and every device on it, from baby monitors to smart heating systems, to prevent hackers from finding an easy route into personal and financial information. Personal identities are safeguarded by BullGuard's continual monitoring of dark web's platforms and websites where stolen user information is traded. And families find the powerful, discreet parental controls invaluable in protecting children from numerous online threats.
Easy to defeat Parental Controls
Customer Rating

3.0
Disclaimer:
I am a member of Best Buy’s Technical Insider Network, TIN for short. Reviewers in this invitation-only program are provided products for the purpose of writing honest, unbiased reviews.
Impressions:
There are a lot of features here but I only have room to those that stood out to me during my short time with the product.
BullGuard Premium Protection suite covers your system from virus attacks, phishing, malware, and network vulnerabilities. It includes a firewall, PC tune-up utilities, cloud backup, parental controls, and a secure browser. During my first week of use I did not run into any virus, phishing, or malware attacks. I went to several unsavory sites that I would normally associate with security vulnerability. Either I am very lucky, or Bulldog did a great job of running interference for any nefarious applications trying to take advantage of me. This does not mean that BullGuard did a good job or that the experience was wonderful. Just the opposite. I found the BullGuard interface to be clunky. And the parental controls were so easy to bypass that I would call the implementation irresponsible.
Parental Controls:
As parents, we must accept that the internet is also raising our children. We also must accept that fact that we cannot 100% monitor 100% of our children’s activity. That’s why automated monitoring and filtering tools are a necessity to help protect our children from content that is considered inappropriate for their age group. BullGuard’s parental controls allows you to use pre-defined profiles for ages 3-7, 8-12, and 13-17. The content restriction categories are Adult, Controversial, Communications or Media, and Shopping and Entertainment. You can also explicitly define safe and unsafe sites. Access controls allows you to set activity times including times of day, hours per day, total usage time, and set the time limit type to entire PC or Internet only. Applications auto block Instant messaging programs. The section allows you to allow chat on with certain applications. You can also add applications to the list. Finally, Privacy settings allow you to setup a filter to prevent user-defined data from being shared. Information such as a phone number or home address that can be easily collected from a child.
To test this, I set myself up under the most restrictive controls; 3–7-year-old. The first thing I noticed was that many of my services stopped working. Surprisingly, OneDrive was blocked. That made no sense to me. The Epic game client was also blocked. BullGuard does not give me any mechanism to override this behavior. Maybe this blocking is tied into another feature in parental controls but there is no way of knowing without turning each option on and off to verify a behavior.
I tried to go to popular sites and perform content searches to see what BullGuard would let me get away with. First, BullGuard blocked me from going to popular sites like xbox.com and bestbuy.com. So, no shopping or gaming. I also tried to hit some less popular sites associated with alcohol, drugs, and social media. Again, the sites were blocked.
Performing searches did not fare as well. BullGuard did not filter any content from the search engine. I believe BullGuard relied completely on the web browser to filter content. For example, MS Edge uses Safe Search. By default, Safe Search is set to moderate. If I perform a search that could bring up adult content, then safe search would filter out those results. However, I can easily adjust Safe Search from Moderate to Off from either the Video or Image search pages. Once I make the change, I can view any illicit imagery associated with the search. BullGuard makes zero attempt to block me, a 3–7-year-old child, from adjusting my own search restrictions. Worse, BullGuard makes it super easy to circumvent the parental controls.
BullGuard has its own browser called Secure Browser. It may be secure, but it is not impacted by the Parental controls. With the Secure Browser, with 3–7-year-old parental controls applied, I was able to shop for alcohol, browse adult content, access any website regardless that I explicitly blocked the site, and could access all sorts of content I would not my child to access. You can mitigate this by deleting the shortcut from the desktop. However, your child can still open the BullGuard Secure Browser from the BullGuard Control panel. This is a huge hole in the system. Either BullGuard needs to integrate parental controls with Secure Browser or block Secure Browser.
Parental Controls Logging:
BullGuard Messaging Centre keeps a log of parental control activity. The Messaging Centre gives a very high-level view of activity. For Parental Controls, you will see User, number of blocks per category, and time spent on the system. Clicking the View Report button will generate a detailed activity log along the option to expand the details for each entry. The only downside I see to this log is that the system does not automatically email the log to the parent. Active monitoring is always better than passive monitoring. And I can tell you from experience with my own children, illicit material is easy to come by when looking for images of relatively innocent content. As a parent, you may never find out about it with passive reporting.
Setup:
Setup was easy and disappointing at the same time. Most security suites I have used will detect and offer to remove previously installed security suits. BullGuard installed alongside McAfee. This caused the real-time file scanner to fail. This state persisted until I manually removed McAfee. I would never know that there was an issue a BullGuard function if I had not been actively monitoring the logs.
User Interface:
The BullGuard interface is functional but needs a usability pass. There is a disconnect between Settings, application features, and logging. Don’t get me wrong. BullGuard collects logging information far more than any other consumer security suite I have used. Control over the Firewall is very good. But there is no unified interface that presents everything in a unified interface. It took me a while to discover the quarks of the UI to find all the features, logging, and settings. In some cases, like with Home Network Scanner, I have not found my way back to the port scanning report.
One more note regarding Logging. Neither Norton nor McAfee allows you to see detailed logging information. If you are into metrics or taking a more direct control over your system security, then BullGuard will provide you with that level of control. The downside is that you will need to do a little hunting to piece together actionable information.
VPN:
VPN is only available in the Premium Protection as a 7-day trial. After which, it is a separate annually recuring fee.
Home Network Scanner:
I like this feature. It is a unique feature that I have not seen in a consumer security suite before. The Home Network Scanner will scan the network for all connected network devices. It then will perform a vulnerability scan on each device. However, BullGuard seems to collect a minimum amount of data on those devices. For example, can identify an iPad, a cell phone, a TV, and a computer (sometimes). It will show me the network names, IP Addresses, and MACs. It will also report if the device is exposing my network to external attacks. I thought I found a port scanning log, once, but I cannot navigate back to it. Also, I did not find any information telling me if BullGuard did anything with the network scan to further strengthen the network. For example, does BullGuard capture behavior data of my smart devices, builds a behavioral profile, and then alerts me to any activity that deviates from the profile?
The Home Network Scanner does not differentiate how each device is connected to the network. Nor will it create a network map. My home network is made up of two wireless networks and several devices hard wired to my wireless router. BullGuard’s Home Network Scanner will identify all devices on the network. It also misreports all the devices on my network to be on the same wireless network as the computer making the scan.
One cool feature of the Home Network Scanner is the auto notification of any device connecting to the network. This is great for uncovering when a neighbor, or someone else, is piggy backing on my network to enjoy an evening of free internet on my dime.
Final thoughts:
I cannot recommend BullGuard. I just don’t feel that they had the average user in mind when designing the user interface. It is not dumbed down as either Norton or McAfee. Nor does it need to be. A unified user interface, larger buttons, and contextual help would go long way to making this product more consumer friendly. Parental controls need a quality pass. BullGuard has received numerous awards for security. Unfortunately, I will need to rely on those experts because I did not encounter a security threat while using BullGuard. And no security threats were reported in BullGuard's security log.
No, I would not recommend this to a friend.
Mobile Submission: False
0points
0out of 0found this review helpful.
Share this review:

Bedgear - Glacier 1.0 Pillow (20x 26) - White
The unique single-chamber construction of the fashionable and very functional Glacier series features a Boost~ foam blend, which ensures weightless pressure relief that won't bottom out, creating the perfect pillow for soft support with no rebound.
Definitely a unique experience
Customer Rating
4.0
Images for this Review
(click to see full-size image)


Disclaimer:
I am a member of Best Buy’s Technical Insider Network, TIN for short. Reviewers in this invitation-only program are provided products for the purpose of writing honest, unbiased reviews.
First Impressions:
The look and feel of the pillow’s cover are elegant. The cover is decorated with copper embroidery, copper gromet surrounds on the air vents, and the top and bottom is a combination of interweaving copper and grey threads through a field of white fluffy material. The white fully material is unevenly spread to give the pillow top an angelic fluffy cloud aesthetic. It also very easily resembles a MineCraft copper mine.
A small zipper along one side of the pillow cover will allow access to the pillow inside.
The pillow is soft, malleable, and has little to no spring to it. The pillow’s surface has a very smooth, almost satin like feel and finish. I could feel an unusual lumpiness to the filler inside as I ran my hand over the surface. If felt like a bag of fluffy cotton balls haphazardly stuffed into a bag kind of lumpiness. Some spots were lite, fluffy, and gave little to no resistance when compressed. Other spots were stiffer and compressed with slightly more force. Pressing down on the pillow with both hands spread confirmed for me that the filler and firmness of the pillow is uneven. The reason for this is because the pillow’s filling is a combination of shredded latex foam and polyester fiber. This also explains why half the pillow feels firmer than the other half. More on that below.
Experience:
The first thing I did was remove the Glacier’s pillow cover and washed it. I am unsure if the pillows are good to go out of the box. In my case, the pillow cover smelled like a rug factory. Following the care instructions on the label I washed in cold water and tumble dried on low heat delegate cycle. This helped a lot. And the Glacier’s pillow cover came out of the wash undamaged and looking just as new as it went into the wash. I then put the Glacier in a pillowcase. This helps protect the pillow from all the nasty things that my face could excrete throughout the night.
How do I feel after 1 week?
I hated this pillow the first night I used it. I felt like my neck was too low, there was not enough support for my head, and my arm went numb when I was sleeping on my right shoulder. I was not using the pillow as I should have though. Part of the reason I was so uncomfortable was because my memory foam pillow held my head and neck at a specific height regardless of my sleeping position. I was used to that even though I woke up most morning with an ackey jaw and a stiff neck. I was not used to the Glacier’s two firmness zones. It was not until the third night that I had this figured out. My preference is to use the soft side of the pillow for back sleeping and the firm side for side sleeping. My nights went a lot better after making this adjustment. I slept well from here on out.
For a final test, I moved back to my memory foam pillow. This is when I realized how much pressure the memory foam pillow was placing on my jaw and ear. No wonder I was always waking up with neck and jaw pain. The Glacier was not exerting pressure on those pressure points. There were a few times where the filler proved uncomfortable. It was relatively easy to readjust the pillow to and find a comfortable position.
Cooling:
The Glacier purports to keep your head cool as you sleep. The pillow has front, back, and side cooling vents to allow air circulation and heat to escape. My bedroom was 68 degrees Fahrenheit or cooler during those nights. It should have been easy to keep my head cool. But it did not. I woke up in the middle of the night and in the morning with the alarm and found my head and the surrounding pillow are to be very warm. I am hesitant to blame in this on my pillowcase because it is made of thin, cheap material and does not insulate very well. I use this same pillowcase on my foam pillow and never felt this warm after a night’s sleep. Maybe the pillow is designed to be used without a pillowcase. I’m not up for going pillow commando.
PillowID
The PillowID of the Glacier pillow Bedgear sent me size 1.0. This means the pillow is designed for people designated as “small”. 1.0 is also applicable for small back sleepers, side sleepers, and multi-position sleepers. The Glacier 1.0 is also good for “medium” and “large” stomach sleepers. How do you know what pillow is the right size for you? The back of the box has a chart that will help you identify your PillowID. What the chart does not tell you is that your PillowID is based on your T-Shirt size. I confirmed on Bedgear’s website that the T-Shirt size estimate are the same for men and women.
My PillowID is a 2.0. Yes, I am using the wrong size pillow according to the size chart. So, how did I fair with the wrong size pillow? Better than I thought. I would still like to try out size 2.0. Why? Recall I mentioned how uneven the filling felt when I ran my hand along the surface of the pillow. This is because this pillow has two firmness zones. The Glazier 2.0 is thicker and hence will offer more support for my head and neck than the Glacier 1.0.
Split zone firmness:
The zones are not mentioned on the box or Bedgear’s website. The only reason I know about it is due some literature I received in the shipping box. With the logo “Glacier” facing you, the right side of the pillow is firmer than the left side of the pillow. I first noticed this when I rolled from my left shoulder to my right shoulder. I thought my head was going to roll off the bed because the pillow compressed so much. This is easily remedied by flipping the pillow long ways when you switch sides. After a few nights you just figure out how to use the pillow.
If you are a back sleeper then just pick a side that matches your preferred firmness. The firm side of the pillow met my needs nicely. I felt that the pillow offered enough support without putting pressure on my jaw.
If you are a back sleeper then just pick a side that matches your preferred firmness. The firm side of the pillow met my needs nicely. I felt that the pillow offered enough support without putting pressure on my jaw.
Conclusion:
I started my week feeling that I would trash this pillow and move back to my memory foam pillow. Now, I am not so certain. My opinion has shifted over the past week. I am favoring the Glacier over the memory foam. Do I feel that the 1.0 is the right pillow for me? No, I am not convinced. The 2.0 pillow is probably the better bet for me. Does this make the 1.0 pillow a bad pillow? Not at all. The memory foam pillow was the cause of many of my neck, shoulder, and jaw issues. I am going to continue to use the Glacier 1.0 until such time I have an opportunity to try out the next size up.
Can I recommend this pillow? This is a subjective thing. I would encourage you to try it out if you are in the market for a new pillow and are tired of the same old discount retailer specials.
I would recommend this to a friend!
Mobile Submission: False
+1point
1out of 1found this review helpful.
Share this review:
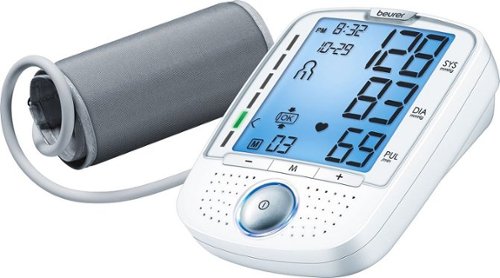
Beurer - Talking Upper Arm Blood Pressure Monitor - White
Effortlessly track you and your family~s blood pressure levels in the comfort of your own home. Your measurements will be clear and easy to read with the XL display and backlight and can also be read aloud through the device~s talking feature. This product is engineered in Germany for accuracy of measurements and features.
Great when it works
Customer Rating
3.0
Images for this Review
(click to see full-size image)


Disclaimer:
I am a member of Best Buy’s Technical Insider Network, TIN for short. Reviewers in this invitation-only program are provided products for the purpose of writing honest, unbiased reviews.
First impressions:
The Beurer BM50 Talking Blood Pressure Monitor is easy and convenient to use. Setup, operation, and proper usage are clearly defined in the user’s guide both in word and in drawings. The LCD screen is bright, the readings are displayed in large font, and the device dictates the readings loud and clear. The arm cuff can accommodate from 8.7 inches to 16.5 inches round which should accommodate your average adult. Finally, this unit has two memory banks allowing you and a partner to use a single device to independently track your readings.
Setup:
The unit does not ship with an AC power adapter. You will need to purchase this separately from Beurer. The BM50 does ship with four AA batteries. I have not owned the unit long enough to report how many readings I can take before replacing the batteries. The air hose is built into the sleeve. Plug the air hose into the side of the unit and then insert the batteries. The unit powers on and is immediately ready for use. I had the BM50 taking my blood pressure within minutes of taking it out of the box.
Operation:
Be sure to read and follow all the instructions in the manual before use. Otherwise, you will not use your new blood pressure monitor to full affect. The BM50 can track up to 100 individual tests per person. It can track a total of two people. The BM50 can display the average of your measurements over the last seven days, the last seven AM measurements, and the last seven PM measurements. You can access individual readings by repeatedly pressing the M button. The BM50 does not have any external data connections so it is not possible to upload your data to any kind of data tracking app. It would have been nice to have an electronic log for tracking, trending, and note taking.
The cuff is designed for single hand, possibly hand and chin, setup. Have a friend or family member assist you if you have any issues securing the cuff. I had to go with the hand and chin method the first few times until I got comfortable securing the cuff with a single hand.
Initiating a measurement is straight forward. Press any button on the BM50 to turn it on. You will know it is on because the device audibly announces, “The device is ready for use. You may start measuring.” Press the + or – buttons to choose user memory 1 or 2. Press the power button again to start the measurement. You will hear the mini-air compressor kick on, the cuff will tighten, and then the unit will start taking your systolic pressure, diastolic pressure, and heart rate. The until will then audibly announce your measurements once the reading is complete. The unit will also tell you your risk level based on W.H.O. guidelines. The risk indicator is represented by a light bar on the left side of the LCD screen. It is color coded green, yellow, orange, and red. A light on this bar will light up to indicate your risk level. The LCD screen places an indicator next to the light to reinforce the risk level reading. Beurer did everything they could to reduce misinterpreting your risk level.
Finally, the LCD lights up with a bright blue backlight. The readings are displayed in black. The font is large and easy to read for anyone who has less than perfect eyesight. My wife has terrible eyesight and was still able to read the LCD display. The BM50 will speak your numbers to you regardless of the quality of your eyesight.
Experience:
My overall experience with the BM50 was positive. For me, if the cuff was not properly fitted then the cuff would pinch during inflation. I also felt the cuff got a little tight when compared to other blood pressure monitoring devices I have used. You can abort the measurement and deflate the cuff by pressing the power button.
My wife’s experience with the BM50 was not so good. We tried to measure her blood pressure several times over the course of three days. The BM50 reflated the cuff three times during each session and always ended with an E2 error, “You speak or move during measurement.” In fact, she did not move or speak during any session. My wife’s arms are larger than mine but not large enough to fall outside of the cuff’s pre-marked tolerances. I tried taking a measurement on both arms. I used another blood pressure device from another manufacturer to rule her are and position out as culprits. I was able to successfully measure her blood pressure with a single cuff compression under the same conditions as the BM50. So, either I am not using the BM50 correctly with my wife or there is something else going on. The controls on the BM50 are so simple that there is nothing to check other than the batteries, the hose, and the cuff. All appeared to be in perfect order. To verify, I took another reading on myself with zero issues.
I noticed that the BM50 will try to recover from an error condition by first increasing the pressure in the cuff a total of two times. This lengthens the amount of time your arm is under compression. Each reinflation increases the pressure over the max pressure of the last inflation activity. Both my wife and teenager errored out and experienced what I would consider above normal compression.
Conclusion:
Conclusion:
This is a very easy to use blood pressure machine when it works. I really do like a lot of the features. Unfortunately, it’s usefulness is limited for my household.
The LCD screen is bright, clear, and easy to read. The audio is great for anyone with poor eyesight. The audio can also be turned up or off depending on the situation or need. The cuff is relatively easy to position by yourself. Though, as I said earlier, if your dexterity is less than ideal then you may want a friend or family member to help you out. Having access to the last 100 records including seven-day averages for all readings, AM readings, and PM readings. I would have liked a feature to export the data for tracking and trending purposes. The BM50 does not ship with an AC adapter. I find this strange but not a deal breaker.
Inconsistent operational success between users is surprising to me. It is great when it works. But it only works for me. As such, I cannot recommend this product.
I hope you found this review helpful. Thank you.
No, I would not recommend this to a friend.
Mobile Submission: False
+2points
3out of 4found this review helpful.
Share this review:
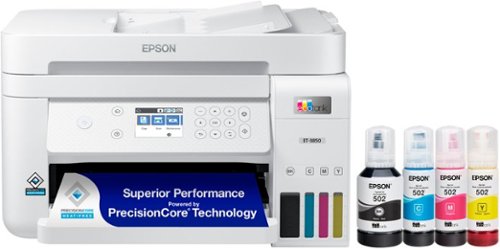
Epson - EcoTank ET-3850 All-in-One Supertank Inkjet Printer - White
Your busy office needs a printer that~s fast, affordable, easy to use, and has great features. That~s why we developed the EcoTank ET-3850 ~ an innovative cartridge-free solution that uses high-capacity, easily refillable ink tanks. So you~ll worry less about running out of ink, and save a lot on replacement ink (1). The ET-3850 features an auto document feeder, fast printing with outstanding print quality, productive paper handling, a high-resolution flatbed scanner, and a large color display ~ making it the perfect printer for your home office.
Great printing and Flatbed, Poor ADF and Reds
Customer Rating
3.0
Images for this Review
(click to see full-size image)


Disclaimer:
I am a member of Best Buy’s Technical Insider Network, TIN for short. Reviewers in this invitation-only program are provided products for the purpose of writing honest, unbiased reviews.
First Impression:
The Epson ET-3850 is lite weight when compared with other multi-function printers I have owned. Single page text and duplex page text print quickly and print to first page is as fast as any laser printer I have used. I was very surprised by how quickly full-page graphics print. Flatbed scanning is quick and detailed. However, colors are not accurate enough for my tastes. I found color accuracy issues with both scanning images and printing images. Scanning documents via the page feeder is terrible. Loading ink is super easy and mess free. The ink tanks hold enough ink to last a good long while under moderate use. See below for further details.
Setup:
It took me 20 to 30 minutes to setup this printer. Unboxing was easy but time consuming. There was a lot of protective tape used to prevent the printer’s moving parts, doors, and sliders from being damaged in transit. The printer includes four bottles of ink (Magenta, Blue, Yellow, Black), an installation CD, quick start guide, and the usual warranty information. See included photo.
You can setup the printer in a few ways: install the included software suite, configure from the printers control panel, or use the Epson app on your cell phone. I chose to configure the printer using the app on my phone. The app walked me through setting up the printer, filling the ink wells, priming the printer, setting up the network, and more. The app setup process is interactive and resembles a texting conversation. I included an image of one of the setup steps.
Loading the ink from the bottles was quick, painless, and clean. To see how clean, I laid a scrap piece of pure white towel on the table in front of the ink wells. Each color is loaded one at a time. The neck of the bottle fits snuggling into the tank head and forces the bottle’s seal to open. The tank is gravity fed and will auto stop filling when the tank is full. On bottle dripped a few drops of ink as I removed the bottle from the tank head. I removed this bottle too slow and tilted it to one side as I removed it. Otherwise, there was zero mess. The attached photo is the white after all tanks were filled.
The Ink priming process takes about 10 minutes. The print head alignment process takes about another ten minutes. I did not like the alignment process. It was four printed pages of being asked to tell the difference between six possible line configurations and picking out the best. The alignment images were so small that I had to inspect each printed page under a magnifying glass just to see them. Then, I spent a good minute or two trying to figure out which of the six picks were most correct. I think Epson could have accomplish the results with larger alignment images. Anyone without perfect 20/20 vision will have a very difficult time with this.
Finally, if you do not have a CD player then you can go to Epson.com/support and get all the software that ships with the printer including the printer drivers.
Printing:
Fantastic speed and clarity. Single page black and white zoom out of the printer. All ink jet printers I have owned print one line of text at a time. The ET-3850 seems to print a quarter of the page at a time. I cannot confirm if this is happening, but I stand by my statement that this a fast printer. I would say as fast as a fully warmed up and ready to print laser printer. Duplex printing is a little slow mostly because the printer must pull the page back into the printer and flip it over. The duplex mechanism is still close to what I have experience with a laser printer.
Color accuracy, however, needs improvement. My biggest gripe is Red. Reds come out orange and never match the original source material. For a test, I downloaded a simple color wheel. See attached images. I printed the color wheel using high resolution settings. The Red and Orange look almost the same. I scanned the image back into the system using both the Automatic document feeder (ADF) and the flatbed scanner. Each scanner read the image differently. Both samples are included in the attached photo. Finally, I photographed the printed color wheel with my Sony Alpha camera in full daylight. I realize the white balance in the photo is off but the differences between orange and red are still evident.
As a second test, I scanned in a book cover that had a very vibrant red to it. I then printed that scan and got a very weak red color like the color wheel. I did not include an image of this test because it did not prove anything different than what my color wheel images already reveal.
The next test was the difference between the ADF and the flatbed scanner. The ADF has color accuracy issues, paper jamming issues, and does an over-all crummy job creating an accurate scan. See attached photo. For this test, I used the book cover I mentioned in the last paragraph. You can see that the flatbed scan is crisp, clean, and vibrant. The document feeder is a printed copy of the book cover from the flatbed scanner. You can see the colors are dull, washed out, and the image is full of horizontal white lines and artifacts. The artifacts are more clearly present in the pure text example I included in the same image. I would compare the image quality of the ADF to that of a fax machine. The text I scanned is from a report that I printed from the ET-3850. The original hard copy looked crisp and without any artifacts. I did notice that the AFP did not smoothly pull the document through the paper feed and through the scanner. I think this led to both the poor scan quality as well as some of the paper jams I encountered.
Faxing:
The ET-3850 has zero faxing capabilities.
Interface Panel:
The interface panel is easy to use, quick between the menus, and well laid out. The display is not touch a screen. Everything is driven by a touch pad. The interface panel is on a hinge that allows that screen to be parallel with the floor for easy use. Then it can folded out of the way when not in use. The LCD panel does have a time-out and will eventually turn off. The power button light will not turn off under any power condition other than unplugged. The power button light is bright enough to light up a small room. If you find this annoying, then you will need to put a piece of tape over the power button. I was unable to find a setting that turned off or dimmed the power light.
Images:
Full page color prints on standard quality are almost as fast as a full page of black and white text. Fine detail prints take about three times longer. To be honest, I did not see much of a difference between standard quality and high quality. I did not see a setting to allow the printer to do borderless prints. It will print full page with an eighth of an inch white boarder around the image. The printed images are clean, lines are sharp, but color saturation can be muddy at times. For example, I printed the one and only image that I can find on the internet of the Battlestar Galactica from Blood and Chrome. On the screen, I could make out all the detail between the Galactica and the space station in the background. Detail was lost in center of the image where the high contrast features were overtaken the darker colors. The detail that did show was much darker than in the original image.
I also saw a similar affect with the image of the Enterprise B from the book cover of Star Trak Shipyards from Eaglemoss. The starship has a lot of dark blues. This caused parts of the ship to fully vanish against the darker background when I printed the image I made from the ET-3850’s flatbed scanner. Is this good enough for term papers and business reports? Yes. Is it good enough to print high quality printers for display in your office? No.
Finally, Reds are not accurate.
Final thoughts:
This printer may not be for you if you require the use of all the features this printer provides. The ADF mechanism is not the best I have used. Color accuracy, paper jams, and scan quality are all major issues for the ADF. Print quality is excellent if you don’t require color accurate reds. I also find detail lost in scenes where a lot of like colors saturate the image.
This may be the printer for you if your main goals are lighting fast prints great flatbed scanning capabilities. Epson does market this printer as a home printer and not a home office printer. If you do not need the ADF or faxing functions then this is a good printer for work from home school, or collage.
One thing that I really love about this printer is the ADF tray folds up into a flat surface. This may sound minor but ADFs waste space. This allows safe storage of laptops, papers, books, whatever you have.
Taken as a whole, the ET-3850 needs some work before I could recommend. If you need a solid MFP that is fast, holds a lot of ink, and can produce great looking reports then this is an easy printer to recommend.
I hope you found this review helpful. Thank you.
I would recommend this to a friend!
Mobile Submission: False
+104points
127out of 150found this review helpful.
Share this review:

WD - BLACK P10 Game Drive for Xbox 2TB External USB 3.2 Gen 1 Portable Hard Drive - Black With White Trim
The WD_Black P10 Game Drive for Xbox gives your Xbox the tools it needs to keep your competitive edge. With up to 5TB* of storage capacity, the WD_Black P10 Game Drive for Xbox is a top-tier external HDD built specifically for gamers looking to expand the potential of their Xbox so they can drive their game the way they choose. Included with your purchase is a 1-month membership of Xbox Game Pass Ultimate, with access to 100+ games on consoles and PC, plus online console multiplayer.****
What I would expect from WD Black!
Customer Rating
5.0
Images for this Review
(click to see full-size image)


I am a member of Best Buy’s Technical Insider Network, TIN for short. Reviewers in this invitation-only program are provided products for the purpose of writing honest, unbiased reviews.
Note: The Black rectangles in the photos are deliberately placed in the images, by me, to remove personal information, activation codes, and serial numbers.
== Why Western Digital? ==
Reliability! Period. I have owned many WD drives, including Black drives, over the last 20 years. I have never had an issue with WD digital performance, longevity, quality, or reliability. They just work and they work for a long time! I own 2 WD Red 2TB NAS drives that have been under constant operation since 2013. I also have a WD Passport X USB 3.0 drive that has been my Xbox external mainstay since 2015.
If my goals are affordability, reliability, and capacity then the WD P10 Black is a no-brainer for me.
== Why a Mechanical Drive in this day and age? ==
Cost. I can get a lot of storage at a reasonable price with a mechanical hard drive. I can get the same capacity for ¼ the cost of an SSD. That matters to me. If you are like me then you do not have an unlimited gaming budget.
== The Drive ==
The Western Digital Black P10 2TB drive is not Western Digital’s fastest offering. It only offers a maximum read throughput of 130 MB/s according to WD’s spec sheet (140 MB/s according to the box art). My best guess is that the P10 is a 5400rpm drive. Why do I think this? First, WD doesn’t state in any of their marketing material the spin speed of the P10s. The P10’s throughput lines up nicely with other 5400 laptop HDDs that I could find online. Second, the D10s, WD’s super capacity external Xbox HDDs, are advertised as 7200rpm with a top throughput of 250 MB/s. Keep in mind that the P10 line covers from 1TB to 5TB of storage. The D10s are 8TB and 12TB respectively.
The P10 is slim. The case is a few centimeters larger, on all sides, than the actual hard drive housed inside. Please see included photo. The case is secured with very strong adhesive strips along all four sides of the clamshell. And then further secured with four screws. The clamshell is made up of hard plastic. The seams separating the clamshell would be imperceptible if not for the contrast between the white cover and the black body. The shell looks like it will do a good job of protecting the drive during travel or if accidently dropped.
The P10 is slim. The case is a few centimeters larger, on all sides, than the actual hard drive housed inside. Please see included photo. The case is secured with very strong adhesive strips along all four sides of the clamshell. And then further secured with four screws. The clamshell is made up of hard plastic. The seams separating the clamshell would be imperceptible if not for the contrast between the white cover and the black body. The shell looks like it will do a good job of protecting the drive during travel or if accidently dropped.
The sides and top of the hard drive are secured inside the case by strategically placed shock absorbers. They look like little bits of stiff foam that are secured to the drive and the inside of the case by the same adhesive tape as the clamshell. The shock absorbers do such a good job that I had to hold the drive in my hand before I could feel any drive vibrations. And even then, the vibrations are slight even under heavy usage.
The drive interface is USB 3.2 Gen 1. This is fully backwards compatible with Xbox One’s USB 3.0 interface and USB 2.0. Maximum theoretical throughput for USB 3.0 and USB 3.2 Gen 1 are the same: 5Gbps (625 MB/s). At full speed, the P10 will never saturate the bus.
== How did it perform ==
All measurements were captured on my Xbox One S console. I measured several games for this review but chose to focus on Star Wars Battlefront II and Titan Fall 2. Battlefront II is the most annoying game, in terms of load time, that I own. Any improvement in this space is a deal sealer for me. I did test other games, but these are the two that stood out the most to me. Keep in mind that the inclusion of the Passport X is because this has been my mainstay since 2015.
Battlefront II
From Xbox home screen to Sign in Screen:
- WD Passport X to splash screen – 1.16.80 minutes
o Note: It took an additional 30 seconds to go from splash screen to game menu.
- WD Passport X to splash screen – 1.16.80 minutes
o Note: It took an additional 30 seconds to go from splash screen to game menu.
- WD Xbox to Splash screen - 56.12 seconds
o Note: It took an additional 10 seconds to go from splash screen to game menu.
o Note: It took an additional 10 seconds to go from splash screen to game menu.
Supremacy game mode. Time was measured from map splash screen to unit selection screen. This was to eliminate the time Battlefront II takes to find a multiplayer match:
- WD Passport X to game screen – 55.77 seconds
- WD Xbox to game screen - 47.73 seconds
- WD Passport X to game screen – 55.77 seconds
- WD Xbox to game screen - 47.73 seconds
Titan Fall 2
From Xbox Home screen to game splash screen:
- WD Passport X to splash screen – 1:26.50 minutes
- WD Xbox to Splash screen – 48.12 seconds
- WD Passport X to splash screen – 1:26.50 minutes
- WD Xbox to Splash screen – 48.12 seconds
From Game menu to load campaign mission 2:
- WD Passport X to game screen – 46.97 seconds
- WD Xbox to game screen – (Mission 2) – 44.93 seconds
- WD Passport X to game screen – 46.97 seconds
- WD Xbox to game screen – (Mission 2) – 44.93 seconds
The biggest improvement I experience, for all games, was loading the game from Xbox Home Screen to the game’s splash page. I did not find as much of an improvement when it came to loading maps or campaign levels. The one place where I find load times do matter the most is in Battlefront II. Supremacy is a multi-level game where stage one occurs on the battlefield. Stage two transitions to one of the two team’s space battleships. The person with the fastest load time between stages gets first pick of the special “Tank” characters. The P10 did not help me get any closer to being the first to pick a “Tank” character. If your goal is first to “Tank” then you will find the P50 the better of the Western Digital investments.
== Portability ==
Portability is good. I own two Xbox Ones. The first is either a second or third generation Xbox One. The second is an Xbox One S. I had zero issues moving the P10 between both units. The first time running a game from the drive required some setup by each Xbox. But, after that setup was complete, every game stored on the P10 loaded up and was playable without issues. I have nothing to complain about.
== Setup ==
The P10 for Xbox comes pre-formatted as NTFS. Out of the box, you can use this drive directly with your Windows 10 PC. Some of my screenshots are from my Windows 10 PC. You will have to do the following to use it with your Xbox:
1) Turn on the Xbox and sign in
2) Plug the drive into an available USB port
3) Follow the on-screen directions.
2) Plug the drive into an available USB port
3) Follow the on-screen directions.
Note: The Xbox will not recognize the drive if you plug in the drive before turning on the Xbox. This will not be an issue post Xbox format.
Now, you can start loading your game library onto the new drive. In my case, I wanted to copy the contents of my WD Passport X to the P10. Xbox allows me to do this under the storage management menu in settings. I have about 1TB of games loaded on the drive. How long did it take to copy the entire contents of one drive to the other? No idea. But I did time 17 minutes for a 57GB game. Based on that figure, I turned off my stopwatch and let the Xbox run over night. Now I have two drives with identical content. One drive for each Xbox.
Regardless of how slow this may seem it is still faster than re-downloading all my content off the internet which is, for me, 12.5 MB/s. USB 3.0 is 625 MB/s. If I do my math right the transfer speed of the game mentioned above was 55 MB/s. (57GB = 57000MB. Divide this by 17 minutes to get 3353 MB/min. And then to find MB/s divide 3353MB by 60 seconds to get 56 MB/s transfer.
== Final Thoughts ==
High capacity, decent performance, and budget friendly is where the P10 fits into my Xbox ecosystem. Load times are longer than can be expected with an SSD. But that performance is going to cost you up to four times as much for an HDD of the same capacity. I have a budget to work within. Plus, unlike the Xbox Series X, my Xbox One S and Xbox One both have traditional HDDs. Getting an external high-capacity USB 3.x drive gets me more of what I already have. I can store more games and bounce the drive from Xbox to Xbox as needed. The drive is protected by a very strong case. And the physical drive is held tightly in place by stiff foam bumpers. This drive is protected better than most portable drives I have owned. And I did see a boost in performance to my load times. I would not hesitate to recommend a WD Black P10 to my friends.
I would recommend this to a friend!
Mobile Submission: False
+1point
1out of 1found this review helpful.
Share this review:
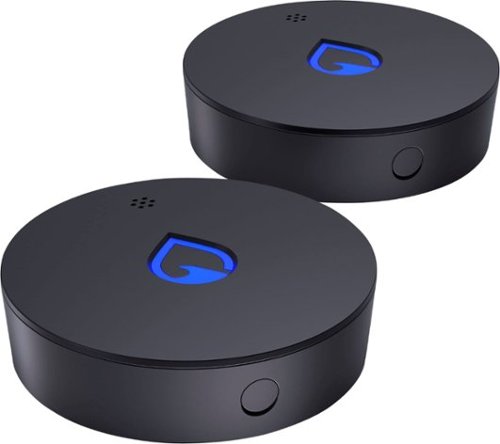
Phyn - Smart Water Sensor, 2-Pack - Black
Don~t ever worry about leaks or floods in your basement, under your sinks, from your water heater and anywhere else around the house. Phyn Smart Water Sensors alert you audibly, visually and with SMS and app notifications to your phone the moment they detect water. Set your own alert thresholds for potentially damaging high and low humidity in the free Phyn app and customize settings to maximize battery life. Easily connects via Wi-Fi to your home network, no hubs necessary. Batteries included.
Does what it says it does. Needs minor tweaks
Customer Rating
4.0
Images for this Review
(click to see full-size image)


I am a member of Best Buy’s Technical Insider Network, TIN for short. Reviewers in this invitation-only program are provided products for the purpose of writing honest, unbiased reviews.
= Why did I get this? =
My home was built back in the 1980’s; well back before foundations were built with water management in mind. As a result, my foundation has a few leaks that I have had to deal with over the years. The foundation also allows water to penetrate my basement in the form of water vapor. I leverage the free space in my basement as living space. Temperature and humidity are controlled via a heat pump. However, my heat pump is incapable of communicating to me metrics regarding temperature and humidity. The Phyn Smart Water sensor solves both issues for me; to a point.
= Device Placement =
I have two Phyn Smart Water Sensors. My plan is to place one in my furnace room around the area that water bleeds through my basement wall when the ground is heavily saturated with water. The spot has been patched several times over the years producing various levels of success. The furnace room also serves as extra storage space. I want to keep an eye on both relative humidity, temperature, and I want to be alerted if water enters the area. You will notice in one of my photos that the water sensor has three copper-colored feet. If two of the three feet contact water then a text alert is sent to my cell phone, an audible alarm sounds, and the Phyn logo on the top of the water sensor will pulsate red in time with the alarm. I tested the unit by pouring water on the floor next to the unit. The alarm was loud enough to hear if I was in general proximity of the sensor. It does not need to be as loud as a smoke detector because it also sends out text alerts when an issue is detected.
The second sensor is monitoring my living space. This is the space that gets the direct benefits of the dehumidification from my heat pump. I want to track the difference in humidity between the furnace room and my functional space so that I can make changes to the way air flows between the spaces. This will allow me to maximize the efficiency of my heat pump’s dehumidification feature. This should allow me better control over the entire environment. I placed this second sensor on a shelf midway in the room.
= Setup =
You need to download Phyn’s software to setup and use the water sensor. I am using software version 7.5.3 at the time of this review. Attached to this review is a photo of the entire user’s manual. There is a web address in the manual if you need more help. If you are like me, then you will need to go to Phyn’s site to find the words to the magical enchantment necessary to remove the battery cover. I have included a photo of the unit with the battery cover removed. I hope it helps. The instruction manual skips the part telling you how to remove the battery cover. There is a little arrow on the bottom of the unit that indicates that that the cover twists off. This arrow is molded into the case, it is shallow, and it is very hard to see. And this theme repeats itself later in the setup.
Next, start up the application and follow the setup instructions. You will need to create an account before you can connect the water sensor to your home network. Why this is important is beyond me. Oh, and if the account registration fails then you will never know because neither Phyn nor the app will tell you. This is how I found out that you need an active, logged on account activate the water sensor and connect it to my home network.
Once your account is active, setup is fairly easy. There is a button on the side of the unit. Pressing the button puts the water sensor into setup mode. Just follow the onscreen instructions. The water sensor has a 3D barcode on the bottom of each unit. You scan this with your phone’s camera. However, the 3D barcode has poor contrast with the background when your cell phone light flashes on it. It took me a few minutes to discover that I had to photograph the barcode from an angle. Otherwise, my cell phone’s flash washed out the barcode enough to make the barcode unreadable.
Finally, I setup a “home” for each water sensor, set my tolerances for alerts, and finally set my water sensor’s metrics capture frequency to 3 times a day. This is the worst for battery setting for battery life. But, I live in an area where humidity and air temperature can change drastically on a daily basis. I can always dial it back if I see a consistent pattern over the course of a month or two.
= Metrics and Reports =
The metrics are simple. The unit captures two data points at every reading: Humidity and Temperature. Go into the app to read the data point. The data points are plotted on a small graph that shows the trend for both temperature and humidity over time. I can also review any alerts triggered by water or if either of the two data points are outside of my established tolerances. Please see my screenshot for an example of the alerts page and the graphs
The app allows you to setup multiple water sensors. But Phyn decided that each sensor must be in a different physical location such as “Home 1” and “Home 2”. This is even true if I have sensor in different rooms at the same geographical location. The application will enforce this rule even if both sensors share the same physical street address. The graphs are tiny. They cannot be expanded. And the rotation of the screen has no impact on the size or number of data points I can see on the screen. I have no idea how this app will operate if I want to see multiple months of data. It could be useful to not only see multiple months of data but to also see multiple months of data from multiple sensors in the same home all from the convenience of a single screen.
I do like that the sensor will send me a text if an issue is detected. However, the data points are collected so far apart that, other than water on the floor, it could take up to 24 hours before I know if my room temperature or humidity have passed beyond my pre-defined threshold. So, if you considering this product put in a room where tight humidity control is a must, then this is not the product for you. There are other products on the market that will take up to the minute readings of air quality, temperature, and humidity. However, those items are less flexible location wise because those products do not operate on batteries.
= Final Thoughts =
The Phyn water sensor is a set and forget device. It does exactly what the manufacturer claims it does. I would like to see some improvements with the app and the setup instructions. I want to be able to look at the sensors of my home from a single screen so I can know immediately if there is anything I need to address. As is, I feel that I am spending too much time navigating screens and not getting the most out of the data. I also would like the option of capturing more data points throughout the day. Three times a day is just too few for me to get a good picture of the environment.
I would recommend this to a friend!
Mobile Submission: False
+1point
1out of 1found this review helpful.
Share this review:
ITJim's Questions
ITJim has not submitted any questions.
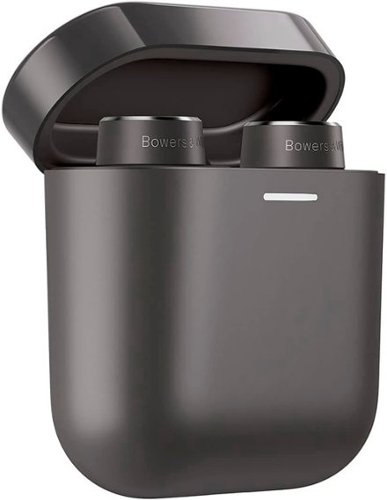
Bowers & Wilkins - B&W PI5 True Wireless Headphones with Adaptive Noise Cancellation, Bluetooth 5.0 with Qualcomm aptX - Charcoal
B&W PI5 true wire-free headphones are attractive, well-built, and they deliver a refined sound quality. Featuring Bluetooth 5.0 with Qualcomm aptX technology these earphones ensure reliable connectivity whether you are streaming from your smartphone, tablet or PC. Allows connection of up to two devices at the same time, however, only one device can be used to play or make a call at a time. Download the Bowers & Wilkins free headphone app, available for Apple and Android for further control of the sound and noise cancellation, right on your phone. The PI5 headphones feature the latest innovations in adaptive noise cancellation along with 4 built-in microphones that pick up ambient noise and cancel it with an equal, but opposite, audio signal and enhance the call quality. There are three levels of Adaptive Noise Cancellation ~ High, Low and Auto, that can be controlled either by the multi-functional button on the left earbud or via the app. Similarly, the touch-sensitive button on the right earbud allows you to enable voice assistance. The buttons also allows you to control playback and phone call functions with single (play/pause, answer call), double (skip forward, end call), or triple presses (skip backward). Another stand-out feature of these headphones is the intuitive detection sensors that put the earphones on standby or reconnect them depending upon whether they are removed or put back on. The PI5s come with a sturdy and attractive charging case for charging the earbuds when not in use. The case is equipped with two 350mAh rechargeable batteries. Each earbud has a rechargeable battery which provides up to 4 hours of wireless playback. Including the charging case, the PI5 can provide up to 12 hours of continuous playback.
Is there an App to set the equalizer?
App version 3.1.3 does not have EQ functions.
4 years, 11 months ago
by
Posted by:
ITJim

Alienware - m15 R4 15.6" FHD Gaming Laptop - Intel Core i7 - 16GB Memory - NVIDIA GeForce RTX 3070 - 512GB Solid State Drive - Dark Side of the Moon
With the 10th Gen Intel~ Core~ i7 processors enabling up to 8-cores and 16-threads of multi-threaded performance, the latest generation of Alienware m17 goes beyond its predecessor. Featuring the new NVIDIA GeForce RTX 3070 with Ultimate performance for gamers and creators. Realistic ray-traced graphics and AI-accelerated DLSS. Our latest thermal technology, Advanced Alienware Cryo-Tech, is an engineering approach where an Alienware system~s gaming performance is never compromised by means of electrical and mechanical methods while maintaining system stability during the highest performance states.
Is this a per-key RGB keyboard or a 4 zone?
Alienware - m15 R4 15.6" FHD Gaming Laptop - Intel Core i7 - 16GB Memory - NVIDIA GeForce RTX 3070 - 512GB Solid State Drive - Dark Side of the Moon
With the 10th Gen Intel~ Core~ i7 processors enabling up to 8-cores and 16-threads of multi-threaded performance, the latest generation of Alienware m17 goes beyond its predecessor. Featuring the new NVIDIA GeForce RTX 3070 with Ultimate performance for gamers and creators. Realistic ray-traced graphics and AI-accelerated DLSS. Our latest thermal technology, Advanced Alienware Cryo-Tech, is an engineering approach where an Alienware system~s gaming performance is never compromised by means of electrical and mechanical methods while maintaining system stability during the highest performance states.
Is the display having G-Sync?
For the 300Hz screen:
From Alienware's site:
"15.6" FHD (1920 x 1080) 300Hz 3ms 300-nits 100% sRGB color gamut"
https://www.dell.com/en-us/shop/cty/pdp/spd/alienware-m15-r4-laptop?~ck=mn
I do not see any indication of G-Sync on/off in the nVidia driver settings.
From Alienware's site:
"15.6" FHD (1920 x 1080) 300Hz 3ms 300-nits 100% sRGB color gamut"
https://www.dell.com/en-us/shop/cty/pdp/spd/alienware-m15-r4-laptop?~ck=mn
I do not see any indication of G-Sync on/off in the nVidia driver settings.
5 years, 1 month ago
by
Posted by:
ITJim
Alienware - m15 R4 15.6" FHD Gaming Laptop - Intel Core i7 - 16GB Memory - NVIDIA GeForce RTX 3070 - 512GB Solid State Drive - Dark Side of the Moon
With the 10th Gen Intel~ Core~ i7 processors enabling up to 8-cores and 16-threads of multi-threaded performance, the latest generation of Alienware m17 goes beyond its predecessor. Featuring the new NVIDIA GeForce RTX 3070 with Ultimate performance for gamers and creators. Realistic ray-traced graphics and AI-accelerated DLSS. Our latest thermal technology, Advanced Alienware Cryo-Tech, is an engineering approach where an Alienware system~s gaming performance is never compromised by means of electrical and mechanical methods while maintaining system stability during the highest performance states.
Is the ram upgradable?
From Alienware's user's guide:
Onboard system memory
NOTE: The memory is integrated to the system board and
cannot be upgraded after purchase.
You can find the user's guide on Alienware's support site.
Onboard system memory
NOTE: The memory is integrated to the system board and
cannot be upgraded after purchase.
You can find the user's guide on Alienware's support site.
5 years, 1 month ago
by
Posted by:
ITJim
HP OMEN - 15.6" Gaming Laptop - AMD Ryzen 7 - 16GB Memory - NVIDIA GeForce GTX 1660 Ti - 1TB SSD - Mica Silver
HP OMEN Gaming Laptop: A thin and light premium gaming experience in an elevated design so you can play everyday. With an AMD Ryzen 7 processor, NVIDIA GeForce GTX 1660 Ti graphics and cooled by OmenTempest Cooling, it makes you think how it all fits into such a tiny little package."
Can this output 144Hz over hdmi?
Yes it can. I am using the HP Omen X 25f over HDMI as an external monitor.
Just be sure to use a HDMI 2.0 or newer cable.
Just be sure to use a HDMI 2.0 or newer cable.
Images for this Answer
(click to see full-size image)

5 years, 10 months ago
by
Posted by:
ITJim
HP OMEN - 15.6" Gaming Laptop - AMD Ryzen 7 - 16GB Memory - NVIDIA GeForce GTX 1660 Ti - 1TB SSD - Mica Silver
HP OMEN Gaming Laptop: A thin and light premium gaming experience in an elevated design so you can play everyday. With an AMD Ryzen 7 processor, NVIDIA GeForce GTX 1660 Ti graphics and cooled by OmenTempest Cooling, it makes you think how it all fits into such a tiny little package."
Does it have Gsync?
This is not a Gsync monitor. At least I cannot find any information online or in the system drivers that tell me otherwise.
You can connect the laptop to a Gsync monitor and take advantage of all the features of Gsync with that monitor.
You can connect the laptop to a Gsync monitor and take advantage of all the features of Gsync with that monitor.
5 years, 10 months ago
by
Posted by:
ITJim
HP OMEN - Gaming Desktop - Intel Core i7-9700 - 16GB Memory - NVIDIA GeForce GTX 1660 Ti - 1TB Hard Drive + 256GB SSD - Shadow Black
HP OMEN Obelisk by HP Desktop: Play graphically intense games with this HP OMEN Obelisk desktop computer. You can easily store large amounts of media and other data on the 1TB hard drive and install games and programs on the 256GB SSD for fast access. This HP OMEN Obelisk desktop computer has 16GB of memory for multitasking effectively, and the Intel Core i7-9700 processor handles resource-intense programs efficiently.
How many cores are there in this pc
8 physical cores. This processor does not support 16-way multitasking.
6 years, 10 months ago
by
Posted by:
ITJim
HP OMEN - Gaming Desktop - Intel Core i7-9700 - 16GB Memory - NVIDIA GeForce GTX 1660 Ti - 1TB Hard Drive + 256GB SSD - Shadow Black
HP OMEN Obelisk by HP Desktop: Play graphically intense games with this HP OMEN Obelisk desktop computer. You can easily store large amounts of media and other data on the 1TB hard drive and install games and programs on the 256GB SSD for fast access. This HP OMEN Obelisk desktop computer has 16GB of memory for multitasking effectively, and the Intel Core i7-9700 processor handles resource-intense programs efficiently.
Is there a gtx 1660ti installed or not? What size pwr supply?
It says in the name that it is a GTX 1660ti. I can confirm that the video card is exactly as described. It is the 6gb version of the card. The Power Supply is 500Watts.
6 years, 10 months ago
by
Posted by:
ITJim
HP OMEN - Gaming Desktop - Intel Core i7-9700 - 16GB Memory - NVIDIA GeForce GTX 1660 Ti - 1TB Hard Drive + 256GB SSD - Shadow Black
HP OMEN Obelisk by HP Desktop: Play graphically intense games with this HP OMEN Obelisk desktop computer. You can easily store large amounts of media and other data on the 1TB hard drive and install games and programs on the 256GB SSD for fast access. This HP OMEN Obelisk desktop computer has 16GB of memory for multitasking effectively, and the Intel Core i7-9700 processor handles resource-intense programs efficiently.
Does this computer have a memory card reader built in?
HP OMEN - Gaming Desktop - Intel Core i7-9700 - 16GB Memory - NVIDIA GeForce GTX 1660 Ti - 1TB Hard Drive + 256GB SSD - Shadow Black
HP OMEN Obelisk by HP Desktop: Play graphically intense games with this HP OMEN Obelisk desktop computer. You can easily store large amounts of media and other data on the 1TB hard drive and install games and programs on the 256GB SSD for fast access. This HP OMEN Obelisk desktop computer has 16GB of memory for multitasking effectively, and the Intel Core i7-9700 processor handles resource-intense programs efficiently.
What is the operating system for the pc, and does it come with a virus protection app
Windows 10 standard. It ships with 30 days of McAfee.
6 years, 10 months ago
by
Posted by:
ITJim