BobinVA's stats
- Review count158
- Helpfulness votes452
- First reviewDecember 19, 2014
- Last reviewJune 10, 2026
- Featured reviews0
- Average rating4.1
Reviews comments
- Review comment count0
- Helpfulness votes0
- First review commentNone
- Last review commentNone
- Featured review comments0
Questions
- Question count0
- Helpfulness votes0
- First questionNone
- Last questionNone
- Featured questions0
- Answer count28
- Helpfulness votes23
- First answerAugust 12, 2016
- Last answerJanuary 22, 2022
- Featured answers0
- Best answers2

Water to Land, the Music Never Ends. Seamless transition from water to land, thanks to OpenSwim Pro's durable IP68 waterproof rating. Submerge your OpenSwim Pro up to 2 meters for 2 hours, seamlessly playing your tunes with perfection. Switch between Bluetooth and MP3 mode for uninterrupted music with a button press or in the Shokz App. OpenSwim Pro is tailored waterproof, versatile, while fitting safe and secure for your workout routine ~ in the water or on the land.
Customer Rating

5
A single bone conduction headset for land & water
on May 31, 2024
Posted by: BobinVA
I’m a big fan of Shokz headphones. I’ve had every model Shokz has produced since the Trekz Air, with the exceptions of the OpenSwim and OpenRun Pro models. My current bone conduction model is the OpenRun, and while they have an IPX67 rating, Bluetooth does not work underwater, so I jumped at the chance to pick up the new OpenSwim Pro bone conduction headphones.
Why should you consider purchasing a pair of bone conduction headphones? As a runner, I’ve found nothing better to take tunes with me on a run, while still maintaining situational awareness, since they leave my ear canals open. There’s also nothing more comfortable for long-term usage. I can leave these on all day long and forget that I’m wearing them at times. Even if you’re not active, the comfort and convenience of being able to leave your headphones on while not being isolated from your surroundings make it worth getting some for yourself. What’s the tradeoff? The sound quality of bone conduction headphones can’t compare to in-ear monitors, but that’s the nature of bone conduction technology, so it’s a tradeoff worth making if you need situational awareness.
With the OpenSwim Pro headphones, Shokz has addressed the biggest deficiency in the previous version: the lack of Bluetooth capability. The OpenSwim Pro expands onboard storage to 32 GB when in MP3 mode, but adds Bluetooth that can be used when you’re not underwater.
If you have the OpenRun headphones, you’ll be hard-pressed to tell the difference between those and the OpenSwim Pro. The OpenSwim Pro is basically the OpenRun with the ability to listen underwater. Doing A/B testing between the two models, I struggled to tell the difference in sound quality between the two, with a possibly slightly fuller sound in the OpenSwim Pro. Two EQ modes are available, standard and vocal. Vocal mode removes a lot of the bass, allowing you to enjoy the spoken words without the extra vibrations that sometimes happen with a speaker who has a lower voice.
MP3 mode relies on mp3 files that you put on the internal storage. Since you’ll be using these underwater where Bluetooth can’t reach, you’ll need to load up the audio files you want to take with you. On a Windows computer, this is almost trivial. To do so, simply connect the headphones to your computer using the supplied multiuse charging cable. Windows sees the OpenSwim Pro as an external drive, so all you need to do is to drag files from your computer to this drive. That’s it! While you can drag and drop entire folders, OpenSwim Pro does not recognize the folder structure, which makes sense, since there’s no screen.
MP3 mode relies on mp3 files that you put on the internal storage. Since you’ll be using these underwater where Bluetooth can’t reach, you’ll need to load up the audio files you want to take with you. On a Windows computer, this is almost trivial. To do so, simply connect the headphones to your computer using the supplied multiuse charging cable. Windows sees the OpenSwim Pro as an external drive, so all you need to do is to drag files from your computer to this drive. That’s it! While you can drag and drop entire folders, OpenSwim Pro does not recognize the folder structure, which makes sense, since there’s no screen.
While I’m accustomed to using my OpenRun while running, I’ve never been able to listen while swimming, so I was anxious to find out how these would work. Switching to MP3 mode is easy, and the companion app allows you assign the mode toggle either to a long press on the button on the left earbud, or to a simultaneous press and hold on the volume up/down buttons. Surprisingly, pressing both buttons can be done with the thumb and works well. Once in MP3 mode, the music starts and you’re ready to swim. As soon as I went underwater, I was struck by how good the music sounded! The bass that is normally lacking was there in spades, and the music sounded full and loud. Upon leaving the water, it’s just as easy to switch back to Bluetooth mode and go back to streaming music and podcasts, and taking calls. By the way, call quality was excellent, so these can be your hands-free headset as well.
If you already have a pair of OpenRun or OpenRun Pro headphones, you probably don’t need these unless you also have swimming as part of your exercise program. If you do, it’s great to have a single set of headphones able to meet your listening needs both in and out of the water. MP3 mode allows you to take your tunes with you without needing your phone, which is an added bonus. If you have a pair of the original OpenSwim headphones, you’ll want to get these for the sorely-needed Bluetooth mode and upgraded sound. For you, this is a worthy upgrade.
If you’re a runner, biker or swimmer and looking for a way to take your tunes with you while remaining aware of your surroundings, bone conduction is the way to go. OpenSwim Pro brings together the best of the OpenRun and OpenSwim headphones while retaining best in class comfort and stability. These aren’t the headphones I pull out when I want to isolate myself and get lost in my music, but for everything else, these are my go-to.
I’m giving them 5 stars, but not because they’re the overall best in all categories. I’m giving them 5 stars because they do such a great job at what they set out to do. Shokz advertises the OpenSwim Pro as headphones that are comfortable, stay in place, allow you to still hear your environment, deliver good quality sound and are not only waterproof, but work when fully submerged. They deliver on those goals and do so very well, so I give them top marks!
I would recommend this to a friend!
Share this review:
0points
0of 0voted this as helpful.
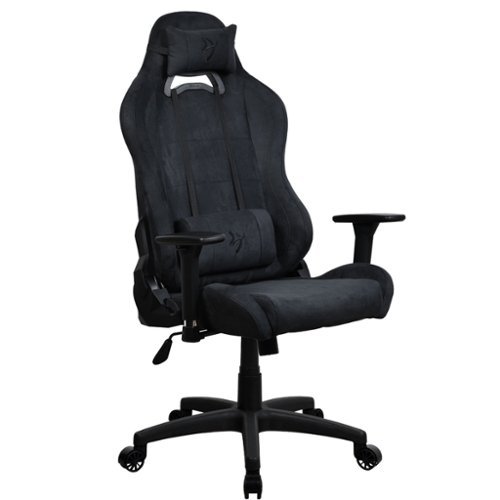
The Torretta Supersoft chair is an attractive long-lasting gaming chair that features Arozzi's minimalist Swedish design, and boasts a plethora of features that enable you to game and work harder and longer.
Customer Rating

3
Comfortable chair with thoughtful features
on May 28, 2024
Posted by: BobinVA
A computer chair is something you spend a lot of time in, so you want it to be comfortable, with the right features to help you maximize the time you spend in it. I recently replaced my previous gaming chair with this new Arozzi Torretta chair, and here are my thoughts on this chair.
Assembly: Arozzi deserves some kudos on their packaging and assembly experience. Everything is well protected and padded inside the sturdy cardboard box. Assembly instructions include step by drawings that do a good job of taking you through the process. A nice touch was the included hex key with rubber handle that was used for tightening all necessary screws. They even included a pair of white cotton gloves for those who don’t want to risk getting their hands dirty! One thing I found helpful was that all the screws came already in the places where they would ultimately be installed. This allowed me to know immediately that I wasn’t missing anything, and just needed to remove the screws and then reuse them to fasten the parts together. Assembly was intuitive and straightforward, and soon I had a fully assembled chair. My only gripe was the plastic covers on the sides of the chairs that are meant to cover the springs that provide the tension for leaning back. Although the covers are supposed to snap in place, they did not fit well. They still cover the springs, so it’s not a big deal.
Features: There’s a small list of features that any chair can provide, and the Torretta delivers. The base is solid, and the 5 caster wheels move smoothly and silently. The pneumatic piston raises and lowers the chair just like other chairs, using the lever under the seat. Pushing in this lever locks the chair in the upright position, preventing you from leaning back. Here’s where the Torretta has an additional feature not found in a lot of other gaming chairs. There’s an additional lever on the right side that allows you to change the angle of the back to the seat, ranging from fully upright to lying completely flat. This allows you to find the angle that is most comfortable for your back, and even to take a nap if necessary!
The arm rests feature a lot of available adjustments. They can be raised or lowered, moved forward and back and even angled side to side. With all these possibilities, it’s easy to find the right combination. There isn’t a lot of padding on the armrests, but they’re not meant to be under the elbow, so that shouldn’t matter.
Comfort: This is the most important quality of a chair, since you’ll be spending a lot of time in it. The Torretta is covered in a soft material like microfiber. This is a nice material, but it does tend to hold onto animal fur, so beware if you have furry pets. I’ll be interested to see how the fabric holds up over time, and my concern is that it’ll stain easily. However, I did drop some chocolate on the seat which melted. It was easy to wipe it off and I couldn’t tell it was ever there, so that was a good sign.
The Torretta has a nice amount of foam padding, but I wouldn’t call it a lot. It’s more than adequate now, but I would have preferred a little more padding. The chair comes with both a lumbar pillow and a headrest pillow, both of which can be strapped in place on the chair. These provide additional options for getting the chair exactly to your liking.
Leaning back in the chair is a little harder than I prefer, even when setting the tension dial to the lightest setting. Perhaps this will loosen up over time, but it’s something to be aware of. I found that the more time I spent in the chair, the more I liked it. I’ve been using it for all my time at the computer desk since I bought it.
Value: The Torretta is priced similarly to other chairs in this class. If you prefer fabric over PU leather, you’ll definitely prefer this chair. It has nice styling and features, and plentiful options for customizing the fit. But, I’ve seen competing gaming chairs at a local retailer that were actually more comfortable and cost hundreds less. Ultimately, you’ll have to decide whether the various finishing touches are worth the difference in price.
If you like a chair with a lot of padding, this is probably not the chair for you, but if you prefer a more moderate level of padding, then you’ll like the Torretta. I’m looking forward to seeing how it holds up over time.
I would recommend this to a friend!
Share this review:
-1point
0of 1voted this as helpful.
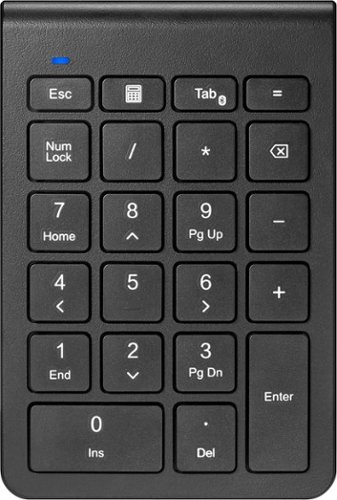
Enter numbers with greater speed and accuracy using the NS-PK3KANB24 Insignia 22-Key Bluetooth Scissor Switch Number Keypad for Windows, macOS, ChromeOS, iPadOS and Android. The keypad connects to your computer or tablet wirelessly with an easy Bluetooth connection. Its slim, inclined design makes it comfortable to use, and it offers a smooth typing experience with quiet scissor switch technology. The compact size lets you carry it everywhere. An LED shows the keypad~s status and when functions are enabled. Finish your work faster with this Insignia keypad.
Customer Rating
5
Great value, build and feel for this keypad
on March 25, 2024
Posted by: BobinVA
In recent years, I’ve migrated to smaller laptops, with screen sizes of around 14 inches. This is great for portability, but with less space available for the keyboard, the dedicated number pad is the first thing to go. While that’s not a problem often, extended numeric data entry is much easier with a dedicated number pad.
The Insignia 22-key Bluetooth number pad is the perfect addition to any laptop keyboard. It’s small and light, and is powered by a single AAA battery. I haven’t had it long enough to really test the battery life, but my expectation is that I won’t have to worry about replacing the battery for a long time.
Pairing the keypad is simple: just hold down the Bluetooth key for a few seconds, and when the blue LED starts blinking, it’s ready to pair. The same LED also serves as the “Num Lock” indicator. The keys feature good travel, and the scissor switches feel good while entering numbers. The underside features rubber feet which are helpful for keeping it from sliding across the desk. Entering lots of numbers using this keypad is much easier than trying to use the top row of numbers on a keyboard, and the keys feel good enough that it’s not annoying to use.
I thought it was strange at first that there is a Num Lock key. After all, it’s a numeric keypad, so what else am I gonna do with it? However, turning off Num Lock enables the cursor keys, allowing you to move your cursor around if you have a need to do that. There’s also a key to bring up the calculator, which is another convenient feature. I only have Windows computers, and this feature worked well for me.
With a reasonable price, solid build quality, nice tactile feel in the keys, and a few extra features, this keypad is the one to get. I’m glad I finally did!
I would recommend this to a friend!
Share this review:
0points
0of 0voted this as helpful.
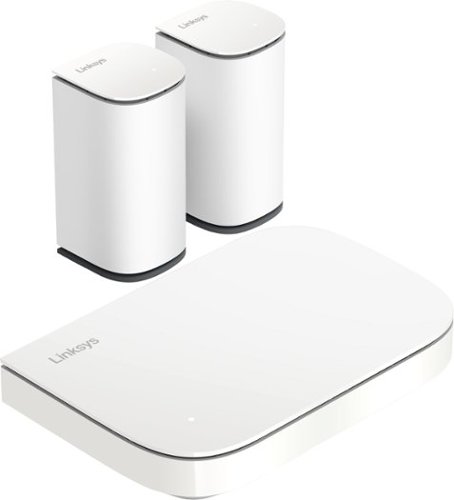
Linksys Micro 6 Mesh is the most affordable multi-gig Wi-Fi system we've ever built, delivering premium performance . Enjoy blazing-fast speeds, seamless coverage, and future-proof for multi-gig WiFi without compromising your budget.
Customer Rating

4
Great performance at a reasonable price
on March 16, 2024
Posted by: BobinVA
I remember when setting up a new router could take most of an evening and involved fiddling with obscure settings and hoping for the best. Thankfully, those days are gone. I’ve been using a Linksys Velop Atlas Pro Mesh system with 3 nodes for the last few years. It’s been my most reliable router, but I mistakenly thought it was older than it actually is, so I got the new Velop Micro Mesh router from Linksys. Thus, my review will take a slightly different approach, as I attempt to answer the question of whether this new affordable mesh router can hold its own against the older, but higher-specced model.
Linksys promotes setup time of only 10 minutes. That estimate is a little optimistic, but only slightly so. I’m accustomed to using the Linksys app to configure my router, but it’s nice that Linksys offers a web-based tool if you choose to not use the app. Going with the default configuration and using the web app, your setup time might be close to 10 minutes, but I spent some additional time setting up the guest network and changing the default network name and password. Once that was done, I was up and running and now just had to get all my devices online. I had no trouble getting the satellites to connect to the main node, which was very nice. It was nice that the Linksys app that I was already using for the previous router was smart enough to pick up the new router, allowing me to use the interface that I was accustomed to using.
One thing that stands out is the smaller size of the satellites. My previous system had 3 satellites which were all identical, meaning that the main node was no different than the satellites. Each of them had a full complement of ethernet ports, meaning that any of them could have served as the main hub. The micro mesh system’s satellites do not feature any ports, which probably saves manufacturing costs, and they’re really not needed anyway. The smaller sized satellites are a tad bit less noticeable in a room.
What about performance? On paper, the new Velop AX3000 comes in at a maximum WiFi speed of 3 gigabits per second. I’m not a wireless networking expert, but my understanding is that number is the sum of all possible speeds on all possible channels and frequency bands supported by the router. In theory, I guess this slower than an AX5400 router, but I’m not sure that’s noticeable in real life. So, while my old router was theoretically faster than this one, I really can’t tell a difference in practice. My previous top speed using speedtest.net was around 650 Mbps. Repeated tests using the new router never topped 600 Mbps. Since I’m using a modem that is several years old and still using Docsis 3.0, I decided to upgrade the modem as well, to eliminate that as a possible bottleneck.
The new modem did indeed deliver the kind of performance I was expecting, but repeated speed tests did bring up a different issue. The speed of the wifi signal broadcast by the Velop Mesh Micro drops off pretty significantly as you move away from the router. When I was within a few inches of the router, I got my top speed, but when I moved to another room about 20 feet away, the speed dropped to just 25% of what I got in the same room. In spite of this, I did not notice anything that I couldn’t do or that slowed down.
My house has a basement, 2 floors and an attic, so I have nodes on 3 of those floors, but not the attic. The new Velop Mesh Micro had no trouble providing a strong signal to all parts of the house. This wasn’t a problem with the old router either, so it’s hard to make a distinction here as well. Linksys rates this model with the ability to cover 5000 square feet, while the Atlas Pro is rated for 8100 square feet. Since I don’t have that much space, I doubt it would ever matter, but I do wonder if this is an area where the Atlas Pro’s strength of signal holds up over a greater distance.
One area where the new Velop would have the advantage is multi-gig speeds. The new Velop supports Ethernet speeds of up to 2.5 gigabits per second, meaning that, if your ISP supports it, you can take advantage of the higher speeds using a wired connection. The Atlas is limited to a 1 gig connection speed. Right now, that’s not important because speeds higher than 1 gig are not available in my area, but if you want a bit of “future proofing”, this might matter to you.
Linksys has a very nice product here. It’s easy to set up, provides a strong signal throughout the house, and it’s reasonably priced. As of this writing (March, ’24), you can pick up the Atlas Pro for $200. You might prefer that if you need to use ethernet ports on the satellites, or if you really need the extended reach it offers. The savings of $79 are good too, but I don’t think you can go wrong with the new Velop Mesh Micro system. I’m sticking with Linksys’ latest offering, but it’s nice to know that I have a more than capable backup.
I would recommend this to a friend!
Share this review:
0points
0of 0voted this as helpful.

Sennheiser AMBEO Soundbar Mini ~ the immersive sound from just one compact device for movie and music lovers. AMBEO Soundbar Mini delivers a cinema-grade sound experience from one sleek unit, with no more cables and speakers cluttering your precious space. Developed with the German research organization Fraunhofer IIS Institute, the AMBEO virtualization technology creates a virtual speaker setup that delivers the maximum possible 3D immersion a single compact device can offer. Designed with Sennheiser~s audiophile expertise, AMBEO Soundbar Mini brings music to life and automatically adjusts the sound to the type of content. AMBEO can even upmix stereo and 5.1 content to make you feel like you are in a concert hall. Enjoy the best of Dolby Atmos, DTS:X, 360 Reality Audio, and MPEG-H audio. Set up is easy. The self-calibration feature adapts to your room~s acoustics, positioning virtual speakers around the room. The intuitive app provides easy control for audio settings, equalizer, voice comprehension, and more. AMBEO Soundbar Mini~s modern design, elegantly crafted to fit any room, hides a feature-loaded digital soul. AMBEO|OS supports all major audio streaming services, WiFi and Bluetooth connectivity, granting access to powerful features. Upgrade your audio experience with Sennheiser~s AMBEO Soundbar Mini.
Customer Rating
4
Big sound in a small package
on November 7, 2023
Posted by: BobinVA
For the last few years, I’ve been using a small soundbar similar in size to the Ambeo Mini, from another major consumer electronics company. My living room isn’t conducive to a full-blown surround system, but I wanted to get better sound than I was getting, so the Ambeo Mini piqued my interest.
Unboxing the Ambeo Mini lets you know that this is a high quality item. Everything is meticulously packaged and protected, which I expected at this price point, but it was still nice to actually get that. Included are the soundbar, remote control, power cable and HDMI cable.
Setup is dead simple. My TV supports eARC, so I only had to plug in the power cable and connect to the TV using the eARC port. The Sennheiser Smart Control app is required to connect to your wifi and complete the setup. The most important step handled by the app is to calibrate the soundbar to the acoustics of your room. This is a simple process that is handled by the app, and when it finishes, you’re good to go.
The Ambeo mini is about 28 inches long, a little over 4 inches deep and just over 2.5 inches high, making it very unobtrusive sitting in front of your TV. Build quality is excellent, with metal casing and fabric covering the speaker grills. Control buttons are included on top of the unit, and these are touch-sensitive, not physical buttons (I never needed these buttons). There is one eARC HDMI port for connecting to your TV, as well as one USB-A port, but that’s it. Optical sound connection is not supported, and the single HDMI port means you’ll be reliant on all sound coming from the TV if you want it to come out of this soundbar. For me that’s not a problem, but if you were planning to connect to other devices in addition to the TV, you won’t be able to do that.
In case you’re wondering, eARC is the latest iteration of the ARC (audio return channel) system. This allows all of the various devices connected to your TV to use the same HDMI connection for audio output, hence the reason there’s only one input port. eARC increases the bandwidth available, allowing you to consume content that includes Dolby Atmos, as well as other audio standards. One nice side benefit that I didn’t have with an optical audio connection is that powering on the TV powers the soundbar. I’m also able to use the TV’s remote to control the output level on the soundbar, which is very convenient. The Ambeo’s remote isn’t necessary unless I want to change the EQ modes that are available.
So, how does it sound? The demo mode included with the app really shows off what the Ambeo Mini can do, taking you into the jungle and surrounding you with sounds of wildlife. This is quite impressive. Next, it was time to try it with movies and TV. Obviously, better input results in better output, so I made sure that I tried out the Ambeo Mini with high quality inputs, such as movies and shows that feature Dolby Atmos sound. Movies such as Top Gun: Maverick and shows like Amazon’s The Rings of Power have Dolby Atmos sound and in fact they sounded great on the Ambeo Mini. When you’re playing Dolby Atmos content, the Ambeo indicates this by lighting up the words on the top of the soundbar. Highs are crisp, mid-range sounds full, and even the bass sounds good, but not nearly as deep as it would with a subwoofer. Some reviewers have heavily criticized the weak bass response, but I think it’s actually quite good, especially for its size.
After listening for a while with video content, I switched to Bluetooth streaming from my phone. It sounded very good, but I wasn’t blown away. That’s when I switched back to my previous soundbar to compare the sound and was very impressed with the sound output from the Ambeo. Everything was richer and fuller, and sounded like speakers much bigger than they actually were. This reminded me that it’s easy to get used to something and you need to be able to compare to really notice the differences.
After listening for a while with video content, I switched to Bluetooth streaming from my phone. It sounded very good, but I wasn’t blown away. That’s when I switched back to my previous soundbar to compare the sound and was very impressed with the sound output from the Ambeo. Everything was richer and fuller, and sounded like speakers much bigger than they actually were. This reminded me that it’s easy to get used to something and you need to be able to compare to really notice the differences.
The Ambeo Mini is not a bargain soundbar. It is priced with other premium competitors, and the main reason for that is the proprietary technology that gives the Ambeo Mini the ability to mimic a 7.1.4 surround setup. This creates a much more immersive experience while watching a movie, without all the extra equipment needed to have a real surround setup. Is the Ambeo as good as the real thing? No, but it provides excellent sound in a small package that you can almost set up without thinking about. I do think the marketing hype about its virtual surround capabilities is a little overblown, and I never really felt like sounds were coming from around and above me. Nonetheless, it is noticeably better than soundbars without this feature, so you’ll ultimately have to decide how much that is worth to you.
The Ambeo Mini features several EQ modes, such as movie, music, news, sports, neutral and adaptive, which dynamically chooses the mode based on the input. Movie mode produces an overall rich soundstage that goes with the typical movie experience, while other modes minimize the background sounds to focus on the main sound channel. One feature I especially liked was the voice mode, which emphasizes dialog in movies and TV shows, and it really does do a good job of emphasizing dialog and making it stand out against background music or sound effects. Night mode subdues the bass, allowing you to listen with all the quality but without disturbing your house mates. The Ambeo mode attempts to create a more spatial feel, with sounds seemingly coming from above and behind you. While the effect wasn’t dramatic, I think it’s good enough to leave it on all the time, as the overall sound is noticeably better with it on.
In the beginning of this review, I mentioned the lack of multiple inputs. The only issue I found with that is when I used my Blu-ray player. There was a slight mismatch between the audio and people’s lips during dialog, and even though the app allows for some customization in lip-synching, I could never quite get it right. I think that would not have been a problem had I been able to connect the Blu-ray player directly. I’ll continue to tweak this, so maybe I’ll be able to make it better.
The Ambeo Mini is a fantastic option for small to mid-size rooms. Sennheiser offers bigger soundbars for bigger spaces, if you need that. I like the “all in one” nature of soundbars and not having to mess with multiple speakers. For that, a dedicated media room is better, but soundbars like the Ambeo Mini are perfect for rooms where you don’t want to dedicate yourself to a full-blown surround setup, but you still want high-quality sound. This was a significant upgrade for me, but I feel that the sticker price is a bit steep for a system that lacks a dedicated subwoofer (which you can buy for another $699). The virtualization features are excellent. Even if they could be a little better, I’m not sure there’s anything else like this on the market.
I would recommend this to a friend!
Share this review:
+3points
3of 3voted this as helpful.

Nothing about your personal style is standard. So why should your appliances be? Created for those who want to reflect their true style in every room of their home, Caf~ is distinct by design. Backed by showstopping features, every Caf~ appliance gives you the form and the function you've been craving. Now you can bring that exceptional style to your countertops thanks to elegant and innovative Specialty Grind and Brew Coffeemakers with Thermal Carafe from Caf~, which are as intelligent as they are beautiful. All Caf~ coffee makers are WiFi enabled and feature voice-controlled capabilities, connected through the SmartHQ app and compatible with Alexa and Google Home. Flexible temperature controls and a variety of brew settings allow even the most discriminating coffee connoisseur to enjoy the ideal amount of coffee at the ideal brew, without ever sacrificing flavor or performance. The modern, clean look pairs perfectly with the signature Caf~ copper accents that truly mark these as the world's most stylish appliances.
Customer Rating
5
Fresh ground coffee at home!
on October 27, 2023
Posted by: BobinVA
Coffee making in our house has been almost exclusively handled by one of those pod coffee makers, except when we have guests and need a pot of coffee, when we have to get our traditional machine out of the closet. The new Café Grind and Brew coffee maker brings those two together, allowing you to make either a single cup or a pot of coffee with the same machine. Yes, there are other machines that do this, but the Grind and Brew adds the ability to freshly grind your coffee beans just seconds before brewing, giving you the freshest coffee possible.
I received the stainless-steel model. All of the available options include copper accents, and it’s a good-looking machine, very well built. A clear plastic water reservoir sits next to the grinding/brewing station. It’s fairly large, but looks good sitting on a countertop. Beans are placed in the top of the machine, and ground coffee ends up in the included filter(s) in the basket area just under the grinder. Included are filters for single-cup and coffee pot mode. Both of these are made of plastic with metal mesh, so they should last a long time, but are not dishwasher safe. Paper filters may also be used as an alternative that doesn’t require cleanup.
You’ll notice immediately that the design of this one is different. GE moved away from the traditional single-tower design, and I’m glad they did. Traditional coffee makers often have an internal reservoir for the water, with a flip-up lid where you pour the water in. With many designs, this is annoying and sometimes makes it hard to pour the water in without making a mess on your countertop. The Café Grind and Brew features a completely separate water reservoir with a built-in replaceable charcoal water filter. The reservoir can be lifted off and taken to the sink to fill, eliminating spills. It is also clearly marked for different capacities, so you’re sure you have enough water for the size you want. For me, I just make sure it’s full all the time, so I don’t have to worry about that.
Setup is fairly intuitive, although I recommend reading the included manual. Getting ready to brew is as simple as filling the hopper with your beans, putting the appropriate filter in the basket (single-cup or pot), setting the switch for cup or carafe, filling the water reservoir, and placing the cup or carafe under the basket. From there, you use the touch controls to select your settings, and touch the brew button to begin. A countdown timer shows how long before your brew is ready to drink. Interestingly, it also keeps track of how much time has elapsed after your brew is finished, and reminds you to empty the grounds from the basket. This felt like the machine was nagging me, but at least you can’t blame GE if you come back and find mold growing in your basket!
Let’s talk about the settings for a moment. The Café Grind and Brew puts you in complete control of the brewing process, allowing you to select the brew size, temperature, strength and bloom time. I haven’t seen the bloom setting on many other coffee makers, and I think it may be called other things, but the idea is that by exposing the fresh grounds to hot water, it allows the carbon dioxide to escape and the remaining water to fully absorb the flavor in the beans. This helps to counteract the slightly sour taste that can result from the carbon dioxide. It’s a nice touch.
As you might expect, being able to brew coffee immediately after grinding results in the freshest coffee. This machine features a removeable burr grinder, and you can turn off the grinder if you happen to have some coffee that’s already ground. When we first loaded up the bean hopper, we realized that our beans were pretty old, and therefore not very tasty. Unfortunately, there’s no easy way to get the beans out if you want to switch to another flavor. We vacuumed out as many as we could and then made some throwaway coffee to grind up the rest. It would have been nice to have a way to completely empty the hopper, but that’s probably not something you’d need very often. You can choose how coarse you want your grind, and it’s impressive that the machine grinds just enough for whatever size cup you’ve chosen, but it does not sense when the beans are gone, in which case it’ll grind up some air for you. The included carafe is insulated, and kept coffee as hot as when it was brewed for almost 2 hours.
The Café Grind and Brew works with GE’s Smart Home app, and it works well. The app quickly recognized the coffee maker and immediately paired. The app allows you to control the coffee maker remotely, choosing all the same settings you can choose on the machine itself. If you get in the habit of filling the machine with beans, water, and a ready cup or carafe, you can use the app to start the brew from your phone before you get out of bed. You can also program it to start at a particular time, but that kind of thing has been available for years, so the app is more fun. We had the machine ready to go when guests arrived. We met them outside and offered to brew a cup of coffee for them, which we then started from the app. By the time we went inside, the coffee was almost ready.
Overall, this is a great machine, and we’re looking forward to trying different kinds of beans to really see what works best. It produces coffee that tastes fresher than what we’ve been accustomed to with pods or grounds, and it gives you the ability to tweak the brew settings as much as you like. There are many competitors on the market, at a variety of price points, so if you’re in the market, compare the flexibility, design and build quality of the Café Grind and Brew with those others, and I think you’ll find this to be a worthy competitor.
I would recommend this to a friend!
Share this review:
0points
0of 0voted this as helpful.
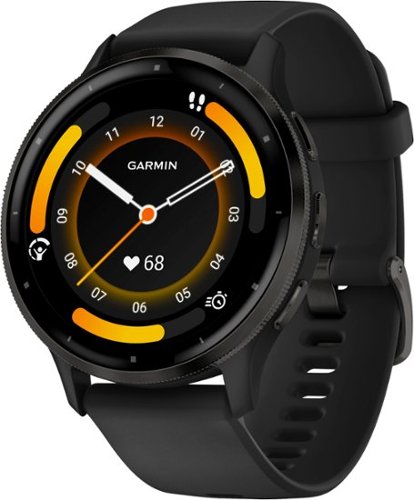
Know the real you with the Venu 3 smartwatch, the ultimate on-wrist coach designed to support your goals ~ whatever they may be. Featuring a bright, colorful display and up to 14 days of battery life, this GPS smartwatch is purpose-built with advanced health and fitness features to help you better understand your body. Body~Battery energy monitoring helps you keep your energy levels in check with personalized insights based on sleep, naps, stress, workouts and more. Improve the quality of your sleep with personalized sleep coaching and nap detection plus even more details such as HRV status (data presented is intended to be a close estimation of metrics tracked). During the day, switch up your activities with animated workouts and more than 30 built-in sports apps ~ including for active wheelchair users ~ plus advanced training features to keep you going strong. With its built-in speaker and microphone, the Venu 3 smartwatch makes it easy to make and take calls right from your wrist when paired to your smartphone ~ and even reply to texts by using your phone~s voice assistant. Plus, enjoy connectivity features such as music storage, Garmin~Pay contactless payments (with a supported country and payment network) and more.
Customer Rating
4
Enough features for smartwatch and sports nuts
on September 25, 2023
Posted by: BobinVA
My first Garmin was the clunky Forerunner 305, which I still have and it still works! Since then, I’ve had other brands of GPS sports watches, as well as the Apple Watch. The new Garmin Venu 3 caught my eye, so I decided to upgrade my sports/smart watch. As a runner, I appreciate having physical buttons because they work better when wet, and the Venu offers the best of both worlds with physical buttons as well as a vibrant touch screen.
Inside the box, you get the watch, a proprietary charging cable, and some instructions. The watch is very lightweight, and the soft rubber band is comfortable and secure. Setup is pretty easy, and the accompanying Garmin Connect app guides you through the setup process. If you want to add additional apps to the watch, you must also get the Garmin Connect IQ app, which Garmin’s app store for their watches. Downloading apps (such as additional watch faces) is very easy, but that’s where the setup process seemed to grind to a halt. After trying to figure out why the apps were not installing to the watch, I figured out that I had joined the Venu to my guest wifi network, but my phone was on the main network. Setup didn’t warn me about this, and while I should’ve noticed this, it would have been nice if the setup process could have at least shown a message to remind me. Once I noticed that, it went a lot more smoothly, and I was able to finish the process.
The Venu 3 has a beautiful AMOLED touchscreen and 3 physical buttons. I have the 45mm size, and I love the big screen which is very easy to see. The buttons are sufficient for tracking activities, but for non-sports activities, you’ll use the touch screen. The button functions are well laid-out, but it does take some exploration to figure out how everything works. Even though I’ve had the watch for a week and have been using it every day, I still haven’t discovered where everything is located within the menu structure. I do wish the buttons provided a little more tactile feedback than they do. Of the 3 buttons, the top and bottom buttons are pretty good, but the middle button has a smaller profile than the other two, and as a result it seems a little harder to reliably press it. Perhaps this is by design, but I’m not sure. Holding that button down invokes the voice assistant, so maybe this behavior is designed to prevent accidental presses. Hopefully this isn’t a harbinger of the future reliability of the buttons.
The Venu 3 has a beautiful AMOLED touchscreen and 3 physical buttons. I have the 45mm size, and I love the big screen which is very easy to see. The buttons are sufficient for tracking activities, but for non-sports activities, you’ll use the touch screen. The button functions are well laid-out, but it does take some exploration to figure out how everything works. Even though I’ve had the watch for a week and have been using it every day, I still haven’t discovered where everything is located within the menu structure. I do wish the buttons provided a little more tactile feedback than they do. Of the 3 buttons, the top and bottom buttons are pretty good, but the middle button has a smaller profile than the other two, and as a result it seems a little harder to reliably press it. Perhaps this is by design, but I’m not sure. Holding that button down invokes the voice assistant, so maybe this behavior is designed to prevent accidental presses. Hopefully this isn’t a harbinger of the future reliability of the buttons.
Using the watch for sports activities really couldn’t be easier. A press of the top button brings up the activity menu. Select your chosen sport, press the button again, then one more time to start tracking. GPS activation on this watch is quicker than on any other watch I’ve owned, which is fantastic. I’m able to pick up a signal in about 5 seconds, which means my running group no longer has to wait for me to get a signal before we can start the run. Choosing which stats to show on the face is easy, and I love that I’m able to do that from the watch itself, instead of having to go to the app for things like that. By default, the Venu 3 announces your lap time after each mile, but this is adjustable. I mostly only use the watch for running, walking, biking and indoor biking, but I’m glad to know it can handle other activities as well.
The Venu does a great job of making information easily available. Swiping up from the bottom brings up the “glances” screen, with a big list of things like steps, heart rate, intensity minutes, sleep coaching, etc. Pressing on any of these brings up a full screen with more details, or you can go to the app on the phone for even more. This is a great feature and makes it easy to find what you want. Garmin offers a lot of widgets that you can download, so that’s an area for me to explore later.
Garmin advertises battery life of 14 days when the screen is only on when you raise your wrist, or 5 days if you put it into “always on” mode. I’m not sure if that’s accurate, since I didn’t experience this myself, but I wonder if I used up more battery because of initial setup and downloading of music (more on that later). After getting everything set up and using the watch every day for a 40-minute run, I got about 6-7 days of battery life. Even that is better than anything I’ve used before, and allows me, for the first time, to be able to wear the watch at night for sleep tracking. Garmin includes a morning report to get your stats from the night before, and a sleep coach tracks your sleep, including naps. This is a pretty nice feature, and provides insight into your overall sleep patterns and their impact on your health. It’ll also suggest how much sleep you need, adding more after an especially strenuous day or reducing it after a restful day. Garmin also has something it calls a “body battery”, where it calculates an overall rating that is the net of things that recharge your body (like sleep) and those that deplete your body (like vigorous exercise). You can find out each data point that went into this calculation to get an idea of your overall energy status.
Garmin watches always excel at sports tracking, and the Venu 3 is no exception. But, can it take the place of your smart watch? The Venu has a legit speaker and microphone, allowing to place and receive calls using just your watch (assuming your phone is nearby). While you won’t want to take a long call this way, it’s just fine for a quick call when your phone is too far away to reach it, and callers said I sounded just fine.
Garmin watches always excel at sports tracking, and the Venu 3 is no exception. But, can it take the place of your smart watch? The Venu has a legit speaker and microphone, allowing to place and receive calls using just your watch (assuming your phone is nearby). While you won’t want to take a long call this way, it’s just fine for a quick call when your phone is too far away to reach it, and callers said I sounded just fine.
The Venu also supports onboard music, meaning you can leave your phone behind and still have some tunes with you. Old school MP3s may be loaded, or you can use a supported music service such as Amazon Prime Music or Spotify. For Spotify, a subscription is required before you can load music, so I didn’t try that one. Instead, I tried out Prime Music. As a Basic subscriber, I was only offered a preselected set of all-access playlists, which is very easy, but what if I’m not in the mood for their options? Downloading the music was easy enough, but does take some time. Also, I could see the battery strength declining as the songs were copied over, so I guess that’s a power-hungry operation. It’s a really nice option to have, but it’s probably easier just to take your phone with you. You can also control playback of the music on your phone, but you have to bring up the playback interface manually after the music starts playing on the phone.
The Venu 3 supports the ability to read text messages as they come in, but there’s no way to reply to them in iOS, due to some Apple restriction. I was used to doing that on my Apple Watch, so it’s a bummer to not be able to do that. The Venu also supports the ability to get notifications from all the apps, and you can select which ones to turn off. One of my most-used features on previous watches is the ability to instantly check the temperature outside, and I can do that on the Venu as well, and also get a full-blown forecast for the week ahead.
I think I’m going to be learning things about this watch for some time to come, but I really like it, and it’s a very capable watch, whether you’re exercising or not. The only thing I miss from my Apple Watch is the ability respond to text messages on the watch, but it’s offset by the great battery life and physical buttons for use during sports. The overall health reporting is top notch, with plenty of details for the statistics lovers. I’ve been using it as my main watch since I got it, and I really don’t miss my regular smart watch—I don’t think you will either.
I would recommend this to a friend!
Share this review:
0points
0of 0voted this as helpful.
Jabra~s Elite 10 true wireless advanced earbuds for work and life. For the first time, revolutionary Jabra ComfortFit technology has been combined with Spatial Sound and Dolby Head Tracking, for a more immersive Dolby Atmos experience to create the clear-sounding earbuds that you can comfortably wear all day. Complete with 10mm speakers, you can immerse yourself in rich, life-like sound that puts you right inside your favorite tracks. We scanned over 62k ears to create our unique oval EarGels that sculpt to every ear shape, and a semi-open design that relieves any pressure. Unwanted background noise will be blocked by our Active Noise Cancellation even in challenging environments, and you can connect the earbuds to two devices at once for super simple switching between phone and PC. Time to comfortably sink into mind-blowing sound. Don~t get caught without charge again with up to 36 hours (ANC off) of battery life that lasts throughout the day. When your buds run out of juice, simply pop them into the wireless charging case for a fast charge of 1 hour worth of battery in 5 mins. Ready to support Low Energy Audio. Stream pristine audio to multiple pairs of earbuds for easy sharing or tune into public broadcasts.
Customer Rating
5
Even better sound than the 85t!
on September 19, 2023
Posted by: BobinVA
Since getting Jabra’s 85t earbuds in 2020, they’ve remained at the top of my list for in-ear wireless earbuds. While I’ve tried a number of competitors, I keep coming back to Jabra for 3 core reasons: comfort, sound quality, and functionality. A key reason they are so comfortable is the use of oval ear gels, which prevent them from completely sealing off the ear canal and creating a feeling that is caused by occlusion, which is the blockage of the ear canal. Most earbuds rely on a good seal to produce deep bass, but Jabra went a different route for the 85t, and I love it, but while I loved it, I was concerned that this would be a “one and done”. Not to worry, the new Elite 10 brings back all that was good about the 85t, and then makes them better.
Initial pairing is super easy, although my left earbud was completely discharged when it arrived, requiring me to charge the buds before I could get started. Even as simple as Jabra makes pairing, it took a few tries before it actually worked. Initially, only one or the other of the buds would pair, but after a few tries I got both paired up and they’ve been good to go ever since. Oddly enough (I’m not making this up), the earbuds disconnected and reconnected while typing this!
As an 85t fan, I’ve loved the sound quality of those earbuds, especially using AAC on an iPhone. Jabra’s marketing touted improved sound, so I was excited to find out if that would be true. Sound quality is a very subjective thing, but to my ear, the Elite 10 earbuds really do sound much better. The soundstage seems wider, and the overall tone is crisper, with sharper highs and more defined mids. The bass is as good as ever—solid, but not muddy, and not the pounding bass that you find on some of the more bass-heavy earbuds. The Elite 10 has a balanced sound with just enough focus on the highs to make the overall experience much better than before.
One of the big new features this time around is Spatial Sound with Dolby Head Tracking, courtesy of Dolby Atmos. I’ve seen several professional reviewers raving about this, so I was really looking forward to experiencing it for myself. I even found songs that were remastered in spatial audio to test out this new feature. The idea is that you’re supposed to feel like you’re in the middle of the sound, with notes coming at you from all directions. With spatial sound turned on, it did feel a little like the sound was in front and to the sides of me, but not decidedly so. It made sounds seem more distant, not as loud, and maybe even with a little less definition. With head tracking on, turning my head to the right made most of the sound shift to my left year, and the reverse was also true. I’m not sure why that’s a good thing. Why do I want to pretend like the sound source is directly in front of me? This only made me want to keep my head still. Ultimately, I didn’t like the compromises required of these features, so I’ve turned them both off for now.
If you’re going to take advantage of spatial sound, make sure you’re using the latest version of the app on your phone. Since I already own 2 other pairs of Jabra earbuds, I have the Sound+ app. I assumed that this would seamlessly welcome the addition of the Elite 10s, but that was not the case. The ability to turn on/off spatial sound did not show up until I uninstalled and reinstalled the app. Keep that in mind before you lose time like I did trying to find the right setting in the app.
Do the Elite 10s have 2 times better ANC? Well, it might be 2 times better than Jabra standard ANC, but it’s not 2 times better than that found on the 85t. In fact, I could not find any difference from the ANC on the 85t.
Do the Elite 10s have 2 times better ANC? Well, it might be 2 times better than Jabra standard ANC, but it’s not 2 times better than that found on the 85t. In fact, I could not find any difference from the ANC on the 85t.
Jabra touts “comfortably better sound”, and this is probably my favorite feature of these earbuds. I’m a big fan of the oval ear gels, as I said above, and these are truly the most comfortable earbuds I’ve ever worn. Jabra continues to utilize physical buttons as opposed to touch-sensitive, and I’m glad. Physical buttons can be used with gloves, and accidental presses are almost nonexistent. I was pleased to find that the latest versions of the buttons are a bit more sensitive (in a good way), but still not overly sensitive.
Call quality is on par with previous versions, although some reviewers have complained about the ANC not being very effective during calls. I found the ANC to be more than adequate for my needs, and my callers told me I sounded just fine. If you’re going to be making calls in noisy situations regularly, you may want to investigate this in further depth.
If you’re currently using the Elite 85t, should you upgrade? I’m pretty happy with the improvements in sound quality, and the new smaller size and coating make them feel premium. But ANC is virtually indistinguishable from the 85t, and the older model is very comfortable in its own right, and sounds very good as well. So, you’ll need to decide if those incremental improvements are worth $250. If you’re in the market for new earbuds, you can’t do much better than these, and I highly recommend them. In the end, we buy earbuds to listen to music, right? Listening to music on the Elite 10s is wonderful!
I would recommend this to a friend!
Share this review:
0points
0of 0voted this as helpful.

The Tablo 2-tuner, whole-home DVR ablo lets you watch, pause, and record TV for free~. Tablo connects to your TV antenna and your Wi-Fi to send live broadcast programming from ABC, NBC, FOX, CBS~, and more as well as a selection of 100+ free streaming channels~ to compatible smart devices - including smartphones, tablets, as well as smart TVs & streaming players from Roku, Amazon Fire TV, Apple TV, Android TV, Chromecast w/ Google TV, Samsung TV, LG TV, anywhere in your home.
Customer Rating
4
Finally, a DVR for OTA at a reasonable price
on September 7, 2023
Posted by: BobinVA
I’ve been a “cord cutter” for many years, and while I subscribe to several streaming services, I’ve always had to get my local channels over the air. I’ve tried devices that claim to let me utilize my antenna’s signal on all my devices and recorded OTA broadcasts, but these have always been big disappointments, and I’ve never kept any of them. Tablo has a new offering with an affordable price, so I decided to try again to see if the technology is good enough yet.
Setup should have been easy, and I thought it was going to be, but it definitely was not. The first step is to download the Tablo app for your phone. The latest Tablo hardware does not work with their legacy apps, so you’ll need to make sure you download the latest version. The Tablo quick start guide includes a QR code to take you right to it, and I suggest you use it. Next, the Tablo sets up its own local Wi-Fi network, just to allow you to connect to the device, since it doesn’t have a screen. Once connected, it will guide you through connecting the device to your home Wi-Fi network.
My first attempt at connecting to Wi-Fi seemed to work right away, but then suddenly it said it could not find the Wi-Fi network. No problem, I’ll just try again. Unfortunately, the device seemed to think it was connected to Wi-Fi (according to its lights), but it wasn’t, so it put me into a loop to try to manually connect. At this point, it was trying to get me to manually connect my phone to the internal Wi-Fi network of the device (back to step 1), but that Wi-Fi network was not actually running and couldn’t be found by the phone, so I was dead in the water. Multiple resets made no difference.
I talked to a very nice guy at tech support, but he wasn’t sure what to do either. He instructed me to try to connect and set up using an Ethernet connection and then switch to wifi. So, I tried that. Using a wired connection did allow me to set things up, but I still had the wifi problem. At that point, I got an idea: what if I held down the reset button for a longer time? I did that, and it triggered a hard reset, which is what I wanted all along! Turns out that a quick press of the reset button is a restart, not a reset. Now that I could redo the wifi setup again, it correctly connected and allowed me to set it up via wifi. Finally, I was in business!
Once the setup was complete, the next step is to connect an antenna and scan for channels. The positioning of the antenna matters here. One nice thing about using a device like the Tablo is that you aren’t constrained to keep it near the TV, since you’re using your home’s wifi signal and not the physical wire from the antenna. Mine picked up about 34 channels in the attic, but unfortunately the attic is too hot to leave it there, and here’s where I ran into a limitation that I’ve experienced with other devices like this: the device’s tuner is not as good as the tuner in the TV. In my normal spot, using my normal antenna (which gets all 34 channels), I could only get 6 channels. Obviously the old maxim is true here as well: location, location, location! After finding a suitable location in the house, I’m able to view my live channels on any device that can support the app. That means that instead of only being able to view my local channels on the TV where the reception is best, I can now view programming on my phone, tablet and any TV that has its own Roku, Fire Stick or Apple TV.
The heart of the Tablo system is the Tablo app, which uses a third-party channel guide to make it all work. One thing about this new 4th gen Tablo is that it includes the channel guide at no additional cost! I don’t have an older Tablo, but my understanding is that you have to have a subscription to get more than a day of guide information, but on this new one, it includes a week of guide info at no cost. It takes a few minutes for all of the guide data to load, but once it does, you can select a show and then choose to watch it live or record it. The guide is nicely laid out, and it was very intuitive to use. It includes a Home Screen which highlights some of the top upcoming shows, and this is very nice, as it brings a modern touch to your OTA channels.
I did experience a small glitch with the guide. All the channels except one loaded up without issue, but no guide information was included for my local CBS affiliate. Without the guide information, you really don’t have that channel, as you cannot select any programs for viewing or recording. The app on my phone did allow me to watch that channel live, but not the Roku app. I worked with tech support via email, and I must say that they were very responsive and great to work with. It took a few days, but they finally got the situation resolved, and now my Tablo is fully working.
What about recording? The Tablo comes with 128 GB of storage built in, which the company says will provide up to 50 hours of recording. With the guide, it’s easy to select a show for recording and not have to put in start/stop times like an old-fashioned VCR. The user interface is nice, and fast-forwarding is easy and better than any of the DVRs that I have on my streaming services. Recording and watching recorded content was easy and flawless, and I’m really enjoying finally being able to record network TV broadcasts.
Tablo also includes a good selection of free TV channels, and this is a nice touch. These channels are often included in smart TV packages, but it’s nice to have them here, and with the ability to record. While it’s not perfect, I really like the Tablo app. It does have some quirks, especially the Roku version, but hopefully these will smooth out over time with future updates. One thing to be aware of is that this version does not support viewing your content outside of your home. I think older versions support that, but it doesn’t work for this one. That’s probably a decision that was made to differentiate the different models. I’m not bothered by that, but it’s good to know about this up front.
I’m very pleased with my new Tablo, and looking forward especially to being able to record live sporting events, which I haven’t been able to do for years. It’s a nice solution, and best of all, it works! I’m deducting a star for the setup experience, which definitely could have been better. I’m a “techie” person, so I’m willing to put up with troubleshooting problems, but I can see how many people would just box it up and return it. A more in-depth installation guide might have helped here, especially explaining the difference between a single press and a long press of the reset button.
At $99, this is a great way to enhance and extend your local stations. It doesn’t have all the bells and whistles of the higher-priced legacy models, but if you don’t need those things, this will work just fine.
I would recommend this to a friend!
Share this review:
+1point
1of 1voted this as helpful.
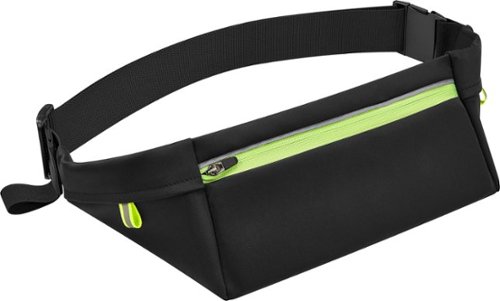
Don~t sacrifice contact with your family or friends when you~re walking or jogging ~ try the Insignia NS-RNGBLT Running Belt for Phone Screens up to 7". This belt keeps your phone and other items within reach, freeing up your hands. The belt has a zippered main pocket and two side pockets to provide plenty of storage options. It keeps your keys securely in place with an interior hook, and reflective trim helps you to stay visible even in the dark. A fully adjustable strap offers a comfortable fit. Don~t leave the house without your phone and this Insignia running belt.
Customer Rating
4
Well-built protection for running with your phone
on July 25, 2023
Posted by: BobinVA
During my years of running, I’ve come to appreciate a running belt for taking my phone with me, as opposed to arm bands or other solutions. That’s because a running belt holds the phone securely without constantly reminding you that it’s there. I’ve used a number of cheaper belts like this, but I decided it was time to try out a nicer one, which is where this Insignia belt comes in.
The belt is black with neon green and yellow accents, and a few stripes of reflective tape. It’s made of a slightly stretchy nylon material on the outside, and the inside is lined with a slick coating that would seem to provide some water resistance. Although Best Buy says it’s not water resistant, I found that the interior coating protected my phone from getting wet from my sweat while I ran. Looking at its construction, I’m not sure how well it would do in a rainstorm, but I think it would provide at least enough protection to get out of the rain.
The belt has a large main pocket to accommodate phones up to 7 inches. It was plenty big enough for my iPhone 12 in a case. What’s nice about this belt is that it also has separate compartments to allow you to carry other things. On each side of the phone pocket are compartments for things like keys other little items you may want to have with you. One of these pockets also features an integrated clip to hold your key in place, and this is a nice touch. There are also 2 slim pockets behind the phone compartment that could be used to keep folded money if you like.
The Insignia Running Belt is well-made and held my phone in place without bouncing while I ran—this is what’s most important to me. Adjusting the belt’s sizing is easy to do, with an integrated finger loop included. The only area that concerned me was the belt’s clip. It feels pretty solid, but the plastic is thin, causing me to wonder about its long-term strength. Time will tell, and perhaps the thinner plastic will prove to be more comfortable than something thicker. Overall, this is a nicer belt than others I’ve used. If you’re looking for something to hold your phone without bouncing around to annoy you during your run, this is a good choice. If you need something fully waterproof, you’ll need to look elsewhere.
I would recommend this to a friend!
Share this review:
0points
0of 0voted this as helpful.
BobinVA's Review Comments
BobinVA has not submitted comments on any reviews.
BobinVA's Questions
BobinVA has not submitted any questions.

Create, learn, work, and play like never before. Featuring an immersive 9.7-inch Multi-Touch Retina display,~ powerful A10 Fusion chip, and now supports Apple Pencil,~ there's nothing else quite like iPad.
Can I buy this without service to a wireless carrier for the same price?
The WiFi only model for $329 does not include cellular service with a wireless carrier, and is the cheapest price available (other than sales).
8 years ago
by
BobinVA
Enjoy up to 10 hours of wireless audio with these Sony noise-canceling headphones. They produce rich sound by playing at audio frequencies of 3-40,000Hz and have a closed-back design that blocks outside noise for a better listening experience. These Sony noise-canceling headphones sit comfortably behind the neck and work with or without the 1m wire.
Can you mute while on a call. I want to take some conference calls on my way to work and need to mute myself. Is there a way to mute while on the call from the headphone. I know i can always mute from the phone. Thanks.
Yes, you can mute by pushing the volume up and down buttons simultaneously, but that's a little tricky, so it might be easier to mute from the phone.
8 years, 4 months ago
by
BobinVA
Keep your Wi-Fi connection strong anywhere in the house with this NETGEAR router. Monitor your network with the NETGEAR genie app, keep track of your kids with parental controls, and use multiple devices simultaneously for downloading, gaming and more
Is there a monthly charge for this netgear wireless router? Or does it just need an outlet and from there your off and running?
No monthly charge, you just need a modem to provide a signal, and you'll be good to go!
8 years, 8 months ago
by
BobinVA

Type on your terms with Keys-To-Go, the super-slim, super-light Bluetooth keyboard for iPhone, iPad and Apple TV that fits anywhere and goes everywhere. The durable, spill-proof Keys-To-Go helps you escape the cramped on-screen keyboard and turn any space into a workspace whether you~re in the backyard, the kitchen, or the park. Keys-To-Go has comfortable, soft keys that type silently so you and people around you can focus without distractions. Plus, a full row of iOS shortcut keys provide one-tap access to your most-used functions including volume and media controls.
Is this compatible with an iPad pro
Yes, but don't expect it to take the place of the Apple Smart Keyboard. This is a great keyboard, but it will connect via blue tooth, not using the new smart connector.
8 years, 9 months ago
by
BobinVA
Type on your terms with Keys-To-Go, the super-slim, super-light Bluetooth keyboard for iPhone, iPad and Apple TV that fits anywhere and goes everywhere. The durable, spill-proof Keys-To-Go helps you escape the cramped on-screen keyboard and turn any space into a workspace whether you~re in the backyard, the kitchen, or the park. Keys-To-Go has comfortable, soft keys that type silently so you and people around you can focus without distractions. Plus, a full row of iOS shortcut keys provide one-tap access to your most-used functions including volume and media controls.
Will this work with the new IPad 5th generation (2017)?
It'll work with any blue tooth enabled computer.
8 years, 9 months ago
by
BobinVA
View files or videos in custom positions with this HP Envy x360 laptop. The hinge lets you lay the computer flat, fold it for use as a tablet or prop the screen at angles to enhance your viewing experience. When you aren't streaming videos on this HP Envy x360 laptop, convert it to a traditional position for standard keyboarding action.
How do you turn on the keyboard backlite ?
View files or videos in custom positions with this HP Envy x360 laptop. The hinge lets you lay the computer flat, fold it for use as a tablet or prop the screen at angles to enhance your viewing experience. When you aren't streaming videos on this HP Envy x360 laptop, convert it to a traditional position for standard keyboarding action.
does this computer come with windows 10 or.........
Yes, it's Windows 10, the November, 2015 build.
9 years, 10 months ago
by
BobinVA
View files or videos in custom positions with this HP Envy x360 laptop. The hinge lets you lay the computer flat, fold it for use as a tablet or prop the screen at angles to enhance your viewing experience. When you aren't streaming videos on this HP Envy x360 laptop, convert it to a traditional position for standard keyboarding action.
have msata ssd socket inside ?
I'm not sure about what's inside, as this laptop really isn't built to make it easy to open up. It's quite thin, so I doubt there's an extra slot in there. Sorry that I don't know for sure.
9 years, 10 months ago
by
BobinVA