Xephyroth's stats
- Review count105
- Helpfulness votes1,394
- First reviewMay 11, 2016
- Last reviewApril 30, 2024
- Featured reviews0
- Average rating4
Reviews comments
- Review comment count0
- Helpfulness votes0
- First review commentNone
- Last review commentNone
- Featured review comments0
Questions
- Question count0
- Helpfulness votes0
- First questionNone
- Last questionNone
- Featured questions0
- Answer count5
- Helpfulness votes8
- First answerOctober 23, 2016
- Last answerNovember 28, 2020
- Featured answers0
- Best answers1

Orbi Wi-Fi 7 is in a class of its own, designed for a new era of entertainment, hybrid work, and smart home convenience. The Orbi 970 Series unlocks the power of Wi-Fi 7 with speeds up to 27Gbps, 2.4X faster than Wi-Fi 6. Exclusive, patented Quad-Band technology with Enhanced Dedicated Backhaul ensures Wi-Fi stays fast across all devices simultaneously. In addition, the Orbi 970 brings exceptional 360° Wi-Fi coverage across every corner of your home, regardless of the layout, from the front door to the back yard and the basement to the rooftop. It includes a 1-year subscription of NETGEAR Armor, all-in-one internet security protection.
Customer Rating

4
Excellent Performance but at an Extreme Price
on October 11, 2023
Posted by: Xephyroth
UNBOXING:
Firstly, the box is pretty big and decently hefty for this Orbi 970 system. There are 2 boxes within a larger box. The first box contains 1 router node and 2 satellite nodes, and the second box contains the 3 power adapters and a single ethernet cable for connecting to your router. The overall packaging was good, and the nodes fit snugly without concern for damage.
BUILD:
The chassis for each node is plastic, but I feel the plastic is decently durable with no glossy elements that would lead to cosmetic blemishes. Additionally, there are LED status indicator lights in the front of the unit towards the bottom, so it illuminates the surface it stands on. You also have a very basic power status LED on the back of each node.
Each node is 11.58in x 5.68in x 5.15in and weighs 3.96 lbs. These nodes are certainly not small, and they can also dissipate a decent amount of heat.
The router has (1) 10 gigabit WAN ethernet port to connect to your modem, (1) 10 gigabit LAN port for a client device, and (4) 2.5 gigabit ethernet LAN ports for client devices.
Meanwhile, the satellites each have (1) 10 gigabit LAN port and (2) 2.5 gigabit LAN ports for client devices. You can connect the satellite nodes to any of the LAN ports on the router if you prefer to use them as wired access points, or the satellites can connect wirelessly to the router.
Other than that, the router uses an undisclosed Quad-core processor at 2.2GHz, 4GB of Flash storage, and 2 GB of RAM. All 3 nodes have 12 high performance internal antennas with high-power amplifiers, and they all have quad-band WiFi with 6GHz, 5GHz and 2.4GHz bands with an additional dedicated 5GHz band as the dedicated backhaul for wireless communication between nodes.
SETUP:
Setup is pretty easy, albeit that may also depend on your own comfort with technology. You can set up via web browser or via smartphone app. I chose to perform the setup via the smartphone app.
The app provided guided setup instructions from plugging in the router, to setting up the satellite nodes, to connecting to your ISP. With my fiber optic internet, I knew that I had to connect via PPoE, for which I had credentials which I’d obtained from my ISP. The app gave me this option during setup and let me provide my username and password.
In a short amount of time and with very little friction, I was up and running with all nodes.
I do want to mention, you should avoid switching between the browser-based setup and app-based setup as you may end up repeating steps. Stick to one throughout the setup and you should have minimal issues.
Once I was through the setup, I also wanted to set up a dedicated 2.4GHz network for some devices in my home that only support that band. You can achieve this in the Orbi app by going to the hamburger menu then selecting Settings > WiFi Settings > IoT WiFi.
The Orbi app calls this an IoT (Internet of Things) network dedicated for smart home devices like robot vacuums, thermostats, and other devices that care more about signal strength and not bandwidth.
SETUP ISSUES:
In terms of issues I encountered, the first is more of a gripe than an “issue”. Whenever you reboot the Orbi 970, it can take quite some time for the router to re-establish a link with the satellite nodes. In my home, I set up the satellite nodes as wired access points to the router node. And despite that, I had to wait several minutes before the main router and satellite nodes were operable. Most people shouldn’t have to reboot the system frequently, but for the price you’re paying, I would have hoped it could perhaps be faster at re-establishing a connection.
One thing I didn’t like is that the Orbi App prevents the IoT network from having any spaces in the SSID. It’s a minor issue which can be bypassed by setting up this IoT WiFi network through the browser console. But this limitation caught me off guard since I wanted to maintain the same SSIDs as my previous mesh router system so that I wouldn’t have to go around my home and reconnect all my devices to a new SSID. But again, setting this up via the browser lets me get around this issue, but it’s very likely that some folks may not think to try that.
PERFORMANCE:
Once I set up my network, I was off to run some performance tests.
Within the app, you’re able to run a speedtest, and I was measuring about 2ms ping to the nearest server, and typically over 900Mbps for both download and upload speeds. So from the Orbi’s perspective, it’s getting excellent performance from my modem.
When testing a client device like a laptop or desktop, I deliberately set my WiFi card’s driver configuration to prefer a 5GHz + 6GHz connection to achieve the best possible bandwidth, and in my testing, I was typically able to get over 900Mbps download and upload speeds with around 4ms ping. This is substantially higher than what my previous mesh WiFi 6 system delivered, but you’ll also need to have a client device with a WiFi 6E or WiFi 7 chipset to achieve these kinds of speeds. And if you happen to have a 2.5 gigabit or 10 gigabit internet plan, you can theoretically achieve even better results than this from your ISP.
At the time of writing this review, there aren’t a ton of WiFi 7 devices in existence which makes the Orbi 970 system a pretty expensive investment to be on bleeding edge tech. But if you happen to have 10 gigabit internet access, have very high bandwidth traffic, or need internet access across a very large floorplan, the Orbi 970 system is worth a look.
Because it has a 5GHz dedicated backhaul, it should be able to sustain high-bandwidth traffic for up to 27Gbps of WiFi throughput and support up to 200 concurrent devices.
While there isn’t a ton of high bitrate 4K/8K content on streaming platforms, it’s conceivable that some folks may have high-bitrate transfers over their local WiFi network, and that’s where the Orbi 970 can especially shine.
Whether it’s transferring high bitrate camera footage from a computer to your network attached storage (NAS), or streaming high resolution PC Virtual Reality to a wireless VR headset like the Meta Quest, the Orbi 970 can handle this traffic and with low latency. Of course, this will also be dependent on the specifications of your client devices, so you can’t expect magic, but if you’re looking to purchase this system, then it’s likely that you also lean towards keeping technology in your home up-to-date.
OTHER NOTABLE FEATURES:
The first apparent feature of the Orbi 970 is the NETGEAR Armor security software which detects vulnerabilities and protects against them. It’s powered by Bitdefender which is a trusted cybersecurity company. However, this is not a free feature and is a paid add-on. A 1-year trial is included and activated out of the box.
The Orbi 970 also features the ability to host a VPN so that you can join your home network at any time. It’s only accessible through the browser console under the Advanced section. The browser console allows you to download the configuration package for use within an OpenVPN compatible client and also includes instructions for Windows, macOS, iPhone/iPad, and Android.
Another feature that can be important to operating the VPN is the Dynamic DNS. The IP address that your ISP provides you can change, so a Dynamic DNS will give you a static domain name that will route to your home IP address. This way, you’re always able to connect to your home VPN without issue and without having to know the IP address assigned to your modem.
If you happen to have a data cap or are simply interested in seeing your bandwidth usage, there is a monthly Traffic Meter which can help you see your daily usage as well as set data caps so that you don’t go over your monthly bandwidth cap.
MISSING:
The Orbi 970 marketing advertises a paid NETGEAR Smart Parental Controls integration, but I was not able to find this feature in either the Orbi app or the browser console. So at the time of writing, this feature is not available despite being advertised.
CONCLUSION:
The Orbi 970 is an excellent performing mesh WiFi system both in its ability to deliver high bandwidth throughput, as well as deliver on signal strength/range. It has some good features like VPN hosting for more advanced users, but forgoes features found on some competitors like the ability to directly host USB storage over a samba share.
And while the software experience is decent, it still feels a bit barebones compared to some of the competition.
At the current MSRP, you’re paying to be on the bleeding edge of WiFi 7 which doesn’t carry much value yet since there aren’t many WiFi 7 devices on the market yet. But if you need something to cover a large floorplan and would rather be future-proof, you will absolutely be paying a premium for the Orbi 970 mesh WiFi system, as I imagine the pricing will decrease over time.
No, I would not recommend this to a friend.


Share this review:
+5points
5of 5voted this as helpful.

Acer unveils an ultralight 16-inch OLED Laptop. Designed for mobile professionals with active and fast-paced lifestyles. The Swift Edge 16 is a perfect blend of performance, security and durability. Powered by the latest AMD Ryzen 7040 Series Processor with Radeon 780M graphics this PC showcases a brilliant 3.2K OLED display supporting 100% of the DCI-P3 color gamut and 400 nits peak brightness for cinema-grade visuals. It also incorporates Microsoft Pluton security processor, helping defend against increasingly sophisticated attacks - keeping you at ease.
Customer Rating
4
Light on Weight, but Not on Performance
on September 29, 2023
Posted by: Xephyroth
UNBOXING:
Acer kept the unboxing experience very minimalist. You get a very basic box with two smaller boxes within it—one with the laptop and small 65W USB-C PD charger, and another with the carrying sleeve (which is really nothing fancy). The packaging is super minimal without any fancy marketing, and it’s largely recyclable outside the occasional plastic.
BUILD:
My first impression of the Swift Edge 16 is that it is quite lightweight thanks to the magnesium aluminum alloy chassis. In terms of the texture, it doesn’t feel premium, but it’s also hard to fault it considering it’s a larger 16” laptop weighing in at only 2.73lbs.
Because the chassis is using such thin material, that means the overall chassis has quite a bit of flex on the keyboard, but in all honesty, it’s not something I notice day to day without intentionally pressing on the center of the keyboard. But it’s certainly not going to be as durable as heavier options, but that’s the tradeoff you make when trying to get down to this weight.
The Swift Edge 16 is only 12.95mm thick which is really quite thin, making this very easy to slide into a bag that’s already packed pretty full. Sometimes I pack a pretty full backpack and my normal thicker 16” laptop can sometimes be a bit difficult to pack, but the Swift Edge 16” slides right in.
PORTS:
The Swift Edge 16 has a surprising number of ports for a thin and light laptop. It has 2x USB4 Type C ports, 2x USB 3 Type A ports, 1x HDMI 2.1 port, a microSD card slot, and a Kensington lock.
I very frequently use a Thunderbolt 4 dock at home, and the Swift Edge 16 had zero issues connecting to my dock. My dock is hooked up to my 2.4GHz wireless peripherals, 4K webcam, 165Hz 1440p ultrawide gaming monitor, and my 120Hz 1600p portable monitor, and the Swift Edge 16 had zero issues with all of these devices connected.
It should be mentioned that since there is no DC barrel jack on the Swift Edge 16, you’ll need to rely on USB-C Power Delivery to charge the laptop.
EXPANSION & UPGRADES:
In terms of expansion, you can only really upgrade a few things—the m.2 NVMe PCIe 4.0 drive, the Wi-Fi/Bluetooth combo module, and the battery. Unfortunately, the RAM is soldered with no option for expansion, so you’ll be stuck with 16GB on the Swift Edge 16.
KEYBOARD:
I typically average 114wpm on a Monkeytype test across my main keyboards and laptop, and on the Swift Edge 16, I feel like I’m making just a few more mistakes than normal. I’m topping out around 106wpm and as low as 93wpm. I think for me, this is because the space between each key is wider than I’m used to. The key travel itself is fine for me, by comparison. With that being said, I do think the Swift Edge 16 has a good keyboard that a lot of people will enjoy.
Another important element of the keyboard is that it does have backlit keys, and it also has a numpad for those who need to do number crunching. I don’t typically use a numpad these days, but I think there will be plenty of people who will really appreciate this addition.
And lastly, the power button actually doubles as a fingerprint sensor, so you can use it to unlock Windows, authenticate with password apps and more. In my testing, I found it performed very well by quickly authenticating and without failure.
TOUCHPAD:
The touchpad is good, but also nothing extraordinary. It’s reasonably large, it’s responsive, and the multi-touch gestures work. Honestly, not much to complain about, which is more than I can say about some other laptops I’ve reviewed.
DISPLAY:
The display on the Swift Edge 16 is the real highlight of this laptop. At this price, you’re getting a 3200x2000@120Hz 10-bit OLED panel with DisplayHDR True Black 500 certification. My unit used a Samsung panel with the hardware ID of SDC418D and manufacturer model of ATNA60BX03-0.
While I don’t have the tools to test the accuracy of this panel, I can say that it gets quite bright, the colors are vivid and the blacks are deep thanks to the nature of OLED panels. I really like the 3:2 aspect ratio for productivity purposes, and as a software developer, I can see more lines of code on this display compared to 16:9 displays. And while it would be awesome to have smaller bezels, I really don’t think they’re obnoxiously large like some other laptops I’ve used.
The 120Hz refresh rate isn’t enabled by default since it will draw more power, but if you decide to use it for some light gaming or just for a more responsive experience while plugged in, it is delightful to use. However, the display isn’t FreeSync enabled, so you won’t be able to benefit from adaptive refresh rates while doing some light gaming. Since this laptop is designed more for productivity as opposed to gaming, I think this is a pretty fair omission.
One downside however is that this display doesn’t seem to have an anti-reflective coating, so you may see reflections in the display. Depending on where you plan to use this laptop, it could be a non-issue or a serious issue.
WEBCAM & MICROPHONE:
The 1440p webcam is above average—which isn’t to say that it’s good per se, but that it’s better than the typical mediocrity we see in most laptops these days. In well-lit conditions, I think it’ll actually be pretty clear, but in lower light conditions you’ll see more noise within the image.
The dual-array microphone was also decent at isolating my voice, and you can configure it for personal or conference calls using the pre-installed Realtek Audio Console app. While I didn’t think the audio quality was particularly notable, I felt it was certainly serviceable, and didn’t have a bunch of noise. If you disable the AI noise reduction within the console, you’ll get more detailed audio, but with a higher noise floor and picking up more background noise.
SPEAKERS & HEADPHONE:
Just being blunt, the speakers are not good. They’re bottom-firing which means they will sound worse on your lap compared to on a desk, and they’re also very tinny sounding with effectively no bass. They’re also rather quiet, so they’re not going to be great for immersion. Definitely one of the weakest aspects of this laptop.
As for the headphone jack, I found that it could definitely push my in-ear headphones to blisteringly loud volumes, but I could tell it was coloring the audio in a way I wasn’t used to. Disabling Audio Effects on the headphone output from the Windows sound panel yielded a more familiar transparent sound profile, but it’s still on the mediocre spectrum.
Regardless, if I’m trying to get immersed in music or other content, I’d rather use a pair of wired IEMs or a pair of Bluetooth headphones than rely on the built-in speakers.
PERFORMANCE:
The AMD Ryzen 7840U in this laptop is a low power 8-core 16-thread beast with a humble Radeon 780M integrated graphics.
For a Cinebench R23 test while plugged into power, I was able to get a multi-score score of 12200+ and a single-core score of 1690. However, on battery these scores can drop significantly. In the case of multi-core, I saw the score drop down to 8941.
That being said, for productivity-oriented tasks like web browsing, office applications, coding, and light photo editing, these specifications will be plenty sufficient. And with 16GB of RAM, you’ll be able to load numerous applications into memory, but that will certainly have some limits if you are a heavy multi-tasker.
For the occasional gaming session while plugged into the wall, I think eSports titles on low settings are achievable for 60fps gameplay, and 2D indie titles will play well on the Swift Edge 16—especially on the OLED display. You can also tap into the AMD Software: Adrenaline Edition app that is pre-installed to change various characteristics to improve fidelity or performance within games.
And since you have 1TB of fast PCIe 4.0 NVMe storage onboard, loading up Windows and apps is a very fast process.
BATTERY:
The battery life of the Swift Edge 16 is decent but not really competitive with other offerings. Even on power-efficiency settings, I’m not seeing myself getting 8 hours of mixed use. Perhaps I could achieve that by also enabling the battery saver mode, but in the age when laptops are getting well over 10 hours, I think this is one downside that might be a stronger dealbreaker for some.
Of course, more demanding workloads will only drain the battery faster, so it’s also important to consider that in your purchase decision. So while these Ryzen processors are more efficient, you can still put all the cores to work and you can also crank the brightness—both of which will drastically impact how much time you’ll have before you’ll be searching for a wall to plug into.
One issue I also encountered is that the fans wouldn’t turn off when I put the laptop into sleep mode, so it seems like this is another laptop experiencing issues with Windows Modern Standby. As an alternative, I configured the power options such that closing the lid or pressing the power button would put the laptop into Hibernate mode so that it doesn’t drain the battery while idling. But that comes with the tradeoff of not being able to resume as quickly.
CONCLUSION:
So who is this laptop really for? I think the Swift Edge 16 is a decent pick-up for someone who is looking for a lightweight computer with a bright, vivid high-resolution 16” display and wants a machine that can handle some heavier workloads while plugged in. It relinquishes some durability in order to be lightweight, but that could be a tradeoff work making if you travel a lot and need something that isn’t going to weigh you down in your bag. And while performance will be best while plugged into the wall, its performance is decent enough on battery for many tasks. But it simply doesn’t have the battery stamina of some competitors.
I would recommend this to a friend!


Share this review:
+3points
3of 3voted this as helpful.
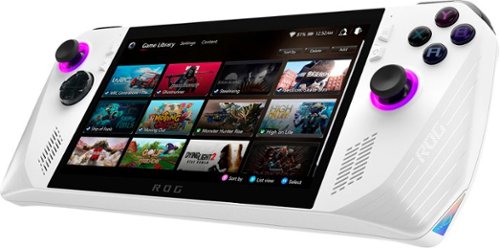
Play your way with the ROG Ally gaming handheld. Access any game that runs on Windows across all game platforms, including Steam, GOG, Xbox Game Pass, cloud gaming services, Android apps and more. Play anywhere, anytime, using handheld mode or by connecting the Ally to a TV and linking multiple controllers to play with friends. The Ally even transforms into a gaming PC by connecting to ROG XG mobile eGPU and dock - supporting mouse, keyboard, monitor, and more of your favorite peripherals. Equipped with an AMD Ryzen Z1 processor, a smooth 7-inch 1080p 120Hz touchscreen with AMD FreeSync technology, and ROG intelligent cooling, the ROG Ally takes handheld gaming on to a whole different level.
Customer Rating
4
Excellent for 2D Gaming; But Price Should Be Lower
on September 28, 2023
Posted by: Xephyroth
UNBOXING:
Inside the box, you’ll find the ROG Ally, a surprisingly sturdy paper stand for the Ally, and a 65W USB-C wall adapter. Other than that, it’s pretty simple packaging. Unfortunately, a case and screen cloth will need to be separate purchases.
BUILD:
The Ally is a sturdy plastic build. It fits comfortably in my hands, although perhaps over time I feel a bit more stress in my palms due to the way the bottom edges are angled. I think ASUS opted to go with an overall slimmer profile, which some may find less comfortable, although it is sleeker and perhaps more portable that some competitors if you stow it away in a case or bag.
PORTS, EXPANSION & UPGRADES:
The ROG Ally is unfortunately very light on ports. For most folks, you have a 3.5mm combo jack, a microSD Card Slot that supports up to UHS-II cards (although there have apparently been a lot of issues with this slot damaging customer microSD cards), and a USB-C 3.2 gen 2 port for Power Delivery, DisplayPort output, and data.
Additionally, for a very high price, you can purchase the ROG XG Mobile external GPU dock which can give more graphics horsepower to your Ally as well facilitate the usage of your Ally as your primary desktop computer since it has additional USB ports, Ethernet, and display outputs. But the proprietary nature of this technology means you’re solely relying on ASUS to provide newer docks over time, not to mention the exorbitant price you’re paying for a laptop-grade graphics boost as opposed to a desktop-grade graphics boost.
As far as onboard upgrades are concerned, you can really only upgrade the m.2 2230 PCIe 4.0 NVMe SSD. Both the RAM and WiFi modules are non-removable, so you are locked in with no options to change.
CONTROLS:
The face buttons and bumpers have decent tactility and the analog triggers are also quite comfortable and responsive. It uses offset thumbsticks akin to an Xbox controller which I find very natural coming from an actual Xbox Series controller. You also have rear macro buttons which can help serve secondary functions or be remapped through the Command Center software (although options are a bit more limited).
You also have the Command Center button on the left of the display which can give you quick access to a variety of Ally-specific functions like power profiles, an FPS limiter, a real-time performance monitor, a quick 60Hz/120Hz toggle, and 720p/1080p toggle. I really like having these options accessible without needing to dive into deep menus to make adjustments, and I hope they expand on the user experience in the command center over time.
And on the right of the display you have the Armoury Crate button which will give you quick access to your game content across all your libraries as well as many Ally-specific settings like controls, lighting and display calibration.
And while perhaps not the main attraction, the volume buttons are on top of the Ally—which I do find a bit inaccessible if I want to make a quick adjustment, but you can always use Command Center to make such adjustments without taking your hands off the gamepad.
Lastly, the power button actually functions as a fingerprint reader, which I like. This means your Ally can be quickly secured and unlocked by only you, and you can always unlock via pin or password via on-screen keyboard should your fingerprint fail. That being said, I found the fingerprint reader to work accurately.
DISPLAY:
The Ally uses a 7” 1080p IPS LCD touch screen display that can operate at 60Hz or 120Hz and with FreeSync variable refresh rate. My display had the hardware ID of TMX0002 and the monitor name TL070FVXS01-0.
Subjectively, the display looks quite good and is crisp at the 7” display size. Compared to the mainstream alternatives, it’s a notable upgrade and while modern smartphones are higher pixel density, this display makes me forget about that when it’s quite vibrant and can get plenty bright for daytime use and also reasonably dim for late night gaming sessions.
As for the touch-screen aspect, it’s quite responsive to input, but I feel like the biggest limitation is really Windows’ on screen keyboard experience. I simply cannot get fast at typing on a screen of this size, and the limited customization of the touch screen keyboard in windows makes improving this a challenge. For this reason, I can understand why some of the competition is using other clever methodologies through hardware for keyboard input.
MICROPHONES:
The onboard dual array microphones are flanking the display, positioned just above the view and menu buttons. In my testing, they are very clear and do a great job at isolating speech. If your speakers are constantly blasting noise, it might struggle to pick up your speech properly, but if you’re playing games with others and have lower in-game volume, then the Ally should do a fantastic job for that circumstance. In my opinion, there’s no need to use a separate microphone while playing games on the Ally where voice communication is prominent.
SPEAKERS & HEADPHONE:
Audio on the Ally is one of its stronger suits. You have two front-firing speakers that deliver clear audio and it gets plenty loud for portable handheld gaming. Pushed a little too hard and you might get a touch of distortion, but overall I do feel it’s under control.
Headphone performance is sufficient for most consumer headphones and some high-sensitivity audiophile headphones as well. Just be aware that by default, Audio Enhancements are enabled on the headphone output within Windows, so music may sound unnatural at first. I disabled this and found a significant improvement in clarity over headphones. With that said, this is a Realtek integrated audio chipset. It’s still not going to compete with many modern audiophile headphone dongles, but I don’t expect most folks to be running expensive IEMs or headphones through the Ally.
PERFORMANCE:
Game performance on the ROG Ally Z1 is decent, but you have to keep your expectations in check. Given that this variant only has 6 cores, 12 threads and 4 RDNA3 compute units, it simply does not have the same power as the Z1 Extreme variant of the Ally. I decided to focus on testing my catalog of modern 2D titles, and across the board many of these games like Gravity Circuit or Ember Knights could reach 120Hz at 1080p maxed out.
Even under the Turbo power profile, 2D games which employ more advanced effects like Ori and the Will of the Wisps will not be able to yield 120Hz on High settings—especially without dynamic resolution scaling. Usually, a combination of dropping down to 720p, using 60Hz or lowering settings can get you a smooth experience for these more demanding titles. But it’s important to note that if you’re on battery, these kinds of games can draw a lot of power.
Additionally, some games still need more than 4GB of VRAM to operate on higher settings, even at 1080p. So depending on the game, you might find it advantageous to tinker around with the amount of reserved VRAM through Armoury Crate, but you’ll need to restart for the changes to take effect.
And in some cases where I could yield a consistent 40fps, it’s important to note that using the 120Hz display refresh rate will yield a smoother experience compared to the 60Hz mode.
While on battery, I do think 120fps is really only a feasible framerate target under the 15W Performance profile or higher, while I found the Silent profile to be better suited for light gaming at 60fps.
I also tried to take advantage of the built-in FPS limiter in the Command Center, but it wasn’t until I looked around online that people said you needed to set your FPS limit before you start the game, which isn’t an intuitive user experience. I also found it strange that there’s no 40fps frame limit option while the 120Hz refresh rate is engaged, but instead a 45fps option which would cause some dropped frames.
BATTERY:
Battery life is really challenging to gauge since this is a handheld focused on gaming. If you consider the ROG Ally as a 2D gaming machine with fantastic compatibility for different ecosystems like Steam, PC Game Pass, Epic Games Store, GOG, Itch, etc. then you may be able to yield 3-5 hours on battery if you use a manual performance profile with the lowest possible 7W power settings, lower screen brightness and stick to 720p 60Hz.
But if you decide to push the limits in Performance or Turbo modes, you can reasonably only expect somewhere between 1-3 hours.
CONCLUSION:
Overall, I think the ASUS ROG Ally Z1 is a good product as is, but it certainly has areas where it could improve. I do think more tools to yield better battery stamina could improve the value of the Z1. But there’s no denying that having Windows installed means it has a ton of compatibility out of the box, and it does have sufficient power for a lot of gaming experiences. But it simply doesn’t have the same kind of horsepower that The Z1 Extreme variant has, although it may have an advantage in having a lower power draw.
So if you’re a gamer that is focused more on indie titles without too many advanced graphical features, this could be a good option, but you will be able to get more out of it when plugged into power. But is it worth saving the $100 over the Z1 Extreme? I think most gamers probably would want the extra performance to ensure smooth gameplay while getting clear visuals on the Ally’s 1080p display.
So this puts me in a bit of a bind. Most of my graphically intense games, I’d much rather do without compromise, so I tend to play those on a more powerful system, while I look at the Ally Z1 as a fantastic gaming handheld for a vast ecosystem of wonderful 2D games like Gravity Circuit, Ember Knights, Sea of Stars, and Eastward.
My closing thought is that if you heavily lean towards games with low graphics demands, the Z1 Ally may be a good option for you. But if you’re an enthusiast who wants high performance, you should be looking at the Z1 Extreme variant.
I would recommend this to a friend!


Share this review:
0points
2of 4voted this as helpful.
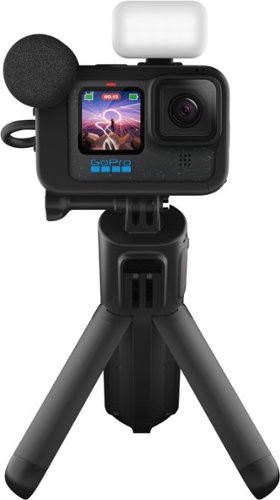
The HERO12 Black Creator Edition is an all-in-one content capturing powerhouse that makes vlogging, filmmaking and live streaming easier than ever. Packing pro-quality 5.3K 60 video and Emmy Award-winning HyperSmooth 6.0 video stabilization, it puts all the tools you need to tell your story in the palm of your hand. It features High Dynamic Range (HDR) video and photo, a variety of aspect ratios (including full frame 8:7) and 10-bit encoding with Log to deliver great footage and maximum post-production flexibility. The versatile battery grip delivers over 5 hours of 4K recording time per charge and features built-in buttons that let you comfortably control the camera during long shoots. This complete system also has a directional microphone that reduces ambient noise, Bluetooth audio for use with your wireless mic, an LED light and multiple options for transferring footage including wireless, wired and with your SD card.
Customer Rating
4
Minor Update from Hero 11, Big Update from Hero 8
on September 22, 2023
Posted by: Xephyroth
UNBOXING:
The Creator Edition version of the GoPro Hero 12 Black is full of accessories to facilitate your creative needs. You get a soft-shell zipper case with organization via removable cardboard compartments. I’m not sure if the intent is for users to get their own organizers, but I do think it would have been nice to be provided better organization that isn’t just cardboard.
Inside the case, however, you’ll find the GoPro Hero 12 Black, a 1720 mAh Enduro battery, the 4900mAh Volta battery grip, the Media Mod (with built-in microphones, 3.5mm headphone jack micro HDMI output, and USB passthrough), a foam windscreen for the Media Mod microphones, a few mounting thumb screws, a USB Passthrough battery door, a curved adhesive mount, and 2 mounting buckles.
And of course, two USB-A to USB-C cables for charging.
HARDWARE:
The build quality of the GoPro Hero 12 Black is solid. It’s rugged, and designed to be waterproof up to 33 ft without a case.
I compared it against an older GoPro Hero 5 Black which came out in 2018 and there’s no doubt that they have leveled up the build quality. In 2023, you’re getting larger color displays on the front and rear that get plenty bright for monitoring in bright outdoor conditions, you get much larger buttons, a better (albeit not great) built-in speaker, better internal microphones, and built-in mounting hardware for GoPro accessories and ¼”-20 threading for standard camera hardware.
Toss it into the Media Mod enclosure and it feels even more rugged and durable. Plus, you’re getting front and rear microphones with the Media Mod, so you’ll have improved audio compared to the internal camera. And with two cold shoe mounts on the Media Mod enclosure, you can add the Light Mod and other cold shoe accessories. However, I found that I could not use the built-in threading for camera mounts while the Media Mod enclosure was attached. Thankfully, I did have a standard GoPro to ¼”-20 threading adapter of my own, but I do think GoPro could have included this adapter in the Creator Edition since the customer is potentially losing some compatibility when using just the Media Mod. More on that in a moment.
One distinction I should mention however is that this older Hero 5 Black had built-in Micro HDMI which is now only possible with the Media Mod on the Hero 12 Black. So if you’re coming from an older GoPro and haven’t paid attention to all the changes since then, it’s probably worth noting this one regression should it matter to you. Other than that, I consider the Hero 12 Black to be a full upgrade for older GoPro owners.
The Volta battery grip is also quite useful for creators who find themselves needing a grip stick for better handling, want a mini tripod, need a wireless remote, or just need a bit extra battery. The Volta does it all with your GoPro, and it’s my favorite part of the Creator Edition kit since it gives extra versatility to correctly capture the moment under numerous circumstances—whether you need to be hands-on or hands-free. One lesser known feature about the Volta is that it actually has camera threading on the bottom so you can attach the Volta to ¼”-20 threaded camera hardware. So if you intend to use the Media Mod on a tripod or just want the battery charging when you’re not shooting, then this would be one way to achieve that.
SETUP:
Setup requires a firmware update out-of-box which will prompt you during the setup process with the GoPro Quik app. GoPro has always made it easy to discover new devices via Bluetooth, so I found the pairing process to be super easy and intuitive. And while they do ask if you’d like to create a GoPro account or subscribe to their cloud services, you can also just decline those and Continue as a guest in the app. This is my personal preference, and I hope they continue to respect that choice for customers.
SOFTWARE:
The operating system on the GoPro hardware is really not so different from older GoPros. If you want an easy out-of-box experience, it can absolutely give you that, but as the name implies, if you want to go pro, it can also let you dial in a ton of different image settings for field of view, frame rate, 8-bit vs 10-bit color, SDR, HDR or Log profiles, and others for audio.
It would be hard to list everything out, but I think the important thing here is that if you’re well-versed in photo or video, then there are absolutely a ton of settings that can allow you to dial in the right picture and even capture a separate audio track with or without processing should you be interested in editing your audio in post.
Moreover, the Hero 12 Black has support for 5GHz WiFi for faster wireless transfer speeds and live previewing if you choose to use the companion app for these features. If you want to live stream to Twitch or YouTube (achievable through the mobile app), you can also use the Hero 12 Black over WiFi for that, but you could also use the GoPro Webcam app for desktop if you plan to use it tethered to your computer over USB.
Also, with Bluetooth onboard, you can use a pair of wireless headphones to hear better audio quality during playback as opposed to using the onboard speaker. GoPro also states you should be able to use the microphone on your bluetooth headphones to record, but I was unable to find this option in any of the settings, so hopefully GoPro makes this capability a bit more intuitive.
MOBILE APP:
The mobile app facilitates all of the same controls available on the hardware itself, just controlled via Bluetooth. As previously mentioned, you can also transfer media through a WiFi Direct connection with your GoPro, and also get a low-latency live preview over WiFi—which is significantly better than Bluetooth monitoring.
Moreover, you can preview your recorded media on the GoPro itself (in lower resolution) without having to transfer the files to your phone, which is very convenient for quickly reviewing your footage. And of course you can also begin recording from the
You can also set up auto-uploads to the cloud using GoPro’s subscription service, and you can initiate live-streaming to Twitch or YouTube using the app, but I did not test these services.
IMAGE QUALITY:
The quality of each pixel out of the GoPro Hero 12 Black certainly won’t compete with modern flagship smartphones, but that’s not exactly the point of it. Under excellent lighting conditions, the Hero 12 Black excels in its motion smoothing capabilities and delivers a sharp, vibrant, punchy image. Under less ideal lighting conditions, you’ll find that it yields a softer, noisier image.
I mounted the Hero 12 Black directly to my electric scooter, and across a variety of different terrains, the footage was always very smooth, and with the Horizon Lock capability, I was able to retain a very stable image as though it were mounted to a gimbal. By comparison, the same test on my smartphone yielded incredibly shaky footage. Of course I had to use different mounts for my phone and GoPro, but without a doubt the GoPro processes shaky footage significantly better—especially with the HyperSmooth + AutoBoost feature. That being said, in lower lighting conditions and/or at lower framerates, the footage could be more shaky. You could certainly use the Light Mod to improve your lighting conditions, but in general, you’re going to yield the best results when recording in good lighting conditions.
As far as the different wide angle views are concerned, I found that the 12mm HyperView had way too much warping on the edges for my taste and the 16mm SuperView also had some warping, but wasn’t as aggressive. So I think I will stick to Wide or Linear for situations where I don’t want warping (like people’s faces).
If you decide to capture still photos, the GoPro really doesn’t do anything better than most flagship smartphones these days. In general, the GoPro’s onboard hardware just doesn’t have the computational power to do the kind of processing that modern smartphones have. But it’s still nice to have the option—especially with the option to take a very wide angle shot. I think the photos can be good (especially under excellent lighting conditions), but they won’t compete with the likes of modern smartphones. Using third party editing software can certainly alleviate some of these shortcomings, however.
AUDIO QUALITY:
Audio Quality on the Hero 12 Black is good but not at the level of flagship smartphones. You shouldn’t expect much directionality, and you might get a lot of noise if you’re mounting on a bike or scooter, but I also wouldn’t expect a smartphone to be great at handling audio for this, either.
Using the Meda Mod with built-in microphones, you’ll get better microphone quality in addition to being able to record both rear and front facing microphones at the same time, or choose just one to use. I personally like having this flexibility since there are some circumstances where having only one microphone recording makes more sense—especially if wind noise is involved.
BATTERY:
GoPro claims that the Hero 12 Black can yield 1.5 hours at 5.3K@30fps or over 2.5 hours at 1080p@30fps.
With the Volta attachment, GoPro claims you can achieve over 5 hours of 4K@30fps footage. But it’s important to know that you cannot charge the Hero 12 Black’s Enduro battery while it is actively recording, so the Volta will only charge the Hero 12 Black while it’s idle or powered off.
Removing the Enduro battery from the GoPro, you can still power the GoPro directly from the Volta. So you shouldn’t have any issues running out of battery.
CONCLUSION:
Overall, the GoPro Hero 12 Black is really another iterative upgrade from the Hero 9 platform, but for those who are coming from the Hero 8 or older, I think the Hero 12 does offer improvements in its hardware and platform to justify the upgrade. And the Creator Edition adds a ton of flexibility for recording a variety of different situations.
I would recommend this to a friend!


Share this review:
0points
0of 0voted this as helpful.
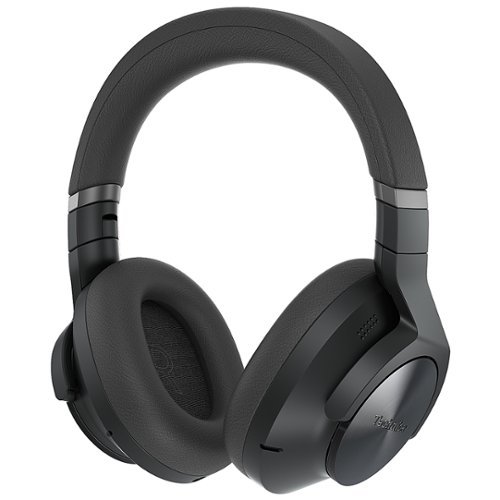
Enjoy legendary Technics sound quality in over ear headphones, with advanced noise cancelling technology and superior call clarity. Technics A800 Wireless Noise Cancelling Headphones allow you to hear music—and life—as it’s meant to be heard. Enjoy unparalleled high fidelity, hearing every detail without interruption from outside sound. Whether you are at home, at work, working out, or traveling, the Technics EAH-A800 amplifies words and reduces surrounding noise for impeccable call quality on your phone and video calls, with the option to add more or less ambient sound to your experience. Also, with multi-point connectivity, switching audio devices for any of your tasks is seamless and clear. Comfortable over-the-ear earpads, with a headband that reduces pressure across the entire head, ensure the perfect fit for maximum comfort and effectiveness in noise cancellation. Built for comfortable all-day use, Technics A800 has a battery life of up to up to 50 hours on a single charge with ANC on, with quick charge of 15 minutes for 10 hours of playback, and a Wearing Sensor for auto shut-off. It is compatible with voice assistant technology (Siri, Alexa), interfaces with the Technics audio connect app, and folds easily to place in compact carrying case.
Customer Rating
4
Quality Sound & Powerful Active Noise Cancellation
on September 9, 2023
Posted by: Xephyroth
UNBOXING:
Before I’ve even opened the box, I’m surprised at how insanely light everything is. It was shipped to my house and I was surprised at how light the shipping box was. Inside the box, you’ll find the standard documentation as well as the headphone zipped up into the travel case.
Opening the travel case, you’ll find the headphone as well as a USB-C charging cable, a 3.5mm cable, and an airplane adapter.
BUILD:
Right off the bat, picking up the headphones you will realize how light they feel. I weighed my pair at 299g which is still heavier than the most popular options from other brands in this price segment.
The plastic on the Technics has a bit of a cheaper feeling compared to some other active noise canceling headphones in its price bracket. That being said, it doesn’t seem like the material used is actually structurally worse. I’m not sure if I should have any concerns regarding its structural integrity, but for the asking price I do think the build quality could have at least been better feeling.
The included case is also quite light, has a soft texture, and has space for the included cables and airplane adapter, and also has labels to make it obvious how to fold the headphone when stowing it away in the case.
COMFORT:
Different people have different needs when it comes to comfort, but I think the Technics EAH-A800 does some things well while also needing improvement in others. Out of the box, the ear pads and the headband were a little bit more stiff compared to the competition, and while over time I do feel that the ear pads eased up, the clamping force was still enough to cause some discomfort over time (especially since I wear glasses), and the headband padding caused a hotspot of discomfort at the apex of my head.
That being said, I’m pretty sensitive to headband pressure, so this isn’t a headphone I could wear for hours without taking a break. That being said, I brought these to work and used them on and off with breaks throughout the day and didn’t consciously think about pain as long as I was taking breaks. But for a longer flight, I don’t think these would be particularly great for me, but your mileage will certainly vary.
I would recommend Technics revise their headband material, and I think their clamp force is less of a problem after a break-in period, but I also noticed it’s easier to break the seal which can trigger the
CONTROLS:
The controls on this headphone are simple, but honestly just not distinctly placed for easy access. Even across the days I’ve been using it, I still fumble to press the play/pause button and sometimes accidentally press the volume down button or the power button. Because the volume and playback controls are grouped so closely together, it’s just inevitable you’re going to make mistakes pressing the buttons. I think if they had used some sort of protruding dots like braille on the play/pause button, this could have made finding the controls much easier when they’re on your head.
You can double-tap on the right ear cup to toggle between the active noise cancellation and ambient sound modes. And taking the headphone off your head can pause playback and resume upon putting them back on your head. However, I’ve found that this has more delay compared to the competition, and Technics advertises it as resuming within 60 seconds which is absurd for claiming it to be a “seamless” operation when other products will reliably resume in less than a few seconds.
APP:
The app includes numerous customization features for controls, ANC strength, toggling the “headphone fitting sensor”, “touch sensor”, a basic 5-band EQ, and microphone noise reduction strength for calls.
You can also enable/disable LDAC if you have a supported device, change between signal strength and playback quality, and also enable multipoint connectivity.
Overall, I found the app to be of good quality—especially for a brand that isn’t known for headphones. I was surprised to find such a large number of features and customization.
SOUND:
As an audiophile, I try to lower my expectations regarding the sound profile of active noise canceling headphones. However, Technics is also a brand that is better known for their high-end Direct Drive turntables, so I think it’s fair to think that they want to appeal to those with a discerning ear—especially when their price is competing with some of the most well-known ANC headphones.
The stock sound signature was pleasant out of the box. It delivers a fun bassy signature without the midbass bloat that a lot of other consumer-grade ANC headphones tend to impose. It also delivers a good midrange that isn’t too accentuated or fatiguing but also not so recessed that it sounds dull or muffled. You can make some tweaks with the 5-band EQ in the app if you have deviating preferences, but I’ve been very happy to find that Technics is delivering an enjoyable audio experience that lets me be immersed in my music. Whether it’s Pop, R&B, Metal or Electronic, I never really felt like I was getting a dulled experience on the EAH-A800.
ANC / AMBIENT SOUND:
I’ve reviewed numerous ANC headphones from cheap $50 truly wireless in-ears to my $800 audiophile pair of ANC headphones, and I think Technics has ANC performance that rivals the most popular competition.
The ANC on the EAH-A800 can exhibit more of an ANC “pressure” feel compared to some other options, but the noise cancellation performance is very good. Playing rain sounds, white noise or traffic noise on loudspeakers, the Technics is able to suppress an incredible amount of low-end and midrange droning noises. If you’re not listening to music or other content, you’ll be more likely to hear noises like speech or intermittent sounds, but if you listen to music at relatively low volumes, it will certainly do wonders to negate outside sounds and keep you immersed.
I most often used the Technics at my workplace which is an open-office floor plan with plenty of people chatting, keyboards clacking, etc. These headphones let me ignore all the noise and chatter around me and be focused on my work while listening to music.
The Ambient Sound mode can also be surprisingly good. The app lets you switch between “Transparent” and “Attention” profiles for this mode. In my experience, the Transparent profile is clearer with just a bit of muffling, but the noise floor is surprisingly low compared to other headphones with transparency modes. Overall, it’s pretty clear, and you can hear yourself pretty well, but with a minor volume decrease.
The “Attention” profile on the other hand I was not a fan of. It has an emphasis on voices, but I actually found that it was harder to depict what was being said if too many other voices or noises were also present, since this mode amplifies those noises, as well. So depending on the circumstance, it can be much more harsh. So I think the “Transparent” profile will be better for most situations.
One thing to note, however, is that these headphones are a little bit more sensitive to quick movement such that they might induce strange popping noises if you’re walking, chewing, etc. There were times where it was much more reproducible and others where it was not; so your mileage may vary.
MICROPHONE:
The EAH-A800 boasts 8 MEMS (microelectro-mechanical systems) microphones in total. 3 external to each ear cup, and 1 internal to each ear cup. This plays a role in the aforementioned ANC and Ambient Sound modes, but the external microphones are also used for calls and for reducing microphone noise on calls to make your voice clearer.
In my testing, I found that the microphones did an impressively good job at blocking noise. I tested the microphone by recording myself in the app using the “Call Quality Test” and talking over background voices, TV shows, droning noises, etc. I found that the best performance was by setting the background noise reduction setting to “Strong” instead of the default “Normal”.
That being said, there’s definitely some improvement to be made in terms of clarity, but I didn’t encounter issues with distortion. Overall, I feel like it would be a good choice for taking calls in noisy environments.
BATTERY:
Technics claims up to 40 hours if you use a device with LDAC enabled, and up to 50 hours on AAC or SBC codecs. In my experience, I feel comfortable agreeing with this claim, and you can always set it to turn off when it idles. And in a quick pinch, a 15 minute charge can yield 10 hours of listening time.
CONCLUSION:
The Technics EAH-A800 is a pretty impressive ANC headphone for the price. My biggest critiques are in regards to the comfort and build materials—which aren’t bad, but I do think could be better.
That being said, I do think the sound quality can be appealing for more discerning listeners who want a controlled, balanced bass response and plenty of midrange energy without being fatiguing.
But the biggest surprise for me is how good the ANC is. You don’t often find ANC of this performance on a brand’s first ever over-ear ANC headphone. And its “Transparent” mode and call quality is also quite good thanks to its 8 onboard MEMS microphones.
I look forward to any firmware updates that Technics might deliver, and would be very optimistic about future ANC headphone endeavors they consider based on community feedback. If you find this headphone on sale for a price below the competition, I’d say it’s especially worth your consideration if audio performance and ANC is your primary concern.
I would recommend this to a friend!


Share this review:
-1point
0of 1voted this as helpful.
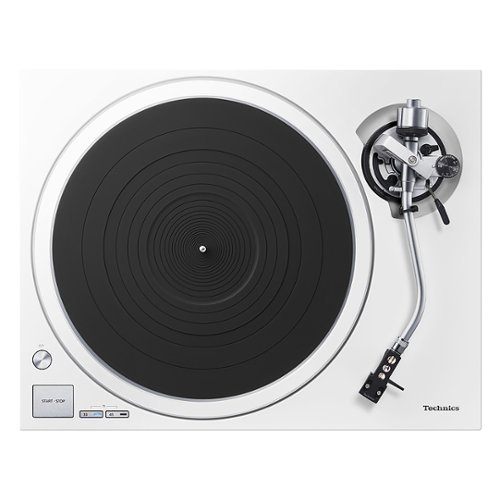
The SL-1500C inherits Technic’s high-end sound quality concept and adds a host of original Technics technologies, such as a coreless direct drive motor and high-sensitivity tonearm. To simplify the playing of analog records, the built-in Phono EQ connects to a wide variety of devices. The SL-1500C also comes equipped with a high-quality Ortofon 2M Red phono cartridge. The SL-1500C is a complete turntable system designed for a wide range of users, even outside of strictly dedicated audio enthusiasts.
Customer Rating

5
A Premium Choice Among ~$1k Turntables
on August 27, 2023
Posted by: Xephyroth
INTRO:
I’m a newcomer to vinyl and turntables, but started collecting physical CDs nearly a decade ago. With vinyl back on the rise, last year was the start of my collection with the full intention of picking up a turntable. And now that I have the Technics SL-1500C turntable, I’d like to share my thoughts as an audiophile and music lover that is inexperienced with vinyl.
UNBOXING:
My turntable was shipped with decent packaging and actually triple-boxed. So I wouldn’t be particularly worried about your expensive gear getting damaged during transit.
Everything is disassembled and well-packaged without any loose pieces. Inside is everything you’ll need to get started. You’ll need to supply your own amplifier and speakers and vinyl, but so long as you have those, you’ll be good to go.
SETUP:
I won’t go into nitty gritty detail here, but the included instruction manual will be your best friend in guiding the assembly process. It outlined every accessory included in the box and what they were for.
I really appreciated all of the illustrated diagrams and descriptions throughout the instruction manual so I knew exactly what I was doing for the setup process. While I’m a very technically inclined person, I think that someone less technically inclined could follow the instruction manual pretty well in setting up this Technics turntable.
I was able to get everything set up at a relaxed pace in less than 30 minutes, but I could have had it set up significantly faster if it wasn’t my first time setting up a turntable.
SOUND:
While the sound quality of your music will be dependent on the quality of the mix/master and the pressed vinyl, I did my listening through a set of speakers as well as high-end headphones—both with appropriate amplification equipment.
The Technics SL-1500C’s direct drive motor has effectively instant torque, so it takes no time to get up to speed, and is very consistent in maintaining its constant RPM during playback. And when you want to switch sides or switch to a different LP, it stops playback just as quickly—making it much less of a hassle.
Throughout my listening using just the included Ortofon 2M Red cartridge, I found that the highest quality vinyl had the most consistent playback without any distracting pitch variance, while more budget-focused vinyl had a very low amount of pitch variance, always keeping things enjoyable–especially for an analytical listener like myself who can hear any subtle pitch deviation.
So for those who just want to hear the cartridge against the grooves of an LP, the Technics’ direct drive motor will ensure that you have no belt to replace or lubricate. It’s very low maintenance and easy to start.
There are arguments that belt-drive turntables are quieter than direct-drive, but my experience with the SL-1500C has me baffled at this proposition. From my own listening experience, the Technics direct drive motor is incredibly quiet, and any potential mechanical noise is perhaps dampened by the sheer weight of the turntable—at just over 21 lbs. With the turntable on and the platter spinning, I cannot hear any noise directly from the table—even with my ear close to it in a dead quiet room.
HEAD SHELL:
If you’re the kind of person who is interested in using different cartridges to achieve different tonality across your vinyl library, the detachable head shell on the SL-1500C makes it incredibly easy to do so. A few turns of the locking nut is all it really takes to remove the head shell. So whether you like to buy combos or assemble the cartridge to a headshell yourself, Technics is providing flexibility that should be expected from a modern turntable. That being said, you’ll still want to perform calibration to ensure proper stylus pressure.
TONEARM:
The tonearm was very easy to adjust on the SL-1500C. While you can certainly leverage a stylus pressure gauge to dial in the most accurate calibration, I felt that the included instructions were sufficient for those performing a first-time setup.
The tonearm clamp is sturdy but easy to release, and lifting up the tonearm via the lever is effortless. And assuming you’ve performed proper calibration, the tonearm also lowers gently when you press the lever down.
AUTO-LIFT:
One feature less commonly found is that the SL-1500C can auto-lift the tonearm approximately 60 seconds after a record has ended. This means less wear on your stylus and your vinyl if you have to step away. In my testing, I found that this feature worked pretty reliably, but it can also be disabled through a switch on the back of the unit.
CONCLUSION:
As a newcomer to vinyl and turntables, I think the Technics SL-1500C is a good option for those looking for a turntable that offers high quality features, sound and premium build. While there are certainly cheaper turntables on the market, Technics is delivering a pain-free experience with a premium build and excellent clarity.
I would recommend this to a friend!


Share this review:
0points
0of 0voted this as helpful.
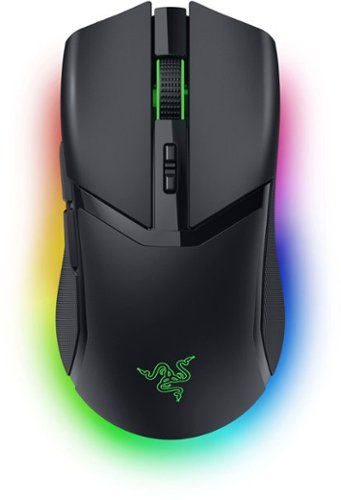
Cut the competition down to size and dazzle them all with the Razer Cobra Pro—a wireless gaming mouse powered by Razer Chroma RGB. Featuring Razer HyperSpeed Wireless and 11 individually programmable lighting zones, color your play with an illuminating level of freedom and immersion.
Customer Rating
4
Versatility & Portability but With Extra Weight
on August 5, 2023
Posted by: Xephyroth
INTRO:
In the wireless mouse industry, Razer is known for having some excellent offerings. And while many folks have been asking for a new wireless Viper Mini, Razer has decidedly gone the route of creating the Cobra Pro—a versatile “jack of all trades” lightweight gaming mouse that sets out to achieve many of the competing desires from gamers by accepting tradeoffs in the process.
UNBOXING:
Razer keeps the unboxing experience simple. Inside, you’ll get the warranty and manual, a USB-A HyperSpeed wireless dongle, a USB-A to USB-C cable for charging and connectivity, and a USB-A to USB-C adapter so that you can use the cable as an extension for the dongle.
It’s important to note that you do not get the wireless charging puck in the box, as that is sold separately.
BUILD / CONSTRUCTION:
As an owner of the Razer Viper Ultimate (non v2 Pro), I immediately noticed that this mouse was very familiar in some ways while also making some changes that may have some controversy.
Like the Viper Ultimate, it has a rubberized textured grip for the sides while using a matte plastic on the top of the mouse. The matte plastic isn’t as diffused as the Viper Ultimate, but I don’t think it’s better or worse.
With the dongles detached, the Cobra Pro weighed in at 77g on my scale which is more than the 75g of my Viper Ultimate. So it weighs slightly more, but there are also additional features which we’ll touch on later.
Despite weighing slightly more, the Cobra Pro is slightly more compact than the Viper Ultimate with a length of 119.6mm compared to 127mm, a width of 62.5mm compared to 66mm, while the height remains practically unchanged. While I don’t think this will be a game-changer for those looking for more compact mice for portability, I think Viper Ultimate owners will feel right at home but with a slimmer profile.
When compared to the Viper Mini, the Cobra Pro is much closer in terms of its form factor, but it also weighs much more compared to the ~61g of the Viper Mini, making it an unfit replacement for those looking for a wireless Viper Mini without paying the cost of the Viper Mini Signature Edition.
As for the bottom of the mouse, you have the wireless mode toggle switch, a profile button, and a removable puck under which the dongle can be stowed away for transport or when not in use. Another change is that the gliding feet on the Cobra Pro have increased surface area. This means there’s less overall friction compared to the Viper Ultimate.
And lastly, the Razer Chroma RGB is actually pretty appealing. I’m not a big fan of RGB in general, but I like the ambient underglow and the mouse wheel lighting. The Razer logo itself isn’t my favorite, but I think the mouse looks pretty good even with it lit up.
COMFORT / GRIP:
Given that the Cobra Pro borrows from the DNA of the Viper Ultimate, it will share a lot of similarity. However, the slimmer profile does mean that it fills out your hand a bit less, so owners of a Viper Ultimate might not find it as ergonomically fit. That being said, while I feel the difference, I still find it to be comfortable; it’s similar enough to the Viper Ultimate that I feel at home with it.
If you’re a left-handed mouse user, you were probably disappointed when the Viper V2 Pro omitted the ambidextrous thumb buttons. Unfortunately, the Cobra Pro still omits this, but it does still retain a symmetrical design.
BUTTONS:
Another noticeable difference is that the switches in the Cobra Pro use Razer’s 3rd generation optical switches. The primary left and right clicks are slightly higher-pitched, while the thumb buttons and mouse wheel button are significantly dampened compared to my Viper Ultimate. Despite this, they do still retain a tactile click and are slightly easier to press before the click sound registers.
I do also like the addition of the 2 small DPI switch buttons on top of the mouse. This makes the Cobra Pro more versatile for those who switch multiple between DPI profiles for more granular control.
WIRELESS VERSATILITY & BATTERY:
If you’re using the Cobra Pro through the HyperSpeed wireless dongle, you’ll be able to achieve up to a 1000Hz polling rate for fluid mouse motion for up to 100 hours of use at constant motion, and as low as 125Hz for those who don’t need the fluidity and would rather sustain a higher battery life.
You can also pair this mouse with Razer’s Mouse Dock Pro (purchased separately) which enables wireless charging and also a 4000Hz polling rate, but will yield up to 33 hours of use at constant motion. Alternatively, you can omit the wireless charging and simply purchase the HyperPolling dongle to achieve the 4000Hz polling rate.
Another addition to the Cobra Pro is Bluetooth connectivity. Personally, I find this quite useful if I’m in a pinch and want to use the Cobra Pro for productivity tasks, non-competitive gaming or if I simply want to leave my dongle plugged in at home. And the mouse itself can always be used in wired mode if I forget the dongle and need the high polling rate. Razer doesn’t advertise the battery life or polling rate over Bluetooth, but I would guess 125Hz based on my testing and comparisons to other mice.
SOFTWARE:
Razer Synapse has to be my least favorite peripheral software in existence. It consumes too much memory, takes way too much time to update, and tries to do too many things that I don’t need it to do.
That being said, if you want to customize the RGB zones, change your DPI settings, or customize the functionality of the buttons, Razer Synapse is how you’ll achieve that.
CONCLUSION:
So here’s the thing—this isn’t a Viper Mini replacement if you care about weight. The Cobra Pro isn’t advertised as a wireless Viper Mini, and it’s clear to me that Razer isn’t targeting the same crowd of people who want a super low weight compact mouse. Rather, they are targeting the gamer who wants an all-rounder compact wireless mouse—one with RGB, wireless/bluetooth versatility, and optional wireless charging capabilities.
But look around at the reception of this mouse and you’ll see the community saying “who asked for this?”, and it’s honestly a good question that I don’t really have an answer to. But if I have to evaluate the mouse without that bias, I do think it’s quite a good all-rounder compact mouse.
It’s certainly not going to replace the Viper Mini for a lot of folks, but I think there are others like myself who quite liked the Viper Ultimate, but would also enjoy a more versatile compact mouse. So while many folks would love to see a more price-conscious wireless Viper Mini, this simply isn’t that, nor is Razer making that claim. But for those who don’t mind the weight of the Viper Ultimate with a more compact form factor and some additional features, I think this could be a good versatile pick.
Share this review:
0points
0of 0voted this as helpful.

With its advanced dual front and rear suspension and 10” honeycomb tires, the Hover-1 Boss electric scooter delivers a remarkably smooth ride to maximize your comfort. Boss’s 500W brushless motor propels it to 20 mph and the rechargeable lithium-ion battery gets up to 24 miles of range on a single charge. The premium LED display is easy to read and shows the Boss’s current speed, speed mode, battery level, odometer, and more. Keep your Boss safe from theft with the remote lock security feature via the Hover-1 E-Mobility app. Simply press the “Lock” key in the app, and the throttle will not engage until you unlock it. If your Boss is locked but you want to grant access to a friend or family member remotely, you can do that too! Take control of your commute or your weekend getaway with the Hover-1 Boss.
Customer Rating

3
A Good Scooter That Has Even Better Competition
on June 21, 2023
Posted by: Xephyroth
INTRO:
For a year and a half now, my daily commute has consisted of me driving to a light rail station 3 miles away, hopping on the light rail to travel a little over 6 miles, and then walking half a mile to my office, then doing that in reverse on the way home. So my daily commute is under 10 miles one-way, which really isn’t that much.
So when I got the Hover-1 Boss R500, I figured I should try relying less on my vehicle since the commute is already so short. I’d get a little bit more time outdoors, and reduce my carbon emissions by using the scooter instead.
UNBOXING:
The unboxing experience was pretty easy for me. I had no help from anybody else, and since the scooter weighs in at 46.9 lbs, I figured it wouldn’t be too much of a challenge. The scooter is secured in the box by styrofoam and it’s further secured from dust and debris with a large plastic. I would have liked to see more eco-friendly (and less messy) packaging, but I’ve seen more egregious use of non-recyclable material with other products.
Inside of the box you’ll also find the rather small charging brick, a pair of hex wrenches, some spare hex screws for the handlebar assembly, and all documentation on the scooter.
ASSEMBLY:
The included guide makes assembly pretty straight-forward. First, you’ll need to straighten up the folding hinge and lock it into place. Then you just need to unscrew the hex screws where the handlebar needs to attach, insert the handlebar assembly, then re-fasten the screws.
That’s all it takes for assembly. Then you’ll want to give it some time to charge up to 100% before you really take it on a cruise.
BUILD / FEATURES:
The Boss R500 is a metal frame, although I’m not sure what kind of metal they’re using. I consulted the manual, but did not manage to find any information about the material. That being said, it feels quite sturdy, it doesn’t have creaking points, and the folding hinge doesn’t rattle or accidentally unhinge during operation.
The kickstand is also sturdy and I did not have issues with it during normal operation. However, I do wish that there was some sort of wheel locking system so that the scooter doesn’t potentially roll while on public transit, as the kickstand isn’t strong enough to prevent that from happening.
Throughout my time with it, I have noticed that the glossy finish on the display area scratches pretty easily, so that is an unfortunate design choice.
Despite being 46.9 lbs, it isn’t unwieldy for me, and I have been able to pick it up with one arm while it is folded up. So compared to an e-bike it’s certainly a little easier to maneuver on public transportation.
That being said, I drive a 2019 WRX and I was not able to fit the R500 into my car from my trunk while it was folded, which is unfortunate. It might fit some sedans, but my trunk’s opening and vertical height clearance simply wasn’t enough to fit the scooter. Instead, I had to fold down the back seats and place the scooter back there. If you have a hatchback, or larger vehicle you’ll likely have a better time fitting the R500 into your trunk space.
CONTROLS:
The controls for the R500 are pretty plain but some of the more advanced features also require a bit of memorization. Firstly, you can toggle the power on the R500 by holding the power button for a couple seconds.
Once it is on, you can single-press the power button to cycle through the Pedestrian (0-3mph), Eco (0-9mph), Drive (0-15mph) & Sport (0-20mph) modes.
A fast double-press of the power button will toggle the headlight.
A fast triple-press of the power button will switch between miles and kilometers.
A fast quadruple-press of the power button will toggle cruise control.
A fast 5-press will toggle the kick-to-start setting that requires the scooter to be in motion before the throttle can be engaged.
A fast 6-press will switch between the trip mileage and the odometer.
And of course, you have the front and rear brakes, as well as a bell for alerting nearby pedestrians as you approach. However, I felt that the bell was out of reach for my natural grip, and I also felt it was very cumbersome to change options on the display since the button was inaccessible from the handlebar grips during operation.
Because all the controls are functioned through this single button
APP:
APP:
As long as the scooter is on, the above controls (other than powering it on/off) can be engaged from the Hover-1 E-Mobility app, as well. I found the iOS app to be responsive once the scooter was paired via Bluetooth. I have not tried the Android app.
There is also a “lock” feature in the app which basically engages brakes and disables the throttle while the scooter is powered on. It’s a pretty minimal auto-theft deterrent because it only works when the scooter is powered on. So while it prevents someone from using the scooter electronically, it does not prevent someone from still scooting away while the power is off—which you can do.
The app also has an activity/route tracking feature, but in my personal opinion, it’s basically inoperable because it does not do any tracking if the app is not unlocked with the app open. I do not have a mount for my phone; nor do I want one. So unless this feature can be updated to run in the background, it doesn’t really serve any meaningful function for me.
RIDE & COMFORT:
The ride itself is pretty comfortable to me, although I recommend caution when operating in Drive or Sport mode. The scooter is outfitted with 10” solid inner honeycomb tires, so they have a bit of rigidity to them that means less surface area contact with the ground. In my experience, this means high-speed operation will need two hands on the scooter at all times to maintain stability.
I choose to wear a helmet while operating the R500, and overall I feel safe as long as I’ve got two hands on the handlebars. I’ve driven over uneven sidewalks, city roads and some manholes, but would advise caution around potholes or driving through trash and debris. The dual-suspension certainly helps instill confidence to deliver a pretty smooth ride even as I traversed obstacles and made turns. But you’ll of course want to shift your weight as necessary and avoid taking sharp turns.
Everyone that I got to try the R500 agrees that it’s quite fast. Regardless of which speed mode you’re in, the acceleration curve seems to be the same, but then you quickly feel it top off when it nears top speed.
For the brakes, there are front and rear brakes, and I found that the front brakes are quite gentle so as not to accidentally throw you over, and the rear disk brakes are much more effective, but also more inclined to lock and skid if you apply too much pressure. The rear brakes on my unit make a high pitched noise when engaged at higher pressure, which is a bit unpleasant, but otherwise they are effective.
BATTERY & RANGE:
For me, I was surprised to find that the 3 mile trip I usually make by car to the light rail station is still achievable within the ~15 minute window if I’m going 20mph. Of course, this will depend on traffic and how many stop lights I hit, but I can also leave a few minutes earlier if I’m really concerned.
For my use-case, this is actually pretty good and in some cases, I can see how this could potentially save me time when traffic is exceptionally poor and I’m able to traverse trails or sidewalks.
The range is one area that I wish Hover-1 would be clearer about because they claim up to 24 mile range, but I think that is if you’re driving in Eco mode. When driving in Sport mode, you may get closer to a 16 mile range based on my experience, but that will still depend on your terrain. Even so, the manual claims you can charge in 6.5 hours, and given how portable the charger is, you can just throw it in a bag and charge it at your destination.
CONCLUSION:
Overall, I think the R500 is a decent electric scooter. But when you investigate some of the competition, I do feel as though Hover-1 is lacking some of the features and elements of usability that other brands are bringing to the table—especially at the asking price where there is a lot of competition. I will continue to use my R500, but I think it has also piqued my interest further towards what is available from other manufacturers.
I would recommend this to a friend!


Share this review:
+1point
1of 1voted this as helpful.

As game files get larger and larger, the WD_BLACK C50 Expansion Card for Xbox is the fast and easy way to give your Xbox Series X or Xbox Series S a big capacity boost so you can keep more titles installed. Just plug this officially licensed card directly into the dedicated slot on the back of your Xbox Series X|S console and it’s good to go, no extra software or installation steps needed. The card delivers similar performance as the Xbox internal storage for a seamless experience when you’re installing, loading, playing, and saving your favorite games. Keep your library ready to play and get into the action fast with the WD_BLACK C50 Expansion Card for Xbox.
Posted by: Xephyroth
PRICING:
Let's just be honest. As of writing this in 2023, you can obtain 2TB PCIe 4.0 NVMe SSDs for around $100 or less if you know where to look. As a result, PS5 owners are able to expand their SSD storage to even larger capacities than Xbox Series owners for drastically less money.
CONVENIENCE:
However, it's important to mention that if you're the kind of person who has multiple consoles or find it valuable to take your game library to another Xbox within your home or even a friend's house, this C50 Expansion Card from Western Digital is significantly more convenient. You can run your games directly off the Expansion Card, and with no performance caveats.
INSTALLATION:
On the back of the Series S or X consoles you will find the Expansion Card slot, which might be a bit annoying if your console is nestled into a tighter cubby space of your entertainment system.
I installed the C50 into my Series X and was prompted to select 1 of two options—was I to keep the expansion card permanently installed in this Xbox, or did I intend to use it across multiple Xbox Series console? Given that I have both a Series X and Series S, I chose the latter.
TRANSFER SPEED:
First thing I did was actually move some games off my internal storage onto the C50, and I found that it topped out at 6Gbps which is about 750 Megabytes per second. This means that moving games that are 100GB+ in size can typically be achieved in 1-2 minutes. Most titles will be moved significantly faster than that, however.
GAMEPLAY:
Unsurprisingly, I had no issues with playing games directly off the Expansion Card. While it can certainly experience heat during gameplay, I didn't find that to have any impact on my experience. I'd just recommend that you ensure your Xbox Series console is given ample space for air intake and exhaust.
PORTABILITY:
The C50 Expansion Card also comes with a sleeve to keep dust, water and debris out while it's not plugged in, which is good. Given the expansion card has a small hole on it, you can also put it on a keychain or lanyard if you feel so inclined to do so.
CONCLUSION:
Overall, the Western Digital Black C50 is a good product, but it's also just overpriced in 2023. Given that at the time of writing there are only 2 companies manufacturing expansion cards, it means that there's really not enough competition to bring down the pricing of these expansion cards. And while I'm happy to see that there's a reduction in price compared to the launch price of the 1TB Expansion Card in 2020, it still feels like an exorbitant cost to pay. While I don't have any issue with the product itself, I would hope to see it on sale from time to time.
I would recommend this to a friend!


Share this review:
+4points
4of 4voted this as helpful.
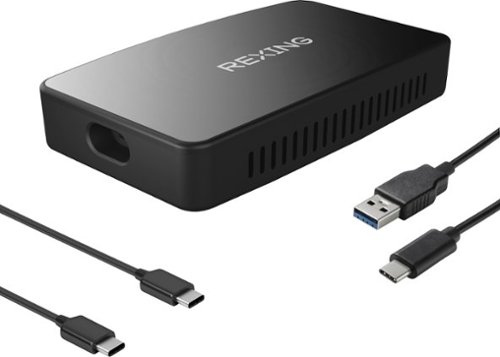
This wireless Apple CarPlay adapter will take your driving, convenience, and productivity to the next level. If you own an iPhone and drive a vehicle with built-in Apple CarPlay, a wireless CarPlay adapter is a powerful tool that makes your commute safer and your favorite media more accessible. Enjoy quick auto pairing, stable bluetooth connection, and wireless hands-free media streaming/voice control.
Posted by: Xephyroth
UNBOXING:
The packaging is quite small, to my pleasant surprise. The unit itself was well-secured within the box. Maybe a little too secure since it took me a bit of work to even remove the lid of the box from the box.
But other than that, inside the box you get the adapter, a USB-A to USB-C cable, a USB-C to USB-C cable, a manual, and a warranty/registration pamphlet.
BUILD:
The build of the adapter is plastic, but it feels well-built, and the cables are short since to prevent cable mess.
The adapter itself has a USB-C input on it, an LED to indicate when it's powered on, a TFT/microSD card slot for firmware updates (there were none at time of review), and a reset button accessible by a paperclip.
SETUP:
Note: According to Rexing's website, BMW's are incompatible.
Setup is super simple. I drive a 2019 Subaru WRX, and my USB-A port is in the storage compartment between the driver and passenger's seat. I used the included USB-A to USB-C cable and plugged it in, then turned the power on in my car.
Then under my iPhone's Settings, I went to General > CarPlay and it showed up as AUTO-AF56. I selected it as my CarPlay device. Then I went into to my Bluetooth and verified that it was also connected there. Then I engaged CarPlay from my vehicle's host operating system, and it was ready to go.
USING:
When you start your car, that's typically when power will be delivered to the CPW-1. For me, from the time I start my vehicle, it takes less than 20 seconds for Wireless CarPlay to connect to my iPhone 13 Pro Max and engage. For me, that's a reasonable amount of time. This is the first time I've used Wireless CarPlay, but I'm gathering that the 5GHz WiFi on the CPW-1 is certainly helping contribute to the responsiveness.
I compared using my iPhone via natively wired CarPlay against the Rexing CPW-1, and other than the start-up time (which isn't always immediate on a wired connection), I really didn't experience a difference in snappiness, reliability or resolution. Over my week of use, the CPW-1 was consistent in its behavior.
One thing to note is that some cars might turn off power to those USB devices when you turn off the engine—even if you leave power on.
CONCLUSION:
Honestly, there’s not much to say here. There are a plethora of adapters out there, and while there may be cheaper ones, they may or may not be less reliable. But my experience with the Rexing CPW-1 has been surprisingly positive even though I cynically expected a subpar experience.
Honestly, there’s not much to say here. There are a plethora of adapters out there, and while there may be cheaper ones, they may or may not be less reliable. But my experience with the Rexing CPW-1 has been surprisingly positive even though I cynically expected a subpar experience.
I would happily recommend the CPW-1 to anybody looking to make their CarPlay experience go Wireless.
I would recommend this to a friend!

Share this review:
-1point
0of 1voted this as helpful.
Xephyroth's Review Comments
Xephyroth has not submitted comments on any reviews.
Xephyroth's Questions
Xephyroth has not submitted any questions.
Xephyroth's Answers

The sound bar for those with small spaces or minimalistic tendencies. The compact Yamaha SR-C20 sound bar fits easily in whatever space is available and can be wall-mounted for even more possibilities. Setup is easy with a simple connection to your TV while Bluetooth lets you stream wirelessly from your mobile devices.
What is the rated voltage for this product?
The sound bar for those with small spaces or minimalistic tendencies. The compact Yamaha SR-C20 sound bar fits easily in whatever space is available and can be wall-mounted for even more possibilities. Setup is easy with a simple connection to your TV while Bluetooth lets you stream wirelessly from your mobile devices.
Does this have the clear voice

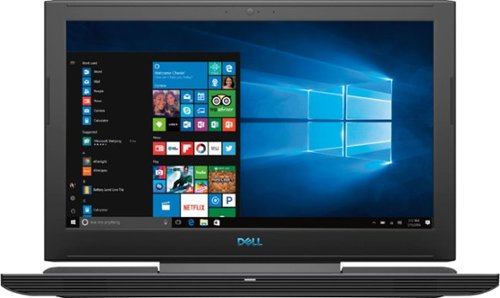
Enhance your multimedia experience with this 15.6-inch Dell G7 gaming laptop. Its VR-ready NVIDIA GeForce GTX graphics board provides seamless, stunning images on the Full HD display, and its hexa-core Intel Core i7 processor and 8GB of RAM handle extended multitasking. Run applications efficiently with the 256B solid-state drive of this Dell G7 gaming laptop.
Has anyone successfully installed Ubuntu 16.04 LTS?
I have not, but that doesn't even matter because a quick google search of Ubuntu Certified Hardware shows that this model has officially been awarded the status of certified pre-install for Ubuntu. Which means Dell can sell it with Ubuntu pre-installed, and you can just as easily install it.
5 years, 10 months ago
by
Xephyroth
Complete your HT-Z9F surround system with this Sony rear speaker. Place it on a stand or shelf, or mount it to your wall for unobtrusive performance, and connect to other components wirelessly to keep unsightly cables out of your space. This Sony rear speaker's S-Master amp outputs 50W for powerful rear audio.
What is the length of the power cord for each speaker...do they use a cord or a wall wart?
These are wireless. They communicate wirelessly with the HT-Z9F soundbar. They only require power from your standard 2-prong wall outlet.
5 years, 11 months ago
by
Xephyroth
Bring the power of Google directly to your fingertips with the Google Pixel. A large 32GB of storage keep data secure, while unlimited cloud storage transfers data as needed, and it's completely automatic. The large 5-inch screen is protected by Corning Gorilla Glass 4 to ensure the Google Pixel remains scratch-free.
Hello, Is it sim free version? If it is not, will it be available to preorder?
Like all Verizon smartphones, this phone is unlocked. Luckily, Google has built in all the radio bands into this phone to allow it to be used on any carrier with proper LTE support—something that most Verizon-branded phones don't do. It is the same hardware in-and-out as the devices being sold on the Google Store. The only difference is that this Verizon version comes with a few Verizon apps (which can be uninstalled) and it also has a locked bootloader. That means that you cannot currently install custom ROMs or "root" your device. This device WILL work on other carriers, and I've tried it with only success.
7 years, 6 months ago
by
Xephyroth