Xephyroth's stats
- Review count105
- Helpfulness votes1,394
- First reviewMay 11, 2016
- Last reviewApril 30, 2024
- Featured reviews0
- Average rating4
Reviews comments
- Review comment count0
- Helpfulness votes0
- First review commentNone
- Last review commentNone
- Featured review comments0
Questions
- Question count0
- Helpfulness votes0
- First questionNone
- Last questionNone
- Featured questions0
- Answer count5
- Helpfulness votes8
- First answerOctober 23, 2016
- Last answerNovember 28, 2020
- Featured answers0
- Best answers1
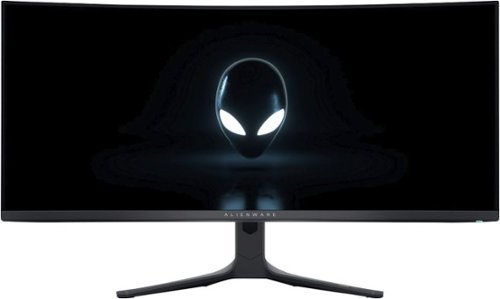
The Alienware 34" Curved Gaming monitor features QD-OLED technology and AMD FreeSync Premium Pro. Featuring infinite contrast ratio, 165Hz refresh rate and VESA DisplayHDR TRUEBlack 400 for an incredible front-of-screen performance.
Customer Rating

5
Strikingly Vibrant Display for Gamers
on May 28, 2023
Posted by: Xephyroth
INTRO
Prior to this review, I have owned the AW3423DW variant of this monitor for roughly 8 months.
The Alienware AW3423DWF is the newer, FreeSync-focused variant of the 2 ultrawide QD-OLED monitors that Alienware launched in 2022.
While it forgoes G-SYNC Ultimate certification in favor of FreeSync Premium Pro and G-SYNC compatibility, it adds support for user-serviceable firmware updates via USB, adds an additional DisplayPort 1.4 input, and a console mode that accepts a 4k60Hz signal over HDMI and uses a 16:9 aspect ratio.
Aside from that, the DWF model supports 165Hz refresh rate down from the 175Hz from the DW model and it comes in the “Dark Side of the Moon” color which removes the RGB ring on the back in favor of lighting up the number 34 on the back.
UNBOXING & INITIAL SETUP
The unboxing and setup process is honestly very straightforward.
The monitor arrived well-packaged with good protection for both the display, the chassis, and the components of the stand.
For accessories, you’ll find a standard DisplayPort 1.4 cable, a Type-C to DisplayPort cable, and a USB 3.2 gen 1 cable to perform firmware updates and also to serve as the connection for the 4x USB 3.2 gen 1 Type-A inputs on the monitor.
With no external tools required, all you need to do is take the base and the stem of the stand and connect them together with a thumbscrew. Then attach that to the back of the monitor while it’s face-down on a stable surface with the protective material still applied.
However, if you’re going to VESA mount (which I chose to do), then there are screws pre-installed on the back which you can simply remove via phillips screwdriver and re-install with your mount of choice.
BUILD & ADJUSTMENTS
The build quality is a standout aspect of this Alienware monitor. Without the stand, it weighs in at 13.8 lbs which is reasonable for most ultrawide monitors. But more importantly, the plastic is sturdy, the RGB lighting is consistent, and the control joystick on the bottom of the display is intuitive to use compared to a lot of other OSD adjustment controls I’ve used across other monitors.
If you intend to use the stand, it’s a pretty good stand. You have height adjustment, vertical tilting, and 20 degrees of swivel, but zero rotation. So you won’t be able to rotate into portrait mode with the included stand, but I think that’s expected for a monitor designed for gaming.
ON-SCREEN CONTROLS / OPTIONS
For the OSD menu, Alienware opted not to inundate users with too many confusing options, and I honestly appreciate that. Gamers want to set up quickly without having to spend too much time navigating complex menus to get the most out of their monitor.
The simplified quick menu gives access to your presets, a dark stabilizer, an input selector, brightness/contrast adjustments, and “AlienVision” effects. The advanced menu adds settings for game-related functions such as the Console Mode and a Frame Rate counter, as well as AlienFX Lighting options, and advanced Display calibration options that also include HDR settings and PIP/PBP.
DISPLAY
In the box, Alienware includes their calibration tests for the monitor. They know that gamers are paying a premium for this product, and I think it’s the right call to give that extra assurance that their monitor has been properly inspected and calibrated from the factory. And if you’re concerned about OLED burn-in, Alienware is going as far as providing a 3-year Advanced Exchange Service so that if a replacement becomes necessary, it will be shipped to you the next business day during your 3-year Limited Hardware Warranty.
The QD-OLED display itself is vibrant & punchy. Thanks to the incredible contrast of having individually lit pixels instead of a backlight panel, when a pixel is black, it is deeply black, and it’s strikingly noticeable for games and movies.
If you’re a gamer, I think you’ll find that playing games on the AW3423DWF will bring new life to any experience. From 2D indie titles to 3D AAA games, I haven’t found a single game that hasn’t looked better on the QD-OLED display. And if your game has good support for HDR, the QD-OLED display will do a fantastic job at keeping darker elements more dimly lit while brighter elements will be more accurately lit without being crushed or washed out.
And in my opinion, having this in tandem with a 165Hz refresh rate makes this Alienware monitor among the best for games that deliver fast action and need quick response times. Whether you play competitive games or even indie titles that just need you to react quickly, this display has low response times that will be excellent for those demanding immersion and fast action.
On top of that, the display has FreeSync Premium Pro and G-SYNC Compatibility, so as long as you have a compatible GPU, you’ll be able to reduce frame stutters in games where the frame rate can’t lock to the display’s native refresh rate.
One caveat to mention is that because of the triangular subpixel layout, text may not perceptibly be as sharp as some other monitors, but using a free tool like Better ClearType Tuner for Windows can lead substantially better results. That being said, not everyone is sensitive to this kind of thing, and I personally did not find this aspect to affect my day-to-day use. And for context, I am a professional software developer, and so I spend a lot of time looking at text throughout the workweek. As someone who has used 6+ ultrawide monitors for both work and play, I still feel that this Alienware has been the best experience I’ve had for both use-cases.
CONCLUSION
The Alienware AW3423DWF is an excellent option for those looking for an ultrawide monitor for gaming. My experience with both variants of the monitor have been positive, but the more affordable pricing of the DWF model in conjunction with its additional features make it more appealing to me than the G-SYNC Ultimate variant.
So if you’re looking for a top-tier ultrawide monitor for gaming and productivity, I really think that the Alienware AW3423DWF should be at the top of your list of considerations. It delivers a number of improvements upon the original, while also being less expensive.
I would recommend this to a friend!


Share this review:
+3points
3of 3voted this as helpful.
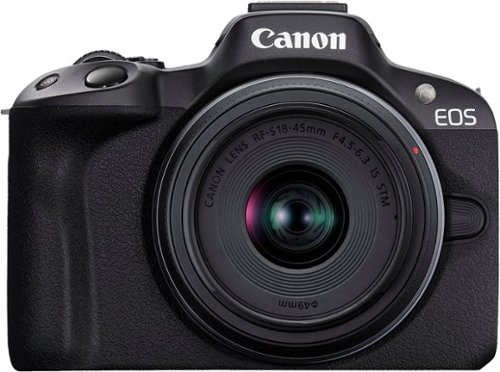
Capture the Moment Just as You Imagine It: The EOS R50 camera makes photography fun, simple, and convenient with intuitive photo functions that capture beautiful images automatically, just as you imagine them. A host of video functions such as 6K oversampled 4K 30p capture and Dual Pixel CMOS AF II makes the EOS R50 a great camera for movie recording and vlogging as well. The 24.2 Megapixel APS-C size CMOS Image sensor and DIGIC X image processor ensure high image quality in a compact and lightweight form factor.
Customer Rating

4
Good 4K Mirrorless for Creators under $1k
on May 23, 2023
Posted by: Xephyroth
UNBOXING:
I’ve got the Canon EOS R50 with RF-S 18-45mm f/4.5-6.3 IS STM Lens. The packaging is lightweight, which was surprising for me as someone who had only worked with a larger DSLR before.
Inside the box you’ll find the EOS R50 body, the kit lens, protective caps for the body and lens, the removable battery and charger, and a neck strap that you can attach to the body.
BUILD:
The first thing I noticed about the EOS R50 body was how compact it was. I didn’t really have any expectations upon its arrival, but just holding it was satisfying. The body is lightweight, but the outer plastic feels sturdy and the rubberized textured grip gives you confidence that it won’t accidentally slip out of your hand.
The battery compartment is easy to lock and unlock, and fitting the R50 with the battery or an SD card delivers a tactile click and a sense of security.
The physical controls on the R50 also feel sturdy and confident—I don’t have any concern about accidentally turning a dial or pressing a button. The controls require intention to engage, and I feel that’s often underappreciated. Working with mushy physical controls could really lead to accidental triggers, but I have no worry about that with the R50.
Additionally, the touch screen can articulate out so you can take pictures or video of yourself while monitoring the feed.
The included lens itself clicks tightly onto the body and delivers a tactile click when you set it to 18mm.
PHOTO:
As a content creator and reviewer, when I’m taking pictures of products, I want the process to be simple. I want to be able to reliably engage the autofocus, and take images that are sharp and deliver a pleasant bokeh with minimal noise.
While I haven’t been able to test every single setting on the R50, I will say that if you prefer manual modes, then you can certainly dial in your aperture, ISO and shutter speed as you wish to achieve the best possible shot across a wide variety of scenarios. But if you like to keep things simple, then there are plenty of photo modes that can help you take great pictures without too much effort.
In my experience with the R50, it takes sharp in-focus images and is able to provide a pleasant bokeh which you can certainly dial in if you’re comfortable controlling the aperture.
If you’re opting for the bundle with the kit lens, then it’s important to note that the included lens does not have optical image stabilization, and the camera body uses only digital image stabilization. There are RF mount lenses with optical image stabilization if you are planning to use the R50 by hand and without a gimbal or tripod, but I did find it took sharp images without external gear as long as you have a reasonably steady hand.
VIDEO:
Video seems to be one of the bigger improvements of the EOS R50 compared to the M50 mk II, and the aspect which I find myself most excited about. At its very best, the R50 can record 6K content and downsample the footage to 2160p30, and which delivers a very crisp image with very low noise under proper lighting conditions. It can also record 1080p120 for slow motion content, but audio isn’t recorded in this mode.
My favorite feature, however, has to be the close-up demo mode that is great for product reviews, makeup tutorials, or any other style of content where you may need to show a close-up of a product at times. I’ve tried it on numerous items of varying sizes, textures and colors and found that the autofocus was very responsive and was able to quickly latch onto whatever object I put in front of the lens. And as soon as I removed the object from the view, the autofocus quickly latched back onto the main subject.
One shortcoming for the video is the lack of optical image stabilization on the body or the kit lens. If you are recording video with a lot of movement and without a gimbal or other hardware for stabilization, then you may see some correction artifacts from the digital stabilization trying to correct for the lack of optical stabilization. So for sports or other high-movement purposes (e.g. even walking while filming), I’d still recommend looking into a lens with OIS or a gimbal. You can enable Enhanced Image stabilization in the settings to further compensate for erratic movement, but I found the footage to feel a bit more artificial and overly processed, and even it felt that way while actively recording as well.
AUDIO:
The built-in microphones are also surprisingly decent. While they might not be able to withstand rushes of wind, they were able to capture clear audio that I felt would be reasonably good for folks who don’t yet want to commit to additional audio gear. That being said, if you can, I’d still recommend upgrading to a shotgun microphone that you can mount to the hot shoe since there are so many great affordable options on the market.
APP:
The Canon Connect Mobile app has its ups and downs while over Bluetooth/Wi-Fi. Overall, transferring images and video from the camera to your phone or tablet over Wi-Fi is a slower process than I might like.
You open the app, register the device, and as long as Bluetooth and Wi-Fi are enabled on both the R50 and your device, discovery should be straight-forward.
By default, you’ll receive compressed video and images since this is significantly faster than transferring the content at original size. But you are welcome to enable importing original size content in the app settings. You can import RAW images, although you’ll need software that will be able to open the files. If you choose to import compressed video, then your 4K or 1080p120 video will be downscaled to 1080p30 at best. I honestly don’t recommend importing original size video content this way because it can take quite a bit of time to transfer.
However, you can also connect via USB and import content that way (for lightning-enabled Apple devices, you’ll need the Camera adapter). Comparatively, importing content over USB is significantly more responsive and I would recommend it if you intend to import original size content.
I also really enjoyed the remote live view feature that gives you a live video feed access to some of the controls. This feature is okay in wireless mode, but the latency isn’t particularly great if you’re looking for responsiveness. But if you can hook it up wired like I did, it is super responsive and latency is a non-issue. I found this was especially valuable for using my iPad as an even larger viewfinder.
WEBCAM:
Another feature I found was interesting was that you could hook the R50 up to your computer via USB and turn on the video streaming/call feature under the USB options in the menu options. This turns your R50 into a glorified webcam. This could make it a great option for creators who do video streams, since they can purchase a dummy battery connected to AC power. However, output is limited to 1080p30 SDR in this mode, so if you have a much more advanced setup and want 2160p output, you may have to use the Micro HDMI output with a capable capture card. That being said, you may have to disable various power-saving settings to ensure optimal performance for this strategy to be effective.
CONCLUSION:
Overall, I think the Canon EOS R50 is a good camera that could fit the needs of many creators. If you’re looking for a camera with a compact body that is good for both stills and video, then the R50 is a solid option—especially if you already have RF lenses with optical image stabilization.
But if you’re looking to get into vlogging, or intend to record video without a tripod or gimbal, there are better mirrorless options on the market that will have very similar features with better image stabilization.
In the end, there are a ton of features to compare across many brands. The EOS R50 is going to meet my limited needs as a video-oriented content creator who doesn’t have frequent camera movement. And while it may work well for me, the features I prioritize may not be the ones most important to you.
I would recommend this to a friend!


Share this review:
+1point
1of 1voted this as helpful.
CONFIDENTIAL UNTIL 6/1/23.
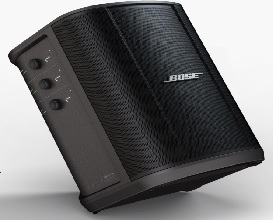
Best in category audio performance with enhanced LF port performance, Ultra-Portable Design, Integrated Wireless Receivers on Channel 1 and 2, Bluetooth connectivity on Channel 3, Tonematch on Channel 1 and 2, OLED Displays, 11hrs of battery life, Bose Music app control, Multi-position EQ (PositionEQ), Remote mixing via Bose Music.
Customer Rating
5
A Truly Wireless Performance Rig
on May 16, 2023
Posted by: Xephyroth
UNBOXING:
Inside the box, you’ll find the Bose S1 Pro+ speaker with a user-replaceable rechargeable battery pre-installed, a power cable, and basic documentation.
For the most up-to-date information on how to get the most out of the S1 Pro+, I highly recommend checking out the manual from their support website, as this will detail a lot of features that are hidden to the eye.
If you are interested in the ¼” Wireless Transmitter or XLR Wireless Transmitter, those are separate purchases and do not come with the S1 Pro+. That being said, I’d argue it’s one of the main reasons you should want to consider purchasing the S1 Pro+ in the first place.
BUILD:
The S1 Pro+ has a rugged, durable-feeling build. It doesn’t at all feel cheap, and while it certainly has some weight, it’s also not unwieldy. It’s actually surprising how light it actually is given how it looks.
Compared to my traditional 10” 1000W PA speaker, the S1 Pro+ is significantly lighter, and can be carried and positioned using only 1 hand thanks to its rugged top handle. So if you’re used to carrying a much larger PA speaker with two hands like I am, you’ll be happy to know that the S1 Pro+ will let you take fewer trips to whatever gig you have.
Additionally, you can put it in 4 different configurations—flat, tilted back, on its side and tilted up as a monitor, or on a speaker stand. So whether you’re just doing karaoke, playing in a coffee shop, or busking out on a street, there is versatility to suit your needs. And the system automatically adjusts the EQ for each of these configurations, since it knows that each configuration will yield different sonic characteristics it may need to compensate for.
INPUTS / OUTPUTS:
The S1 Pro+ has 3 inputs. Channel 1 & 2 are both ¼” / XLR hybrid inputs for wired dynamic microphones or instruments. It’s important to note that these XLR inputs DO NOT deliver 48V Phantom power, so you are limited to dynamic microphones.
Alternatively, if you have either of the wireless transmitters, you can remove the rubber plugs next to these inputs and dock the wireless transmitters where they can recharge from the S1 Pro+, receive firmware updates, and be set up to perform wirelessly. If you opt to go with these wireless transmitters, they will function over Channel 1 & 2. It’s important to note that you can’t use a wired and wireless input on the same channel. But you’re more than welcome to use a wireless transmitter on one channel while using a wired connection on the other, or wireless transmitters on both channels. In my experience, latency from these transmitters is good when you’re nearby the S1 Pro+, but latency will become more noticeable once you are 20-30ft away.
Channel 3 is technically multiple inputs. You can provide either a ¼” balanced mono line input, a 3.5mm stereo line input, as well as bluetooth connectivity. You are able to use one of these physical line inputs as well as a bluetooth device simultaneously on Channel 3, so if you wanted to connect a keyboard/synthesizer in addition to using your phone over Bluetooth, this would be the best way to do so.
There is also an XLR Line out if you want to send the mix to another sound system or speaker. You can also enable a crossover to optimize sound for use with a powered subwoofer via this output.
Lastly, there is a USB-A output for charging a mobile device and USB-C output for Live Stream mode and firmware updates via a computer.
HIDDEN INPUT CAPABILITIES:
Within the online manual, Bose displays a number diagrams for over 10 different configurations that folks may want to use. And it’s not immediately obvious everything that the S1 Pro+ supports without reading it, so I highly recommend checking it out to see if it will fit your specific use-case.
In my particular use-case, I wanted to leverage the wireless transmitter with my electric guitar, but also be able to run through my Neural DSP Quad Cortex amp modeler. And since the wireless transmitter only works with the Bose S1 Pro+ since there’s no detachable receiver, it wasn’t immediately intuitive out of the box on how I could achieve this.
But reading the section in the manual titled “GUITARIST WITH WIRELESS TRANSMITTER AND AMP MODELER PEDAL” It diagrams how I can use the send & return outputs of my modeler via an insert cable. On another page within the manual titled “CONNECT EFFECTS TO A CHANNEL INSERT WHEN USING A WIRELESS TRANSMITTER” it describes that cable as a ¼” TRS to dual ¼” TS cable. I did a quick search, bought the cable, and with a bit of configuration within my amp modeler, I was soon using my wireless receiver.
That being said, if you have a similar use-case as I do but want to go wired, it’s a bit more straightforward, with just a bit more cables involved.
CONTROLS:
Once you’ve figured out which inputs you want to use, you can also use the onboard control knobs to navigate menus by pressing them as a button, and dial in your mix by rotating the knobs.
On Channels 1 & 2, you can control volume, bass and treble, as well as a reverb. On Channel 3, you can control volume bass and treble, but no reverb. If you’re using a bluetooth audio source, it’s important to note that the volume setting from your source device (e.g. smartphone) will be independent from the volume control of the volume knob for Channel 3.
Additionally, pressing and holding any of these knobs for 3 seconds will enter the secondary menus.
BATTERY:
While I haven’t been able to put the S1 Pro+ through the most rigorous usage yet, Bose claims up to 11 hours of use out of the S1 Pro+ with “typical usage” and to allow up to 4 hours to fully charge the system battery.
If you need to check the system battery level and charging status, you can look at Channel 3’s display for the battery status, and a lightning bolt will appear if it’s actively being charged. And no worries, you can still use it while it’s being charged.
Bose also claims that the wireless transmitters will last up to 5 hours with typical usage and to allow up to 2 hours to fully charge the transmitter battery, so bear this in mind if you’re expecting to operate the S1 Pro+ for prolonged periods of time.
APP:
For me, the app is a critical element of the S1 Pro+. It gives you the ability to adjust volume, EQ and reverb into scenes that you can save and reload. This means you can dial in mixes for different scenarios and reuse them without having to fidget with knobs. I chose to create a scene for karaoke where I’ve dialed in the mix and reverb across 2 microphones and a bluetooth audio source, and I’ve also created another scene specifically for my guitar amp modeler.
Another app feature that’s very useful is ToneMatch. Initially, when I set up my guitar modeler, the sound wasn’t quite what I expected, but by going into the ToneMatch settings for that channel and selecting an Instrument ToneMatch preset for Utility > Full Range Flat Response, I was able to get a much more sonically pleasing sound for my guitar modeler. Additionally, there were also Microphone ToneMatch options for popular handheld microphones like the Shure SM58 and Sennheiser E855 which delivered a better tonal balance for those microphones when enabled.
There is a decent sized list of ToneMatch presets for different scenarios, and hopefully the list grows over time to better meet the needs of the community.
SOUND:
From what I can see, the Bose S1 Pro+ consists of 3 tweeters in an array and a woofer placed behind the tweeter array.
Out of the box, I do think that using it flat on a ground surface may yield a much-too-bassy frequency response, so I find that it sounds much better when tilted back or put it on its side tilted up. Your mileage may vary, but limiting the bass resonance with the ground has yielded a more natural sound profile to my ears that is clear without being boomy. I’ve not yet put it on a speaker stand, but that would also deliver a more balanced frequency response. It’ll really depend on where you use it and the acoustic environment. I’ve also cut back or added bass via the EQ for different circumstances.
For general music-listening via bluetooth or aux-in, it’s important to note that the S1 Pro+ is not a stereo system—it down-mixes stereo audio into mono audio. This is really meant as a PA speaker that has additional functions for performance purposes. If you’re not interested in performing and just want a speaker for listening, you will want to look elsewhere. Even so, I find that bringing a speaker like this to a party can still be good if you want to pair it up with another or other speakers. But as a single speaker, it’s very directional, so the sound field won’t be particularly wide.
For live performance vocals, the S1 Pro+ does a great job at keeping them prevalent in the mix without completely drowning other instruments out. If you’re considering using the S1 Pro+ for karaoke, I think it’s a great option that you could take from house to house with very little setup.
For instruments like electric guitars through a modeler or FX processor, it can also deliver a lot of body for such a small speaker, and I appreciate that ToneMatch makes it easy to get good tone through my system.
CONCLUSION:
When I got the S1 Pro+ in my hands, I had no idea how feature rich it actually was until I started delving into the manual. There’s really a lot of capability here for a portable PA speaker, and it ended up fitting multiple of my use-cases really well. Going forward, I intend to use The S1 Pro+ for karaoke night with friends, for jams at our weekend volleyball, for bumping tunes at house parties, and for rocking out through my guitar amp sim wirelessly.
There are still numerous use-cases I’ve still not covered, but given my experience with it thus far, I think the S1 Pro+ is a great option for performers who are looking for portability, wireless convenience and good sound.


Share this review:
+1point
3of 5voted this as helpful.
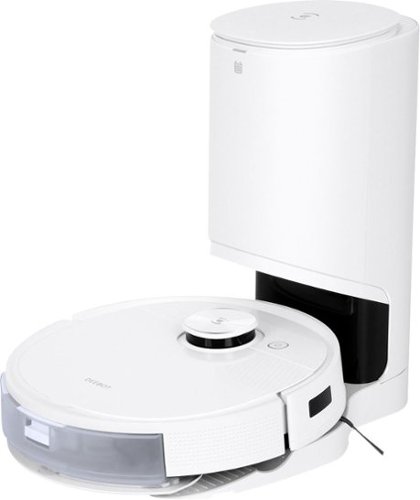
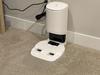
Your mess is no match for ECOVACS DEEBOT T9+. The advanced vacuum and mop system uses cutting-edge mapping and object detection to clean every inch of your home without disturbing kids, pets, or precious belongings. No matter which family member or furbaby creates the clutter, DEEBOT T9+ will clean it up quickly and quietly. It will even get the job done in the dark while you sleep and wake you with the scent of freshly-cleaned floors. Rest easy knowing that you’re getting a superior clean with DEEBOT T9+.
Customer Rating
4
A Feature-Packed, Reliable Robot Vacuum
on April 16, 2023
Posted by: Xephyroth
UNBOXING:
ECOVACS keeps the unboxing experience of the Deebot T9+ is simple. In the box, you’ve got the auto-empty base station, the robot vacuum with air freshener and mopping attachments and additional accessories.
Everything was packaged well and quite intuitive and easy to unpackage for setup.
BUILD:
The T9+ is a well-built and well-designed robotic vacuum—which has been my general experience for ECOVACs robots thus far.
Visibly on the top of the robot is the main sensor, in addition to the run button. Lifting the top lid of the robot shows the power and reset switch, a multi-function cleaning tool, as well as the dust bin that you can easily remove if it gets too full or if you need to replace/clean the filter. Fortunately, this shouldn’t be necessary since the robot will auto-empty the bin into the base station after each run.
On the bottom, you can attach the two replaceable side brushes and access the main brush, wheels. I once had to access the main brush and get a cable dislodged, and was glad to find it was intuitively easy to access without needing additional tools or having to reference the manual.
SETUP:
If you prefer to get started hands-on, you can get started pretty quickly just using the app, but you can also reference the instruction manual which has diagrams and labels to make sure you know how each element of the vacuum works.
It’s important to note that the app isn’t really optional if you want to get the most out of the T9+ and other ECOVACS products.
You’ll need to set the base station against a wall where it has appropriate clearance on all 3 sides. The power cable has an organizer on the back to keep your cable management nice and clean.
Switching between the air freshener module and wet mopping module is very easy, although some caution needs to be taken to ensure you don’t wetten any metal contacts on the mopping module when you fill it up with water.
It’s important to mention that the T9+ will only function over a 2.4GHz wifi network, but not a 5GHz network. So be sure that whatever network you select has a 2.4GHz channel option. The app does explicitly warn you about this.
Once you have it setup, you can send it off for the first mapping of your floor.
CLEANING FEATURES:
Once you have performed a mapping of your floor plan, you can then view a 2D map and set up cleaning zones. You can divide and merge zones, assign names to zones, and set up virtual boundaries if there are areas that you want the T9+ to avoid. For example, I have an area where I have cables on the ground and I prefer that the T9+ avoid that area altogether since it might otherwise get tangled in the main brush. Once I set up that virtual boundary, the T9+ has respected the boundary and hasn’t had any issues.
You can also view a 3D map of your floor plan and select from a common list of furniture items and roughly lay them out on the floor plan. However, unlike the higher-end X1 Omni, I’m not sure there’s much practical benefit in this since you can’t use any special voice commands or tell the T9+ to “clean under the dining table”. For me, this felt more like building my home in The Sims—maybe a bit fun for visualization purposes, but doesn’t really seem to serve an obvious purpose otherwise.
Also within the app you can choose specific zones to clean or let it clean all the zones. You can specify the order in which you want each zone to be cleaned if you have a preference, and you can control the water flow level and vacuum power, and even set different levels for each zone if you have a preference for deeper cleaning or perhaps need quieter cleaning in certain zones. And a feature I never would have thought of—you can enable/disable the air freshening fragrance. The included fragrance cartridge claims to last for around 60 days, and I thought it was overall pleasant without being too harsh on the nose, but others may feel differently. But thankfully, you don’t have to use it. And as with any good robot vacuum, you can set schedules for it to automatically run throughout the week.
Another thing one can appreciate is that if you move the robot and base station to another floor, it will create a new map for that floor and remember it so you can seamlessly switch between floors should you decide to use one robot for multiple floors within your home. At any given time, you can edit any of the floors it has mapped and also delete a floor should you need to have the T9+ re-map a floor after a significant layout change.
ROBOT PERFORMANCE:
Performance-wise, The T9+ is sure to please many—especially for those who’ve never used an ECOVACS robot before.
The T9+ can still get caught on cables and cords if you’re not careful, but if you keep them tidy and organized, it’s usually not a problem. Even so, the virtual boundaries can help you prevent the T9+ from entering some of those problem areas. After setting up virtual boundaries in areas that were likely to be problematic, I have not encountered any issues with the T9+ across numerous runs throughout my first week.
It’s important to note that the T9+ has a primary focus on its vacuuming functionality. And while it does have a mopping feature, it’s not a set-and-forget kind of feature since you will likely need to refill the mopping reservoir and eventually dispose of the mopping pad. For those looking to mop regularly, the X1 Omni or newer T10 Omni is the star of that show. But the T9+ is certainly no slouch if you need it to do some occasional mopping. While it won’t use the quantity of water that the X1 Omni uses, the T9+ uses an S-shaped oscillating motion for quick scrubbing or a back-and-forth motion for deeper cleaning—and it does a pretty good job at it. When the mopping module is attached, the T9+ will avoid carpet, but it will still vacuum while simultaneously mopping for a thorough clean.
While it might not get the stickiest messes off the floor, it certainly helps prevent any small messes from getting worse, and it’s overall efficient in doing so.
The T9+ vacuumed 431 sq ft of my basement (all carpet other than a small bathroom) in 54 minutes, and it mopped+vacuumed 474 sq ft of my main floor in 80 minutes using the Quick Scrubbing pattern with Medium water flow. But it’s important to note that these numbers represent its first mapping of the area, and in the case of the main floor, I watched it obsessively clean a couple small areas that gave me the impression that it might have been “stuck”, but it never triggered an error message, and it eventually found its way out. My X1 Omni usually mops+vacuums the same floor in around 60-70 minutes. I’d expect there to be a run-to-run variance, but the results speak for themselves.
My floors were cleaned, nothing was damaged, and I haven’t had to intervene once I set up virtual boundaries for areas that I found to be problematic. This is the kind of experience that any robot vacuum owner should want. And best of all, if it’s just vacuuming, I hardly ever need to do any maintenance since it auto-empties the dustbin into the base station. So unless I want it to mop, the vacuuming experience is autonomous and hands-off.
CONCLUSION:
The Ecovacs T9+ is another solid entry into the ECOVACS product line. And even though it’s been great for me, I do find that ECOVACS has a lot of other options that might achieve most of what I like from the T9+ at a lower price and without some of the extraneous features like the air freshener.
I’d encourage anybody considering the T9+ to consider this as a recommendation since it’s overall a good product, but know that there may be other ECOVACS options that will be more convenient or perhaps even more affordable based on your needs.
I would recommend this to a friend!


Share this review:
+2points
4of 6voted this as helpful.

Stainless steel precision for a perfect beard, hair and body trim. The Philips Norelco Multigroom 9000 will help you perfect your personal style with our most precise and versatile trimmer. Craft your personal look with this premium stainless steel trimmer, which includes 21 quality tools and accessories for styling your face, head and body. The precision trimming guard delivers a precise trim at the exact length you want, with 5x more precision settings vs the predecessor. The Philips Norelco Multigroom 9000 comes equipped with a body shaver attachment to efficiently shave body hair while protecting skin. The Multigroom 9000 also has Smart BeardSense technology to boost power exactly when you need it to tackle dense, bushy or long beards. The self-sharpening stainless steel blades remain sharp as day one for long lasting performance, no oil required. Plus, the steel frame and rubber grips deliver superior control and the Lithium-ion battery yields 6 hours of runtime. A premium storage case helps you stay organized and is convenient for travel. USB-A charging cable included (wall power adapter not included)
Customer Rating
4
Not Quite As Great for Thicker Beards
on January 30, 2023
Posted by: Xephyroth
INTRO:
Before the Multigroom 9000, my primary shaver was actually the Multigroom 7400 which I’ve had for 6 years. So I’m no stranger to Philips Norelco. The Multigroom 9000 (MG9510) takes what I’ve loved about the 7000 series and gives you many more options for trimming that could make it a great choice as the only trimmer you may need.
UNBOXING:
The unboxing is super simple. Inside, you’re presented with the trimmer and a firm zipper shell case. Inside the case are all the included attachments and trimmer heads you might need, a very helpful manual that explains the intended purpose for each attachment, the USB-A to DC power cable, as well as a compartment to store the trimmer itself.
For the included blades, you have a body groomer with skin protector, an extra-wide hair trimmer, a precision trimmer, nose/ear hair trimmer, precision shaver, and a full-size hair trimmer.
As for attachment guards, they are categorized by color. The 3 light gray guards have a focus on the body and eyebrows with the full-size hair trimmer, while the 7 medium gray guards have a focus on scalp hair with the extra-wide hair trimmer, and the 2 black guards are for your beard and scalp hair with the full-size hair trimmer.
POWER & BATTERY:
It’s important to note that this kit does not include a power adapter. The manual and the trimmer itself are labeled with a recommended 5V==1A rating, and the manual suggests a power adapter that you can buy from Philips. If for some reason, you really want to overpay for a basic 5V==1A USB adapter, you can find the Philips HQ87 for around $26 + shipping on the Philips Encompass parts portal.
In terms of battery life, Philips Norelco claim a 5 minute charge can be enough for a quick shave, but a proper 3 hour charge can yield you 6 hours of run time.
While I haven’t had the time to test these claims to the fullest, my experience with multiple Norelco products in the past would leave me to feel pretty trustworthy about these claims. This model does not have multiple power modes, so the variance between two full charging cycles shouldn’t be dramatically different.
BUILD & COMFORT:
The trimmer itself has a firm, stainless steel body. It is easy to grip, and I never had a worry about it falling out of my hands. The attachments are made of plastic, but they are rugged, durable and comfortable when touching the skin. The last thing you want is to have a piece of plastic with textures that cause skin irritations, and I never felt that way about the materials used on the Multigroom 9000.
Clipping the guards/combs onto the trimming heads required a bit of observation to see where everything clicked and to understand which guards/combs were made for which heads. But once I got the hang of that, clipping them on became easy, and removing them was also quite easy.
I really recommend consulting the manual before you operate the Multigroom 9000. While it may look intimidating at first, in the end it’ll help make sure you get a proper trim.
NOTES:
For whatever reason, the adjustable comb for this model only goes up to 7mm beard length. Which means if you like to have a thicker beard beyond 7mm in length, you will want to look at the MG9520 variant of this product as that model supports adjustable beard guards from lengths 9mm - 13mm and 16mm - 20mm. You can also try using the wide hair guards.
I went on to Philips’ Encompass portal and searched for the MG9520 to find that none of the larger adjustable combs were available for purchase since I know it would be interoperable with the MG9510 since it shares the same design. Only the 3mm to 7mm adjustable comb was available for purchase. So if for some reason you end up losing or breaking one of these larger combs, you will be unable to obtain a replacement via the Encompass portal at the time of writing this review.
BODY HAIR:
Given that this is a multigroom kit, the expectation should be that the trimmer can be used for all parts of the body. In my testing, each trimming head was effective for its designated task. I never ran into the trimmer heads snagging my hair while shaving so it’s a comfortable trim/shave overall. This is especially important if you have sensitive skin. I didn’t incur any rashes or redness during my shave, which was a pleasant surprise coming from my older Norelco where it was more typical to experience a little bit of irritation.
FACIAL HAIR:
The adjustable comb helped improve my consistency while shaving, so it’s unfortunate I didn’t have the larger comb since I would have liked my beard to be thicker. But for someone who is happy with the options presented to you in this package, you can get a nice trim as well as clean up unwanted hairs around your cheeks using the precision shaver. That way, you can achieve a clean look with well-defined lines.
NOSE HAIR:
Compared to my previous trimmer, I think I prefer this omni-directional style of nose hair trimmer more. I feel as though I can more easily tell that it’s effective, and overall I experience less discomfort compared to trimmers that are not omni-directional. I’ve used this style of trimmer on the very first Norelco trimmer I ever bought, and I’m happy to have it back on the MG9510.
SCALP HAIR:
Unfortunately, I don’t typically trim my own scalp, so I haven’t been able to test this trimmer for that purpose. I’m sure someone else may provide better insight if that’s of greater concern to you.
CONCLUSION:
Overall, I think Philips has continued to create a good product under their Norelco line of multi groomers. Although I’m not entirely sure why they have opted to exclude the longer adjustable combs in the MG9510 so that they can create the MG9520 model. I would really like to see Philips provide the ability to purchase those additional combs separately for those who purchased an MG9510 but decide down the road that they would like to try for a thicker beard.
So if you’re interested in maintaining a thicker beard, I’d suggest the MG9520, but for those who need a closer shave on the beard or care more about trimming other hair, I think the MG9510 is a solid offering on the market.
I would recommend this to a friend!


Share this review:
+2points
2of 2voted this as helpful.
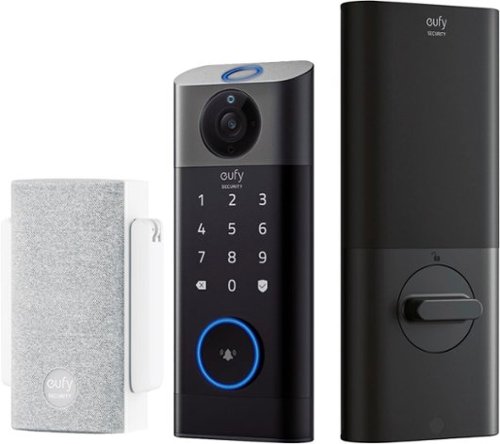
Introducing the 3-in-1 Video Smart Lock S330 - a feature-packed solution for unparalleled home protection. Experience crystal clear visibility with 2K clarity and a 160° wide field of view for easy monitoring of your doorstep. Featuring Self-Learning AI, it constantly improves fingerprint recognition accuracy ensuring fast and precise door access every time. With Person, Pet, and Vehicle Detection, only receive relevant alerts that matter to you. Dual motion sensors help reduce false alerts by 95% and can accurately detect movement up to 19 ft (6 m) away, identifying objects with 99% accuracy. Effortless control and management with the eufy Security App. Get instant notifications* when kids come home, see and communicate with visitors using 2-way audio, and unlock the door remotely – it's convenient and security when you're away. Videos and data stay protected with local storage - all with no monthly fees.
Customer Rating
5
Fantastic All-In-One Smart Lock And Video Doorbell
on November 9, 2022
Posted by: Xephyroth
INTRO:
The Eufy Security Video Smart Lock aims to be your one stop shop for front door security. Equipped with a doorbell, 2k video camera, pin pad deadbolt and fingerprint reader, it can help consolidate multiple devices at your front door and restrict your need to charge a separate battery operated doorbell and deadbolt system.
UNBOXING:
In the box, you have the front panel that exposes to the outside of your home, the deadbolt assembly with multiple strike plates, as well as an indoor WiFi bridge/chime as well as a 10,000mAh battery and 16GB SanDisk Edge microSD card for storage.
Everything was organized neatly in the box, and if you’re familiar with installing a deadbolt, you will feel pretty at home with the installation procedure.
SETUP:
Setup was quite a breeze. You can perform the assembly either by following the instructions via the eufy Security app, the instruction manual, or just by general knowledge of how most deadbolts work. Once you’ve disassembled and removed your previous deadbolt assembly, it really does only take 15 minutes to install the new assembly.
Once you’ve done that, you can follow the setup process on the eufy Security app which will have you install the WiFi Bridge and Chime and install the microSD card slot into the bridge. This microSD card will be used to store video footage.
You’ll go through the process of connecting the WiFi Bridge and Chime as well as Video Smart Lock to your WiFi router, as well as calibrate the lock to your door frame.
Honestly, the seemingly longest period of time of this setup process is really just being patient while the firmware updates.
BUILD:
After having set it up, I can say I think it’s overall a solid build that instills as much confidence as most standard locks. That being said, it certainly isn’t indestructible, but the emphasis of this lock is to create a balanced blend of convenience and security.
You have your fingerprint sensor on top of the unit, and below that is the video camera followed by the digital pin pad and doorbell button with hidden key entry behind the doorbell button.
One aspect that I like less is that it can be hard to see the digital pin pad in the dark, so I tend to brush my fingers across the smooth surface until the LEDs light up. Other locks have physical buttons, but this is all capacitive, so you can’t really “feel” where the buttons are in the dark. So if you’re vision impaired, you may want to lean on the fingerprint reader more often.
I really like that there’s a USB-C port on the bottom of the lock as a backup measure so that you can use a battery bank to provide power to it if you ever find that the battery died. But Eufy did go the extra mile by providing a removable 10,000mAh rechargeable battery that can be charged via USB-C, so you should be able to get plenty of use between charges.
And although I’m not sure of the use case just yet, there is also a reboot button on the bottom of the lock where the emergency USB-C port is. Allowing this button to be accessible from the outside could enable malicious actors to reboot the device which could interfere with the video recording.
LOCK:
The app provides plenty of options to customize and use your Video Smart Lock. You can set 4-8 digit passcodes for each person you want to grant access, as well as optionally register 1 or more fingerprints per person for even faster access. Do bear in mind that registering fingerprints must be done via the fingerprint reader on the lock as opposed to readers on your phone. So registering a fingerprint will require the person to be physically at the lock.
When creating a passcode, you must manually provide a code (it doesn’t generate a code for you). And you can optionally create a schedule for a period of day which that code can be used, as well as which days of the week it is enabled.
There are also other security mechanisms like Wrong-Try Protection to prevent someone from entering a wrong passcode too many times, and Scramble Passcode which allows you to enter random digits before or after your passcode to make it difficult for someone who might be trying to peek while you enter a passcode.
Another feature I found convenient was the One-Touch Locking which allows you to lock the door by holding the check button on the lock. The alternative would be to enter your passcode, scan your fingerprint, or use the app to engage the lock.
And of course, the ability to have a timer that auto locks is one of the most important features of any smart lock. You can set a timer of up to 3 minutes before it automatically locks. Do note that it will only start the countdown timer after it has detected that you have closed the door. So if you set it to a 1s timer, it will basically lock as soon as you close the door behind you—which may even be a preferable alternative to One-Touch Locking.
And lastly, if you pull back the doorbell button, you will find the hidden key hole so that you can physically unlock the door in emergency situations.
Overall, I found that the lock worked reliably and provided many convenient ways to lock and unlock my door. And I also appreciate the ability to customize that experience for the security needs of my home.
DOORBELL & VIDEO:
The Video Doorbell is also quite good. I have been using a eufy 2k Video Doorbell for over 2 years now and can say that it has suited my needs quite well, so when I realized I could consolidate my pin pad lock and video doorbell into a single package, I was quite excited to see how well it functioned.
In terms of video quality, the footage I am seeing is quite good, overall. However, I do think that there is a clear opportunity to improve the dynamic range and auto exposure because bright white skies often end up causing significant overexposure. That being said, I haven’t yet found any footage where a bright outdoor environment caused someone’s face to be overexposed or unrecognizable. Even so, doorbell footage has been used to catch criminals and I think eufy should consider improving their image processing pipeline. The Night Vision mode is also quite good if you decide to leave your porch light off. In this case, I felt as though quality met my expectations and there weren’t any notable issues.
The motion detection has decent customization options for setting distance-based sensitivity across different angles, and whether you want human detection or all motion detection. There’s also Loitering Detection which can sound your chime and automatically play a message if it detects someone has been lingering around too long. And there is also Leaving Detection if you want to be notified when someone is leaving.
And lastly, you have the ability to set activity zones so that you can limit motion detection to a certain portion of the camera view. This is helpful if you want to ignore certain areas of the camera view that might trigger accidental motion events.
One potential thing to consider before you purchase this Video Smart Lock is if you have a recessed door frame where there’s a side wall blocking part of the camera view. Since it attaches directly to your door, you won’t have any way to adjust angles. And when you open the door, the camera will go with it, so it will end up recording your wall or stop recording altogether. This makes it a bit less reliable compared to a separate video doorbell, and it has no other option than to be battery powered.
CONCLUSION:
Overall, I came away pretty happy with the solution eufy has put together. The Video Smart Lock does a good job at balancing convenience with security. And as someone who was already using a eufy smart lock and video doorbell, I think that combining the two into one product makes for a good overall experience with a few acceptable compromises. I personally did not find any glaring issues with the eufy Security Video Smart Lock and would certainly recommend it to anybody looking to improve their front door experience.
I would recommend this to a friend!


Share this review:
+1point
1of 1voted this as helpful.
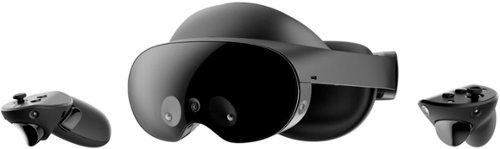
Meta Quest Pro is a virtual reality system that unlocks new perspectives into how we work, create, and collaborate, so you can go beyond what was previously possible. A completely reimagined headset is slimmer and more well-balanced for long-lasting comfort. Breakthrough high resolution mixed reality passthrough uses full-color sensors to let you see and engage with the physical world around you–even as you connect, work and play in virtual spaces. Multiple room-sized displays let you skip between tasks to get more done, more easily. Connect better with friends or collaborate with peers like never before with real-time avatar expressions that mirror your authentic facial reactions. Intuitive, redesigned controllers dispense with tracking rings, using self-tracking cameras to capture a greater range of motion and fine motor controls to translate detailed finger operations like writing and drawing into VR. Advanced multi-point haptic feedback makes virtual interactions feel more real. Meta Quest is for ages 13+. Certain apps, games, and experiences may be higher.
Customer Rating
4
Great Hardware; Under-Utilized Features (For Now)
on October 30, 2022
Posted by: Xephyroth
INTRO:
2 years after the original release of the Quest 2, the Quest Pro has a much higher price tag, but with a lot of advancements to improve immersion into the metaverse. But if you’re a VR enthusiast and price isn’t as much of a concern, then the Quest Pro has a lot of technology that makes it a unique and compelling offering.
UNBOXING:
Inside the box, you’ll be greeted with the Quest Pro headset, the Quest Touch Pro controllers with stylus tips, as well as the magnetic charging dock, a protective cover for the outer glass of the headset, partial light blockers for covering your left and right side peripheral vision, a couple wrist straps, and charging cables and the 45W wall adapter.
Additionally, there is some literature included as well as a lens cloth. It’s important to note that you should not use any chemicals to clean the lenses.
BUILD:
The build on the Quest Pro has some significant improvements from the Quest 2. It leverages a darker black plastic that appears to be the same as the material used on the Quest 2, but now it has glass on the front of the headset, as opposed to plastic. I imagine this is due to the new optics, so it’s important to not accidentally run into a wall, as you may damage the glass on the front of the headset if your guardian boundaries aren’t accurate.
You also have a new silicone padding for the forehead to reduce numbness compared to the original Quest 2 design. The new silicone padding makes the Quest 2 much easier to clean compared to the foam design on the original Quest 2. And if you’re having a party and taking turns among multiple users, then a quick wipedown will make everybody feel much more sanitary, as the Quest 2’s foam became a sponge for sweat, while the silicone design on the Quest Pro completely alleviates this issue.
The new counterbalance design better distributes weight on your head. The rear of the headset is where you’ll find silicone padding, the tension adjustment mechanism, and the non-removable rechargeable battery.
The magnetic charging dock is a great addition, as it makes it very easy to charge the headset and the controllers after every session. Conveniently, there is haptic feedback from the controllers when they are successfully charging, and the headset makes an audible chime as well. Additionally, there are LED indicators on the controllers and headset that light up when they are charging.
COMFORT:
Comfort on the Quest Pro is certainly an improvement over the Quest 2, but may have some small hurdles for those who wear glasses.
If you wear glasses, the partial light blockers may prove to be a minor challenge on the Quest Pro. Whenever I wear glasses, I find that the partial light blockers get in the way of my frames while I’m trying to put the headset on. One thing that works for me is to pinch the light blockers and put the headset on with your glasses close to the display lenses. Be careful to avoid having your glasses make contact with the lenses, though, as you don’t want to risk scratches. Alternatively, you can avoid wearing the partial light blockers altogether—it’s certainly more convenient, but perhaps less immersive.
I never really had issues with comfort on the Quest Pro thanks to this new design. I don’t personally experience issues with my frames pressing against my temples with the Quest Pro’s design. It is wide enough to fit my head and my glasses without applying pressure to my temples. This is a definitive improvement for glasses-users over the Quest 2’s design.
SETUP:
The Quest Pro does a good job out of the box introducing you to its physical features and adjustments. It teaches you about the physical adjustments you can make, including the new continuous IPD (interpupillary distance) and lens distance adjustments that were absent on the Quest 2. This means you can bring the lenses closer or further away from your eyes, and better adjust the distance between the two displays to better match your unique eyesight.
The Quest Pro’s setup experience also introduces you to the new Quest Touch Pro controllers, hand tracking, and Pro-exclusive features like facial gestures, eye tracking, and mixed reality. I also want to make mention that the new experience allows you to login with a Meta account, so you do not need a Facebook account to use the Quest Pro.
DISPLAY:
Thanks to a new optical stack, the Quest Pro experiences improved clarity via the pancake lenses. The displays in each eye come in at 1800×1920 from 72Hz to 90Hz—which isn’t much of a change from the Quest 2, but they have improved the horizontal field of view to 106 degrees from the 96 degrees on the Quest 2.
In my experience, the Quest Pro has a clearer, sharper image compared to the already fantastic Quest 2. I always forget that I’m actually looking at a grid of pixels.
AUDIO:
The onboard audio has also improved on the Quest Pro. The speakers are placed across the side bands and have a fuller sound compared to the Quest 2. However, if you want a more private experience, you now have access to two 3.5mm headphone jacks on each side band. This allows Meta and other manufacturers to provide single earbuds that connect to just one side of the headset instead of using a single stereo jack. This helps with keeping cable clutter to a minimum if you use headphones designed for VR headsets like this. That being said, both headphone jacks can also output in stereo if you do not mind dealing with some cable clutter. I wouldn’t use over-ear headphones due to the difficulty of fitting them over the side bands, but some over-ear headphones may fit better than others.
Additionally, the Quest Pro does have Bluetooth 5.2, but I tried using my AirPods Pro 2nd gen and the experience was far too laggy, so I would avoid Bluetooth headphones. However, the USB-C input could theoretically connect to some 2.4GHz wireless headphones with a dongle.
CONTROLLERS:
The new Quest Touch Pro controllers are self-tracking which means they are significantly more accurate compared to the Quest 2 controllers. Since the headset itself no longer has to track the controllers, the controllers omit the ring of LED lights in favor of 3 onboard tracking cameras. This means that the controllers have a smaller footprint, can be brought closer together without accidentally colliding, and will be tracked much more accurately in 3D space. Gone are the days of controller drift because the controllers are behind your back and out of view of the headset cameras.
Other than that, the controllers have a new rubberized grip and also have a removable wrist strap where you can instead attach the stylus tips to use the controller for whiteboards and other drawing experiences.
SOFTWARE ECOSYSTEM:
In terms of apps and games, the Quest Pro can do everything the Quest 2 can do, but do it better. The ecosystem is rich and diverse with different experiences. There are apps for productivity and remote desktop experiences, and there are even apps for watching movies and videos in VR—alone or with friends.
If you enjoy playing games, there are a slew of titles from rhythm games to cooking competitions to table tennis and golf, or even puzzle games, board games, Action-Adventure RPGs and First-Person Shooters. Over the past 2 years, the ecosystem for the Quest has expanded significantly, and I genuinely believe there’s something for everyone to enjoy.
FACIAL TRACKING & MIXED REALITY:
Firstly, these are opt-in capabilities and are completely optional.
That being said, the new facial expression and eye tracking capabilities are currently very limited in usability because, at the time of writing, so few apps are currently taking advantage of them. Both the Meta Horizon & the Horizon Workrooms allow you to test these features, and from my experience, they do a good job at detecting facial expressions to add a bit more liveliness to my avatar. However, these expressions aren’t very nuanced because the models don’t have dimples and wrinkles. That being said, I think this may improve as time goes on.
For mixed reality, I feel as though further breakthroughs will need to happen to make it more desirable. In my testing of the new AR mode from the RPG board game Demeo, I was able to put the 3D board game onto my real life coffee table. While quite impressive, I think the fact that the passthrough cameras are fairly grainy diminishes the immersion factor for me. That being said, I could see how integrating a seat and a coffee table might be nice if you don’t want to be completely pulled away from reality if you need to be aware of your physical environment for some reason.
BATTERY LIFE:
There are a lot of claims about the Quest Pro having a 1-2 hour battery life, and I think this is highly dependent on the types of experiences you are engaging in, and what features are enabled or disabled on the headset. In some cases, you may see 3-4 hours of battery life, but I think more realistically, you should take breaks after 1-2 hours.
CONCLUSION:
The Quest Pro represents the direction that Meta envisions for the future of the metaverse. On top of its improvements from the Quest 2, it adds new features to make experiences more immersive. And while I think most people are probably still better off with the Quest 2 at its price-point, I think the Quest Pro’s high cost may find its justification in time when apps and games begin to take advantage of the suite of new facial tracking and mixed reality features.
No, I would not recommend this to a friend.


Share this review:
+6points
7of 8voted this as helpful.
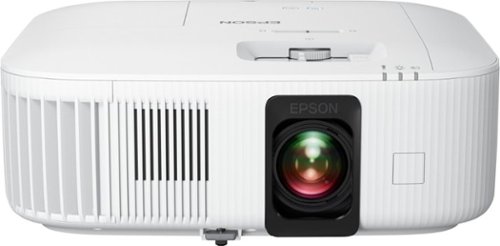
Enjoy an immersive, big screen home theater experience with the Home Cinema 2350 Smart Streaming Projector. Featuring Epson’s innovative 4K PRO-UHD®1 technology and phenomenal HDR102 brilliance—the Home Cinema 2350 delivers a truly epic 4K experience.. True 3-chip 3LCD technology offers outstanding brightness and color accuracy without disturbing the overall contrast, ensuring deep blacks and remarkably vivid colors. And with Android TV®3 included, the Home Cinema 2350 Smart Streaming Projector also makes it easy to stream your favorite Twitch and YouTube™ channels—or watch the latest movies and TV shows on Netflix, Amazon Prime Video, Hulu, Disney+, HBO Max™ and more4. Allowing for multiple audio options, the Home Cinema 2350 features an integrated 10 W bass-reflex speaker, plus Bluetooth® wireless audio device support5 for connecting soundbars or headphones. And, with a sleek, compact design and vertical lens shift, you can place the projector nearly anywhere—including tables and bookshelves—for flexible setup and easy viewing.
Customer Rating

3
Epson Uses Misleading Marketing to Target Gamers
on October 24, 2022
Posted by: Xephyroth
INTRO:
There are gaming monitors, gaming-oriented TVs, and now gaming projectors. Epson claims that the Home Cinema 2350 is a “Smart Gaming Projector.” But in my testing, I’ve found that the 2350 is effectively a stripped down Home Cinema 4000 3LCD (which I happen to own and reviewed in 2017). This means it lacks features supported by the latest generation of game consoles.
UNBOXING:
If you’re new to Epson projectors, the 2350 is a much simpler unboxing experience compared to some of Epson’s larger projectors. I already own a Home Cinema 4000 3LCD which is much bigger and heavier by comparison. The 2350 comes in a much more manageable box and transporting it should not be much of a concern.
Inside the box is the projector, a translucent lens cap, a power cable, and two remotes—one for the projector, and one that omits the projector-oriented buttons if you want to remove the Android TV dongle and use it on another device like a TV.
BUILD:
One thing I want to immediately bring to attention. I don’t like that Epson tries to hide that the projector itself isn’t smart. Rather, the projector has a built-in covered compartment that hides an Android TV dongle and also covers the HDMI port and USB port that the dongle occupies. So the projector itself isn’t smart (which I don’t mind), but it occupies an HDMI input to enable the “smart” functionality. That being said, I do like that you can just remove this dongle and potentially replace it, as it will eventually become outdated and slow.
When looking at the front of the Home Cinema 2350, you’ll see that it has an intake vent on the right and exhausts hot air on the left side. The intake side is where the Android TV is stored so cool air can pass through and cool the dongle before cooling the lamp. You also have a single adjustable front leg if you need to tilt the projector upward.
On top of the projector you have 3 physical adjustments for the lens—focus, zoom, and vertical lens shift. Additionally, you do have a software keystone slider for adjusting the angle if your projector is positioned at an angle rather than straight down the center of your screen. And as expected, there is a power button and input button. If you want to change projector settings, the only way to accomplish that is via the remote control which is quite unfortunate.
Visible on the rear is an ARC-enabled HDMI port and a 3.5mm stereo audio out. Under the compartment is the second HDMI port as well as a 5V2A USB port occupied by the Android TV dongle.
SETUP:
The setup for the projector is pretty simple. If you’re able to, set up your projector directly down the center from your screen or wall. You can set it up at an angle as well, but you’ll need to make keystone adjustments in the software to compensate.
To test an imperfect configuration, I set up the projector about 14 feet away and about 2 feet leftward from the center of my 135” screen. The surface it stood on was 54” tall, which was above the center point of my screen. Since this is a fairly portable projector, I do think it’s reasonable to assume there will be folks who choose not to mount it and may put it on a shelf or bookcase as a compromise. So to me, it was important to test it this way as opposed to a perfect mounting scenario.
To test an imperfect configuration, I set up the projector about 14 feet away and about 2 feet leftward from the center of my 135” screen. The surface it stood on was 54” tall, which was above the center point of my screen. Since this is a fairly portable projector, I do think it’s reasonable to assume there will be folks who choose not to mount it and may put it on a shelf or bookcase as a compromise. So to me, it was important to test it this way as opposed to a perfect mounting scenario.
Once I had it where I wanted, I plugged the power and turned it on. You’ll immediately get prompted to set up the Android TV system, but you can also try to align the projection with your screen or surface. Using the physical adjustments on the top of the projector, I got my zoom reasonably positioned with the edges of my screen, then manually dialed in the focus until I got a crisp image. I tried to use the keystone slider on the top of the projector, but I felt as though it had too few adjustments in either direction—it would either overcorrect or undercorrect and I needed something in between.
Once I had the primary remote control paired, I started shifting through the settings from the remote to see what additional adjustments I could make. Lo and behold I found a setting called Quick Corner which allowed me to adjust the four corners into the perfect position on my screen. I’m rather amazed this doesn’t exist on my Home Cinema 4000 3LCD, as it really did make a big difference for the alignment.
SOFTWARE:
In terms of the software, it’s important to note that the projector settings are independent of the Android TV dongle. So you can unplug the dongle and still operate the projector settings, but they can only be changed via the remote control, as there are no hardware navigation/menu controls on the projector itself.
You have various options for color and brightness, projection styles for rear/front projection as well as support for ceiling mounting. There’s a slew of other configuration options, and I recommend consulting the user guide on Epson’s website if you want to know what options are present.
As for the Android TV experience—I’d say it’s the typical experience you’d have from a mid-range smart TV. You should expect some lag from time to time, and the experience is best when you limit the amount of apps you download. If you keep it focused on video playback, you’ll have a relatively smooth experience, overall.
IMAGE:
Compared to my older Home Cinema 4000 3LCD, the Home Cinema 2350 produces a reasonably similar image that I’m familiar with. It gets bright enough for a lower light environment, but won’t hold up quite as well in bright environments. With mine being set up in a lower light basement environment, I was able to experience vibrant colors with decent contrast at the Standard light output.
However, not all is good. This projector is marketed as a “Gaming” projector, and that’s where this projector comes up short. Epson misleadingly applies ambiguous footnote markers to some of their marketing about this projector supporting 4K60, HDR and 120Hz at 1080p. In reality, it doesn’t support HDR at 4K 60Hz, but does support 4K 30Hz with 4:2:2 chroma subsampling at either 10 or 12 bit HDR. This means that 4K HDR works for movies that run at 30Hz or even 24Hz, but it does not work at 60Hz.
And in regards to 120Hz, this projector doesn’t support 120Hz at all. Not even at 1080p. This effectively makes it very similar to my current Home Cinema 4000 3LCD but with some stripped down features.
If you’d like to see the full table, I highly recommend you read the section titled “Supported Video Display Formats” in the online user guide for the Home Cinema 2350, as this more clearly laid out what this projector is capable of.
This means that Xbox Series X and PlayStation 5 owners won’t be able to experience HDR gaming out of this projector nor any sort of 120Hz gaming, even at 1080p. Pretty disappointing for a “Gaming” projector. That being said, you will be able to take advantage of the 4K 60Hz output, which is still a good experience, with around 20ms of latency if you engage the Fast image processing mode on the projector.
In my experience, latency was reasonably good. While I mostly opted to play more cinematic games as opposed to fast-paced games, I did feel as though either experience was reasonably good and that I didn’t consciously sense any slowness while playing.
SOUND:
In terms of noise, the fan exhaust will be audible during operation, especially if you’re in a higher altitude environment where you need to engage the “High Altitude” mode in the settings. That being said, I did not find it annoying when I had it hooked up to my home theater system.
The built-in speaker gets reasonably loud, but is nothing to write home about. It’s important to emphasize that this speaker is mono output, so there’s no stereo separation. It will help mask some of the fan noise, but certainly won’t lead to an immersive cinematic experience. It’s more of a convenient option for those who might want to project content casually. I think it could be a good compromise for projecting outdoors or on a wall for shorter sessions as opposed to extended long-term use. I watched several episodes of a series on my bedroom wall while relaxing in my bed and found the audio to be sufficient for a casual experience.
HEAT:
The Home Cinema 2350 produces quite a bit of heat during operation, so it’s important that you keep the intake and exhaust vents clear from any obstructions. I accidentally obstructed the exhaust during my first time operating it and it shut off for safety measures. If this happens to you, it’s recommended that you wait 5 minutes for the lamp to cool, clear the obstructions, and monitor the temperature LED on the projector. If the LED is orange while the other 2 LEDs are off, that means it has overheated. And if you’re in a high altitude environment, you’ll certainly want to engage the high altitude setting so that the fan can operate at a higher speed to ensure better cooling of the lamp.
CONCLUSION:
Overall, the Epson Home Cinema 2350 isn’t really a “Gaming” projector, and it’s not quite a “Smart” projector if you simply remove the dongle. But it’s a decent 4K projector for gaming if you don’t mind that it can’t do HDR gaming.
But the premise has been set by Epson. They are marketing this as a Gaming projector, and I really just don’t think the marketing matches the consumer expectation. They use way too many footnotes and confusing specification tables rather than being transparent about what this projector is and isn’t capable of. It doesn’t do 120Hz—even at 1080p, and none of the latest generation of consoles can game at 4K60Hz with HDR on this projector. As someone who was actually deceived by this marketing until it was in my hands for testing, I think it’s important that the deceptive marketing be called out.
It’s not a gaming projector, and it’s not even really a “smart” projector. But it’s a decent 4K projector, and I’m disappointed that the marketing doesn’t focus on that narrative.
Share this review:
+6points
6of 6voted this as helpful.

Feel the action with 4K HDR visuals, ultra-fast 144Hz refresh rate, and Full Array Local Dimming contrast that makes game worlds come alive with detail and vibrance. Built for extraordinary gaming performance with support for Nvidia® G-SYNC® and HDMI 2.1 VRR compatibility, the INZONE™ M9 is your path to victory.
Customer Rating
3
Good Display, But Worth Considering Alternatives
on September 5, 2022
Posted by: Xephyroth
INTRO:
Sony is entering the gaming monitor industry with their first 4k 144Hz HDR display. While Sony isn’t new to producing monitors, their monitors have been focused on broadcast video production as opposed to consumer-oriented displays. But Sony has also been making some very premium televisions—many of which have modern features for gamers. So does the premium price tag hold up when the competition is very strong?
UNBOXING:
The unboxing experience is pretty typical of most monitors. Everything was packaged well and arrived without damage. In the box you get a 2-piece stand that is assembled by screw driver (not included), the display, and the power supply.
One notable omission is that unlike every other monitor manufacturer in the market, Sony has opted to not include any display cables with the M9. I think the assumption here is that you are using the M9 with your PlayStation 5—which does include an HDMI 2.1 cable in the box. But this is really unfortunate for PC users who expect to have an included DisplayPort 1.4 cable or HDMI 2.1 cable. So you’ll need to bring your own cable.
SETUP:
Setup is pretty straight forward, and all you’ll really need is a screwdriver (not included). First gently place the display face-down on a flat surface. Then connect the stand to the back of the display and make sure it clicks in and locks. Lastly, take the legs and screw them into the stand using the two provided screws. There is also a cable clip for letting you organize the cables from the back of the display.
BUILD:
The build is clearly inspired by the PlayStation 5 design aesthetic. It shares a similar plastic build as the PlayStation 5, and even features a LED light bar spanning horizontally across the rear of the display that you can change the color of or turn off entirely.
The vertical height adjustment is easy to perform, as you slide the display upon the diagonal stand. So as you move it higher, it moves slightly away from you, and as you move it lower, it moves slightly closer to you. You get 70mm (~2.75”) of vertical height adjustment, which isn’t a ton, but you can always purchase a different 100x100 VESA mount. Unfortunately, Sony does not make their own alternative stands that match the aesthetic.
You also get 70 degrees of upward tilt on the M9, but no down-facing tilt, which isn’t an issue for most people, as you should be using this at straight eye level and in a relaxed position by having the M9 tilted slightly upward.
There is no swivel or pivot on the M9, so you can’t put it in portrait orientation, and if you need to rotate it, you’ll have to readjust it by picking up the base and rotating the entire monitor Not a big deal, but I think I expect monitors of this price range to have some degree of freedom, as there are plenty of much cheaper (yet high quality) displays that come with decent physical adjustment options.
CONNECTIVITY:
The M9 comes with 2x HDMI 2.1 ports, 1x DisplayPort 1.4 input, 1x USB-C (with DisplayPort alt mode and only 15W of power delivery), 3x USB Type-A ports for peripherals, 1x USB Type-B upstream, and a 3.5mm headphone output.
If you’re using a computer that supports DisplayPort alt mode 2.0 over USB-C, you can achieve the full 4k@144Hz with HDR if your laptop’s GPU can provide the necessary bandwidth. Should your computer not support DisplayPort alt mode, you can simply connect to the DisplayPort 1.4 input or the HDMI 2.1 input. It’s important to note that for PC’s, to achieve the 144Hz refresh rate, you must use DisplayPort. In my testing, HDMI 2.1 will be capped at 4k 120Hz should you have a graphics card that supports HDMI 2.1. Additionally, it should be noted that Ultra High Speed HDMI (48Gbps) cables are necessary to achieve the full throughput over HDMI.
Additionally, the USB-A ports on the M9 will connect to the USB-C host, which means you can connect a mouse, keyboard, and a USB headset or other devices to the M9. Alternatively, you can use a USB Type-A to Type-B cable from your host PC to the M9 so that it may function as a USB hub for your peripherals. I was disappointed to find that the Type-B cable did not work with my PlayStation 5, and Sony has limited the KVM functionality to the USB-C port for the PlayStation 5. So I think this KVM solution is really half-baked. I don’t know if Sony can fix this in a firmware update, but this is not a true KVM. Other comments online seem to indicate that you need to unplug the USB cable of the previous device before changing output to the next device if you have two devices powered on simultaneously.
Additionally, I found that my Valve Steam Deck could not connect to the M9’s display via USB-C. It was able to detect the devices plugged into the USB hub, but was unable to deliver a signal to connect to the display of the M9. My first guess is that the M9 uses DisplayPort alt mode 2.0 exclusively, which is a part of the USB4 specification. Unfortunately, the Steam Deck doesn’t use USB4, so it does not have this newer technology.
SOFTWARE:
In terms of software, you can download the INZONE Hub which allows you to perform all the same customizations as the on screen display. It can take 10 seconds for the INZONE Hub to recognize the M9, but is otherwise a nice feature since physical controls on monitors can be pretty clunky and slow to navigate.
Right off the bat, you can use Auto Picture Mode to let the monitor pick what’s best. Additionally, there are presets like Game1, Game 2, Standard, FPS Game, and Cinema. There are also your typical manual adjustments but you cannot change these when HDR is enabled. Unfortunately, it’s not entirely clear what settings are locked down when you have other features enabled.
You also have framerate counter and Adaptive-Sync/VRR toggles, 3 levels of display response time adjustment, and a 4 levels of black equalizer adjustment.
DISPLAY:
In my subjective experience, the INZONE M9 is a pretty awesome display on its own. I enjoy the high refresh rate and Adaptive Sync when playing games, and the HDR is pretty impressive when playing movies or HDR-supported video games. But there is no denying that there are other displays with superior HDR implementations with more local dimming zones. The M9 supports 96 local dimming zones, which is great to have if you’re coming from an edge lit display, but there’s certainly more blooming when displaying bright foreground content against a black background when compared to the Neo G7 with its 1,196 dimming zones.
If you are not a display geek (I don’t find myself to be), I think you will still be able to appreciate this display. But you should not expect it to be OLED-like. As someone who also owns a QD-OLED display, the M9 will not be able to compete on that level. The new QD-OLED displays get incredibly bright unlike older generation OLED displays, and won’t exhibit the kind of blooming you’ll find on the M9.
That being said, the M9 gets plenty bright. Day to day, I don’t really notice the blooming on the M9 when I’m not comparing it against the QD-OLED. From a practical perspective, if I’m playing a game or watching a film, there’s really so much movement going on that my eyes are not fixated on looking for bloom. Instead, I’m really focused on the content, and it absolutely pops out.
If you’re just watching 4K HDR videos on YouTube that highlight deeply contrasting elements for OLED TV’s, you’re likely to notice bloom, but I’m not the kind of person who actually watches this content outside the context of assessing or showcasing a display.
Also, I don’t notice any ghosting on the M9 which is awesome. Most console players play on TVs which will exhibit much more ghosting than monitors, but it’s nice to see that Sony is trying to make a monitor that caters to both PC and console players.
The 4k resolution makes images crisp and detailed, and the HDR implementation makes cinematic games and movies feel much more vibrant and colorful. Overall, I’m quite pleased with the experience. Most budget “HDR'' panels at $500 or lower end up with a lot of gradient color banding that make HDR gaming not worthwhile, but that is not as much of an issue on my unit. That being said, very bright uniform colors tend to show vertical bands. So viewing pages with bright white backgrounds may exhibit this unfortunate behavior.
SOUND:
I just want to briefly mention that the M9 does have built-in 2x2W stereo speakers, but be assured that these have the sound of greeting cards. I have a 14” Alienware x14 laptop that sounds legitimately better in a much smaller form factor. So you should consider the M9 to be a monitor, not a TV. Any TV on the market right now has objectively better sound than the M9.
The 3.5mm headphone output is more serviceable by comparison. I hooked up a pretty efficient pair of Beyerdynamic DT 700 Pro X to the headphone output and they were able to get plenty loud without an audible noise floor. While I probably wouldn’t use this over a dedicated amplifier for nicer audiophile headphones, it should suffice for most standard consumer headphones, but I wouldn’t make it my first option.
CONCLUSION:
The INZONE M9 makes the most sense for folks looking for one of the best 27” HDR gaming monitors under $1k. It’s best thought of as a display-first piece of technology with some other “okay” features. They could refine their KVM experience, they could have provided speakers that people would actually want to use with their PS5 console, and they could have provided at least one display cable for PC players.
Depending on availability and sale pricing, there are certainly some options I would be more inclined to pick over the M9, but they often cost over $1k when not on discount.
The M9 is good as a display under $1k. But I do think the M9 has better local dimming than many of the options in that sub $1k price bracket. But I’ve also seen 48” OLED TV’s go for this price which will yield an even better experience.
No, I would not recommend this to a friend.


Share this review:
+1point
1of 1voted this as helpful.
Meet Google Pixel Buds Pro, the wireless earbuds with premium, immersive sound that adapts to you. Active Noise Cancellation with Silent Seal blocks outside sounds, so your music shines.
Customer Rating
4
Google’s First Try at Earbuds With ANC is Good
on August 13, 2022
Posted by: Xephyroth
INTRO:
The Pixel Buds Pro are entering a pretty saturated space of truly wireless earphones with ANC and Transparency modes. While Google has produced Pixel Buds in the past, none have had either of these features, so after AirPods Pro came out in 2019 and dominated the market, Google will need to come in with strong sound, controls and features to put a dent in the market.
UNBOXING:
The box is very easy to open. Two pull/rip tabs is all it takes to get inside the box. All the packaging is paper, which is nice to see compared to a lot of plastic found in other packages. Inside you’ll find the Pixel Buds Pro, a small cylindrical container which houses two extra pairs of different size ear tips, and the safety + instruction manuals.
A charging cable is not included, which seems to be more commonplace these days.
BUILD:
The case is made of a soft touch smooth plastic. It’s reminiscent of the kind of smooth pebble you might use to skip rocks at a lake or something—a very satisfying feeling in the hand. However, this does mean it’s pretty slippery. I’m not yet sure if finger oils will wear it down, but you can always get a case if you want to protect it.
As for the actual buds, they are quite smooth with touch-sensitive controls on the exterior, a hall effect sensor to detect when they’re in your ears, and there are microphones for their ANC and Transparency modes.
Because of how slippery-smooth the case and earbuds are, I have found myself fumbling a few times while pulling the earbuds out. There isn’t really a good lip within the case to pull the earbuds out—especially if your hands are a bit soft. So I’d advise caution because you might find yourself dropping either the case or the earbuds, or both if you’re really unlucky. It’s likely that as you wear the earbuds, oils will collect on the earbuds and will exacerbate this issue. So I recommend cleaning them from time to time, as they do collect quite a bit of oils from your skin.
COMFORT:
I’ll start out with this—comfort is different than “fit”. I do find the Pixel Buds Pro to be comfortable. As I’ve been wearing them at home, at work, and during my public transit commute, I haven’t felt like they were pestering my ears. So I gotta give credit where credit is due.
However, the fit is not intuitively great. Unlike most earbuds I’ve tried, these require more rotating once the ear tips are secured into the ear canal. I’ve been using the smallest ear tips and I find that I have to jostle them into place to get them feeling secure. There are Comply foam tips for the Pixel Buds Pro, and I may certainly get them, as they’ve been fantastic for fitment with my AirPods Pro.
I think a lot of people will likely give up on these pretty quickly because their weight distribution is rather top-heavy and will be a bit more prone to falling out if you don’t manage to figure out how to get a good fit.
But once I got a good fit, excessive head movement did not unsecure the Pixel Buds Pro from my ears, which is great.
SETUP:
The first thing to note here is that there is a firmware update that should be applied for best performance, and this can only be done from a device running Android. So if you’re an iPhone user, you will need to find an Android device to perform the update from.
Simply open the lid of the case, press and hold the button on the rear of the case, and the front LED will blink to indicate it’s in pairing mode. Once you pair with your device, you may be prompted to download the Google Pixel Buds app. If not, you can download the app from the Play Store.
You can run through the setup where it will teach you of all the features of the Pixel Buds Pro, and it may present a firmware update afterward. If it does not, I found that the app provided the option the next time I pulled the buds out of their case. At the time of writing, I am on firmware 120+release_2.12_signed for both the buds and the case.
FEATURES:
The basic features of the Pixel Buds Pro are Active Noise Cancellation (ANC), Transparency Mode, touch sensitive controls, multipoint audio and automatic switching, and a ton of Google Assistant integration. On top of that, you also have the USB-C charging on the case and Qi Wireless charging.
The swiping controls are a bit different than some other in-ear headphones I’ve experienced. To change volume, you swipe forward to increase and swipe back to decrease. Tapping once will pause/resume playback or pause/answer a call. Double-tapping will go to the next track forward or reject a call, and triple-tapping will go back to the previous track. All the aforementioned actions can be performed on both ear buds.
If you have an Android device, you can customize what touch & hold does on each earbud. For example, I’ve set my right earbud to toggle between ANC and Transparency modes, while holding my left earbud will engage Google Assistant where I can say a command and release my touch to finish the command. I do like this because it’s more deliberate, but you can also use the popular “Okay Google” or “Hey Google” voice activation keywords. You can also disable Google Assistant and voice activation altogether if you prefer.
One standout feature with Google Assistant was the translation mode. By telling Google “Be my translator”, it was able to interpret a foreign language like Japanese to English and vice-versa. It was most effective with shorter sentences as opposed to really long run-on sentences, as it waits for pauses before translating, but it does a pretty solid job.
There is also the Volume EQ which supposedly enhances bass and treble frequencies at lower volumes, but in my testing, I really had to listen very intently to notice a difference.
And lastly, there is the Find device feature to help you locate your Pixel Buds Pro.
SOUND:
The Pixel Buds Pro have a pretty balanced sound that I think many people will be happy with, but it’s not perfect. They have a competent bass presence that is especially enjoyable for bass-heavier music, but is still good for most music. I think if anything, I’ve listened to a few mixes where the vocalist sounded pushed further back in the mix than was intended. I did also notice that the treble is a bit hot in certain regions that cause snares or cymbal crashes to come across as a bit harsh—especially at louder volumes. I don’t think it’s a deal breaker for me, but this experience will be highly dependent on the kind of content you listen to and how it was mixed and mastered.
So while the sound isn’t a home run, I do think that they are capable of delivering a competent listening experience. Google says they are working on an 5-band EQ that should come in a software update later down the road. I’d really have liked to see a 5-band EQ, but hopefully this could make a difference in addressing people’s personal preferences.
ANC & TRANSPARENCY:
The ANC on the Pixel Buds Pro does a good job at blocking out droning noises. In my experience, it does a better job with lower-end noises. If you’re listening to music, you likely won’t notice any droning background noise, but intermittent noises like human speech will still be more noticeable by comparison. That being said, this is still the case with most ANC earbuds, so it’s not a knock on the Pixel Buds Pro—simply an observation.
The Transparency mode on the Pixel Buds Pro is also quite good. Like with any other wireless headphones, transparency mode doesn’t help make speech very comprehensible if you have audio playing at louder volumes, but at lower volumes, you should be able to hear what’s going on around you reasonably well. But this implementation doesn’t quite sound fully transparent, as there is a slight bit of muffling/damping in treble detail. Despite this, it is a very good transparency mode.
MIC:
The microphone is also unsurprisingly competent under good conditions. If you’re under harsh wind, the microphone will probably struggle to pick you out, but under quieter circumstances or with mild background noise/conversation, I think the Pixel Buds Pro do a good job at picking up your voice and delivering it with clarity for phone calls or online meetings without introducing too much distortion.
BATTERY:
In my limited testing, the battery life is also quite good. Google says the Pixel Buds Pro should last 7 hours with ANC on and 11 hours without. And with the charging case, they should get “up to” 31 hours of battery. While I can’t say I’ve managed to analyze the battery thoroughly in the limited time I’ve had them, I do feel confident in their estimates based on the hours I’ve spent with them.
CONCLUSION:
Overall, the Pixel Buds Pro are worth considering if you want an option with good battery life, decent ANC and Transparency modes, and delivers competent sound. There are absolutely other options that will deliver better sound, but they probably won’t be able to translate a conversation.
While I don’t think these are knock out in the park, I do think Google’s first implementation of a Flagship pair of truly wireless ANC earbuds is solid and they deserve some attention.
I would recommend this to a friend!


Share this review:
+5points
5of 5voted this as helpful.
Xephyroth's Review Comments
Xephyroth has not submitted comments on any reviews.
Xephyroth's Questions
Xephyroth has not submitted any questions.
Xephyroth's Answers

The sound bar for those with small spaces or minimalistic tendencies. The compact Yamaha SR-C20 sound bar fits easily in whatever space is available and can be wall-mounted for even more possibilities. Setup is easy with a simple connection to your TV while Bluetooth lets you stream wirelessly from your mobile devices.
What is the rated voltage for this product?
The sound bar for those with small spaces or minimalistic tendencies. The compact Yamaha SR-C20 sound bar fits easily in whatever space is available and can be wall-mounted for even more possibilities. Setup is easy with a simple connection to your TV while Bluetooth lets you stream wirelessly from your mobile devices.
Does this have the clear voice

Enhance your multimedia experience with this 15.6-inch Dell G7 gaming laptop. Its VR-ready NVIDIA GeForce GTX graphics board provides seamless, stunning images on the Full HD display, and its hexa-core Intel Core i7 processor and 8GB of RAM handle extended multitasking. Run applications efficiently with the 256B solid-state drive of this Dell G7 gaming laptop.
Has anyone successfully installed Ubuntu 16.04 LTS?
I have not, but that doesn't even matter because a quick google search of Ubuntu Certified Hardware shows that this model has officially been awarded the status of certified pre-install for Ubuntu. Which means Dell can sell it with Ubuntu pre-installed, and you can just as easily install it.
5 years, 10 months ago
by
Xephyroth
Complete your HT-Z9F surround system with this Sony rear speaker. Place it on a stand or shelf, or mount it to your wall for unobtrusive performance, and connect to other components wirelessly to keep unsightly cables out of your space. This Sony rear speaker's S-Master amp outputs 50W for powerful rear audio.
What is the length of the power cord for each speaker...do they use a cord or a wall wart?
These are wireless. They communicate wirelessly with the HT-Z9F soundbar. They only require power from your standard 2-prong wall outlet.
5 years, 11 months ago
by
Xephyroth
Bring the power of Google directly to your fingertips with the Google Pixel. A large 32GB of storage keep data secure, while unlimited cloud storage transfers data as needed, and it's completely automatic. The large 5-inch screen is protected by Corning Gorilla Glass 4 to ensure the Google Pixel remains scratch-free.
Hello, Is it sim free version? If it is not, will it be available to preorder?
Like all Verizon smartphones, this phone is unlocked. Luckily, Google has built in all the radio bands into this phone to allow it to be used on any carrier with proper LTE support—something that most Verizon-branded phones don't do. It is the same hardware in-and-out as the devices being sold on the Google Store. The only difference is that this Verizon version comes with a few Verizon apps (which can be uninstalled) and it also has a locked bootloader. That means that you cannot currently install custom ROMs or "root" your device. This device WILL work on other carriers, and I've tried it with only success.
7 years, 6 months ago
by
Xephyroth