Xephyroth's stats
- Review count105
- Helpfulness votes1,394
- First reviewMay 11, 2016
- Last reviewApril 30, 2024
- Featured reviews0
- Average rating4
Reviews comments
- Review comment count0
- Helpfulness votes0
- First review commentNone
- Last review commentNone
- Featured review comments0
Questions
- Question count0
- Helpfulness votes0
- First questionNone
- Last questionNone
- Featured questions0
- Answer count5
- Helpfulness votes8
- First answerOctober 23, 2016
- Last answerNovember 28, 2020
- Featured answers0
- Best answers1
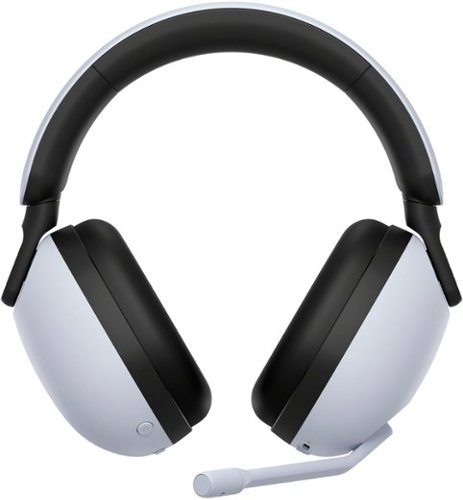
Sharpen your senses and prepare for your match. Our INZONE H9 headset immerses you in the zone with 360 Spatial Sound for Gaming and noise cancelling for supercharged hearing and super sharp reflexes. Take performance beyond your best, detecting enemies before they see you.
Customer Rating

3
Great ANC, Average Sound, Okay Software
on August 11, 2022
Posted by: Xephyroth
INTRO:
Sony is entering the expensive wireless gaming headset industry. And while some might know that Sony actually does make HiFi headphones and audio equipment, it’s important to note that none of that DNA really exists in the Sony INZONE H9. Rather, the H9 is more closely related to Sony’s mainstream consumer headphones like the WH-1000XM5 in terms of sound while retaining the PlayStation 5 aesthetic.
UNBOXING:
The unboxing experience is honestly barebones with a paper construction—which is better for the environment compared to plastic. In the box, you’ll find your USB-A to USB-C charging cable, a USB-A dongle and the H9 headset. Additionally, there are some INZONE stickers as well as the warranty, safety and reference guide.
BUILD:
Despite being quite lightweight, the H9 is rather large due to its ear cup design. The plastic of the ear cups and headband has a nice matte textured finish reminiscent of the PlayStation 5. And the LED indicators at the yokes are helpful for showing the connectivity status with 2.4GHz and Bluetooth. Although connectivity over 2.4GHz didn’t have the most impressive range, as I did experience it cutting out more than some other headsets I have.
The ear pads are using the same memory foam inner cushion and sweat-resistant exterior padding as the XM5, but the ear cups are deeper on the H9 to accommodate larger size ears. So the inspiration from the XM5 is very obvious, but they’ve made some smart adjustments to better suit a wider range of head sizes. I don’t think these ear pads are removable, but I think Sony’s hoping that their sweat resistant pads will make them easier to clean and that the pads are unlikely to wear out as fast.
Additionally, I do like that the H9 has tactile headband height adjustments with 10 fixed stops on each side, whereas the XM5 has smooth gliding height adjustments. If you’re the kind of person who wants the adjustments to be symmetrical on each side, the H9 has you covered. I only had to adjust to the 3rd or 4th height setting on each side for my average head. And the headband is flexible enough to stretch out for wider heads.
COMFORT:
Comfort of the H9 is pretty good, overall. I have been able to wear the H9 for hours at a time with occasional breaks. The ear cushions are soft, and I didn’t have issues with my ears getting particularly hot. The headband comfort in my experience is also good. This is usually a point of contention for me across different headphones and headsets, but I’m glad that the lightweight design paired with the thicker headband padding yields great comfort.
SETUP:
The setup process is very simple on PC and PS5. The USB-A dongle has a “PC” and “PS5” toggle switch that you can set before you plug it in to your respective device. PC users will additionally have the ability to download the INZONE Hub app for Windows which will give you access to sound settings, microphone settings and settings for ANC and Ambient sound modes.
Once your dongle is toggled to the correct device and plugged in, you should see the LED indicator on the dongle blink to let you know it is waiting for the headset to pair. Simply put the H9 on your head and power it on by holding the frontmost button on the right ear cup. You will hear a short, audible beep, and within 5 seconds, it will make another beep to indicate that it has been automatically paired with the dongle. And if you want to power off, simply hold the power button until you hear a longer beep.
FEATURES:
On the headset itself, the left ear cup has the microphone which mutes and makes a tactile click when you flip it up. Additionally, the left ear cup is home to the USB-C charging port, volume dial and the ANC/Off/Ambient sound toggle switch. The right earcup has the power button, bluetooth multifunction button, and the Game/Chat mixing buttons. It’s a little weird that there’s no physical microphone volume adjustment on the H9, but you can of course control it in software. Additionally, there is an LED indicator on both ear cups where the headband attaches to the ear cup.
One feature to briefly highlight is that you can use Bluetooth while simultaneously using the 2.4GHz wireless. In my testing, you can use the microphone on one device at a time, but can receive sound from a Bluetooth device and PC/PS5 simultaneously.
SOFTWARE:
For PS5 users, the H9 integration is plug and play. There’s no additional download, and everything works as you would expect. You can control volume, mix game and voice chat audio, toggle your ANC and transparency modes (although there will be no visual indicator for this on your PS5), and flipping the microphone up will mute it, which will also visibly indicate such on the PS5 as well as your DualSense controller.
On PC, you get the same feature set, although it’s certainly more involved since you will need to configure your default sound output device to the “Game” output while your communication apps like Discord will use the “Chat” output. If you don’t want to use the Game/Chat mixer on the H9, then I’d just set everything to use the “Game” output device.
When using the INZONE Hub on PC, you gain access to some more features not available on the PS5. The first thing you gain is the ability to set your own sound profiles and save them. Sony includes their EQ presets which are Flat, Bass Boost, Music/Video, and Custom. The Custom preset allows you to customize your own 10 band EQ. Unfortunately, these EQs do not persist from device to device, nor do they apply to audio transmitted over Bluetooth. There is no EQ for the microphone.
The INZONE Hub also gives you access to their Spatial Sound and personalization features which can have you take a picture of your ears to use a personalized sound profile when you have Spatial Sound enabled. You can also set Dynamic Range Control which is supposed to give you the option of making quiet sounds a bit louder which might help for certain games. I don’t personally use this.
Additionally, you’ll be able to control the sensitivity of ANC or Ambient Sound modes which you don’t have any control of directly on the H9. There’s also the ability to enable “Focus on Voice” during Ambient Sound mode to make voices more prominent.
The Hub also gives you access to control your microphone gain and sidetone monitoring. By default, Automatic Gain Control is enabled if you don’t want to manually set your microphone volume.
You can also adjust the Game/Chat balance and adjust basic settings like if and when it will automatically power off.
SOUND:
The stock sound signature of the H9 is not particularly special. It has the typical boomy overpowered bass and a fair midrange presentation. The treble overall is somewhat relaxed to my ears—which is likely a good thing for long gaming sessions, as you don’t want to fatigue your ears with bright treble.
I played a number of games on PC and PlayStation 5, and overall, I think the H9 does a good job at letting you just focus on the game. I honestly didn’t think about the fact that I was wearing a headset, and was just immersed in the games at hand. I can’t speak for competitive gaming, but I think for most games, the H9 presented audio in a reasonable way.
The Spatial Sound option in the INZONE Hub was not a good experience. It actually made everything sound more narrow to me—centralizing every sound into the center of my head, rather than creating a wide spatial effect.
For music, I really find this headphone’s stock sound signature to be uninspiring. The Bass Boost and Music/Video EQs in the INZONE hubs are also laughably bad. For those with more discerning ears, consider using the EQ to dial in a better frequency response to better suit your preferences. For my preferences, I toned down a bit of the bass and brightened up a bit of the treble to my liking. And honestly, it’s serviceable. It’s not going to make me excited to listen to music, but I think it will suit the needs of casual listeners.
ANC & AMBIENT:
The ANC borrows from the work Sony has been doing with their WH-1000 series headphones since 2016. And in my experience, the ANC is quite good. It’s not as powerful as the XM5 headphone, but it’s strong enough to hide the high pitched fan noise of a whiny laptop. So if you’re gaming in an environment where there are droning noises, the H9 will do a good job to help keep you immersed. I don’t personally find the ANC pressure to be overwhelming, but some people are more sensitive to this kind of feeling. I’d like to see Sony provide better customization for this on the PS5 for console gamers.
The Ambient sound mode is not a transparency mode like some other headsets, and even at max sensitivity, things do sound a bit muffled. When you’re playing music at louder volumes, it’s unlikely you’ll be able to hear a whole lot of what’s going on around you, but with less busy audio, you may be able to hear more going on in the environment.
MIC:
The microphone sounds reasonable for a wireless gaming headset. It doesn’t really carry much low-end bass, so its focus is really more on delivering clarity in the mid-range and treble. This means you won’t get a broadcast style sound, but on a positive note, people will be able to hear you clearly without issue.
BATTERY:
Sony claims that the battery life on the H9 can hit 32 hours with ANC off. If you’re listening at quieter volumes, you can certainly exceed this number. With ANC on, Sony claims you can achieve 20 hours of use. In my experience actually using the H9, I think their estimates are reasonable.
CONCLUSION:
For the price, I think the INZONE H9 delivers some of the best ANC in a wireless gaming headset, but it’s not special in terms of sound. If you want a wireless gaming headset that matches the PlayStation 5 aesthetic and brings on excellent ANC, this should be on your radar. But if you are a more discerning listener who wants a more versatile headset for both gaming and music, I don’t think this is a home run.
I would recommend this to a friend!


Share this review:
+1point
2of 3voted this as helpful.
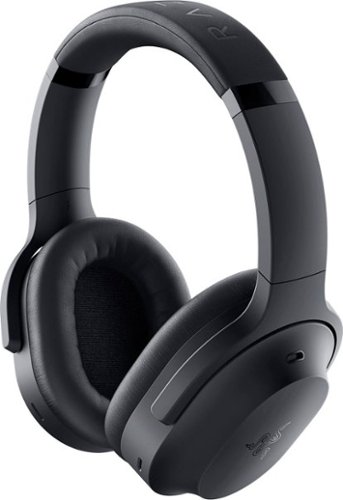
Meet the premier gaming headset to rule them all. Armed with hybrid ANC, THX AAA, and upgraded Razer TriForce Bio-cellulose drivers for flagship quality audio. Backed by an intelligent dual-wireless design for seamless switching between low-latency PC/console gaming and Bluetooth mobile use.
Customer Rating
3
Great Audio with a Mediocre Mic & Software
on August 5, 2022
Posted by: Xephyroth
INTRO:
I’m a gamer (on all modern platforms), but also an audiophile and headphone enthusiast. For me, audio is critically important to any gaming experience, but there’s often a desire for conveniences like 2.4GHz Wireless, Bluetooth, or Active Noise Cancellation. The Razer Barracuda Pro sets out to be your cross-platform (minus Xbox) gaming headset as well as your travel companion. And to my surprise, overall, I think it achieves a fair bit of that but not without compromise.
UNBOXING:
The box was easy to open, and inside you’ll find a nice carrying case. It’s relatively rigid as to keep the headset protected, but that does mean that it won’t flex a whole lot in your bag. It is among the largest cases I’ve had for portable headphones like this, but I don’t think it’s unreasonable either.
Inside the zipper case is the Barracuda Pro and a nice compartment with charging/data cables and 2.4GHz adapter. The wireless adapter uses USB-C male for versatile connectivity. The cables include a USB-A male to USB-C female cable for adapting and extending, as well as a USB-A to USB-C for charging the Barracuda Pro directly.
BUILD:
The build is decent on the Barracuda Pro. The build is plastic, but doesn’t feel like rubbish. However, as I displace the earcups away from each other to put the headset on my head, I do hear some light plastic creaking noises.
I also really like how the design is not as gamery as other Razer products. The logo is quite stealthy, and people would probably not notice that I was wearing a “gaming headset” unless they looked hard enough.
COMFORT:
I’ve been using the Barracuda Pro at home and at work to really put them through their paces. And I’m honestly pretty happy with how comfortable the Barracuda Pro is. While it does weigh in a bit heavier than some other headphones that I regularly use, I find that the clamping force is ample for my normal size head to get a good seal for isolation, and the headband doesn’t create any pressure points that cause me discomfort.
I have worn the Barracuda Pro for hours at a time, which I honestly didn’t expect I’d be able to do. I’ve used the most hyped up 2022 ANC headphones, and for my head, the Barracuda Pro’s ear pads and headband are surprisingly more comfortable. Not only that, but the Barracuda Pro has deeper pads which means your ears are less prone to touching the fabric that covers the speaker drivers. This aspect of comfort is honestly pretty noteworthy because I would actually consider taking these onto a flight.
SETUP & FIRMWARE UPDATE:
Setting up the Razer Barracuda Pro is pretty simple. Plug the USB-C dongle into your device, and hold the multifunction power button on the left earcup of the headset to power it on. If you hold it for longer while it powers on, you will enter pairing mode for the 2.4GHz HyperSpeed Wireless.
On a Windows machine, I was prompted to install Razer Synapse—which I reluctantly did. I ended up finding that there was a firmware update for the Barracuda Pro and its dongle which I did perform.
Prior to this firmware update, my unit exhibited a strange microphone feedback loop which caused the headphones to make a continuous high pitch sine wave noise while ANC was enabled with the headphones off your head. I’m amazed they shipped it like this as it’s definitely unacceptable behavior for a headphone these days. So it’s really important to stress that you should UPDATE THE FIRMWARE.
I also encountered a strange bug (at least in Windows 11) where over 2.4GHz, having the sound panel open makes the Barracuda Pro sound incredibly tinny and removes all the bass. The moment you close the sound panel, this problem goes away. PLEASE FIX THIS RAZER.
FEATURES:
On the headset, you have a pretty minimalistic control scheme, which I can appreciate.
On the left earcup, you have the microphone mute switch, a volume wheel, a multifunction button, and the USB-C charging port. The multifunction button can be held to power on/off the headset, pressed 1x to play/pause, pressed 2x quickly to skip forward a track, and pressed 3x quickly to go back to the previous track.
One unfortunate aspect of this headset is that because there is no boom microphone, you won’t have any LED indicator showing you when your microphone is muted. Unfortunately this means you might end up talking and not realize that your microphone is muted.
And while the Razer Synapse software does allow you to enable sidetone monitoring, it is software based rather than hardware based—so it appears to only work on Windows, but even worse is that the latency is too high for me to recommend it. You will likely end up stuttering if you use this. If you absolutely need to hear yourself, I would recommend the Ambient mode over the Razer Synapse sidetone monitoring since that is hardware based and won’t have any perceptible latency. But you’ll lose out on ANC as a result.
On the right earcup, you have a single button that when pressed toggles between ANC on, ANC off, and Ambient mode. When you press the button 2x quickly, this will toggle between 2.4GHz HyperSpeed wireless and Bluetooth. And when you hold it for several seconds, it will enter Bluetooth pairing mode.
Unlike some other headsets, you cannot use Bluetooth and 2.4GHz simultaneously. So you won’t be able to chat on Discord on your smartphone over Bluetooth while playing on PlayStation or Switch via 2.4GHz. And there’s no wired listening option on the Barracuda Pro, as there appears to be no data over USB-C and there’s no 3.5mm jack for traditional analog use.
SOFTWARE:
The Razer Synapse software experience is probably the worst part about the Barracuda Pro. Once you perform your firmware update, Synapse is largely optional. You get some basic EQ capabilities and control over the ANC strength and can switch between ANC on, ANC off, and Ambient modes. You can also enable/disable THX Spatial Audio, but this requires you to change your output device in Windows to a virtual THX Audio device.
You also get some microphone EQ, noise reduction and voice clarity options, but I honestly felt as though none of them were particularly great. The volume normalization helped make the microphone louder, but voice clarity seemed to mostly just cut bass out of your voice which can really suck the life out of your voice, so I would keep that setting to a minimum.
Once paired over Bluetooth, the mobile app allowed basic controls like how long it can remain idle before turning off, a 10-band EQ, ANC strength, microphone noise cancellation, a low latency mode, do-not-disturb settings to prevent calls from interrupting a mobile gaming session, and the ability to switch which Bluetooth device it is connected to. Overall, a basic software experience here, but honestly favorable over the experience that is Razer Synapse.
SOUND:
I think the Barracuda Pro’s stock sound signature is “balanced, and it’s my favorite way of listening. The Barracuda Pro isn’t overly bass heavy like a bunch of cheap gaming headsets, but it definitely has bass and can pack a punch. It does a decent job at presenting midrange and treble detail without presenting any sharp sibilance and also without being overly relaxed or veiled. It is honestly a surprise to me how much I actually think Razer is onto something with this stock sound. It is quite competent for music compared to many other headsets I’ve tried.
And while I’m not a hardcore competitive gamer, I do personally find that playing a variety of games on the Barracuda Pro to be quite enjoyable. As someone who normally plays games and music on high-end headphones, I find that the Barracuda Pro doesn’t make me grimace. It lets me listen without constantly criticizing my listening experience. And it’s worth mentioning that there’s a reasonably wide soundstage, so whether it’s music, cinematics or game sound effects, they will be presented with good stereo separation.
ANC & AMBIENT:
In terms of Active Noise Cancellation, I’m pretty impressed with what Razer has implemented with the Barracuda Pro. I don’t personally feel a lot of pressure with the Barracuda Pr; having the ANC set to the maximum via Synapse or the mobile app is effective enough for my needs.
The Ambient mode is also pretty good compared to some implementations I’ve heard from other companies. When I’m using it, I can hear myself quite well and don’t struggle to hear my environment.
MIC:
MIC:
Because the Barracuda Pro doesn’t have a boom microphone, you’re getting very mediocre microphone quality, which is definitely a bummer. The most popular Bluetooth ANC headphones on the market have better microphone quality compared to the Barracuda Pro, which is disappointing. But at the same time, the Barracuda Pro also functions as a gaming headset and is typically more affordable than those popular ANC headphones.
On both 2.4GHz and Bluetooth, I’d describe the sound as warm, muffled, and a bit distanced. It gets the job done, and I’ve heard much worse. But I’ve also heard much better from bluetooth headphones that came out 6 years ago.
BATTERY:
There’s honestly not much to say here other than it’s been fantastic. I’ve been using it through both 2.4GHz and Bluetooth. Razer claims 40 hours, and I’m definitely getting my 40 hours worth with ANC enabled. Very happy with the results here. You won’t have any issue getting through a week of use.
CONCLUSION:
Overall, I like the physical product, and I like the way it presents music and gaming audio. The noise cancellation is quite effective, but not industry-leading. The worst part about the Barracuda Pro is the fact that Razer Synapse is overly complex and buggy. And while the microphone is not great, it’s certainly serviceable and doesn’t sound like a distorted mess.
My initial impression was not-so-great first impressions because of Razer Synapse and other firmware bugs. But each day I used it on a machine without Synapse, the more I am impressed by its versatility and performance.
I would recommend this to a friend!


Share this review:
+7points
7of 7voted this as helpful.
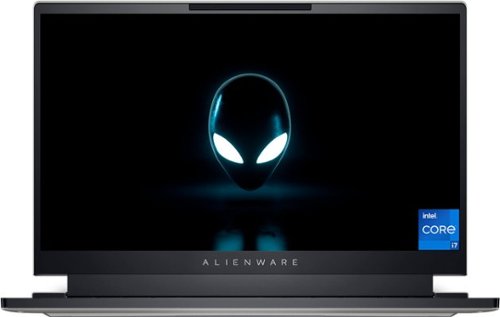
Introducing Alienware x14 R1 - our thinnest 14" gaming laptop features Type-C charging ports, exceptional battery life and a dual-torque hinge design that brings new levels of mobility to everything you do. Experience greater freedom and more productivity with high-performance 12th Gen Intel® Core™ processors. Enjoy smooth gameplay and optimized battery life with the first 14" gaming laptop in the world to offer NVIDIA®G-SYNC® and Advanced Optimus.
Customer Rating

4
Sleek, Thin and Powerful Doesn’t Come Cheap
on August 2, 2022
Posted by: Xephyroth
INTRO:
For years, gaming laptops have been getting larger and larger to pack more performance in larger thermal envelopes, but in more recent years, we’ve seen gaming laptops getting smaller, thinner and sleeker while still packing a ton of power. For me, I have had plenty of experience with 15”, 16” and 17” gaming laptops, but this Alienware x14 R1 is the first 14” gaming laptop I’ve had. And thus far, I absolutely see the appeal.
BUILD QUALITY:
The Alienware x14 R1 has one of the best builds I’ve experienced in a gaming laptop. It uses a metal chassis, and it looks even more fantastic in person compared to the pictures online. It’s incredibly slim and lightweight.
However, because of its hinge design, it has a longer chassis, so it might not work well with tighter-tolerance laptop cases.
Open the lid of the x14 and you’re greeted with a matte, soft semi-rubbery texture for the palm rest. Unlike the exterior, the interior is plastic, but they’re using a good plastic that is rigid and doesn’t cause keyboard deck flex.
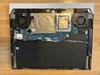
EXPANSION & UPGRADES:
The Alienware x14 R1 is pretty limited in terms of upgradability. All RAM is soldered, so it cannot be replaced by the average person. However, you can upgrade the storage—although it only has a single m.2 NVMe slot with support for up to a 2280 form factor SSD. Additionally, you can also upgrade the WiFi/Bluetooth chip on this unit, as it is a socket-removable chip. But at the time of writing, it comes with the very recent Intel AX211 module which supports 802.11ax WiFi 6E and Bluetooth 5.2, so you won’t have any issues with wireless connectivity on this laptop.
PORTS:
All the ports on the x14 are on the rear of the laptop. Some might not like this, but I personally do. On the back, you’ll find a USB 3.2 gen 2 Type-C port that also supports DisplayPort output, a 3.5mm headphone/combo jack, an HDMI 2.1 output, a USB 3.2 gen 1 Type-A port, a microSD card slot, and 2x Thunderbolt 4 ports with Power Delivery and DisplayPort.
I think it might have been nice to see an additional USB Type-A port on the rear as some folks may use a 2.4GHz wireless mouse and wireless gaming headset on the go. So those who are reliant on two ports for those peripherals may need to rely on a USB-C dongle to gain some additional USB Type-A ports. Personally, I would have rather had the additional USB-A port over the microSD card slot, but I can also see how some folks might want to use the microSD card for storing games or documents as opposed to the time it would take to clone and upgrade the SSD to a higher capacity drive.
DISPLAY:
The display on my x14 is the Sharp LQ140M1. It’s a 1080p@144Hz IPS display with fast response times and a decent brightness of around 400 nits. While I don’t have all the tools to measure accuracy, other outlets have reported that it has quite good accuracy out of the box, but can be further calibrated should someone be interested in video/photo editing on the go.
One odd thing I noticed out of the box was that there was some adaptive screen brightening based on the content being displayed. This meant that content that was meant to be dark ended up being brightened up. After some digging around, I determined that you can fix this by visiting the Intel Graphics Command Center app and going to System > Power and disabling “Display Power Savings”. The description seems counter-intuitive, but this change let me be in control of my display’s brightness again.
I do feel as though it would have been nice to see a 16:10 aspect ratio display on the x14, and perhaps the display could have been more pixel dense, as I’ve actually reduced the windows UI scaling from the default 150% to 125% so I can fit more elements on the screen. And a higher resolution display would allow text to shrink smaller while remaining crisp. Other 14” gaming laptops are doing it, so Dell should consider doing it, as well.
WEBCAM & MICROPHONE:
On a good starting note, the x14 sports the IR sensors needed for Windows Hello facial recognition which makes it fast and easy to login to your Windows account.
That being said, the webcam and microphone on the x14 are pretty mediocre, overall. I think it’s basically expected these days that most laptops have poor webcams, and Dell isn’t out to change that notion on this Alienware laptop.
For the best quality microphone audio, my recommendation is to (1) adjust the microphone volume so it’s not clipping, (2) disable the intelliGo Neptune app’s AI noise reduction and (3) install and use NVIDIA Broadcast for noise reduction.
Additionally, should you decide to use the webcam, NVIDIA Broadcast can also add a decent background blur, do background replacement or perform noise removal on your webcam. There may be some minor gaming performance loss when using this app, but it can make a bad webcam look a bit better when you have reasonable lighting conditions.
SPEAKERS & HEADPHONE:
The speakers are nothing special on the x14. They’re pretty tinny overall and don’t pack much bass character to them. You can use the Dolby Access app to customize how they sound, but this seems to also have an impact on the headphone jack, which I didn’t find to be preferable as I prefer a neutral experience without effects applied for my headphone output.
The headphone jack is certainly serviceable. For music, I set my Dolby settings to “custom” and disabled the surround virtualizer and volume leveler. Volume was quite loud for my Sennheiser HD 560S, Focal Clear and LCD2 Classic. This headphone jack is best used with lower impedance headphones, but will work for audiophiles in a pinch.
KEYBOARD:
The keyboard deck on the x14 has a rigid construction and each key has good key travel in my experience. Coming from the MacBook Pro as my daily work machine, I’m fairly happy with the typing experience on the x14. But because the palmrest is smaller, it does cause your lower palms to sit on the edges, but it helps that they’re not sharp, so I don’t really have too much to complain about for general mixed usage. But if you’re gaming on this keyboard, I do think a plush palm rest could be a good addition for longer gaming sessions.
Additionally, you can configure macros and the RGB for the keyboard and/or power button within the Alienware Command Center app.
PERFORMANCE:
Performance of the x14 is pretty impressive for such a slim form factor. While there are other 14” laptops out in the market that are throwing down some big performance numbers, none are quite as thin as the x14, and Alienware’s thermal design is remarkably good to be able to cool an Intel Core i7-12700H with 6 performance cores (12 threads) and 8 efficiency cores for a total of 20 threads.
Not only that, but this SKU sports the 60W RTX 3060 which can dynamically boost up to 85W. Since the x14 is limited to the 130W from the AC adapter, the CPU and GPU have to share power accordingly. Games that are more GPU-intensive and lighter on CPU might be able to pull more power towards the GPU, while games that are more CPU-intensive like real time strategy games may demand more from the CPU.
You can view my 3D Mark Time Spy run using stock settings here: https://www.3dmark.com/spy/29744353
I also played Control with DLSS on the integrated display at 1080p with DLSS and everything maxed out and yielded a smooth 60fps gameplay experience. I also played a mixture of other games like The Ascent, The Escape Academy and Embr and found that I was happy with the gaming experience I was getting for a 1080p display.
The x14 can stretch its legs a bit further to 1440p, but your mileage will certainly vary more depending on settings.
In terms of thermal performance, most non-benchmark workloads never went past 70C for the CPU. For the GPU, I usually saw averages below 80C in more demanding titles, and in other titles, even lower than 70C which was pretty incredible. Even so, it’s important to note that fan noise gets decently loud, so I’d keep it under the balanced thermal profile.
Honestly, the Alienware x14 is the kind of laptop for someone who wants a thinner, sleeker computer that can not only play games on the go, but also get some serious work done. With 20 logical threads, I could undoubtedly be running Docker containers and running a full stack web development workspace with the most limiting factor being the 16GB of RAM.
Additionally, the storage, while only 512GB in this model, does use a Samsung PM9A1 PCIe 4.0 drive to deliver strong performance with sequential speeds of 6769R / 4984W in CrystalDiskMark 8.
Additionally, the storage, while only 512GB in this model, does use a Samsung PM9A1 PCIe 4.0 drive to deliver strong performance with sequential speeds of 6769R / 4984W in CrystalDiskMark 8.
BATTERY:
For battery performance, I would say it’s mostly average or even less. Somewhere around 6-7 hours if you go out of your way to use the battery saver mode. For better or for worse, these Intel chips draw more power and put out more heat. It’s certainly disappointing considering that they put an 80.5 Whr battery into the x14.
Even during basic operations while on battery, the CPU is pulling a good bit of power. I would like to see the option for more aggressive power saving during battery operations, as I’m sure there will be folks who want their x14 to behave more like an ultrabook during portable use.
CONCLUSION:
Overall, I do feel as though Alienware has something unique here. They have an interesting aesthetic, sturdy construction, a very slim (albeit long) chassis, and a great thermal solution that yields great performance for how thin the chassis is. I do think there may be potential for power-related improvements for longer usage on battery, as this may be a dealbreaker for some. The real kicker here is that the competition for 14” gaming laptops is better than ever, but to deliver a premium 14” this slim is a feat. If you’re enamored by how thin and sleek the x14 is, just remember that it still might not fit into your bag because of its length. But if you’re looking for the best 14” with excellent price-to-performance, I do think there are better options that should be considered first.
I would recommend this to a friend!


Share this review:
+4points
4of 4voted this as helpful.
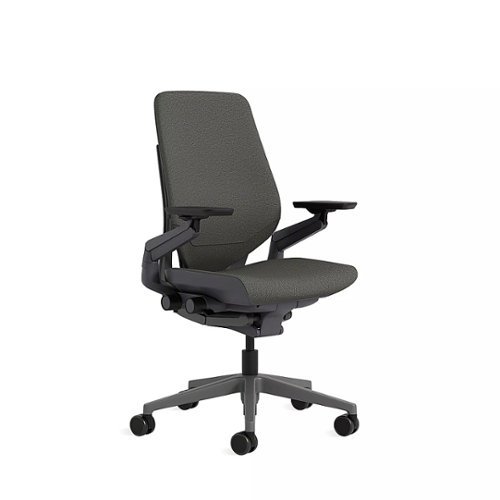
Perfect for the endurance sitter and technology power user, Gesture adapts to your every move, and every device you use, to provide ultimate, long-lasting comfort and support for your body. With the most inclusive fit of any chair in our portfolio, everyone feels comfortable sitting in Gesture. Our proprietary seat cushion design leverages built in air pockets that conform to your body and reduce pressure that comes from long term sitting. Gesture’s arms adjust through a full range of motion – 360 degrees – for support that follows you as you work with multiple tech devices and interfaces. Armrests are designed to remain parallel to your work surface as you move, so you can stay comfortably on task at every angle of recline. Gesture’s 3D LiveBack(TM) technology is designed to flex and mimic the natural movements of your spine as you change postures. The contoured shape of the back helps to align your spine in its natural S-shape. Features include adjustable seat depth, fully adjustable arms, adjustable lumbar, seat height adjustment, recline tension adjustment, 4 position recline lock, plastic outer shell-back, upholstered back and seat, and wheels for hard flooring. Arrives fully assembled and is backed by a 12-year warranty.
Customer Rating
4
Great Chair For Those Willing To Put In The Time
on July 23, 2022
Posted by: Xephyroth
INTRO:
I am a software developer. I don’t have the best back, but I often rotate between sitting and standing at my height-adjustable desk.
For over 4 years, I’ve been using a generic mesh task chair that cost me $200. The seat was comfortable and breathable, and my arm rests had a fair amount of adjustability. So to migrate from an affordable task chair to a flagship chair like the Steelcase Gesture, you could imagine my excitement. And while overall I do like the Steelcase Gesture, you shouldn’t expect it to be perfect right out of the box. This chair is really meant for those who are committed to developing their seating posture, and that can take time.
UNBOXING & SETUP:
I had the Gesture shipped to my house, and it came in a 34x27x21 inch box. It was a little unwieldy for me, but I was able to get a grasp on it and bring it into my home.
Opening the box, the chair was separated into 3 separate pieces—the wheelbase (with wheels assembled), the seat, and the pneumatic cylinder to connect the two.
The easiest way to set up the chair is perhaps to connect the pneumatic cylinder to the wheelbase, then place the seat on its side or back, then connect the other side of the pneumatic cylinder to the seat. At that point, you’ll want to make sure you apply pressure to ensure both the seat and wheelbase are connected.
This took me only about a minute or so to assemble.
BUILD:
In terms of build, the Gesture is well-made. Although it is plastic like most chairs, the rigidity of the plastic is quite good. It’s not rickety like cheaper chairs, and the control mechanisms instill confidence in their build. The fabric is also well-knit without any rips or tears in the seams.
ADJUSTMENTS:
The Gesture has the most number of adjustments I’ve seen on an office chair.
Like all pneumatic chairs these days, you have the height adjustment which can be done simply by adjusting your pressure on the seat and pressing/pulling on the height lever on the front-most knob on the right of the chair.
You can also adjust the seat forward and backward by rotating the front-most knob, and you can even do it while seated. So there’s no need to stand up to adjust the seat.
Additionally, the backrest can be adjusted via the other knob on the right of the chair. Rotating the knob can adjust the tension required to move the backrest backwards, which is very helpful if you want to sit in an upright 90 degree position, or laxen it up to make it easier to lean back in the chair. This knob also has an adjustable tilt lock that can prevent the backrest from moving beyond a certain point. However, one downside about this mechanism is that the backrest cannot be locked into a specific position—it always returns to a 90 degree upright position when you’re not applying force to lean it backwards. So if you’re used to leaning back into a specific position, the Gesture will not help you do that, and it caught me off guard.
There is also a lumbar adjustment slider on the sides of the backrest that can help provide some rigidity, although it doesn’t have the ability to adjust how much rigidity you want to apply at any given position.
Lastly, the arms and armrests are probably one of the best features about this chair. The arms can be lifted up and down, they can swivel inward or outward, and the armrests can slide forward and backward as well as rotate, giving you a lot of options to suit your posture.
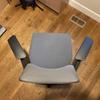
COMFORT:
In terms of comfort, I think the Steelcase Gesture is only as good as you can make it. It provides many of the adjustments to create a comfortable seating position, but it doesn’t inherently tell you what those might be. So you really have to dial in each of those parameters and spend some time doing trial and error to achieve good results.
While I don’t feel as though I had issues with the seat, my first hour sitting in the chair was not that great for my lower back. And this is really because of the point I just mentioned—you need to find what works for you, and that can take time.
As I’ve slowly made more and more adjustments, I’ve begun to find better typing posture thanks to the flexibility of the armrests. And my lower back discomfort has begun to diminish as I’ve worked towards determining what posture is most comfortable for my body.
I’ve had experiences where I tried a chair at a store for a limited time, then brought it home to realize that the short-term usage was really not enough to help make a good judgment call. But a chair with as much adjustability as the Steelcase Gesture is likely to be a more confident pick when you bring it home. However, you’ll still need to put in the time to find the best posture for you.
CONCLUSION:
I’ve used the Gesture for long hours of mixed use (14+ hours) at my desk for work and even gaming and felt quite comfortable in it, overall. But I didn’t come away with the impression that it’s a life-changing chair. People tend to hype up these expensive flagship chairs or say that they “swear by x chair”.
But there’s really a lot of companies making well-designed ergonomic chairs, and I don’t think the Steelcase Gesture is necessarily designed for ergonomics as much as it is designed to facilitate different postures—even poor postures. I think many people can appreciate the versatility that the Gesture provides, and if you need a chair where different people are going to sit, it’s nice to choose a chair that can fit the needs of many different body types.
So while I think this is a great chair for the right person, it has gotten significantly more expensive over the past several years while competition has become more fierce. So while this is undoubtedly a great chair with a 12-year warranty, I do think it’s at least worth considering other brands before looking to pay this very high price.
I would recommend this to a friend!


Share this review:
+4points
4of 4voted this as helpful.
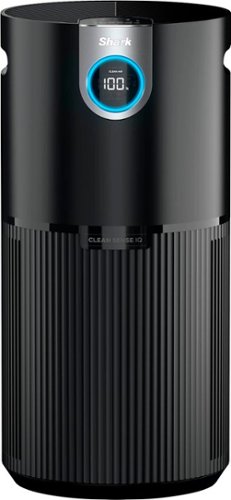
The Shark Air Purifier uses Pure Air Microforce to deliver fast, powerful, and quiet purification. Clean Sense IQ senses air quality & auto-adjusts to improve air quality and report results in real time. A HEPA filter captures 99.98% of airborne particles like allergens*, dust, and dander (based on IEST-RP-CC007.3, 0.1-0.2 microns). Cleans up to 1200 square feet.
Customer Rating
4
Auto-Sensing Air Purifier for Large Spaces
on June 20, 2022
Posted by: Xephyroth
INTRO:
The Shark Air Purifier MAX with True HEPA (HP202) sets out to be an intelligent air purifier that can self-manage keeping the air clean within a 1200 sq foot area.
UNBOXING & SETUP:
When you first open the box and remove the first piece of paper egg carton protection, you’ll find the Shark HP202 Air Purifier and a getting started guide. Upon lifting the HP202 of the box, you’ll need to gently turn it upside down, remove a couple peels and remove the bottom door to access the HEPA filter. You’ll need to remove the plastic wrap around the HEPA filter, then reinsert it and securely close the bottom door. Once that is done, you can flip the HP202 upright and plug it into the wall.
One discrepancy I do want to mention is that manuals from Shark indicate there is some sort of Remote Control that can be used with the HP202, but no remote control was provided in the box or advertised from the outside packaging. I think a remote would be a great addition, so it’s disappointing that it does not come with the HP202, and my own research on Shark’s website indicated that none of the remotes they have listed are compatible with the HP202.
BUILD:
In terms of build, the HP202 is a very plasticky build. It’s a bit disappointing considering the price you are paying, but at least it is lightweight and easy to transport from room to room. The downside here is that I’d be a bit more worried in regard to any incidents where it could potentially tip and fall over if you have very energetic pets or children who accidentally knock it over. So I advise caution in terms of where you place the Shark Air Purifier MAX within your room.
Additionally, there is no pre-filter which means larger particles like hair and dust will be pulled into the HEPA filter and will more quickly reduce the lifespan of the filter. I suspect that this choice was to prevent obstructing the amount of air that could be pulled towards the filter so that they could achieve their 1200 sq ft rating. Adding a pre-filter would cause a change in pressure and would likely reduce airflow.
CONTROLS:
Upon plugging it in for the first time, the power button light will turn on so you can see where to press to turn it on. Pressing and holding the capacitive power button for a few seconds, the system will turn on and the front display will light up and the control panel on the top will illuminate all of its various capacitive controls.
On the capacitive control panel you’ll find the fan control, an info button to toggle between various air quality stats on the front display, a brightness control, a timer for running the purifier between 1 and 12 hours, a button to show the filter lifespan, and a child lock to prevent accidental touches during operation. Every time you press one of the buttons on the control panel, it makes a chime noise, but you can disable that by pressing and holding the info button and the child lock button together for a few seconds.
In terms of things that Shark could improve upon, I think being able to automatically cycle between the PM1.0, PM 2.5, PM 10, % Clean Air and Time to Clean views during operation might be helpful. That way, at any given time, you might be able to take a glance across the room and see how it’s performing. Since there is no remote control as of writing this review, it is a bit more cumbersome to have to walk up to the HP202 just to cycle through its stats.
PERFORMANCE:
By default, Shark recommends using the Auto/Eco mode as it will sense when air quality decreases and will adjust the fan speed to pull in the air to purify it. Once the Shark reaches 100% clean mode for 10 minutes, the purifier will enter eco mode where it will wait for the air quality to decrease before ramping up the fans.
During operation at the lowest fan level (1), the fan is very quiet. When my central air is running in my house, I cannot hear the HP202 running unless I am within 1-3 feet of it. When there are no other surrounding noises, the fan is a whisper.
On fan level 2, the fan is certainly more audible, but still more of a relaxing noise. That being said, level 3 and 4 are much more audible and are more necessary for scenarios where the air quality is going to be below average such as high-heat cooking.
While I cannot objectively measure how well the Shark Air Purifier MAX performs, I do think it makes sense that it is marketed towards a larger 1200 sq ft room, as it does have a reasonably large fan and moves quite a bit of air.
While I wouldn’t trust it to dispel larger puffs of dust, I do think that this is great for cleaning up smoke, pet odors and cooking odors.
CONCLUSION:
The Shark Air Purifier MAX with True HEPA is not the most sophisticated air purifier on the market, but its goal is to focus on cleaning the air in a large room rather than being the smartest air purifier on the market. While it lacks a smartphone app or an included remote control, it isn’t inherently necessary if you leave it in Auto mode so that it can turn on as it sees fit. Operating it is very easy, and it appears to do a decent job at cleaning the air in larger rooms. Compared to many other 1200 sq ft air purifiers, Shark is asking for a much lower price, but also fewer features. So if you’re after something that gets the job done without a ton of bells and whistles, the Shark Air Purifier MAX may be worth considering.
I would recommend this to a friend!


Share this review:
+11points
11of 11voted this as helpful.
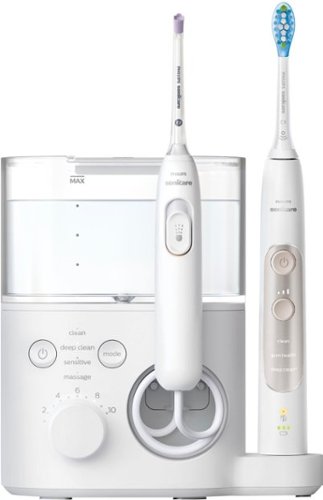
Discover the power of X! The new Philips Sonicare Power Flosser creates an X-shaped stream of water that reaches deep between teeth for a gentle, thorough clean. This X-shaped water stream, known as Quad-Stream technology, covers more surface area for a faster, deeper clean versus manual floss. Because of Quad-Stream technology, Philips Sonicare Power Flosser enables you to improve your gum health by 50% in just 1 minute per day!
Customer Rating
3
Great for Dental Hygiene, But also Overpriced.
on April 25, 2022
Posted by: Xephyroth
from Denver, CO
UNBOXING:
The unboxing experience of the Sonicare Power Flosser & Toothbrush System is pretty straightforward. In the box, you receive the Power Flosser machine and removable reservoir, 3 flossing nozzles plus a nozzle case; the toothbrush plus brush head, and travel case, and also a travel charger.
There are also two manuals—one for the flosser and one for the toothbrush. I do recommend going through some of the details, as it explains some functionality that you might not otherwise realize if you skip the manual.
BUILD:
Overall, it’s a very plastic build, but that’s to be expected. The flosser is lightweight in the hand and while it’s permanently attached to the system, the tubing easily retracts into place, so you won’t be hassled with the cleanup.
The water reservoir is easily lifted up without any sort of latching mechanism, and the reservoir door swings up from the top so you can refill the reservoir with ease. I found this to be very easy to work with. You just want to take care to hold the reservoir at the base rather than near the reservoir door so that you don’t accidentally lose grip and spill water everywhere.
The pressure level knob on the flossing system has a very gentle clicking feedback when you turn it in order to indicate changes to the pressure level. The Power and Mode buttons, however, are a bit annoying to press because the system doesn’t quite weigh enough to prevent it from sliding across the counter while you press the buttons. So more often, I find myself using my thumb to press the buttons while wrapping my fingers around the flosser for support. This is such a nit-pick thing, but something at least worth noting for Philips to improve upon—whether it means using capacitive buttons or adding more friction at the base so the whole thing doesn’t slide across your sink countertop.
The toothbrush certainly weighs more than the flosser, but was comfortable in the hand, the buttons were easy to press, and it was easy to attach/detach brush heads. And I certainly like that it can be charged by simply dropping it on the Power Flosser’s dedicated charging station as well as the basic travel charger.
FLOSSER:
Starting with the Power Flosser, you have 4 different flossing modes—clean, deep clean, sensitive and massage.
Clean mode pushes water out in rapid succession like a machine gun, while Deep Clean mode starts gentler and ramps up to a peak then abruptly starts over from gentle and ramps up again. This makes it sort of confusing as to why the more brutal Clean mode is not called “Deep Clean”. If I had to guess, Philips might have found that people were more attracted to the name “Deep Clean”, but didn’t want to associate their most brutal mode with the one that people would likely use the most, as this could yield negative results if people found it to be too painful. Whatever the reasoning is, between those two I think the “Deep Clean” mode is probably more comfortable mode at higher pressure levels, while the normal “Clean” mode may yield discomfort at high pressure levels. Your mileage may vary based on the condition of your teeth and gums.
Sensitive is much more like Deep Clean, but it actually oscillates by starting gently then ramping up to its peak, then ramping back down to gentle pressure, and repeats that cycle. Massage mode is more like the Clean mode, but switches between a high pressure blast and a lower pressure blast but in a consistent, rapid succession.
Realistically, I think you’ll find one or two you like and generally stick with them. Overall, I think these modes are really just a matter of preference towards comfort.
Additionally, there are 3 nozzles included which can spray in multiple directions. I’m honestly not sure how necessary this is, as the standard single-direction nozzle can provide the highest pressure for a deeper clean. As long as you are decently thorough, I think that is probably all that is necessary.
Compared to conventional flossing, I do think this does a good job at being convenient and accessible. I recently visited my dentist who told me I should floss more. So I started flossing more with traditional floss and floss picks, but found it somewhat difficult in terms of reach. Not only that, but it was also a more time-consuming activity, which I think detracts a lot of people from flossing on a daily basis.
Interestingly, studies have shown that most people don’t have great flossing techniques. Experts believe that a good flossing technique should be more effective than a waterpik solution, but on average, those who use a waterpik end up removing 17% more plaque than those who only use traditional floss. So while experts might not recommend a waterpik solution to be a pure substitute for traditional flossing, it does appear to be more effective on average because it’s easier to do. And in my pragmatic opinion, having a convenient way of flossing daily is better than not flossing at all.
Overall, I did find the Power Flosser to be quite effective for me. I do have a very mild case of gingivitis around a few specific teeth, so I have been adding flossing to my daily regimen to help reduce plaque and inflammation. While it’s too early to report any concrete results, I do feel confident that this should help reduce bleeding over time. But there is no denying that there is plenty of pressure from this Power Flosser.
TOOTHBRUSH:
The toothbrush is something that Philips has typically done quite well, but I feel as though the execution here could use a bit of work. Firstly, this toothbrush recommends Philips BrushSync toothbrush heads—which basically use unique RFID tags to help the toothbrush detect how long you have been using the head. That allows it to recommend that you change the head once it has worn out. This will typically be every 3 months, but if you brush more than 2x a day, you may find that it recommends a replacement sooner than 3 months. On the toothbrush itself is a small LED that will light up when the brush head needs to be replaced. If you’re the kind of person who switches between different models of brush heads, this usage data should be unique to each brush head.
The caveat to this is that these BrushSync-enabled heads are very expensive. Often between $30 and $40 for a 4-pack. That being said, you do not have to use BrushSync heads.
With that out of the way—the toothbrush has 3 modes—Clean, Gum Health and Deep Clean+. The Clean mode counts 3 minutes of brushing time at a normal brush head vibration level, Gum Health gives a gentler vibration level for 3 minutes, and Deep Clean gives 2 minutes at a more intense vibration level. In each mode, the toothbrush tries to make a somewhat detectable vibration pattern when it’s time to switch to the next section of your teeth/gums, but honestly, it’s just not good. The battery LED on the toothbrush also blinks when it’s time to switch, but this isn’t at all noticeable because it isn’t in your view while you’re brushing your teeth.
The best way to experience these modes is to connect the toothbrush via Bluetooth to the Sonicare smartphone app where you can view the number of times you’ve brushed each day, the average amount of time you’ve brushed per day, and also get feedback about how much pressure you should be applying.
During an actual brushing session, using the app can show you which section of your teeth to brush along with a total countdown timer. When a section is up, it’ll visually indicate to move onto the next session. And if you’re applying too much pressure, it’ll warn you to ease up. The toothbrush handle will also reduce the vibration intensity when you apply too much pressure. Honestly, a mobile app should not be needed for this to be a good user experience, but if we’re being honest, this could use some work. Philips could provide better vibration or auditory cues on the toothbrush to indicate when it is time to change the section of your teeth, and could also do a better job at warning users of applying too much pressure. If they can do that, then there’s not too much reason to use the mobile app other than to see stats on your brushing habits—which can certainly be valuable for some people.
Overall, I think the toothbrush is good, but you’re paying a premium for an experience that doesn’t quite live up to the expectation. However, because it does have the ability to function over Bluetooth, Philips does have the ability to update the firmware to improve on some of these elements. I updated the toothbrush out of the box, and my current experience is better with the smartphone app as opposed to standalone usage, but that really should not be the default.
CONCLUSION:
The Sonicare Power Flosser & Toothbrush System 7000 is decent, but it’s also quite expensive. In my opinion, I think you’re likely to get better value out of purchasing a cheaper Power Flosser 3000 and a cheaper Sonicare toothbrush. Much of the features in this system just aren’t ironed out in such a way that makes me feel like they’re imperative to your dental hygiene journey.
I want to be clear—I do think that these products are effective when it comes to your dental hygiene, but these extra features are somewhat half-baked and partly feel like solutions to problems that Philips created. So to me, it doesn’t seem right to charge so much for it.
Overall, for dental hygiene, I like it, but in terms of value, I’d only consider buying it on sale.
No, I would not recommend this to a friend.
Quality

4
Performance

5
Durability
5
Value

3
Ease of Use
4


Share this review:
+2points
2of 2voted this as helpful.

Unleash the power of the Samsung 980 PRO with Heatsink for next-level computing. With a PCIe® 4.0 NVMe™ interface, get up to 2x the data transfer rate of PCIe® 3.0¹ while remaining compatible with PCIe® 3.0. ¹Results are based on a comparison with Samsung PCIe® 3.0 NVMe SSDs and SATA SSDs.
Customer Rating
4
Great for PS5 / May Require Firmware Update
on January 17, 2022
Posted by: Xephyroth
from Denver, CO
If you’re looking for an SSD that’s ready to be installed into your PlayStation 5 without hassle or concern—then let me cut to the chase, the Samsung 980 Pro 1TB PCIe 4.0 NVMe SSD is a great option that will perform well on the PS5, but it is not inherently the best value option.
UNBOXING:
Inside the box, you’ll find minimal packaging with the SSD and Heatsink preinstalled for your convenience. Additionally, you’ll find an installation guide and warranty booklet included.
FIRMWARE UPDATE:
Prior to me setting up with the PS5, I was made aware that the Samsung 980 Pro had a firmware update that I should install because previous firmware versions yielded suboptimal performance.
In order to accomplish this, I had to install it into a m.2 slot on my computer motherboard and run the Samsung Magician application which found a firmware update for the drive. I ran the firmware update, restarted the computer, and verified the new version number (4B2QGXA7) and that no other updates were available. It should be noted that this is only possible on a Windows operating system.
If for some reason you do not have an additional slot to perform this firmware update on the SSD, you CANNOT use an external USB m.2 enclosure because it will not be recognized within Samsung Magician as the 980 Pro. So you may want to consider other avenues. I just don’t think this will be a good experience if you don’t have any experience doing this kind of thing.
SET UP WITH PS5:
To set up the 980 Pro with your PlayStation 5, you need a smaller precision screwdriver kit. I advise you to look at the instructions provided by Sony, but it was very easy to fully turn off the PS5, remove from power, remove the bottom white panel of the PS5, unscrew the SSD access bay, re-locate the mounting screw, install & screw in the SSD, then re-secure the access bay and reattach the panel.
Once that was done, I booted up the PS5 and it prompted me to format the SSD before I could continue. Once I formatted it, it automatically ran a speed test and achieved a read speed of 6,477 MB/s. Which certainly meets Sony’s minimum requirements.
HEATSINK:
In terms of the build, you have a compact heatsink that encases the SSD. Sandwiched between the heatsink and the SSD is thermal interface padding to help reduce any air gaps that would and to optimize for best thermal transfer from the actual flash memory chips and memory controller to the heatsink.
From what I can tell, the heatsink design should transfer heat well. I unfortunately don’t have any sort of thermal probe to verify the differences with the heatsink on and off, but there are a number of videos online demonstrating that the heatsink is recommended because these SSDs tend to produce a lot of heat especially if they’re under load. So different games will have different read & write demands from the SSD—with the more graphically intense games more often requiring much more data transfer to and from the SSD. Without this heatsink, the SSD may overheat and thus cause longer loading times, potential performance issues, and reduce overall lifespan of the SSD.
PERFORMANCE:
Sony recommends upgrading your PS5 with a PCIe 4.0 NVMe SSD with a read speed of 5,500MB/s or faster. Since Sony doesn’t specify anything about write speed since it’s less of an issue during gameplay. It seems as though drives with slower write speeds would still work as long as its read speed is near Sony’s recommended target.
Samsung rates the 980 Pro 1TB at 7,000 MB/s read and 5,000 MB/s write on a computer—which is enough for the PS5. In my testing, the PS5 yielded 6,477 MB/s read speed.
With all that being said, with my time playing games like Ratchet & Clank, Ghost of Tsushima, Final Fantasy VII Remake & Sackboy Adventure, I did not experience any noteworthy difference between the onboard SSD of the PS5 compared to the Samsung 980 Pro, which is a good thing. Once installed, it’s a seamless experience.
For the price that you’re paying, however, I do think many other great alternatives have released that will achieve the same functional results for less money—namely the XPG GAMMIX S70 Blade 1TB (the Blade variant uses a slim heatsink that fits in the SSD bay of the PS5) and the lesser PNY CS3040 1TB (you’ll want to purchase a different PS5-compatible heatsink because the one that is included on some variants is too tall). So just be sure to check your sale pricing and see what best fits your needs. That being said, there is always the possibility that firmware updates may still be required for any of these drives.
CONCLUSION:
Overall, I do think the Samsung 980 Pro 1TB is a good SSD expansion solution for the PlayStation 5. It exceeds the recommended specifications, and also makes installation easy with a compatible heatsink that will fit in the SSD bay, whereas some other SSDs have heatsinks that are too large to fit in the bay.
The one real kicker is that Samsung launched the 980 Pro with some major performance bugs that were ironed out via a firmware update. At this time, there is no guarantee that you will purchase a unit that is fully up-to-date, and the update process isn’t trivial if you aren’t relatively tech savvy, or don’t have the proper computer hardware running Windows.
Mobile Submission: False
I would recommend this to a friend!

Share this review:
+1point
1of 1voted this as helpful.

Introducing G303 Shroud Edition—the remaster of our iconic mouse. Featuring LIGHTSPEED, it delivers ultra-low latency and reliable performance. Helping Shroud and you take aim. With HERO 25K Sensor, Shroud’s G303 is built for precision and speed, without sacrificing energy. G303 Shroud Edition weighs 75 grams, made for low-sensitivity DPI and faster aiming. Designed in collaboration with Shroud, the new G303 perfectly matches his specs and includes our latest pro-grade technology.
Customer Rating
4
Logitech Functionality in a Niche Form Factor
on December 17, 2021
Posted by: Xephyroth
from Denver, CO
INTRO:
The Logitech G303 Shroud Edition gaming mouse is a collaboration between Logitech and the popular eSports gamer Shroud with the goal to bring back one of his favorite mice into the modern wireless era. With ergonomic refinements to fit Shroud’s hands and put the Lightspeed wireless technology and HERO 25K sensor into the G303, this mouse is set to be very lightweight, designed primarily for claw grip, and maintain a 1ms latency.
While I’ve not typically dabbled with claw grip mice in the past, I am not at all unfamiliar with Logitech mice. Thus far, I have owned and used regularly the following Logitech mice which are more palm-grip mice:
Logitech G500
Logitech G9x
Logitech G700s
MX Master
MX Master 2s
Logitech G703
Logitech G604
Logitech G9x
Logitech G700s
MX Master
MX Master 2s
Logitech G703
Logitech G604
That being said, I do not at all follow Shroud and advise that you not buy into any marketing hype—rather, you should rely on unbiased reviews and make informed decisions based on your personal preferences. This mouse was designed for Shroud, and his needs may not match your own.
Prior to using the G303 Shroud Edition, my mouse of choice for competitive FPS games was the Razer Viper Ultimate which I used in palm grip fashion.
UNBOXING:
Unboxing the G303 Shroud Edition, you are presented with the mouse itself, a USB-A (male) to USB-C (male) cable charging/sync cable, a USB-C (female) to USB-A (female) adapter, a USB-A wireless dongle, as well as a safety guide, setup guide and Logitech sticker. The adapter is for repurposing the charging/sync cable as an extension cable for your dongle.
Interestingly, Logitech has a label on the box indicating that this is a carbon neutral product. You can read more about that at CarbonNeutral.com should you be interested in learning more about what that really entails. The box is otherwise made out of recyclable material, and I only found one small piece of foam that keeps the G303 secure while in the box. Good to see companies like Logitech make efforts like this.
BUILD / CONSTRUCTION:
The G303 is designed to be quite lightweight. Not quite as light as the G Pro X Superlight, but on par with the Razer Viper Ultimate that I was using before the G303 Shroud Edition. Mine weighed in on a food-grade scale at 74g, which is within margin of error of the 75g that Logitech claims.
It’s largely made of a smooth matte plastic material, and the large feet make it easy to glide across a mouse pad or smooth desktop surface.
The power switch is on the bottom of the mouse and there is a storage tray for the dongle towards the rear of the mouse to ensure you don’t lose it when it’s stowed away for a rest or during travel.
You’ve got your standard two mouse buttons, two side buttons accessible by thumb, a scroll wheel with a middle button, and a DPI switch right behind it. Interestingly, there’s an RGB LED between the two primary mouse buttons that lets you know which of 4 DPI settings is currently toggled on. Each color represents a certain DPI setting, and this becomes more obvious in the G HUB software. When turning on the mouse, this LED also serves as the current battery status. It will show a solid LED for a few seconds before turning off—where green would be a high percentage and red would be low battery.
The G303 charges and synchronizes via USB-C on the front of the mouse and can fit a decent variety of USB-C cables without issue, but cables with larger terminating jackets will not work very well, since the input on the mouse is tucked into the body rather than being flush with the outside.
While I’m not sure which switches are being used in the G303, I did find them to be more tactile, with a bright clicking noise, rather than mushy and dark sounding. Thus far, they instill confidence as far as I’m concerned, but Logitech has also had a history of double-clicking switches, so we’ll have to see how this holds up over time. That being said, it comes with a 2-year limited warranty, and in my experience, Logitech has always held up on that.
COMFORT / GRIP:
If you prefer more of a textured grip, this might not be for you, but I personally did not find any issue keeping the mouse in a comfortable position. The sides of the mouse use a diffused semi-translucent plastic, which gives the sides a bit more texture without negatively impacting comfort. It’s a nice touch for just a bit more grip.
More interestingly, this mouse has a shorter height of 4.92” and depth of 1.57” which makes it a fair bit shallower. For me, I found that it sort of naturally positions itself tucked inward towards my palm and encourages a claw grip. When I first put it in my hand, it was sort of awkward, but as I started to use it, it began to feel natural to me. As someone who has average size hands and has more often used a palm grip, the G303 is a bit more compact and compressed—which isn’t a bad thing. Rather, it encourages my thumb to settle below the side buttons against the desk, with my thumb knuckle resting along the changing curvature of the mouse and my pinky and ring finger in a similar position on the other side. This way, your thumb and fingers are tucking the mouse inwards towards your palm, which sort of forces your index and middle fingers into a bit of an arch.
While I do find that holding it this way is fairly comfortable and delivers a fairly secure grip for me, I think the G303 requires a more specific grip to have comfortable access to the side buttons. So sometimes instead of resting my thumb under the buttons and against my desk, I rest my thumbs on the side buttons. Since the mouse is so light, it doesn’t feel like I’m losing a ton of confidence in my grip, but it’s not my preference to have to hold it this way.
I think that confidence in my grip when using side buttons just isn’t quite as good when compared to something like the Viper Ultimate or the G604. In my opinion, these buttons are not ergonomically placed for great reach on this mouse—at least not for me. But I do feel that with time I can get used to it.
BATTERY:
While I’ve not been able to test the full claims of the battery life, Logitech claims that the G303 Shroud Edition will yield 145 hours of battery life or 70 hours of constant motion—which is undoubtedly a lot. Strangely, their box says 140 hours of constant motion, but I’m guessing this was a misprint compared to their website.
Given that you can set the USB report rate to as low as 125Hz for casual use, you can likely extend the battery even further. Out of curiosity, I did this and found only a 5% loss of battery across probably 15-20 hours of use. Thankfully, you can use it while charging and you don’t need the dongle plugged in to use it wired.
Lastly, Logitech claims that 5 minutes of charge can yield you 2.5 hours of playtime.
SOFTWARE:
While not necessary, you can make adjustments using the Logitech G HUB software. Since this mouse is fairly minimalistic, the changes you will make will be in regards to polling rate, DPI, and any macros you want to set.
You can set DPI speeds from 100 to 25600 and USB report rates from 125Hz to 1000Hz to so that you can choose to balance latency and battery life.
CONCLUSION:
Overall, I think the G303 Shroud Edition is a niche mouse—not a bad one. Some will love it, and some will hate it. Personally, I think that if someone were to ask me what mouse to get for a claw grip, it’s the kind of mouse that I might suggest to someone who has sort of exhausted their options.
There are already some very popular, widely praised mice such as the G Pro Wireless, the G Pro X Superlight, as well as the Razer Viper Ultimate (which is also ambidextrous, might I add). These mice should be great for a lot of people to try, but those who are looking for something different might find some luck with the niche G303 Shroud Edition.
But with the competition available, I’m not convinced that the price is justified for most people.
Mobile Submission: False
No, I would not recommend this to a friend.


Share this review:
0points
1of 2voted this as helpful.
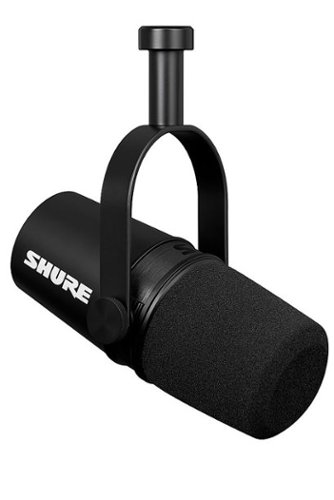
The Shure MV7X is a professional-quality XLR dynamic microphone, ideal for close mic applications that require vocal intelligibility with a balanced tone. Voice Isolation Technology ensures the microphone is laser-focused on your voice and does not capture any unwanted background noise to give you perfect recordings in imperfect rooms. The attractive and durable all-metal design features an adjustable yoke that can be mounted onto a variety of microphone stands forflexible placement options.
Customer Rating
4
A Good Broadcast Microphone with Caveats
on December 15, 2021
Posted by: Xephyroth
from Denver, CO
INTRO:
Nowadays with podcasts, broadcasting & streaming becoming more commonplace, Shure is entering the scene with an affordable podcast/broadcast microphone at the premium entry level with the MV7X—an XLR-only variant of the Shure MV7.
UNBOXING:
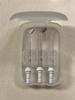
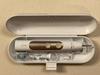
The unboxing experience for the MV7X is quite simple. You’ve got a basic cardboard box with a recyclable egg carton style insert that holds the MV7X. Maybe I would have liked to see a more protective insert with foam, but if the objective is to use more environmentally friendly materials, then I have no problem with that.
Overall, the packaging was protective enough. And after repackaging it and shaking the box around, it remained stationary without knocking around inside the box.
Other than that, it comes with a 3/8" Thread Adapter, warranty information and a safety guide.
BUILD:
The MV7X appears well built. Both the housing and the yoke mount are made of metal, and they feel like they could take a reasonable beating with impacting performance.
The foam windscreen screen is easy to remove and replace, but I do wish it were a bit more snug. It doesn’t rustle or make noise when used in a normal environment, but if you were actually using this in a very windy environment for some reason, I might be a bit concerned since any movement of the foam screen could be picked up by the microphone and could impact your audio recordings.
Overall, the MV7X is decently well-built and is aesthetically pleasing despite being smaller than microphones like the Shure SM7B or Samson Q9U.
MOUNTING HARDWARE:
The yoke mount hardware uses 5/8” threading which is common for most mic stands (although you can use the included adapter for 3/8" if needed). It’s rigid, sturdy and made of metal. It allows you to rotate it in either direction and once you figure out the direction you want to face it, you can tighten the hand screws to secure it in that position.
However, one minor headache of this mounting hardware is that the whole mic has to rotate in order to screw onto your stand, rather than just the base where the threading is. This becomes a problem for certain stands if the mounting point rotates and lacks grip. Unfortunately, this was the case for my Samson MBA38 boom arm (see pictures). This made it difficult to remove once it was mounted a bit too tight. If your microphone stand does not have this issue, then you need not be worried. But if it does, I advise you to not tighten all the way if you intend to unmount the microphone from your stand. I had to grab some vice grips and put a bit of damage on my stand to remove the MV7X. Whereas my Samson Q9U could be screwed on and off at the base without rotating the entire yoke mount.
Aside from that, you can remove the yoke mount via the hand screws and use a different mount if you please. However, there are small washers between each screw, and they are just a bit challenging to put back in once removed.
Aside from that, you can remove the yoke mount via the hand screws and use a different mount if you please. However, there are small washers between each screw, and they are just a bit challenging to put back in once removed.
Overall, the mounting hardware is decent, and this niche blip I ran into shouldn’t really impact the overall rating. Many other microphone mounting hardware systems would experience the exact same problem in my particular case, but I felt it was worth the warning.
MICROPHONE SENSITIVITY:
*All testing performed with the MOTU M2 audio interface
Let’s get into sound by talking about microphone sensitivity. Since dynamic microphones are passive, you typically need to speak closer to them in order for them to pick up a reasonable signal. This makes dynamic microphones typically better for noisy environments, since noises that are not closer to the microphone will be less likely to be captured in a recording. So less background noise will be captured and you’ll be less likely to introduce a feedback loop if there are live monitoring speakers nearby.
Shure says that the XLR sensitivity at minimum gain is -55dBV/Pa (1.78mV) at 1kHz, 1 Pa = 94dB SPL. Whereas the Samson Q9U over XLR is even less sensitive at -57 dBV/Pa and the Shure SM7B at -59dBV/Pa.
Just from my testing of the MV7X against the Q9U, the MV7X certainly has an advantage in terms of its sensitivity. While good etiquette for speaking into one of these microphones is typically to speak 4-6 inches away from the microphone, there are times where that is undesirable and in my experience, the MV7X does a good job alleviating that with some additional gain.
However, should you decide to speak closer to the microphone, you’ll be pleased to know that you’ll get excellent noise rejection with lower gain while still retaining a clean sound with plenty of volume.
Lastly, I was pleased to find that the noise floor is quite low even with the gain cranked to the max on my interface.
PLOSIVES:
When it comes to plosives, the MV7X doesn’t quite have the low-end boom that some other microphones have, but it does not do a good job rejecting plosives with just the included foam screen. You can further eliminate plosives by adding a pop filter in front of the microphone and/or speaking further away from the microphone, but out of the box, its plosive rejection is not very good.
One suggestion I have seen to solve this issue is to use a thicker windscreen foam such as the one used on the Shure SM7B. While using the SM7B foam would create an air gap, it would still put much more foam between your voice and the capsule to prevent much more of those unwanted plosive frequencies from reaching the capsule. I can confirm that this worked quite well for me.
SOUND QUALITY:
The tonality of the Shure MV7X is really midrange focused. While my Samson Q9U picks up more low-end, the MV7X really doesn’t aim for that. The MV7X is great for speech that does not need the use of the proximity effect. But if you’re really wanting to lean into that lower, bassier radio DJ voice, I’m not sure that the MV7X is the best microphone for the job. The closer you speak to the microphone, the more bass you will get, but the amount of plosives will be very distracting to your audience unless you address it with a thicker windscreen. Even so, I had to speak quite close to the microphone to achieve a reasonable proximity effect on the MV7X.
Aside from that, I personally did like the way that my voice sounded on the MV7X. It was very clear, as opposed to dull and warm. I think for my voice, something like the MV7X is a good choice. I don’t typically speak with much of a bassy resonance, so I tend not to lean in for proximity effect. So the MV7X delivered a clear tonality for me with an emphasis in the midrange and treble without sounding bright..
And of course, the best way to demonstrate this is to give you some sound tests! Please visit the soundcloud link here to hear speech samples:
https://soundcloud.com/xephyroth/sets/shure-mv7x-microphone-test/s-39sFnXvAUqy?si=be8747d24761462db13e25ca00a47e68
APPLICATION:
Shure has a few different marketing materials online showing the MV7X being used for singing as well as broadcast speech. I think that these are appropriate usages of this microphone, whereas I’m not sure I’d find it optimal for capturing an instrument, as you’d have to place the microphone relatively close to your instrument in order to pick up a clear signal.
If you’re a singer, this could potentially be a decent mic with passive noise rejection to avoid background noises from being captured in your recordings. This could work well for live studio sessions, but the plosives could be problematic with the default windscreen.
But for speech—whether for streaming, podcasting, broadcasting, I do think the MV7X is a good microphone and could serve very well for those not looking to pay for a much more expensive SM7B.
CONCLUSION:
Overall, I like the MV7X and think it is a good broadcast style microphone. While its plosive rejection is not very good with the default foam windscreen, replacing that windscreen can yield much better plosive rejection. The noise floor is low, and the sensitivity is decent for picking up speech within a relatively close proximity. While I don’t think Shure got everything right, I think that the MV7X could be worth it for someone who does not want to pay extra for hybrid XLR/USB microphones like the Shure MV7 or Samson Q9U. Those mics can potentially provide more flexibility and value compared to just MV7, but if you’re solely looking for XLR, the MV7X is a good microphone, but perhaps not the most versatile or feature rich.
Mobile Submission: False
I would recommend this to a friend!


Share this review:
+7points
7of 7voted this as helpful.
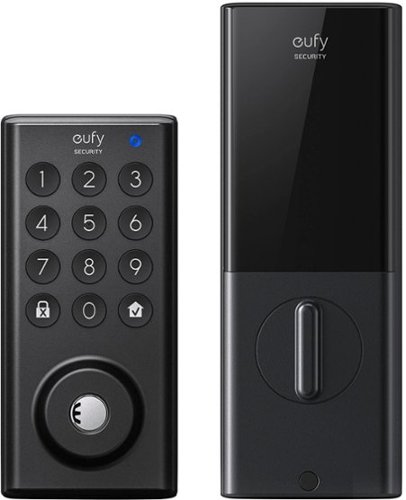
Feel safe and protected with eufySecurity Solo Smart Lock D20. Securely open your front door with built-in Wi-Fi to only let trusted friends and family enter your home when you allow it. And when you are outside your front door, connect with Bluetooth via the eufy Security app, so you don’t need to fumble for your keys. Solo Smart Lock is tough, too, with stainless steel construction that earned it a BMHA certification. Plus, the IPX3 weatherproof rating ensures it can endure wild temperature swings and heavy rain. Give yourself peace of mind with Solo Smart Lock, and you’ll always feel your home is secure.
Customer Rating

5
A Smart Lock That Can Be Smart or Simple
on November 1, 2021
Posted by: Xephyroth
from Denver, CO
INTRO:
The eufy Solo Smart Lock D20 aims to make your property security experience simple to setup, easy to operate, and most importantly make your property secure. And like many other eufy Security products on the market, eufy has done a good job at giving consumers options that make it easy to control who has access to your property.
UNBOXING:
The unboxing experience was largely straightforward, but I do think there were some confusing aspects.
Eufy has attempted to fuse their unboxing experience with their setup experience. Inside are smaller numbered boxes that indicate which step you are on in the setup process. That being said, I did find that I needed to remove all the boxes first and put them in order prior to starting the setup process, as some boxes were stacked behind others.
Included is the basic hardware for installation (excluding tools), 5x physical keys, and 4x AA alkaline batteries. In the long-term, it’d be wise to have two sets of rechargeable batteries—one set in use and another ready to go when the active batteries get low on charge.
SETUP:
While there is an included manual with setup instructions, the best experience would be to use the eufy Security app, since you’ll need to set it up with the app eventually. The app can be found on both the App Store and Play Store.
Once you have a eufy account, you can press “Add Device” and it’ll prompt you to scan the barcode on the back of the actual lock. Once you scan it, it’ll recognize the specific product you need a tutorial for and will guide you through the hardware installation process step-by-step as well as connecting your smart lock to Wi-Fi and pairing it to your account via the app.
Overall, this process was quite easy for a novice like myself who has had to install door locks only a handful of times in the past. That being said, if you do not know how to disassemble your current doorknob, you will need to consult other resources because eufy does not provide directions for disassembly since locks from different brands may be configured differently.
In total, it took me 20 minutes to disassemble my existing lock, assemble the new one, then a few more minutes to set up with the app. Those of you more familiar with door lock hardware will probably zip through this much faster than myself, but I wanted to make sure I knew exactly what I was doing. It could also take longer should you have zero experience with assembling & disassembling deadbolts.
MOBILE APP:
Once you’ve got the app setup, you’re given a reasonable amount of customization for a smart lock. Firstly, the home screen of the eufy Security app shows you the name of each smart lock (which you can customize) as well as the battery state and status of each lock—Locked or Unlocked. This makes it easy to see the status of your lock at a glance.
Selecting one of your locks within the app displays a simple swipe down to lock/unlock prompt, should you have a need to unlock or lock the door remotely for a guest or family member while you are away. Or perhaps you or someone else forgot to lock the door on the way out of the property—this gives you the opportunity to correct that mistake later on.
That being said, you can enable notifications which will inform you whenever the door is locked or unlocked, and you can opt-out of either notification should you find that to be unnecessary.
Additionally, you can share access to the lock via the app with family, friends, employees who also download the eufy app. While I haven’t personally done this, it’s good to know that the operation of the lock doesn’t have to be managed by one person.
You can also assign multiple 4-8 digit passcodes and give each one a name. For example, if you give each person in your circle a unique password, they will use their own passcode to enter your property and you can see the assigned name during the access logs. So you can know who unlocked the door as well as the time. You can remove these at any time should you decide to revoke access. You can also set a timeframe that this passcode will work in case you need to prevent entry after a certain time. I could see this being especially good for a small business that wants to ensure employees have access only during certain hours. This schedule only works for a single timeframe, but you can choose which days of the week it works as well as an optional expiration date.
Additionally, you can generate temporary passwords—good for creating single-use or unlimited-use random passcodes that can be used until a certain expiration date. This may be very useful for a vacation rental property manager who just wants a new passcode for each new visitor.
You also have the ability to set an auto-lock so that your door always locks itself should someone forget to lock the door. This could engage in various increments in as little as 10 seconds and up to 3 minutes.
There is also the option to use One-Touch locking so that you can hold the Lock/Cancel button to lock the door, rather than having to enter a full code to lock the door on the way out of the property. While convenient, this does mean the access logs will not be able to tell who left the property—should that be very important to you. Thankfully, you can choose which is more important to you.
The Solo Smart Lock D20 also has security features like Wrong-Try Protection which will allows you to set a lockdown time between 1min to 5min if too many wrong attempts are entered. You can set it to engage between 3 attempts and 10 attempts, with the default being a reasonable 5.
Scramble Passcode also allows you to enter some random digits before or after your actual passcode in case someone nearby might be looking. However, this won’t be particularly useful if someone catches the whole scramble from start to finish, as they can use the same scramble to get in. It would be wise of Eufy to develop a capability that prevents entry for any successful scrambles so that any individuals who saw the scrambled code could not use the same code to gain access. At which point, only someone who knows it's a scramble might be able to figure out the passcode via brute force—but even that would take time since too many wrong trys will lock them out from entering more. It might also be good to optionally log when a scramble is used and let the account holder know as a precaution. Security features like this might be much more desirable for properties in more densely populated areas or those subject to more crime.
You can also disable Wi-Fi which improves battery performance, but disables all remote capabilities. If you choose to disable Wi-Fi, you will have to use Bluetooth to connect to the lock and use the app. And as you should expect, even if your Wi-Fi connection goes down, you can still unlock the D20 via your passcodes or physical key.
Lastly, you can integrate the D20 with your eufy doorbell so that you can unlock the door while you’re viewing a stream of your doorbell camera.
DAILY OPERATION:
If you’ve set it up correctly, you shouldn’t encounter issues with the Solo Smart Lock D20. My advice is to ensure that the deadbolt has a very smooth glide when unlocking and locking. Some doors may have tighter tolerances than others for locking and unlocking, so if you’ve not made the necessary adjustments, you may encounter scenarios where the door cannot lock or unlock without you pushing or pulling at the door. This kind of behavior most often occurs when your deadbolt is sliding against the metal strike plate in the door frame while locking and unlocking.
Assuming you’ve installed it correctly, you shouldn’t have issues with locking & unlocking. I used the D20 for 1 full week prior to posting this review, and did not run into issues. While I have only experienced temperatures as low as 34F in that time, eufy claims the D20 should be able to withstand temperatures as low as -22F to 158F (i.e. -30C to 70C). Where I live, we haven’t seen temperatures nearly that low in many years, so I do feel safe as autumn temperatures decline and winter temperatures become the norm.
Given that this system runs on batteries, I’m sure some people would be worried about being locked out should the battery die and you don’t have access to bring a physical key. Thankfully, eufy has one more option to help you. Hidden at the bottom is a microUSB port that you can hook up to a powerbank to give it power so that you can unlock it. So those of you who don’t want to carry a key have another failsafe.
CONCLUSION:
The eufy Security Solo Smart Lock D20 has a lot to offer for consumers and small businesses. It’s developed on an established and growing platform and provides capabilities that cater to both the typical homeowner, a business owner, or even a vacation rental property manager. The guided setup is easy to follow and it’s surprisingly feature rich. Just from my 7 day period of using it, I’m definitely considering getting another one.
Good product experiences don’t make you think too much, and after using the eufy Security Solo Smart Lock D20 for a week, it’s really just a product that can seamlessly blend into your life. With all the customization it has, you can make it as smart or as simple as you please. But if you want smart, the D20 is a good bet.
Mobile Submission: False
I would recommend this to a friend!


Share this review:
+6points
6of 6voted this as helpful.
Xephyroth's Review Comments
Xephyroth has not submitted comments on any reviews.
Xephyroth's Questions
Xephyroth has not submitted any questions.
Xephyroth's Answers

The sound bar for those with small spaces or minimalistic tendencies. The compact Yamaha SR-C20 sound bar fits easily in whatever space is available and can be wall-mounted for even more possibilities. Setup is easy with a simple connection to your TV while Bluetooth lets you stream wirelessly from your mobile devices.
What is the rated voltage for this product?
The sound bar for those with small spaces or minimalistic tendencies. The compact Yamaha SR-C20 sound bar fits easily in whatever space is available and can be wall-mounted for even more possibilities. Setup is easy with a simple connection to your TV while Bluetooth lets you stream wirelessly from your mobile devices.
Does this have the clear voice

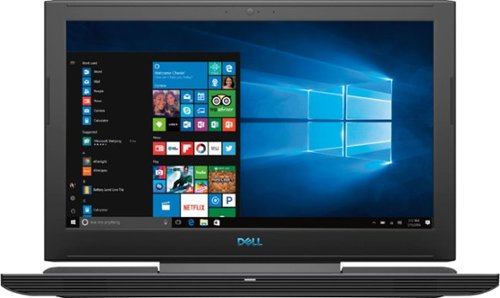
Enhance your multimedia experience with this 15.6-inch Dell G7 gaming laptop. Its VR-ready NVIDIA GeForce GTX graphics board provides seamless, stunning images on the Full HD display, and its hexa-core Intel Core i7 processor and 8GB of RAM handle extended multitasking. Run applications efficiently with the 256B solid-state drive of this Dell G7 gaming laptop.
Has anyone successfully installed Ubuntu 16.04 LTS?
I have not, but that doesn't even matter because a quick google search of Ubuntu Certified Hardware shows that this model has officially been awarded the status of certified pre-install for Ubuntu. Which means Dell can sell it with Ubuntu pre-installed, and you can just as easily install it.
5 years, 10 months ago
by
Xephyroth
Complete your HT-Z9F surround system with this Sony rear speaker. Place it on a stand or shelf, or mount it to your wall for unobtrusive performance, and connect to other components wirelessly to keep unsightly cables out of your space. This Sony rear speaker's S-Master amp outputs 50W for powerful rear audio.
What is the length of the power cord for each speaker...do they use a cord or a wall wart?
These are wireless. They communicate wirelessly with the HT-Z9F soundbar. They only require power from your standard 2-prong wall outlet.
5 years, 11 months ago
by
Xephyroth
Bring the power of Google directly to your fingertips with the Google Pixel. A large 32GB of storage keep data secure, while unlimited cloud storage transfers data as needed, and it's completely automatic. The large 5-inch screen is protected by Corning Gorilla Glass 4 to ensure the Google Pixel remains scratch-free.
Hello, Is it sim free version? If it is not, will it be available to preorder?
Like all Verizon smartphones, this phone is unlocked. Luckily, Google has built in all the radio bands into this phone to allow it to be used on any carrier with proper LTE support—something that most Verizon-branded phones don't do. It is the same hardware in-and-out as the devices being sold on the Google Store. The only difference is that this Verizon version comes with a few Verizon apps (which can be uninstalled) and it also has a locked bootloader. That means that you cannot currently install custom ROMs or "root" your device. This device WILL work on other carriers, and I've tried it with only success.
7 years, 6 months ago
by
Xephyroth