Xephyroth's stats
- Review count105
- Helpfulness votes1,394
- First reviewMay 11, 2016
- Last reviewApril 30, 2024
- Featured reviews0
- Average rating4
Reviews comments
- Review comment count0
- Helpfulness votes0
- First review commentNone
- Last review commentNone
- Featured review comments0
Questions
- Question count0
- Helpfulness votes0
- First questionNone
- Last questionNone
- Featured questions0
- Answer count5
- Helpfulness votes8
- First answerOctober 23, 2016
- Last answerNovember 28, 2020
- Featured answers0
- Best answers1
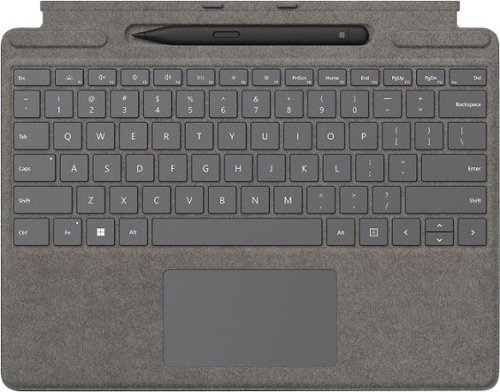
Next-level versatility comes in the perfect pair — Surface Slim Pen 2 stores securely and recharges in the premium keyboard, featuring a large glass touchpad and luxurious, Alcantara material covering. Ready to pair with Surface Pro 9, Surface Pro 8 and Surface Pro X.*
Customer Rating

4
Boost Your Surface Productivity
on October 20, 2021
Posted by: Xephyroth
from Denver, CO
INTRO:
The Surface Pro lineup of tablets aims to showcase Microsoft’s vision of portable computing, but to take your productivity to the next level, Microsoft has developed the Surface Pro Signature Keyboard as well as the Slim Pen 2. Compatible with the Surface Pro 8 as well as the Surface Pro X, these could be must-haves for anyone wanting to take their productivity on the go.
UNBOXING:
In a world where packaging is often incredibly thick and bulky, Microsoft has opted to make their packaging thin and simple, just like the products in the box. Inside this bundle, you’ll find both the Signature Keyboard and the Slim Pen 2, as well as a paper insert explaining how to use them.
In terms of materials
SETUP:
As the paper insert describes, the setup is simple. Attach the keyboard via the magnetic hinge to the bottom of your Surface tablet. As you bring them close together, they simply snap together with no real effort. I’ve had no issues connecting the keyboard to the tablet.
When using it, you’ll want to prop open your Surface tablet’s kickstand before or after snapping the keyboard on. And when you’re done, you can fold the surface over the keyboard like a normal laptop. Alternatively, you can also lay the tablet and keyboard completely flat on a table if you have a strange use-case for that.
When using it, you’ll want to prop open your Surface tablet’s kickstand before or after snapping the keyboard on. And when you’re done, you can fold the surface over the keyboard like a normal laptop. Alternatively, you can also lay the tablet and keyboard completely flat on a table if you have a strange use-case for that.
Meanwhile, the Slim Pen 2 can rest in the wireless charging tray located just above the keyboard deck. More interestingly, when you angle the keyboard at a slant for ergonomics, this can completely hide the Slim Pen 2 from view while you’re focused on keyboard tasks.
KEYBOARD:
One of the first things I was concerned about with the Signature Keyboard was the Alcantara texture. For those who weren’t aware (as I certainly wasn’t), Microsoft says Alcantara is a “unique and innovative material used in high-end luxury products to bring an unparalleled level of design and sophistication.” I don’t personally know that I care, and I’m sure that if a cheaper non-fabric option was present that delivered a functionally identical experience, I’d probably just buy that. Unfortunately, the Slim Pen 2 wireless charging tray is not available on the original Surface Pro keyboard. I advise you to research experiences from others who have used Alcantara keyboards on other Surface products for much longer than myself.
From what I understand, it can get discolored over time, and cleaning it will be more difficult compared to a traditional rubber, plastic or metal keyboard deck. So while I’ve yet to experience this discoloration in my very short time, I should also mention that I don’t typically put my laptop near food or use my laptop with dirty hands. My advice is that you’ll want to baby this keyboard if you want to keep it looking good. But that may also prove to be very challenging for some.
Moving on, I really like that this keyboard can be angled up slightly. It’s just a bit more comfortable, as opposed to typing on a completely flat surface. And while I wasn’t sure how quickly I’d catch on to the Signature Keyboard, I’m very pleased to say that I’ve had no learning curve issues. Most of the time, I’ve typed on mechanical keyboards and Apple’s Magic Keyboards, so this is the first time I’ve experienced a Surface keyboard. It’s definitely one of the best in the industry, in my experience.
The key spacing is perfectly to my liking. The keys aren’t too far apart, nor are they too crammed. They’re very reasonably spaced, and I can reach my typical speeds of 105+ wpm with very few mistakes and consistent pacing. In terms of key travel, I also feel it’s very good for a chiclet style keyboard. The Signature Keyboard has a nice physical feedback when you bottom out the keys, so you can type with confidence.
As for sound, this was clearly designed to be quiet, and it definitely does that very well. The sound is more emphatic in delivering a low-end thunk rather than a typical clicky chiclet sound. This is the kind of keyboard that won’t annoy people around you, which is great for environments where being quiet is absolutely necessary.
For those of you who spend time in darker environments, you’ll be glad to know that it does have backlit keys with 3 brightness levels as well as the option to turn off the backlighting, entirely.
Another feature I like is that simply tapping the Fn key will toggle the F-keys to be the primary actions over the multimedia keys. So those of you who use F-keys for hotkey functions won’t have to struggle to press Fn every single time. A small LED will light up on the Fn key when you want to use the F-keys, as well. When disabled, the multimedia keys become the default actions, so it’s nice that you have the freedom of choice without having to change a setting in software.
Lastly, it should be mentioned that this keyboard operates exclusively via the Surface Connect port on the bottom of your Surface tablet, so it cannot be used while detached from the tablet.
PEN:
While I haven’t spent nearly as much time with the Slim Pen 2, I will say that it can certainly be useful depending on how you use it. For handwriting to text recognition, I did find that after a short period of time, the handwriting recognition was pretty good, but is prone to some mistakes as both you and the software are acclimating to each other.
Drawing on the other hand is much more useful with the Slim Pen 2, whether it’s drawing diagrams using OneNote or doing a Whiteboard session, the Slim Pen 2 does a decent job at being responsive to user input.
However, there were times where my screen was a bit smudgy, and that caused friction while trying to draw using the pen, so I recommend having a clean display while using the Slim Pen 2.
I also like that it has a shortcut button that you can program to open apps based on a single click, double click, or press and hold. However, this button only works while Bluetooth is enabled on your Surface tablet, so bear that in mind.
The Slim Pen 2’s button end also functions as an eraser like a #2 pencil for the apps that support it. Without knowing this, I made a joking attempt to use the blunt end to erase some drawings in Microsoft Whiteboard, and to my surprise, it worked! This is the first time I’ve personally seen this implemented in a digital pen.
This all being said, the Slim Pen 2 still has that “plastic against glass” feeling. But there do exist some screen protectors that promise to provide a more paper-like experience for those who frequently use their tablets with a pen.
Even so, I found the Slim Pen 2 comfortable to hold, and for me it was best used with the Surface tablet set flat or with the kickstand nearly maxed out. But you may have different preferences.
And of course, the fact that it stays magnetically secure in the wireless charging tray within the Signature keyboard makes this combination more seamlessly integrated into your Surface experience. You don’t have to remember to charge it as long as you stow it away in the tray while the keyboard is connected to your Surface Pro tablet.
CONCLUSION:
I do think that if you are getting a Surface Pro 8 or Surface Pro X tablet and are looking to get both the keyboard and the pen for it, this hardware does a great job. The Signature keyboard is a joy to use, and the integration with the Slim Pen 2 makes it ready-to-use whenever you need to draw a diagram, do some photo editing or drawing, do some math, or draw out a plan for something even more grandiose.
Mobile Submission: False
I would recommend this to a friend!


Share this review:
+4points
4of 4voted this as helpful.
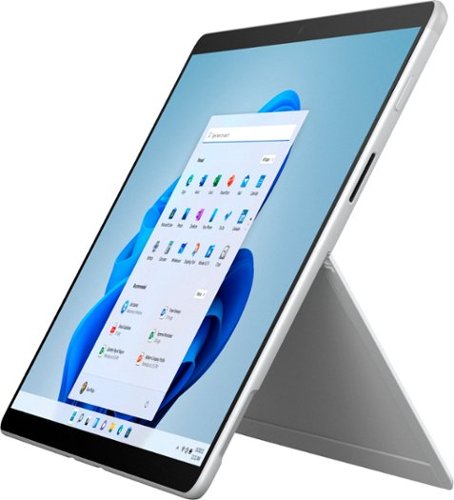
Meet the totally mobile Pro. Always with you, instantly ready, and designed to light up the best of Windows 11. Keep up anywhere, at any angle, with a detachable Keyboard² with built-in Slim Pen storage and charging³ — plus fast connectivity and all-day battery life, with optional Gigabit LTE.⁴
Customer Rating

3
High Price & Incompatible Software
on October 19, 2021
Posted by: Xephyroth
from Denver, CO
UNBOXING:
In the box is the Surface Pro X tablet as well as the proprietary 65W wall charger that charges the Surface Pro X via the Surface Connect power connector. Aside from that, you have a small manual/warranty booklet and nothing more.
BUILD & CONNECTIVITY:
The Surface Pro X is made with anodized aluminum. Holding it in the hand is comfortable, since the edges are round with a chamfer towards the rear of the tablet to give it a softer feeling rather than digging into your hands. While holding it in landscape mode, the volume buttons are found on the left edge on the upper side, with two USB-C ports just below which can be used for charging, data and USB-C docks. Please note that these are not Thunderbolt-enabled. On the right edge is the power/sleep button followed by the Surface Connect port for connecting to a compatible dock or wall charger. At the bottom edge is the Surface Keyboard port in case you choose to use the Signature Keyboard. Last but not least, the integrated kickstand is well-built with a defined rigidity that instills confidence and gives you a large degree of flexibility to use it at whatever angle works best for you.
DISPLAY:
The Surface Pro X uses a 13” touch screen display with a resolution of 2880x1920. This 3:2 aspect ratio is great for productivity and makes it easier to use the on-screen keyboard versus a wider 16:9 aspect ratio. The display has a max brightness of 450 nits making it great for both indoor and outdoor use, but the reflective nature of the display might make it a bit more challenging in the brightest conditions. It should also be mentioned that the display is a fixed 60Hz on this model, whereas the newer Surface Pro 8 has a more fluid 120Hz display.
I found that the display is quite responsive to touch and that the on-screen keyboard was even more usable like a physical keyboard when the kickstand is angled near its max. I wouldn’t want to use an on-screen keyboard like this, but it could be helpful in a jiffy.
AUDIO:
The speakers on the Surface Pro X are underwhelming to my ears. In 2021, it would have been nice if the Surface Pro X had any sort of tangible hardware refinements other than the new storage option, but Microsoft might be waiting until their next iteration with a new SoC to pursue a redesign. As a result, the front-firing speakers on the X are bright sounding, but lacking in the bass region. Meanwhile, the iPad Pro from 2018 has more balanced acoustics with better overall clarity. This isn’t to say the X is bad, but for the price you’re paying, it is disappointing.
That being said, I do feel as though the onboard microphones are decent. They do tend to have a higher noise floor, but the sound being recorded is very clear and would be good for conference calls.
CAMERA:
Among Windows tablets I’ve experienced, the Surface Pro X certainly has among the best of the cameras. On the front is a 5MP 1080p sensor. From my experience, it captures a clean sharp image that is great for video conferencing. It’s easily bested by modern smartphone selfie cameras, but among webcams present on other laptops and tablets, it does earn its recognition for getting this right. On top of that, Windows Hello facial recognition is available to log you in to your Microsoft accounts, which I found to be reliable and convenient versus typing a password or PIN code.
The 10MP rear camera is also available to use for capturing documents, whiteboard notes, etc. You can also capture up to 4K30fps content with this camera should you choose to. I think there are much better options these days from modern smartphones, but if your use-case necessitates this, I think it will satisfy basic video needs.
OPTIONAL ACCESSORIES:
As mentioned before, the Surface Pro X can be used with the Signature Keyboard and Slim Pen 2. While I will have a separate review on the Platinum variant of the keyboard and pen, I will say that these can really help you unlock more productivity-focused workloads out of your Surface Pro X. I prefer to use the X with the keyboard, especially. I wrote the entirety of this review on this very keyboard and found it a joy to use right away. I had no prior experience with the Surface line of keyboards, but I can say that I felt right at home coming from fancier mechanical keyboards and Apple’s newer Magic keyboards.
The Slim Pen 2 is quite responsive with writing and drawing software on the X. I especially like the shortcut button as well as being able to use an eraser like a traditional #2 pencil. It’s most comfortable when the X’s kickstand is propped back or when the X is laid out flat. I did find that the pen tip wouldn’t glide as well if the display had smudges or debris, so I do recommend making sure your display is clean when using the pen, as it may otherwise grip the screen unexpectedly.
WINDOWS 11:
Windows 11 has seemingly launched in a state where some things like Android apps are not yet available and there are still bugs to be ironed out, but overall, I wouldn’t call it a major leap from Windows 10, and in some ways, it’s improved, but in otherways, it’s a bit more cumbersome.
On the Surface Pro X, one thing that I noticed was that the 4-finger horizontal swipe gesture (used to switch between virtual desktops) was not a consistently fast user experience. In fact, most of the time it simply lagged behind compared to the competition. Whereas using the keyboard shortcut of Ctrl+Win+Left/Right Arrow was basically instant.
I believe that this is likely a software related issue, but it’s not something I have experienced on any other Windows 10 tablet or laptop.
I also don’t feel as though the user experience is cohesive for a tablet compared to Android or iPadOS. Paradigms that have now become ubiquitous in those platforms are very different in the Windows 11 environment. Windows 11 likes to think that its users are not tablet users, which causes a sort of cognitive dissonance that results in some strange user experiences for tablet users. Rather, Windows 11 is still truly a desktop operating system, and puts that experience at the forefront. Which makes the Surface Pro X better used as a traditional computer than as a tablet, in some regard.
That being said, one of the big issues with Windows 11 and the Surface Pro X is actually the fact that Windows 11 for ARM-based CPUs has compatibility issues with software developed for x86 processors like those from Intel and AMD. For example, I could not get the drivers for my Canon mf4880dw laser printer to install, so I simply cannot use my printer on my Surface Pro X. This is undoubtedly a big issue. There are no plug-n-play options for my printer, so that didn’t work as a fallback, and attempting to manually select the .INF file for my driver did not yield results.
In addition, some programs just perform sluggishly. For example, Discord’s x86 desktop app (which runs on Electron) was quite sluggish and caused audio/video glitches while the normal web browser app has worked without issue for me.
PERFORMANCE:
This Surface Pro X uses the SQ1, which is an 8-core Qualcomm ARM-based CPU co-designed by Microsoft. And to be frank, it’s nothing to be excited about compared to the competition. A big part of the performance issues plaguing the SQ1 may be the fact that ARM on Windows 11 is very new with a very low adoption rate. In the consumer space, Microsoft’s own Surface Pro X is about the only product that you’ll find that runs both an ARM-based CPU and Windows 11.
I feel like it’s more suitable to be a Chromebook than it is a Windows 11 computer. I could buy an iPad Air, Magic Keyboard & Apple Pen and have a more fluid user experience compared to the Surface Pro X.
If you want a content consumption device, this is far too much money and you can have a much better tablet experience with an iPad Pro for this price.
For productivity purposes, you will basically need the Signature keyboard, which is not included, and while the performance may be decent if the programs have been compiled for ARM on Windows, I do think that this is still just too expensive for okay levels of performance. You’re effectively paying a lot to be a beta tester, and that doesn’t sit well with me.
BATTERY:
In terms of battery life, I found that in 24 hours without any use, the Surface Pro X might lose 10% while in an idle sleep mode. This is certainly more battery loss than some other devices, but not bad for a Windows device with these size and performance constraints.
For daily use, the Surface Pro X can yield vastly different results depending on how you choose to use it. If you keep the display brightness low, you’ll be able to get more time on the battery, since that will be one of the most power-hungry aspects of this tablet.
Within a 3 hour period, I lost 50% battery due to 50% to 60% brightness. During that time, I was writing this review in Google Docs, I had Discord open in a separate browser window on a different virtual desktop, and a paused instance of YouTube Music on another virtual desktop. Most of the time, I was just focused on the doc.
So even with minimalistic usage like mine, the battery life won’t be setting records if you’re still running a high brightness. And trust me, 50% to 60% is decently bright.
Overall, the battery life is honestly mediocre when compared as a tablet, but is maybe more reasonable when assessed as a very thin laptop. Even so, I just find it hard to justify spending this much on something that clearly needs more work.
CONCLUSION:
I really wanted to be excited about the Surface Pro X. And maybe down the road, some software optimizations will be made that truly unlock the versatility of it. But if someone were asking me today if they should purchase the Surface Pro X, I would very much advise against it until the hardware and software become a more cohesive package and deliver a sensible user experience.
Mobile Submission: False
No, I would not recommend this to a friend.


Share this review:
+3points
3of 3voted this as helpful.
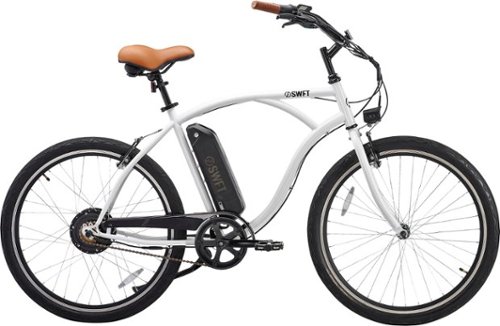
Your SWFT journey starts here. Wherever you’re headed, FLEET will get you there with style, safety, and a fresh design that’ll turn heads as you turn corners. Move ahead of the pack with a SWFT e-bike with a detachable, rechargeable battery. Multiple modes allow you to use pedal-assist or your throttle to propel you forward. With a 19.8 mph max speed, you can travel up to 37.2 miles on a single charge of your battery alone. A built-in monitor display indicates your battery output and speed. Let the journey begin.
Customer Rating
4
A Good Commuter E-Bike With Room for Improvement
on September 11, 2021
Posted by: Xephyroth
from Denver, CO
INTRO:
The Fleet e-bike from SWFT is one of their first entries into the e-bike scene. SWFT’s marketing seems to target a lifestyle/fashion-oriented demographic as opposed to those looking for pure utility (although their Volt e-bike seems to take on a more utilitarian aesthetic. The Fleet is one of SWFT’s first e-bike products, and while my time with it thus far has been limited, I do think SWFT has a good product that they can iterate on in the future.
UNBOXING:
The SWFT Fleet e-bike arrived partially disassembled in a box at my house and was pretty easy to carry into my house despite the weight since they had plastic straps wrapped around the box that I could use as carrying handles. That may just be for the parcel carrier since it was shipped to me, but I figured it might be worth mentioning since I had prepared to use a dolly but ended up not needing it.
After cutting the aforementioned plastic straps, access into the box from the top was pretty easy. Everything was packaged with foam around the frame to prevent it from scuffing during shipment, so everything arrived in good shape from my observation.
Inside the box you’ll have all the tools you need to get the job done, but I also used some of my own tools. That being said, the included tools come in a small baggie and can prove useful should you find yourself needing to make adjustments while out on a ride.
ASSEMBLY:
As a new bike owner, you will be responsible for some assembly of this bike, which is important for those such as myself who may be inexperienced with bicycle assembly.
You will be responsible for installing the handlebars into the frame (easy), installing the front wheel (medium difficulty due to required brake disassembly and adjustments), and installing the seat (easy). There wasn’t really any guidance in the booklet about removing the brake pads to install the front wheel, but that was pretty obvious just from first look. Honestly, the hardest part was getting the front brake pads aligned and not touching the wheel. I looked up some resources on YouTube for this, and it was very helpful for a complete novice like myself to understand how the brakes work.
And while I largely followed the instruction booklet, I did feel as though more diagrams would have helped—especially for those such as myself who’ve never really assembled a bike before. It took me a bit over an hour alone to double check my work and make sure I set the front brakes up properly. SWFT has provided a QR code in the booklet that should eventually link to some video tutorials, but at the time of writing this, nothing was live yet.
After the assembly is done, you can attach the battery to the frame (easy) and lock it so it can’t be removed. This is a design choice I can appreciate because it means I can remove the battery from the frame and charge the battery wherever I please, rather than having to have my whole bike located near a power outlet.
BUILD / FEATURES:
In terms of the build, the frame is made of steel and feels quite durable. This isn’t truly a “lightweight” frame like other e-bikes, but I also don’t feel as though it’s cumbersome. That being said, if I lived in an upper story apartment, I probably wouldn’t be stoked to carry this 50lb bike up and down some stairs. There exist much lighter e-bike options ~35lbs designed for that use-case scenario. So from that perspective, while I feel that the build is good, it doesn’t meet their “lightweight” claim.
I did see one color blemish in the paint on my frame, but upon closer inspection, it appears that this unit was just painted with a minor color blemish from the factory. It’s nothing that bothers me, but it was pointed out to me by someone else. It was not dinged or physically damaged in any way, though. The fact that I’m mentioning it is just because this product is not cheap and some might really care about this.
Like many other e-bikes in this price bracket, this bike only uses V-brake shoes which gets the job done, but bike enthusiasts may certainly feel different about this.
The integrated kickstand feels solid, sturdy and had no issue keeping my bike standing up. It’s easy to engage and disengage confidently without worrying about accidentally engaging it during a ride.
The removable battery is 500W, has a lock so that you can lock it to the bike to prevent theft or even just accidental disconnection during a ride. The battery also has a button you can press on it to show the current battery status, which is good for those times when you might have it shelved. And of course, it has an on/off switch for operating it.
The bike has front and rear V-brakes controls from the handlebars, an electronic controller with a backlit LCD display (powered from the 500W battery), a throttle, and a headlight for visibility assistance during your late evening rides.
COMFORT:
Riding the Fleet, I have found that the seat is a bit too rigid for my liking. While it appears to be a well-built seat, I think the foam used in the seat is a bit too dense and could be revised a bit for those who might be a bit more...boney.
In my experience, an hour of or so of travel can have an impact in terms of comfort. I don’t feel like this is something I usually notice with other bikes I’ve used in the past, but the Fleet stood out to me as being pretty stiff compared to seats I’ve used on much cheaper bikes. I recommend SWFT make a stealth revision to the seat and get more user-testing on it.
The handle bar grips are comfortable to my liking, and I haven’t experienced any blistering. The controller is positioned for easy access (and can be adjusted), the brakes are easy to trigger, and the throttle is located intuitively.
One other thing that should be mentioned is that this bike rides a bit tall. I’m 5’7” tall, and even with the seat at the lowest possible point, I cannot get both my feet flat on the ground. SWFT suggests this bike for riders 5’4” and up, and I can definitely understand why. When you need to come to a full stop, you will likely be propping yourself up with one leg.
CONTROLLER:
The controls are pretty straightforward. Once the battery is connected and switched on, you can hold the power button to turn on the controller. You can press the [+] or [-] button to increase the pedal assistance, hold the [+] to toggle the headlight, or hold the [-] to enable the additional power assist modes.
How to enable these power assist modes is not clearly explained by the manual, but from what I’ve experienced, it appears that you can enable a “walk assist” mode when the bike is going < 4mph, which basically makes the bike push itself. This could be useful if you are walking the bike up a hill, for example. Otherwise, if you are traveling faster than 5mph, enabling the additional power assist mode will initiate cruise control.
Pedal assistance comes in 4 modes: level 0 for no assistance, level 1 for 20% assistance, level 2 for some middleground assistance and level 3 for 100% assistance from the motor.
And on the right handlebar is a throttle that allows you to kick in the motor without pedaling. However, you do have to be moving in order to use the throttle, as it won’t initiate from 0mph.
Lastly, the controller does measure the distance of your trip and has an overall odometer for the total traveled distance (as long as the controller is powered on). This is pretty basic stuff, and some of it is explained in the manual while other aspects of the controller are not explained in enough detail.
RIDING EXPERIENCE:
Since this is a single gear bike, it’s really designed around making the best of the pedal assist functionality. SWFT claims that the Fleet can reach up to 37.2mi on throttle alone, and I’m inclined to believe it. While I’ve not verified that claim, I can say that in a 40 mile round trip session, I had 2/4 battery bars left which was mostly a combination of Pedal assist 1 and Pedal assist 2 modes with a blend of elevation changes.
In my experience, Pedal assist level 2 is probably the best setting for a longer distance assisted commute. Riding on some paved bike trails, I have some bridges to cross, some mild ramps to climb, and level 2 is perfect for that. Even on some of the hills that are much harder to scale, level 2 is a good balance of physical effort and assistance where I don’t feel as though I am “struggling” but maybe getting a mild workout. I found myself demoing level 3 on some of the more challenging hills, but more often I found that I could just leave it on level 2 and use the throttle for some quick boosts, instead.
That being said, level 2 on non-sloped terrain reduces so much of the pedaling effort from the rider that it can make the pedals feel like they’re free-spinning. This takes away some of the stability from the rider and doesn’t help with maintaining posture, either. Getting this right from a motor physics perspective must be challenging, so it’s hard for me to be super critical of this when other e-bikes might share this experience. Either way, it’s worth noting.
Level 1, however, is good for flat terrain or for times where I want a bit more of a workout. The assistance, while noticeable, is still minimal whereas level 2 is very noticeable. I’m more inclined to use level 1 when I’m traveling on flat planes or downhill, but not typically uphill.
And regarding the throttle, it does have a safety delay such that even when you crank it, it will take a second of delay to prevent accidental sudden throttles from occurring. It’s a safety precaution.
CONCLUSION:
Overall, the SWFT Fleet is a decent commuter e-bike.. It doesn’t really live up to the “lightweight” claim that SWFT suggests, but for being one of their first e-bikes, I think there’s some goodness in the bike, and it’s a joy to ride, overall. However, competition breeds innovation and the asking price might push buyers towards other reputable brands.
Mobile Submission: False
I would recommend this to a friend!


Share this review:
+53points
57of 61voted this as helpful.
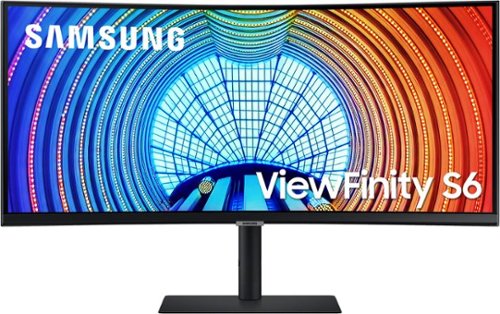
The latest in curved screen technology, the A650 ultra QHD monitor showcases ultimate user comfort and productivity. The A650 monitor provides 1000R curvature, 21:9 aspect ratio, and USB Type-C port with 90W charging power. With HDR10 technology, colors will look vivid and lifelike while the TUV-certified eye comfort care will reduce eye fatigue and keep you productive. The minimalistic, virtually borderless design, clean cable management and slim, sleek stand gives you an optimized clutter-free workstation.
Customer Rating
4
Good Ultrawide with 90W USB-C, But With Caveats
on May 10, 2021
Posted by: Xephyroth
from Denver, CO
< INTRO >
The Samsung A650 Ultrawide monitor aims to provide users with a wide array of features that could appeal to both productivity focused tasks as well as gaming. It sports a 34” 21:9 aspect ratio VA display with high contrast ratio, “HDR10” support, 100Hz refresh rate with FreeSync, and a USB-C connection that supports DisplayPort, USB Data transfer, Ethernet & 90W Power Delivery.
It aims to combine two separate purchases—a Monitor & USB-C dock into one product. But does the A650 deliver on this promised experience?
< UNBOXING & INITIAL SETUP >
The unboxing experience of the A650 was pleasantly simple. Inside the box, you’ll be presented with the components for the 2-piece stand as well as the display, itself. I grabbed a Phillips-head screwdriver and assembled the base to the pole-like stand, and then without any additional tools, I attached the display to the stand using the integrated latching mechanism. It was very easy to assemble, which is always great to see, as I’ve dealt with many monitors that require too many screws or are fidgety to assemble.
< PHYSICAL ADJUSTMENTS >
Once it was assembled, I placed it on my desk and used the stand’s built-in height adjustment to bring the monitor to eye-level. Samsung gives users 120mm (4.7”) of height adjustment which might seem small, but can really make a big difference. On my recording studio desk, I sometimes stand up to play guitar while viewing the monitor, so it’s nice to have that extra height so I can have a more appropriate viewing angle.
You also have a -2 degree (aiming down) to 25 degree (aiming up) tilt which is plenty for users to dial in good posture for viewing the display. Additionally, the display can be rotated left or right 30 degrees each way—this might be useful for showing content to someone standing next to you, so you don’t have to rotate the entire stand.
The stand doesn’t have a swivel which might be desirable for some workflows like coding, but since this display has such a strong curvature, it wouldn’t be such a great experience.
< BUILD >
In terms of the build quality, I have no complaints. The base might be thin, but it is a solid hunk of metal and feels very sturdy. I don’t have issues with screen wobble on my unit, and it doesn’t have any issue maintaining all of aforementioned physical adjustments. The A650 appears well-built, and I like the classy aesthetic. It’s not too business oriented, and it’s also not gamer-oriented. While it’s largely a plastic build, everything feels solid without also being super heavy.
< ON-SCREEN CONTROLS / OPTIONS >
The on-screen controls are usable, but certainly not my favorite. Under the bottom center of the display is effectively a rubber D-pad with a center “action” button (which can also be used to power-on the display). While it’s easy to feel the buttons (as they have small dot bumps that you can feel), they’re rather mushy and require extra force to press in. I’d rather they have provided plastic tactile buttons.
That being said, the user interface for the on-screen controls is fairly intuitive, although if you’re used to dedicated back buttons, you’ll need to instead press the action button to escape modals and the left arrow button to exit sub-menus. As a UI/UX developer, I found this to be not my favorite user experience, but this is honestly just a nit-pick and isn’t something worth dwelling over.
However, one thing that really confused me was the number of settings that directly affect brightness. The on-screen descriptions of these settings don’t explain when the options are available; instead, forcing you to consult the manual for guidance. Many of the settings won’t allow you to engage them if other settings are toggled. Let’s walk through some of the extra settings that affect brightness.
• Eco Sensor Mode: Optimizes brightness in real time, based on your lighting environment.
• Eco Saving Plus: The Eco Saving Plus function reduces power consumption by controlling the electric current used by the monitor panel.
• Dynamic Brightness: Automatically adjust the Brightness to provide the best possible screen contrast under the current conditions.
• Adaptive Picture: Optimizes brightness and provides the best picture quality in real time, based on the lighting condition and the content you're viewing.
• Min Backlight: Minimizes screen backlight when running Adaptive Picture.
If you’re thinking that’s a lot, well that’s because it is. And you’ll need to consult the manual to see which ones you should (and can) engage based on your needs—whether professional or personal.
There are a lot of helpful settings for things such as auto-switching to a newly plugged in device when there’s no signal, as well as some extra power savings features based on your habits and needs.
< USB-C CONNECTIVITY >
The A650 supports DisplayPort over USB-C along with 90W Power Delivery. In the monitor’s system settings, setting the USB-C Preference to High Resolution will enable 3440x1440@100Hz, but will limit the 3 USB ports to USB 2.0 speeds and also limit the speed of the ethernet port. Whereas setting it to High-Speed Data will limit the display to 3440x1440@60Hz, but the 3 USB ports can operate as USB 3.0.
Since this isn’t a Thunderbolt or USB4-enabled monitor, you’re unfortunately forced to pick between these options. On one hand, if you only need to use the USB ports for mouse and keyboard, using the High Resolution mode will be great. But if you planned to use the ethernet jack and/or external SSDs, you’ll have to compromise on the frame rate by selecting High-Speed Data mode instead. Hopefully with USB4 becoming more prominent, we’ll see more ultrawide monitors with high refresh rates as well as high speed USB ports at lower costs. But in the meantime, this is really only available in Thunderbolt 3-enabled ultrawide monitors.
My USB-C usage was limited to my 16” Intel-based MacBook Pro. My intention was to have a one-cable solution that would allow me to forego a Thunderbolt 3 dock. And while it did work just fine during actual usage, it also had some worrisome issues with Power Delivery during sleep mode. I found that during sleep mode, the monitor would seemingly cause the power chime noise to go off every couple minutes until it eventually woke up my MacBook and subsequently woke up the monitor. The MacBook itself would become hot while this was happening. The “fix” to this is to power the MacBook via the wall adapter. This will allow it to sleep normally and without overheating. This means it’s unfortunately not a one-cable solution for MacBook users unless you plan to unplug the MacBook from the monitor after each session. There are other monitors that exhibit this same issue with MacBooks, so it may very well be something more related to the MacBook ecosystem.
But if you don’t have any intention of using this monitor with USB-C, then you may want to consider other options because you could easily spend a couple hundred dollars less and get a great display without USB-C but with faster response times and also higher refresh rates.
< DISPLAY >
My assessment of the display will be largely subjective since I do not have the tools to perform measurements. Firstly, I think this is a great display for productivity purposes. I didn’t think I’d like the 1000R curvature over the milder 1500R curvatures I’m used to, but I forgot about it very quickly after using it for a while. Viewing angles are definitely focused on the sweet spot and will definitely shift more due to the curvature exacerbating the “actual” angle from which you’re viewing the display.
It gets plenty bright when configured correctly and has excellent contrast so that blacks are rich while lighter colors still pop through. The colors present themselves vividly compared to some other displays that end up more washed out. However, HDR is best experienced on displays that can achieve much higher peak brightness. When I tried using HDR in macOS with the A650, darker scenes in HDR content became noticeably noisy at times. Having more local dimming zones is necessary for HDR content, and this A650 just doesn’t really hold up well compared to a proper HDR display certified by VESA
The 100Hz refresh rate lends to a fluid visual experience and is decent for gaming, but there are certainly better monitors for gaming, especially for the price. That being said, there is a Game Mode which Samsung recommends enabling if you intend to use the A650 for gaming. Additionally, there is a setting for enabling faster response times, which is good to see for a monitor that doesn’t market itself heavily towards gamers. If your primary purpose is for gaming, I’d still advise looking at other options.
< CONCLUSION >
Overall, the Samsung A650 ultrawide monitor is a good contender for those looking for a display that is decent for both gaming and productivity over USB-C. If you’re the kind of person who has two computers—a desktop for gaming and a USB-C enabled thin and light laptop for work, the A650 might be a good option to simplify your connectivity. While I don’t think it’s the best option for single-cable use for MacBook owners due to the sleep-related issues I encountered, your mileage may vary for other USB-C enabled notebooks.
It’s well-designed and otherwise a joy to use. The display is good, but not the best I’ve used. And while it claims to support HDR10, it’s not bright enough and also not VESA-certified.
There are not many ultrawide monitors that support 3440x1440@100Hz along with 90W Power Delivery over USB-C. In that regard, Samsung is delivering something that is pretty rare to find—especially at this price point. You’ll have to spend a lot more for Thunderbolt 3-enabled displays. So while the A650 isn’t perfect for everyone’s use-cases, it provides a compelling feature set for the price when compared to the competition.
Mobile Submission: False
I would recommend this to a friend!


Share this review:
+36points
37of 38voted this as helpful.

ASUS TUF Gaming Laptop. Enjoy everyday gaming with this ASUS notebook PC. The Intel i7 processor and 16GB of RAM let you run graphics-heavy games smoothly, while the potent NVIDIA GeForce RTX 3060 graphics produce high-quality visuals on the fast 15.6-inch 144hz FHD display. This ASUS notebook PC has 512GB SSD that shortens load times and offers ample storage.
Customer Rating
3
Balancing Premium & Performance has Caveats
on March 23, 2021
Posted by: Xephyroth
from Denver, CO
INTRO:
The ASUS TUF Dash F15 with the Core i7-11370H and RTX 3060 graphics stands to deliver a portable gaming experience in a chassis that is less than 0.78" thick. It delivers features gamers want, but being in the more budget-friendly TUF lineup rather than the ROG Strix lineup, what compromises did ASUS have to make in order to make this product feasible?
UNBOXING:
The unboxing experience is actually quite pleasant. ASUS opted to go with a pretty cool cardboard briefcase design. Once you open the lid, you’re presented with the TUF Dash F15 and some documentation. And inside one of the cardboard compartments is the DC charger. Overall, a very easy unboxing process.
BUILD QUALITY:
The Dash F15 has a quality build, and it should at the price you’re paying. It’s sleek, slim and feels confident and sturdy. It almost tricks you into believing that the chassis is made of metal, but it is just a very good plastic build. The display lid has a sort of brushed/matte texture, while the keyboard deck is very smooth, but not glossy.
One small pitfall is that this build tends to attract fingerprints. Whether it’s on the lid or the palmrest area, the oils from your hands will likely make their way onto this, so you’ll find yourself needing to reach for a microfiber cloth from time to time.
But if you plan to use this in a docked configuration, you can avoid that issue, altogether.
EXPANSION/UPGRADES:
Performing upgrades is easy with the Dash F15. There are 15 screws on the bottom, but it’s important that you don’t mix them up, as there are different heights. You could end up trying to puncture a hole in your unit if you don’t do this cautiously. I advise anyone curious to look at the guide on ASUS’ support website for the Dash F15.
In terms of memory expansion, the TUF Dash F15 comes with 16GB of RAM @ 3200MHz. 8GB of that is soldered, while the other 8GB is removable.
As for storage, the Dash F15 has two m.2 (2880 form factor) slots for SSDs. One is pre-populated with a 512GB SK Hynix NVMe SSD while the other remains unoccupied for your expansion needs. ASUS’ support documentation claims that this slot does not support a SATA-based m.2 SSD, only PCIe 3.0 NVMe SSDs.
Finally, you do have quick access to the Wi-Fi card should you need to upgrade it later, but it does come with the latest Intel AX201 Wi-Fi 6 & Bluetooth 5 chipset, so that is not an issue for today.
I/O:
Standard DC power connector
3x USB 3.2 Gen 1 Type-A ports
Headphone/Microphone Combo jack
Gigabit Ethernet
Thunderbolt 4 Type-C port (100W PD 3.0, USB4, DP 1.4a)
HDMI 2.0 (up to 4k@60Hz)
Kensington Lock
3x USB 3.2 Gen 1 Type-A ports
Headphone/Microphone Combo jack
Gigabit Ethernet
Thunderbolt 4 Type-C port (100W PD 3.0, USB4, DP 1.4a)
HDMI 2.0 (up to 4k@60Hz)
Kensington Lock
DISPLAY:
The display in my Dash F15 is the Chi Mei CMN1521, but the OEM part is really the Innolux N156HRA-EA1. It is a non-touch 15.6” 1920x1080p matte display with a 144Hz refresh rate. I am not a display expert, but from what I have observed, this is a TFT display, not an IPS. This is likely to cut costs as well as save on battery life, but for my gaming needs, I did not mind.
The display gets decently bright for indoor usage and the occasional outdoor usage. Viewing angles are okay, but this shouldn’t be of large concern for a laptop, since you’ll typically have it in front of you during use. If you plan to use it as a secondary display, I’d advise not going too aggressive on the angle, as the display will appear darker at different angles.
In terms of responsiveness, ghosting was quite low compared to other displays I’ve used, and I didn’t personally feel as though there was an issue with input latency. Overall, the display is a decent choice for those wanting to play eSports titles at 1080p@144Hz as well as more demanding games at lower framerates, but I wouldn’t rely on the display for color-sensitive work.
WEBCAM MISSING:
You should also notice that since there are slim bezels on the Dash F15, there is no webcam, whatsoever. This could be an issue if you plan to use it for remote work, but you can always use other software like Xsplit Vcam to use your smartphone as a webcam for those times you might need it.
KEYBOARD:
From the various keyboards I use, my average wpm on the default monkeytype.com test is around 96wpm with x accuracy. On the Dash F15, I was able to hit 102wpm with 99% accuracy within only a few tests and without much time of using the keyboard. I was actually expecting to struggle on this keyboard, but was pleasantly surprised to find that it was very easy for me to adjust to.
The keys are also backlit with 3 levels of brightness in addition to turning lighting off. While I’m not personally into the gamer font on the keys, it’s somewhat subdued, so I don’t mind too much. But the keyboard does look “busy” compared to others I’ve used. ASUS could have used better contrasting colors for the key letters so that they were more visible when not backlit.
In my testing, I found that the keyboard deck was rigid without any flex or uneven leveling, so overall, good marks with minor nits.
TOUCHPAD:
ASUS has opted to use Microsoft’s Precision Touchpad drivers for the Dash F15. While the trackpad is relatively small, I never found it to be an issue for my needs. The trackpad is large enough for my liking, and I didn’t find any issues with sensitivity or invoking gestures in Windows 10.
SOUND:
Many reports are going around about the speakers being defective in recent ASUS laptops. I noticed similar distortion in my Dash F15 after running a 20Hz to 20kHz frequency sweep, so I reached out to ASUS about this. Unfortunately, the Mylar speaker drivers they use in these laptops are poorly designed. Because the DTS:X software pushes quite a bit of power to these tiny speakers, there is extra energy that causes the Mylar to buzz. On top of that, these vibrations are not being tamed because the speakers are not firmly mounted in the chassis, so they kind of rattling, which ends up creating an even louder buzzing noise that could otherwise be dampened.
I was able to largely remedy this by using strips of a thicker rubber band to insulate the spaces around the speakers to prevent the speakers from rattling. It took some trial and error, and the end result is not perfect, but it’s substantially better, and really only noticeable if I run a frequency sweep.
I also tested the headphone/microphone combo jack and had no issues with it. You won’t be driving high-end headphones with it, but it’ll work great with your typical wired headset.
GAMING PERFORMANCE:
In terms of performance, the RTX 3060 mobile is great for 1080p gaming, and even some 1440p gaming if you dial some settings back. All my results below are at 1080p resolution on the laptop display, and with the Turbo profile enabled under the ASUS Armory Crate for maximum gaming performance.
Time Spy Comparisons:
https://www.3dmark.com/compare/spy/18706034/spy/9422066/spy/6763505
https://www.3dmark.com/compare/spy/18706034/spy/9422066/spy/6763505
Call of Duty Warzone:
Full Screen mode
Render Resolution: 1080p
Details & Textures: Maxed
Shadow & Lighting: Maxed
Post Processing Effects:
Dynamic Resolution: Enabled
Target Frame Rate 60fps
With the above settings maxed out aside from dynamic resolution, I was able to yield 80+fps average, often reaching 90fps, as well. A very playable frame rate with great visual quality.
Control:
Render Resolution: 1280x720
NVIDIA DLSS: Enabled
Quality Preset: High
Ray Tracing Preset: High
Warning: Double-check that Render Resolution is 1280x720 after selecting presets.
With the above settings effectively maxing out the game, I was able to get 60fps in a lot of scenarios, with more demanding regions occasionally dropping to 45fps, while the Astral Plane region often yields significantly higher 80+fps. By setting Ray Tracing to Medium, you can yield an additional ~10fps.
Dirt 5:
Preset: Ultra High
Render Resolution: 100% (1080p)
Vsync: Off
Dynamic Resolution: On
With the settings maxed out other than dynamic resolution, I saw an average fps of 46fps with 1% lows of 40fps. While performance was typically quite good, I’d recommend taking it a notch down to yield a solid 60fps.
Cinebench R23 (10 minute):
Multi Core: 6864
Single Core: 1502
Running both 10 minute tests, I was surprised to find that the quad-core 11370H was blazing fast in single-core performance, but got very close to Intel’s own 2-year old i7-9750H in terms of multi-core performance while far surpassing it in single-core performance. That being said, in 2021, we should expect more and I think the upcoming 6-core Ryzen 5 5600H would have been the perfect candidate for this laptop with great efficiency and performance.
In terms of thermals, the Core i7-11370H can definitely hit a brick wall when in Turbo mode. This mode pushes more power to the CPU, yielding up to 94C to 98C on all cores, which will cause thermal throttling. Whereas the GPU reached 83C in some of my heavy workload tests. In my findings, dropping down to Performance mode instead of Turbo mode still yielded thermal throttling across all cores.
BATTERY:
When not gaming and unplugged from the wall, the integrated Iris Xe graphics take the place of the RTX 3060, and the display will switch to 60Hz unless you configure it otherwise. This allows the battery to last much longer for office-related tasks so that you can use the Dash F15 not just for play, but also for work. From my testing, it appears as though mixed usage can yield somewhere around 5-7 hours, but your mileage may certainly vary.
CONCLUSION:
The ASUS TUF Dash F15 gets a lot of things right, but also cuts on some things that are likely important for a lot of people in 2021. The speaker design needs better quality control, the quad-core CPU isn't a good value for the price when compared to the upcoming Ryzen 5 5600H, and the CPU thermal throttles. But if you're okay with these tradeoffs, I think ASUS is really onto something great here. It just doesn't quite knock it out of the park.
Mobile Submission: False
No, I would not recommend this to a friend.


Share this review:
-3points
25of 53voted this as helpful.
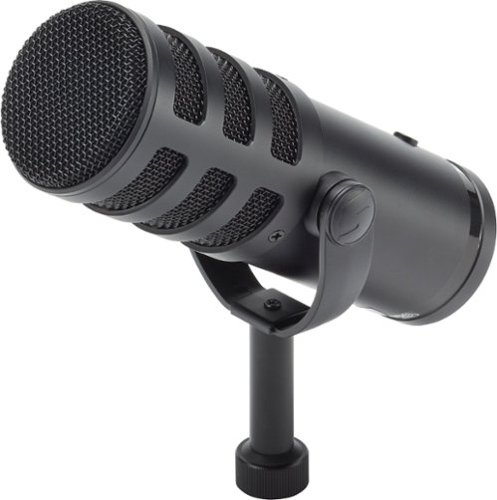
Achieve studio-quality audio for broadcasting, podcasting, streaming and recordings with the Samson Q9U XLR/USB Dynamic Broadcast Microphone. Easily integrated into any professional or home recording studio, the Q9U features both an XLR output and USB-C connection with stunning 24-bit/96kHz resolution. The cardioid polar pattern rejects off-axis sound, focusing the pickup in front of the microphone. A wide frequency response and large dynamic range ensures the detail and nuance of the voice are captured for a natural sounding performance. A pneumatic capsule shockmount and dual-layer windscreen minimizes popping, plosives and mechanical noise. The Q9U also includes zero-latency headphone monitoring, onboard mute switch, and seamless plug-and-play connection with Mac and Windows computers.
Customer Rating

5
A Versatile USB/XLR Microphone For Creators
on March 1, 2021
Posted by: Xephyroth
from Denver, CO
INTRO:
The Samson Q9U is a broadcast quality microphone great for streamers, podcasters or even musicians. It borrows some of the DNA of the Q2U (a successful entry level USB/XLR microphone) while also delivering new EQ features to deliver exceptional audio to any audience.
UNBOXING:
Inside the box, you’ll find the Q9U with the dual layer windscreen pre-installed, two USB cables (USB-C to USB-C as well as USB-C to USB-A), and some simple documentation. A very simple unboxing experience to help you get started quickly.
If you want to mount to a desk, Samson does offer the MBA38 Microphone Boom Arm, or if you’d prefer a nice weighted desktop stand, they also offer the MD5. Both of which are separate purchases, as the Q9U does not come with a stand—only the mounting hardware.
BUILD:
Right away, I noticed how well-constructed the Q9U is. It has a solid die-cast construction which feels very rigid and very durable. I tried tapping on the metal to check for any hollow areas of the construction and was pleased to find none, as that could introduce unwanted resonance or ringing.
The yoke is integrated with the Q9U, so you won’t need to install a separate one before mounting, and an internal pneumatic shock mount ensures that the capsule is isolated from any mechanical noise like an occasional bump to your microphone stand.
USB & XLR:
The Q9U has quite a few features that make it a notable standout for streamers and podcasters. Most importantly, it supports both USB-C and XLR outputs. This lends to great versatility in that you can use USB-C for portable needs such as mobile podcasting or streaming on the go, as well as XLR for more conventional needs like for live performances where you would connect to a mixing board. Or perhaps you just have an excellent interface that you’d prefer to use. Either way, both options are available to use.
The included USB cables have an EMI/RFI Noise Filter to ensure that both electromagnetic and radio frequency interference are filtered out. I can confirm that using cables without this will likely result in unwanted interference in your audio.
HEADPHONE OUTPUT:
Additionally, there is a 3.5mm headphone output on the Q9U that you can use if you’re using the unit via USB-C. Just like the Q2U, this headphone output allows you to monitor your audio with zero latency. This headphone output is rated for 38mW @ 32Ω which means sensitive IEMs like the KZ ZSX (111dbB/24 Ω) will be dangerously loud and introduce a lot of noise during use. But when paired to any reasonable studio monitoring headphones like the NVX XPT100 or Sennheiser HD 280 Pro, I found that the audio was clear without any added noise.
I also found that you can disable direct zero-latency monitoring via the Sound Control Panel in Windows 10 (this was not available in macOS). I find this feature useful if you plan on adding effects in your software and would rather monitor your processed audio from within your software.
Unlike the Q2U, there is no headphone volume control directly on the Q9U for USB-C operations. Rather, you will have to manage this in your operating system of choice, as it behaves just like any other output device.
MICROPHONE GAIN CONTROL:
For gain control, you have 2 options. If you’re using USB-C, then you can control your microphone gain from within the Windows/macOS sound settings. Samson recommends that you run a test to ensure that the loudest your microphone reaches is about 50% when you’re speaking normally about 4-12 inches from the microphone. For Windows 10 users, you can consult the instruction manual for details about how to do this easily. But if you’re a macOS user, you might have to verify through the Sound settings that the Input Meter doesn’t peak past 50%. This is based on Samson’s recommendations, but you can always adjust to better suit your needs.
Additionally, there is a Mute button directly on the microphone in case you need a quick way to cut the audio. The button does stay pressed in when muted, but upon pressing it again, the button rises up to indicate it’s live. While other microphones might use an LED to indicate the mute status, the Q9U likely forgoes it because most of the microphone body is not visible to the user during actual use. Perhaps Samson could try innovating on this user experience in the future.
SOUND QUALITY & EQ:
This is one area where the Q9U really stands to gain over some of the competition. Since the Q9U is a uni-directional microphone, that means it's a bit more susceptible to the proximity effect where bass response increases the closer the speaker is to the microphone. This might be desirable for some speakers who want that late night radio DJ sound, but it can also be undesirable for the bass-heavy consonant sounds from words that use ‘b’ and ‘p’, as they can cause frequently distracting fluctuations in speech.
There are 4 different combinations you can use for EQ’ing the Q9U. If you’d like to hear some simple sample tests, you may consult my audio samples here:
https://soundcloud.com/xephyroth/sets/samson-q9u-test-samples-macos/s-jWEIunXcsjt
Default: This setting is the default configuration with no EQ options applied. It lends itself to the proximity effect well, and is warmer in the mid-range. A good choice for those who generally have brighter sounding speech rather than deeper, resonant speech.
Bass Cut: Reduces the proximity effect and also reduces the bass-booming aspect of ‘b’ and ‘p’ consonants during speech. It does a great job at making speech sound clear and reduces unwanted bass response. This is a great option for people who prefer to speak closely to the microphone but want to prevent bass-booming.
Mid Boost: Increases the mid-range treble response to increase clarity for human speech. It brightens up vocals and increases clarity—especially for male vocals that tend to be on the warmer side. When avoiding the proximity effect by allowing proper distance from the microphone, this is a great way to increase the clarity of your speech.
Bass Cut + Mid Boost: The combination of the two lends to a very clear and consistent sound. This is likely a great setting for applications that prefer consistency like voice overs and audio books since the bass cut reduces unwanted boomy consonants and the mid boost increases speech clarity.
DYNAMIC VS CONDENSER:
These days, many people are streaming and starting podcasts and they’re probably reading about condenser microphones and dynamic microphones. So which should you get? Let me explain why it is that you may want to choose one over the other.
Dynamic microphones are passive, so they are less sensitive compared to condenser microphones which are active (powered). This makes dynamic a great choice when you want to reduce background noise, prevent room hissing, and also be relatively loud without clipping the microphone. However, this also means that you have to speak closer to dynamic microphones in order for them to pick up sound. Alternatively, you could increase the gain so that it can pick up sounds from further away, but increasing too much could introduce unwanted noise and hissing, so it defeats the purpose of a dynamic microphone.
Even when I have speakers playing 1-2ft behind the Q9U, it does a great job at blocking those noises. When it’s just ambient noise from 1-2ft away, the Q9U really doesn’t pick it up at all, but when it’s loud enough that I struggle to talk over it, the Q9U picks up some sound, but still does an incredible job at bringing my voice to the front. And if you add some noise-reduction processing on top, you’ll be sure that your audience won’t hear any of it. And while the dynamic aspect of the Q9U plays a big part in reducing unwanted noise, the fact that it’s also uni-directional helps ensure that it has exceptional off-axis rejection.
Condenser microphones on the other hand must be powered. These days, many are USB-powered or Phantom 12V powered through an audio interface over XLR. This makes condenser microphones much more sensitive to sound, so they’re generally more capable of picking up a wider range of frequencies. This makes them great for detail retrieval for vocals and instruments, but because they’re so sensitive, they perform best in sound-treated rooms to yield optimal results. This means that even if a condenser microphone is uni-directional, they are still more likely to pick up ambient noise. That means if you have any sound going on in the background (conversations, pets, music, alarms, etc.) it’s likely going to be picked up by the microphone.
CONCLUSION & RECOMMENDED USE:
For game streamers, a condenser microphone will pick up a ton of noise from your keyboard and mouse, which will likely be distracting for your audience, so the Q9U is a great option for you.
If you’re a musician that plays an acoustic instrument, I’d likely recommend a condenser microphone, as it’ll capture all the nuances of your performance. While this will come at the expense of picking up any unwanted background noise, you’ll find that condenser microphones are better at picking up quieter sounds no matter how you position them, whereas a dynamic microphone relies more on its positioning relative to the instrument to capture nuances more reliably.
If you’re a singer, either a condenser or dynamic microphone is a great choice. If you need to capture natural environment reverb, then a condenser microphone is likely the better choice. But if you’re going to perform with effects added on, the dynamic Q9U will give you better vocal isolation from ambient & background noise.
And if you’re getting into podcasts or becoming a radio DJ, dynamic microphones are a great choice. For years, podcasters and radio DJs have been setting the standard for lowest background noise, and most of which have been sticking to dynamic microphones like the Q9U because they’re excellent for isolating vocals.
Mobile Submission: False
I would recommend this to a friend!


Share this review:
+10points
12of 14voted this as helpful.

The Live Streamer CAM 513 captures astonishing 4Kp30 video that elevates content to a professional level. With Sony®️ Exmor™️ technology and AVerMedia’s precision adjustments, this plug-and-play webcam is all about the details, featuring 4K Ultra HD crystal-clear video for recording, streaming, and more. For work conferences, school lessons, live streaming, and more.
Customer Rating
4
Great Quality Image & Audio with Caveats
on January 14, 2021
Posted by: Xephyroth
from Denver, CO
INTRO:
The AVerMedia Live Streamer CAM PW513 sets out to be a high-end webcam solution for 4K streaming. Whether it’s streaming on Twitch, YouTube, Discord, Skype, Zoom, WebEx, Teams or through softwares like OBS and XSplit, the PW513 might be what you’re looking for.
COMPATIBILITY:
It’s important to note that since this is a 4K webcam, it does require additional bandwidth and processing power, meaning USB 2.0 will not work. But if you’re on Windows, you’ll need a minimum CPU of i5-4660 and 4GB of RAM; and on macOS, it’s recommended to have an i7 with 16GB of RAM.
AVerMedia also claims that the PW513 might experience video delay on macOS and that you may have to compensate your audio, as well. Not a great user experience, and for this reason, I might suggest macOS users consider alternative products—especially considering the very demanding system specifications compared to those using Windows.
For Windows users who want to use the CamEngine software, AVerMedia recommends that you use a modern dedicated graphics card, with AVerMedia claiming the GTX 1060 being the minimum on desktops and the GTX 1050 Ti as the minimum requirement on laptops. You’ll also want respectable CPU performance with AVerMedia recommending a minimum of the i5-6000 series on desktops and i7-7700HQ on laptops.
For macOS users, there is a CamEngine Lite software which allows adjustments such as Brightness, Sharpness, Contrast, Saturation, and Hue.
BUILD / SETUP:
While the PW513 does have a plastic build, it doesn’t feel cheap. The finish feels more like metal, which gives it a more premium look and feel. On the back, you have a single USB-C connection for power and data, and on the front you have the camera sensor and stereo microphone system. It should be noted that included in the box is a USB 3.0 Type-C to Type-A cable for compatibility with most laptops and desktops, but if you’re on a device with only USB-C, you’ll need to acquire a USB 3.0 Type-C (Male) to Type-C (Male) cable.
The mounting system is simple with a very sturdy hinge design that allows it to mount atop your monitor or other objects, as you see fit. Alternatively, you can collapse the hinge and let it sit on your desk or other flat surface, or you can also use a 1/4" tripod mount (not included).
I had no issues with the hinge loosening up like I’ve seen with cheap webcams, so the PW513 will have no issues staying mounted atop your monitor if you choose to use the hinge mechanism. Just mount it, plug it into a USB 3.0 port on your computer, and you’re just about ready to go!
Additionally, there is a privacy swivel arm that physically covers the camera sensor so that you can always ensure that you’re not visible until you are ready. In the age of personal cyber attacks and online scammers that could leverage your webcam, this should be a standard feature for modern webcams. And while this does not disable the camera sensor nor the microphones, it is a step in the right direction.
While Windows did recognize the PW513 upon connecting it, I also visited AVerMedia’s support website and downloaded the latest firmware update and optional CamEngine software. It’s important to note that the CamEngine software is currently in BETA. During my review period, I used AVerMedia CamEngine (Win) Beta v3.2.0.8 & Firmware: 0.0.8000.24 from their official support website.
I have not tested any firmwares or CamEngine software prior to this.
SOFTWARE:
Using the CamEngine software on Windows, I was able to fine tune the image and preview the changes in real-time. You can make adjustments to the white balance, contrast, hue & saturation, exposure & gain. There are even some automatic options as well as defaults if you prefer to run with those. I found that initially I had a yellow/orange hue to my skin tone, but after making some adjustments to the exposure, white balance, hue and saturation, I was able to get a natural looking skin tone with properly exposed highlights in my environment.
There are other features such as AI framing, effects, and facial smoothing. Personally, I think that the AI framing is probably the only notable one, as it will digitally zoom to crop the image to faces on screen, and can even crop to the current speaker. While I haven’t gotten to test the latter half with multiple people, I can confirm that it does crop to my face when it’s enabled. Additionally, the CamEngine software allows you to create image crop presets which you can bind to hotkeys. This allows you to quickly change which portion of the image you want to show while you’re broadcasting.
It should be noted that the CamEngine AI features might not work in every software, but I have verified that it does work in OBS and Discord as long as you set your camera source to use the CamEngine, rather than the PW513 directly.
Personally, I think it might be helpful if CamEngine allowed you to save presets for your video settings so that you can very easily switch if you do have different lighting conditions, but this is likely more of an edge case.
VIDEO QUALITY:
The PW513 is somewhat akin to a front-facing camera on a smartphone. When configured with the CamEngine software, it can be fine tuned to deliver proper exposure, color, and sharpness. With a 94 degree field-of-view, you can be sure that you’ll always be in frame, so you don’t have to position the camera at a distance. Additionally, if you need to crop the image, you can do so through the CamEngine software so that your audience will only see what you want them to see.
The Sony Exmor R sensor can deliver both 3840x2160p@30fps as well as 1920x1080p@60fps, making it a great choice for different needs. However, I found that 1080p@60fps delivered a much softer image while 1080p@30fps was sharper and more detailed. The basic math here suggests that on average, 60fps has to deliver a frame every ~16.66 milliseconds, while 30fps has to deliver a frame every ~33.33 milliseconds. Photography science would suggest that by using 30fps instead of 60fps, that additional time per-frame is being used to gather more light, resulting in improved detail retrieval. So my recommendation is to use 30fps if you want better detail; however, 60fps could be useful for situations where you need to capture fast motion—such as playing an instrument very quickly.
With webcams, low light exposure is always of concern, and overall, I found that with great lighting conditions, the PW513 does a good job handling exposure with low noise. If you’re the kind of person who uses a softbox for lighting, that will make a big difference when complemented with manual adjustments via the CamEngine software.
But if you plan to use the PW513 with lower lighting conditions, you’ll find that the image can yield more visual noise. To balance things out, I manually raised the exposure in the CamEngine software. But this also decreases the shutter speed of the sensor in order to let more light in per-frame. This means that the framerate can be very low if you end up having to max out the exposure, and you’ll have to adjust the gain which will likely introduce visual noise. So it’s important to recognize this if your lighting conditions are not the best.
That being said, having this much control over the sensor is fantastic compared to other webcam offerings. The PW513 can deliver very impressive results compared to others on the market because it gives you more advanced controls. Normally one might recommend that novice users leverage the default settings, but I think that it’s worthwhile to consider the advanced settings to maximize the image quality.
AUDIO QUALITY:
In terms of audio quality, I found that the built-in stereo microphone was very clear and delivered a very full frequency range that is more comparable to a dedicated USB microphone than a headset microphone or laptop microphone. It wasn’t shrill or harsh in the treble range, but rather a nice balanced sound that could be used for sharing voice, musical instruments, and more.
That being said, the CamEngine software also has an option to enable AI noise cancellation which will allow you to reduce unintentional noise. I found that it was effective without adversely affecting the sound quality. However, it might be best to leave this setting off if you are streaming/recording a musical performance, as it can cut quieter sounds out. After turning it off, I played some clean and distorted electric guitar through a nearby amplifier and it picked up all the dynamics of my instrument without issue.
CONCLUSION:
The PW513 has a lot of potential for streamers who want a high quality webcam solution without needing to buy an expensive camera and microphone. It delivers a quality picture and is complemented with surprisingly great stereo audio. The CamEngine software is mostly easy to use, but cropping your frame can be a little clunky, and sometimes programs will crash if you don’t open them up *after* first opening the CamEngine software, should you choose to use it. But as a plug-n-play option, it generally works well. Once you get things set up and feel comfortable with the results, it’s pretty good, general speaking.
In the end, if you don’t mind a bit of tinkering, the PW513 might just be a great choice. But if you’re hoping for a super easy experience with no difficulty, you might find yourself a bit frustrated with varying compatibility.
Mobile Submission: False
I would recommend this to a friend!


Share this review:
+16points
19of 22voted this as helpful.

The sound bar for those with small spaces or minimalistic tendencies. The compact Yamaha SR-C20 sound bar fits easily in whatever space is available and can be wall-mounted for even more possibilities. Setup is easy with a simple connection to your TV while Bluetooth lets you stream wirelessly from your mobile devices.
Customer Rating
4
A Sound Bar Designed for Compact Setups
on November 28, 2020
Posted by: Xephyroth
from Denver, CO
INTRO:
The Yamaha SR-C20A is a compact sound bar best suited for smaller setups—whether it’s for an apartment living room, bedroom or computer desk, this sound bar hopes to have you covered.
SETUP & CONNECTIONS:
Let’s get right into it. Setting up this sound bar is very easy, just as any should be. You plug in the power, and you connect it to your audio source via 1 of 4 options.
Most modern TV’s these days have an HDMI port labeled ARC on them. ARC stands for Audio Return Channel, and by plugging one end of an HDMI cable (not included) into your TV’s ARC port and the other end into the sound bar, you’ll be ready to go. You may have to change some sound settings on your TV to route sound over this HDMI port instead of the built-in speakers, so you may need to reference your TV’s manual. Just be aware that you’ll need to bring your own HDMI cable, since this sound bar does not come with one for some reason.
Alternatively you could consider using optical if you plan to use this sound bar with a computer or modern TV. Some low-budget TV’s don’t have ARC support, but nearly all do have optical output, leaving this as your next-best option, since Yamaha included an optical cable in the box. On TV’s, this will usually just be labeled as “optical”, but desktop computers and docking stations will usually have it labeled as “S/PDIF”. Not all computers will have S/PDIF (my small form factor custom computer doesn’t), but the vast majority of desktop computers do, while most laptops don’t.
If you’re using the optical out on your TV, you’ll want to plug into the optical input labeled “TV” on the sound bar, but if you’re using the optical out on a receiver or other device, you’ll want to plug it into the optical jack labeled “OPTICAL” on the sound bar. Be sure to remove the small plastic caps from both ends of the cable, and refrain from bending the cable, as fiber optic cables don’t bend like HDMI cables and will be rendered useless if they can’t refract light correctly.
Another option is to use the 3.5mm ANALOG jack for sound. Unlike HDMI and Optical, you cannot get Dolby Digital or Dolby Pro Logic II audio through this method. If available, I recommend using the LINE-level output jack on your source audio device to prevent double amplification. If you’re on a device that only has a 3.5mm headphone jack to use, you’ll want to balance the volume levels on both your source device and the sound bar to avoid distortion, clipping, and more importantly blowing out the speaker drivers.
Lastly, you can use Bluetooth by touching the input control on the sound bar or pressing and holding “Bluetooth” on the included remote until the Bluetooth light starts blinking on the sound bar. I had no problems connecting 2 devices over Bluetooth simultaneously, but you’ll only get output from one device at a time, so you’ll need to pause playback on one device to start playback on another. I also found the latency to be great even when playing video games or videos via a Bluetooth 5 connection.
I highly recommend reading the online manual, as it has a lot of great information and details a ton of features not explained in the included paper manual.
DESIGN:
I like the minimalistic look of this sound bar. Some people prefer not to be able to see the driver behind the fabric, so I tried shining a flashlight right up against the fabric and could not see the drivers. So aesthetically, it won’t leave any surprises, but maybe some curiosity about what it looks like behind that cloth. The sound bar has some nice small rubber feet to lift it up a couple millimeters so it doesn’t leave strange marks.
A simple array of LEDs will tell you which input you’re currently on, but I found that this wasn’t particularly helpful in darker environments where I couldn’t read the labels below the LEDs. I chose to use this sound bar at my desk under my computer monitor and couldn’t really read the labels without getting really close to look. It could have been nice to see a proper LED clock-like display or something, as I’ve seen them on much cheaper sound bars, but for usage at my desk, I’m glad it takes a simple approach so it doesn’t distract me. There’s also the ability to dim the LEDs to 3 settings: normal, dim & off. The LEDs will brighten when you’re changing settings, but will dim again after a few seconds.
The remote control is also very easy to guide—all the main options are on the remote control, making it easy to find everything.
OTHER FEATURES:
There’s a smartphone companion app called Sound Bar Remote that you can download to control the sound bar over a Bluetooth Low Energy connection. I found it to work very well for functioning the same as the physical remote control.
There are some hidden functions that are only discoverable by reading the online manual like HDMI Control, Child Lock, Auto Power Standby, Bluetooth Standby & Dolby Digital Compression. Some of these features do require the usage of the remote control, so I recommend NOT losing it.
It would be nice to see the ability to configure these advanced features from within the app. It’s definitely a missed opportunity at the time of this review. Most users will likely not reference the advanced online manual, so they’ll never end up learning about these features, and there’s still a low chance that they’d bother trying to use the app, but Yamaha could have made some mention of the online manual for more advanced features.
SOUND:
In terms of sound quality, the SR-C20A delivers decent sound in a compact form factor. Your experience will differ if you use a wall-mount versus a TV stand (you should reference the online manual to configure the soundbar’s frequency response to match your configuration), but overall, I’d say it’s full-bodied with a relaxed treble response. It doesn’t fatigue the ears, which is important if you’re using this in a tighter space where you’ll be listening closer to the sound bar.
I think it’s important to remember that this isn’t promising to deliver the absolute ultimate experience, but a great experience for your small setup. It’s been great for dialog, video, music, & gaming. I’ve got access to expensive audiophile headphones, studio reference monitors, as well as surround systems, but having a humble sound bar like this at my computer desk just makes things easy without needing to hook up a bunch of things and press a bunch of switches.
I primarily use this sound bar to listen to music and play games at my desk, while also frequently enjoying videos on YouTube with a lot of dialog, and I’ve got no complaints about its ability to do those things well.
The SR-C20A has the following sound modes:
Stereo: This mode is the simplest one without any surround sound. The sound stage is more narrow and focused, but best suited towards music, as there’s really no processing.
Standard: This mode widens the sound stage just a bit. Yamaha says this is best suited for general content such as sports, sitcoms and reality shows. I’d say the amount of surround sound processing is pretty minimalistic and is actually nice for music, as well.
Movie: This mode further widens the sound stage, but I honestly am not sure I could differentiate if there are any other meaningful differences compared to Standard mode.
Game: This has the widest sound stage of them all. The effect can lead to a more immersive experience, but this is always subjective. I was actually impressed with this mode, even though I don’t typically use virtual surround.
For all of the above sound modes, I honestly didn’t find any of them to be distasteful. Usually with sound bars I find that there’s only one or two modes that are usable, but I think Yamaha took a conservative approach by not overdoing it, and I can appreciate that. The differences are minimal, but provide enough differentiation to give a consistently enjoyable experience for any type of content.
There’s also a Clear Voice mode which will emphasize the frequencies of human speech that is typically good for TV shows, podcasts & news. Yamaha’s approach here is not over-accentuated like I find on most sound bars. Remember, they’re expecting you to be positioned closer due to the compact nature of the sound bar, so there really isn’t a need to overdo it, and I can agree with this approach. All of the other frequencies are still very present and maintain a clarity without compromise.
Lastly is the Bass Extension mode that accentuates the bass response without bleeding into the midrange. Your mileage will certainly vary for this experience, as different surfaces will have different resonance properties. In my case, my desk is just a slate tabletop with no “chamber” to resonate, so I preferred this mode to be on and the subwoofer to be maxed for the fullest experience. But if used with a TV stand with a closed back, I would foresee more resonance and you’ll want to adjust the subwoofer settings to ensure you maintain a balanced audio experience.
CONCLUSION:
The SR-C20A is a sound bar designed to deliver big sound for compact setups. If you’re looking to add a decent sound bar at your desk or a small space, Yamaha has done a good job at delivering a simple, clean solution. The experience has been enjoyable, overall, and with a bit of reading of their online manual (which is actually organized very well), you can leverage some additional features and maximize the experience for your setup. I look forward to seeing how Yamaha iterates on this design in the future.
Mobile Submission: False
I would recommend this to a friend!


Share this review:
+45points
47of 49voted this as helpful.
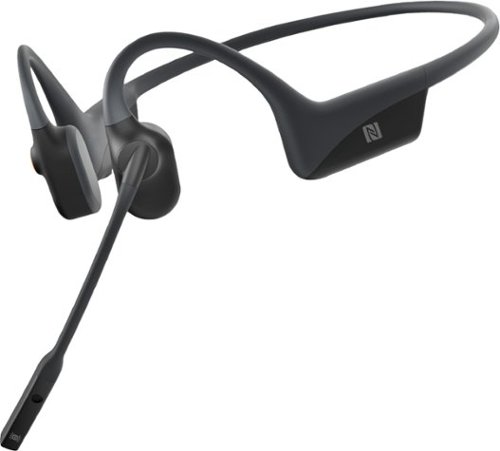
OpenComm is the first AfterShokz Bluetooth headset designed specifically for communication. Engineered with patented 7th generation bone conduction technology & featuring AfterShokz’s signature open-ear design, OpenComm enables clear communication through the DSP noise-canceling boom microphone & helps you stay connected to your surroundings while you’re at your desk, on the road, or on a jobsite.
Customer Rating
4
First Bone Conduction BT Headset with Boom Mic
on October 30, 2020
Posted by: Xephyroth
from Denver, CO
INTRO:
The AfterShokz OpenComm takes AfterShokz bone conduction headphone technology to allow you to remain alert of your surroundings while being able to be on a call or listen to music. But on top of that, the OpenComm integrates a noise canceling boom microphone for those who need to be in communication—whether for a personal call, conference call or other.
The AfterShokz OpenComm takes AfterShokz bone conduction headphone technology to allow you to remain alert of your surroundings while being able to be on a call or listen to music. But on top of that, the OpenComm integrates a noise canceling boom microphone for those who need to be in communication—whether for a personal call, conference call or other.
UNBOXING:
Inside the packaging, you get a nice carrying case which holds the OpenComm and magnetic charging cable. Additionally, there’s a small card with instructions on how to get started, as well as a manual with more detailed instructions towards the various controls available on the headset.
Inside the packaging, you get a nice carrying case which holds the OpenComm and magnetic charging cable. Additionally, there’s a small card with instructions on how to get started, as well as a manual with more detailed instructions towards the various controls available on the headset.
BUILD QUALITY:
The OpenComm has a lightweight build at 33g, with a titanium frame and soft touch rubber. And compared to alternative offerings from other brands, I’d say the AfterShokz have the most professional look and do their best not to look clunky. On top of that, they have IP55 water resistance and moisture detection to protect the battery for safe charging.
The OpenComm has a lightweight build at 33g, with a titanium frame and soft touch rubber. And compared to alternative offerings from other brands, I’d say the AfterShokz have the most professional look and do their best not to look clunky. On top of that, they have IP55 water resistance and moisture detection to protect the battery for safe charging.
SETUP:
The setup is very easy on the OpenComm. While wearing them, simply power them on by holding the Volume+ button for 5-7 seconds. A voice will first let you know that the headset is on, and after holding for the full duration, the voice will let you know that you’ve entered pairing mode. At this point, your device should be able to see the “OpenComm by AfterShokz” device in the bluetooth settings.
The setup is very easy on the OpenComm. While wearing them, simply power them on by holding the Volume+ button for 5-7 seconds. A voice will first let you know that the headset is on, and after holding for the full duration, the voice will let you know that you’ve entered pairing mode. At this point, your device should be able to see the “OpenComm by AfterShokz” device in the bluetooth settings.
If you’d like to enable multipoint pairing (which I only just now figured out you can do while looking at the online FAQ), simply enable the pairing mode as mentioned above, then hold the Multifunction button and Volume+ button for 2-3 seconds. Then connect your first device. Afterwards, power it down by holding the Volume+ down for 2-3 seconds. Then enable pairing mode again by holding the Volume+ button for 5-7 seconds. After which, connect your second device. Now you can have two devices connected to your OpenComm simultaneously. You won’t be able to receive audio from both devices at the same time, but if you were to pause the audio on one and start audio on the other, it should transition in under 10 seconds—a small inconvenience, but it’s more convenient than having to turn off the device just to initiate pairing to the other device.
Additionally, if you use an NFC-enabled device, you can also pair using the NFC chip on the left side of the headset.
CONTROLS:
The controls are mostly standard fare, but there are a couple “gotchas” that I recommend reading the manual for or visiting the online FAQ for to get more information about the controls. Overall, I’d say these “gotchas” could have been avoided if a separate power button was integrated, but considering how quickly I was able to adapt, it’s really not anything I’d complain about.
The controls are mostly standard fare, but there are a couple “gotchas” that I recommend reading the manual for or visiting the online FAQ for to get more information about the controls. Overall, I’d say these “gotchas” could have been avoided if a separate power button was integrated, but considering how quickly I was able to adapt, it’s really not anything I’d complain about.
Additionally, you can flip the boom microphone out of the way, but this DOES NOT mute the microphone, which is really unfortunate, as I would expect this behavior from most headsets these days. While the noise canceling microphone will work to reduce any background noises, you may still remain audible.
COMFORT:
In terms of comfort, the AfterShokz says the OpenComm was designed for all-day communication. I think this experience is going to differ from person to person, especially because the comfort and positioning will depend on the anatomy of your ears and the length of the arc from one ear to the other ear.
In terms of comfort, the AfterShokz says the OpenComm was designed for all-day communication. I think this experience is going to differ from person to person, especially because the comfort and positioning will depend on the anatomy of your ears and the length of the arc from one ear to the other ear.
From my experience, I can certainly wear the OpenComm for several hours at a time, but I do have sensitive ears and prefer to take breaks.
I’ve worn them with my glasses on, and with a hat and face mask all simultaneously. I did have to put on my face mask first before I could put the OpenComm on, but I took it with me on a trip to the grocery store and had no issue enjoying music while still remaining aware of my surroundings.
PORTABILITY:
As far as portability is concerned, you can wear these anywhere, and they can be used for extended periods of time. The headset itself doesn’t cause any obtrusion while worn.
As far as portability is concerned, you can wear these anywhere, and they can be used for extended periods of time. The headset itself doesn’t cause any obtrusion while worn.
However, while the carrying case is nice and sturdy, it’s kind of comically large compared to the actual headset. That being said, I understand that the frame is made of titanium and can’t be expected to be bent around and stuffed into a bag. The case can definitely house the headset, the magnetic charging cable, a USB charger, and perhaps a few more cables if you wish to do so. But I think it could and should be more portable.
If AfterShokz are willing to change the interior mold of the case to house a cable and maybe an optional USB charger, I think they could lower the footprint of their case.
SOUND:
As far as sound is concerned, this one is tough because it’s even more dependent on your anatomy compared to traditional headphones. And while I am an audiophile and have reviewed and purchased headphones and headsets across different price points, I have very limited experience with bone conduction. As a result, I lowered my expectations.
As far as sound is concerned, this one is tough because it’s even more dependent on your anatomy compared to traditional headphones. And while I am an audiophile and have reviewed and purchased headphones and headsets across different price points, I have very limited experience with bone conduction. As a result, I lowered my expectations.
The sound here is not going to blow away any audiophiles, but it is certainly adequate/sufficient to have a decent listening experience for both communication and music. Remember, this headset was designed with communication in mind first, rather than music. That being said, my personal experience has been that treble is generally a strong point and bass can be experienced if the OpenComm is worn in a way that lends to it. That being said, the quantity of bass won’t satisfy serious bass heads, but for the way I position it, the sound signature leans neutral with some treble emphasis
I have noticed that I can get clearer midrange and treble depending on how I position the bone conduction drivers just in front of my ears, and the same applies to the bass response. Unfortunately, you can’t really adjust how you wear the OpenComm aside from tilting it or slightly rotating it. And since it kind of rests on your ears without anything else to keep them positioned, it can be challenging to consistently get the same exact fit/position each time you put them on. Which means that the sound you get each time you put them on can be a bit variable.
So there are times where I’m impressed with the sound, and there are times where I feel like there is a veil over the top-end where the treble takes a hit. For music purposes, I usually find myself adjusting until I get a sound I find to be pleasant, but it usually doesn’t take very long. I do think it would be nice if I could better conform the frame to my head. I tried putting a hat on while wearing the OpenComm and it pushed the frame downwards, causing the bone conduction drivers to tilt a bit—which consequently changed the sound I was experiencing. So I had to adjust the OpenComm again after putting the hat on.
That being said, these things don’t really matter as much when you’re simply on a call with someone. I’ve used the OpenComm on long calls for work as well as for chatting up a friend. I had no issues hearing anyone talk, and I’d generally stick with the default EQ. The secondary EQ cuts out the bass and focuses on midrange and treble. This is likely a more sensible EQ if you are wearing earplugs with these in use—in which case, the sound can actually get overly bassy with the default EQ.
Why would you want to wear earplugs with these in use? Loud environments like construction zones where you can’t have noise canceling headsets. The earplugs will let you attenuate the loud noises while the bone conduction drivers will let you hear audio at volumes that won’t destroy your ear drums.
MICROPHONE:
As mentioned previously, the microphone can be flipped out of the way, but it DOES NOT mute the microphone. So it’s important to be mindful of this. You can mute the microphone while on a call by holding the Volume+ and Volume- buttons for two seconds. But AfterShokz claims that this may not work with all applications—in which case, you should use the mute functionality in your software.
As mentioned previously, the microphone can be flipped out of the way, but it DOES NOT mute the microphone. So it’s important to be mindful of this. You can mute the microphone while on a call by holding the Volume+ and Volume- buttons for two seconds. But AfterShokz claims that this may not work with all applications—in which case, you should use the mute functionality in your software.
I’ve found the microphone to be clear, and the noise cancellation is pretty good at eliminating background noise. When I compared to other bluetooth options I have, the OpenComm was slightly quieter likely due to the noise cancellation, but delivered excellent clarity, otherwise.
BATTERY LIFE:
AfterShokz claims up to 16 hours of call time, 8 hours of playback time, and up to 14 days of standby time. While I certainly have not tested a full 16 hours of call time, I will say that I’ve had no issues being on extended calls with the OpenComm with some mixed usage of music playback, as well. In my testing with mixed usage, I could easily get through a full day without charging them. And even if you needed to charge them, a quick 5 minute charge can yield 2 hours of talk time. A full charge can be had in 1 hour.
AfterShokz claims up to 16 hours of call time, 8 hours of playback time, and up to 14 days of standby time. While I certainly have not tested a full 16 hours of call time, I will say that I’ve had no issues being on extended calls with the OpenComm with some mixed usage of music playback, as well. In my testing with mixed usage, I could easily get through a full day without charging them. And even if you needed to charge them, a quick 5 minute charge can yield 2 hours of talk time. A full charge can be had in 1 hour.
CONCLUSION:
Overall, I approached the AfterShokz with curiosity and skepticism, but I was pleasantly surprised at what they deliver. Whether you work from home and need a bluetooth headset that allows you to be attentive to your family, or someone who works in environments where you can’t safely use other headsets, or you’re just looking for a small comfortable headset that lets you be remain alert, the OpenComm is worthy of your consideration. And while I think the OpenComm has noteworthy potential in business applications, transportation and construction, it really does stand out to me as a choice many people ought to consider.
Overall, I approached the AfterShokz with curiosity and skepticism, but I was pleasantly surprised at what they deliver. Whether you work from home and need a bluetooth headset that allows you to be attentive to your family, or someone who works in environments where you can’t safely use other headsets, or you’re just looking for a small comfortable headset that lets you be remain alert, the OpenComm is worthy of your consideration. And while I think the OpenComm has noteworthy potential in business applications, transportation and construction, it really does stand out to me as a choice many people ought to consider.
Mobile Submission: False
I would recommend this to a friend!


Share this review:
+31points
34of 37voted this as helpful.

Without sound, they’re just sunglasses. Thoughtfully refined and strikingly elegant, Bose Frames Soprano style feature large lenses, delicately sloped browline and an elegant update to the cat eye, providing a dash of retro glamor with modern sheen. Bose Open Ear Audio technology produces clear, lifelike sound, leaving you free to engage with the world around you while discreetly listening to music. Bose Frames also feature an advanced mic system that lets you make crystal clear calls, scratch-and-shatter-resistant polarized lenses and a rechargeable battery that plays for up to 5.5 hours. All this housed in a lightweight frame crafted from ultramodern materials for a luxurious look and feel.
Customer Rating
4
Brings a Bit More Music Into Your Life
on September 8, 2020
Posted by: Xephyroth
from Denver, CO
The new Bose Frames are a refinement over the previous generation of Bose Frames wearables. And while I was initially unsure as to whether or not I’d truly appreciate them, I can say with much more certainty that these are incredible for a lot of circumstances.
UNBOXING:
Inside the box, you get the Bose Frames with UVA/UVB protection lenses, a magnetically-closing carrying case, the charging cable, and a lens cloth. You also get the typical literature about safety, as well as a simple pamphlet explaining usage. I like that Bose is keeping it simple with their packaging.
BUILD:
In terms of the build quality, I have to admit that I’m not particularly impressed, but I’m also not necessarily let down, either. Lots of sunglasses of this style have a shiny, glossy finish to them, and I find that this choice lends itself to more scratches. Personally, I would have preferred a matte finish, but I also understand the limitations imposed by trying to keep them lightweight. It’s honestly a small nitpick for me, but one that I feel is worth at least suggesting to Bose.
Speaking of being lightweight, these measured in at 50g on my scale, whereas my normal prescription glasses with transition lenses weigh in at 27g. My normal glasses have a much thinner metal frame compared to the Bose Frames, but I never felt encumbered by the extra weight of the Bose Frames. When I’m wearing them, they just feel like any other similar pair of sunglasses, which is good because they shouldn’t have to feel any different.
I do appreciate the magnetic charging cable for the Bose Frames—you don’t have to fiddle around with plugging a cable into the Frames, you can just magnetically attach the cable and an LED will blink to show you that the Frames are charging. It’s a good user experience, overall.
It’s important to note that this version of the Bose Frames (Soprano) is not sweat and weather-resistant like the Tempo model. So it would be advised that you be cautious if using these particular Bose Frames in watersports and the like, as you can certainly render their features useless if you are not careful.
APP:
To really get set up with the Bose Frames, you’ll want to use the Bose Music app. I charged my Bose Frames to full capacity (as indicated by a non-blinking LED) then using the app, I was able to easily connect my Bose Frames to my phone. The app gives you all the tips and tricks for using the Bose Frames, playback controls, battery status as well as some advanced power configuration that allows you to toggle Motion Detection (frames power off if you haven’t moved them for 10 minutes) as well as Flip-to-Off (flip the frames upside down for 2 seconds to power off). I found that sometimes I didn’t want these features enabled, so it’s good to see that Bose would allow users the ability to toggle them.
CONTROLS:
To control the Frames, you have very simple controls available to you. To turn on the Frames, you simply press the button located on the right side of the Frames. There are no other buttons, which makes this very easy to get. Once you press the button, a pleasant power-on tune will play for a second, and the LED inside the frames will turn on momentarily—that way, you have both visual and auditory cues to signify whether the Frames are powered on. The LED will turn blue once it has connected to your device.
Using the same button, you can press it once to play or pause, double-press it to skip forward a track, and triple-press it to skip backwards a track. Very typical controls.
Volume control is done via a touch-sensitive area at the right temple of the Frames. Swipe forward to increase volume, swipe backward to decrease volume, and double tap in that region to spawn your phone’s voice assistant should you have one. This takes some getting used to, as I prefer more granular controls for my volume controls. So for me, I probably will avoid using the swiping feature unless I need the volume absolutely all the way up. I found myself more often using granular volume controls from my iPhone or Apple Watch so I could dial in the perfect volume.
I did confirm that the Bose Frames’ onboard microphone is used for the voice assistant, just like with Bluetooth headphones.
BATTERY:
Bose claims that the Bose Frames Soprano lasts up to 5.5 hours streaming audio, and overall, I’d say that claim holds up if you’re listening at quieter volumes, rather than trying to max them out at full volume. I tested them playing volleyball for around 4 hours with mixed usage of volume, pausing, and turning them off and back on. At the end of it, I went from 90% battery down to about 60%. Bear in mind that I wasn’t streaming for all 4 hours.
Prior to that, I did find that despite leaving them on the charger for several hours the day before, they did not report a full 100% by the time I finally went to use them the next day. I found this odd, so I’ll be continuing to monitor this battery behavior.
At the time of writing, Bose claims you should be able to fully charge the Frames in 1 hour or get up to 2.5 hours of play from a short 30 minute charge.
Unfortunately, I cannot yet comment on the idle battery usage if they’re powered on but not streaming any music. I don’t yet have any stats from Bose to report, either.
SOUND:
It’s important to recognize that sound is perceived differently from person to person. The way your ears are shaped will have a substantial impact on the kind of sound profile you will perceive from these, considering that Bose Frames rely on the shape of your ear to channel sound into your ear canal.
But in terms of sound, temper your expectations, audiophiles. The sound is delivered via small acoustic chambers placed in front of your ears. The drivers deliver reasonable levels of volume. At lower volumes, people sitting next to you won’t even realize you’re listening to anything. At higher volumes, it’s audible to those in very close proximity, but it’s still only faint to them. However, as the person wearing the Frames, you’ll still be able to hear people around you while also enjoying your music.
The majority of my realistic usage was while playing volleyball, and I found that I best enjoyed them at lower volumes so that I could communicate with my teammates as well as enjoy a soundtrack while I play. At higher volumes, it was a bit harder for me to hear both my team and the other team communicating.
Compared to something mainstream like the AirPods Pro, you’re not getting in-ear sound isolation, so you can’t really get ultimate fidelity and bass that you can feel. Despite this, I found the audio from the Bose Frames to be pleasant and inoffensive, considering the engineering and acoustic limitations imposed by this form factor.
However, as an analytical listener and audiophile, I have noticed the noise floor is higher than I would have liked. It’s not something you notice when you’re just enjoying music, but when I was intently listening I have heard a very faint high-pitched treble hissing noise when playing some of my music. I doubt any normal person would notice something like this, but I have very analytical hearing.
Overall, the sound profile is neither inspiring nor particularly offensive for what it is. It’s kind of hard to explain the sensation of listening to these, as the bass is audible, but not felt. Sibilance is not an issue, but you don’t get this sensation of warmth and body from the drivers. Music playback has this “small box” kind of tonal quality that many others would call “tinny”, but I struggle to suggest “tinny” is the right word for it. It does maintain a lot of clarity in dynamic music, but doesn’t really captivate you. I found that highly compressed, less dynamic music was less enjoyable due to the drivers fighting over whether to deliver treble/mids or bass. Cupping your hands behind/over your ears in certain ways can actually yield substantial acoustic benefits to warm up the sound, but is obviously impractical.
LENSES:
One of the niceties of the Bose Frames is that you can get prescription lenses for them online. They are also very easy to swap out without also worrying about them falling out, unintentionally. The included lenses do have UAV/UAB protection, so they do have somewhat of a rainbow effect, but it’s not something I noticed unless I was looking directly at my phone. But they did a good job of protecting my eyes while playing volleyball out in the sun.
CONCLUSION:
Overall, despite my rambles pertaining to the sound profile, I really like the Bose Frames. I think there are plenty of people who don’t like putting headphones on or having earbuds in when they’re outdoors, and the Bose Frames are a very interesting way of integrating audio into a product that many people use while outdoors—sunglasses. I would have never considered wearing my AirPods Pro during volleyball, but I would absolutely wear these when partaking in outdoor sports or when going on a walk in the park. It lets me be more alert of my auditory surroundings while also allowing me to have a soundtrack to my life. And while the sound quality isn’t going to win awards, I never expected them to. Rather, the Bose Frames let me listen to music in situations where I didn’t want to put earbuds in. And I think there are likely a lot of other people out there like myself who would like to have a bit more music in their lives. Personally, I find the Bose Frames to be a compelling, although niche innovation.
Mobile Submission: False
I would recommend this to a friend!


Share this review:
+1point
1of 1voted this as helpful.
Xephyroth's Review Comments
Xephyroth has not submitted comments on any reviews.
Xephyroth's Questions
Xephyroth has not submitted any questions.
Xephyroth's Answers
The sound bar for those with small spaces or minimalistic tendencies. The compact Yamaha SR-C20 sound bar fits easily in whatever space is available and can be wall-mounted for even more possibilities. Setup is easy with a simple connection to your TV while Bluetooth lets you stream wirelessly from your mobile devices.
What is the rated voltage for this product?
The sound bar for those with small spaces or minimalistic tendencies. The compact Yamaha SR-C20 sound bar fits easily in whatever space is available and can be wall-mounted for even more possibilities. Setup is easy with a simple connection to your TV while Bluetooth lets you stream wirelessly from your mobile devices.
Does this have the clear voice

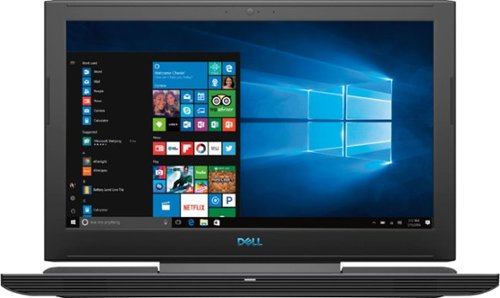
Enhance your multimedia experience with this 15.6-inch Dell G7 gaming laptop. Its VR-ready NVIDIA GeForce GTX graphics board provides seamless, stunning images on the Full HD display, and its hexa-core Intel Core i7 processor and 8GB of RAM handle extended multitasking. Run applications efficiently with the 256B solid-state drive of this Dell G7 gaming laptop.
Has anyone successfully installed Ubuntu 16.04 LTS?
I have not, but that doesn't even matter because a quick google search of Ubuntu Certified Hardware shows that this model has officially been awarded the status of certified pre-install for Ubuntu. Which means Dell can sell it with Ubuntu pre-installed, and you can just as easily install it.
5 years, 10 months ago
by
Xephyroth
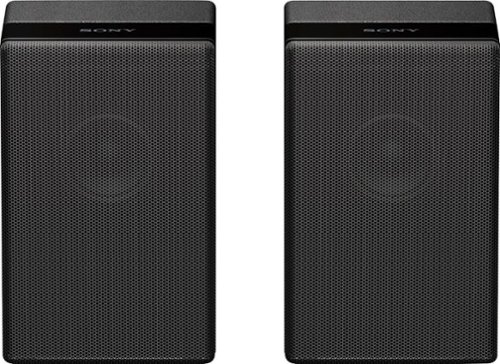
Complete your HT-Z9F surround system with this Sony rear speaker. Place it on a stand or shelf, or mount it to your wall for unobtrusive performance, and connect to other components wirelessly to keep unsightly cables out of your space. This Sony rear speaker's S-Master amp outputs 50W for powerful rear audio.
What is the length of the power cord for each speaker...do they use a cord or a wall wart?
These are wireless. They communicate wirelessly with the HT-Z9F soundbar. They only require power from your standard 2-prong wall outlet.
5 years, 11 months ago
by
Xephyroth
Bring the power of Google directly to your fingertips with the Google Pixel. A large 32GB of storage keep data secure, while unlimited cloud storage transfers data as needed, and it's completely automatic. The large 5-inch screen is protected by Corning Gorilla Glass 4 to ensure the Google Pixel remains scratch-free.
Hello, Is it sim free version? If it is not, will it be available to preorder?
Like all Verizon smartphones, this phone is unlocked. Luckily, Google has built in all the radio bands into this phone to allow it to be used on any carrier with proper LTE support—something that most Verizon-branded phones don't do. It is the same hardware in-and-out as the devices being sold on the Google Store. The only difference is that this Verizon version comes with a few Verizon apps (which can be uninstalled) and it also has a locked bootloader. That means that you cannot currently install custom ROMs or "root" your device. This device WILL work on other carriers, and I've tried it with only success.
7 years, 6 months ago
by
Xephyroth